Amazing Canning Dilly Beans in Just 10 Minutes
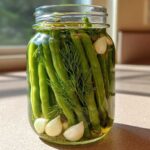
This recipe guides you through making crunchy, tangy dilly beans perfect for long-term storage using a canning method.
- Prep Time: 30 minutes
- Cook Time: 15 minutes
- Total Time: 2 days (includes curing time)
- Yield: 4 pints
- Category: Preserves
- Method: Canning
- Cuisine: American
- Diet: Vegan
Ingredients
Scale
- 2 pounds fresh green beans, trimmed
- 4 cups white vinegar (5% acidity)
- 4 cups water
- 1/4 cup pickling salt
- 4-8 cloves garlic, peeled
- 4-8 sprigs fresh dill, or 4 teaspoons dill seed
- 1 teaspoon red pepper flakes (optional)
Instructions
- Wash and trim green beans.
- Prepare canning jars: wash jars and lids in hot soapy water, rinse well. Sterilize jars by boiling them for 10 minutes or using a dishwasher’s sterilize cycle.
- In a large non-reactive pot, combine vinegar, water, and pickling salt. Bring to a boil, stirring until salt dissolves.
- Place 1-2 cloves of garlic and 1-2 sprigs of dill (or 1 teaspoon dill seed) into each hot, sterilized pint jar. Add 1/4 teaspoon red pepper flakes to each jar, if using.
- Pack green beans tightly into each jar, leaving 1/2 inch headspace.
- Pour hot brine over the beans, ensuring beans are fully submerged and maintaining 1/2 inch headspace. Remove air bubbles by gently tapping jars or using a non-metallic utensil.
- Wipe jar rims clean. Center lids on jars and screw on bands until fingertip tight.
- Process jars in a boiling water canner for 10 minutes (adjust time for altitude if necessary).
- Carefully remove jars from canner and place on a wire rack or towel to cool completely. Do not disturb for 12-24 hours.
- Check seals: lids should be concave and not flex when pressed. If a lid does not seal, refrigerate and consume within a few weeks.
Notes
- Use fresh, crisp green beans for best results.
- Adjust garlic and dill to your taste.
- Store sealed jars in a cool, dark place for up to one year.
- Allow dilly beans to cure for at least 2 weeks before eating for optimal flavor.
Nutrition
- Serving Size: 1/2 cup
- Calories: 25
- Sugar: 1g
- Sodium: 300mg
- Fat: 0g
- Saturated Fat: 0g
- Unsaturated Fat: 0g
- Trans Fat: 0g
- Carbohydrates: 5g
- Fiber: 2g
- Protein: 1g
- Cholesterol: 0mg
Find it online: https://whiskdaily.com/canning-dilly-beans/