

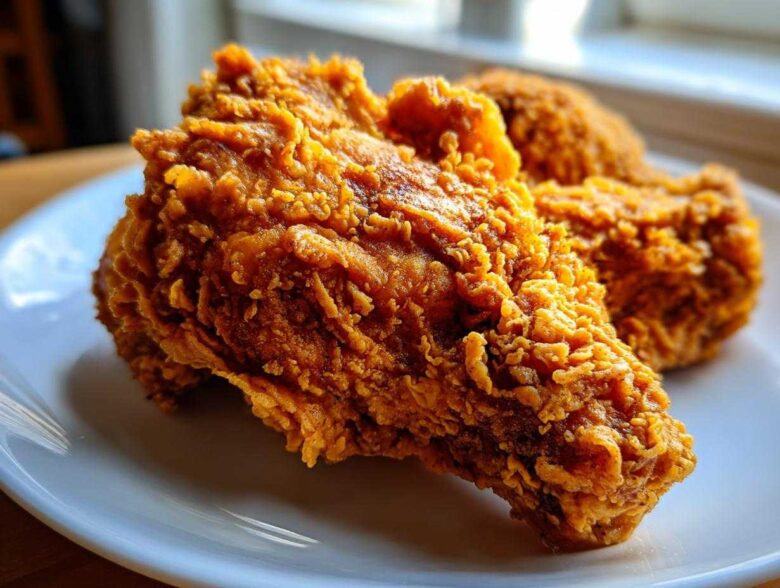
Listen, making truly great **fried chicken**—the kind that shatters when you bite into it—used to feel like a mystery I just couldn’t solve. For years, I struggled with crusts that peeled off or chicken that was dry inside. Then, I finally cracked the code! This Ultra-Crispy Buttermilk Southern Fried Chicken recipe is my absolute gold standard. We’re talking about ridiculously juicy meat tucked beneath a golden, craggy crust that locks in all those savory juices. Trust me, once you master this double-dip, you’ll never go back to store-bought versions again. This is the real deal comfort food you’ve been dreaming of!
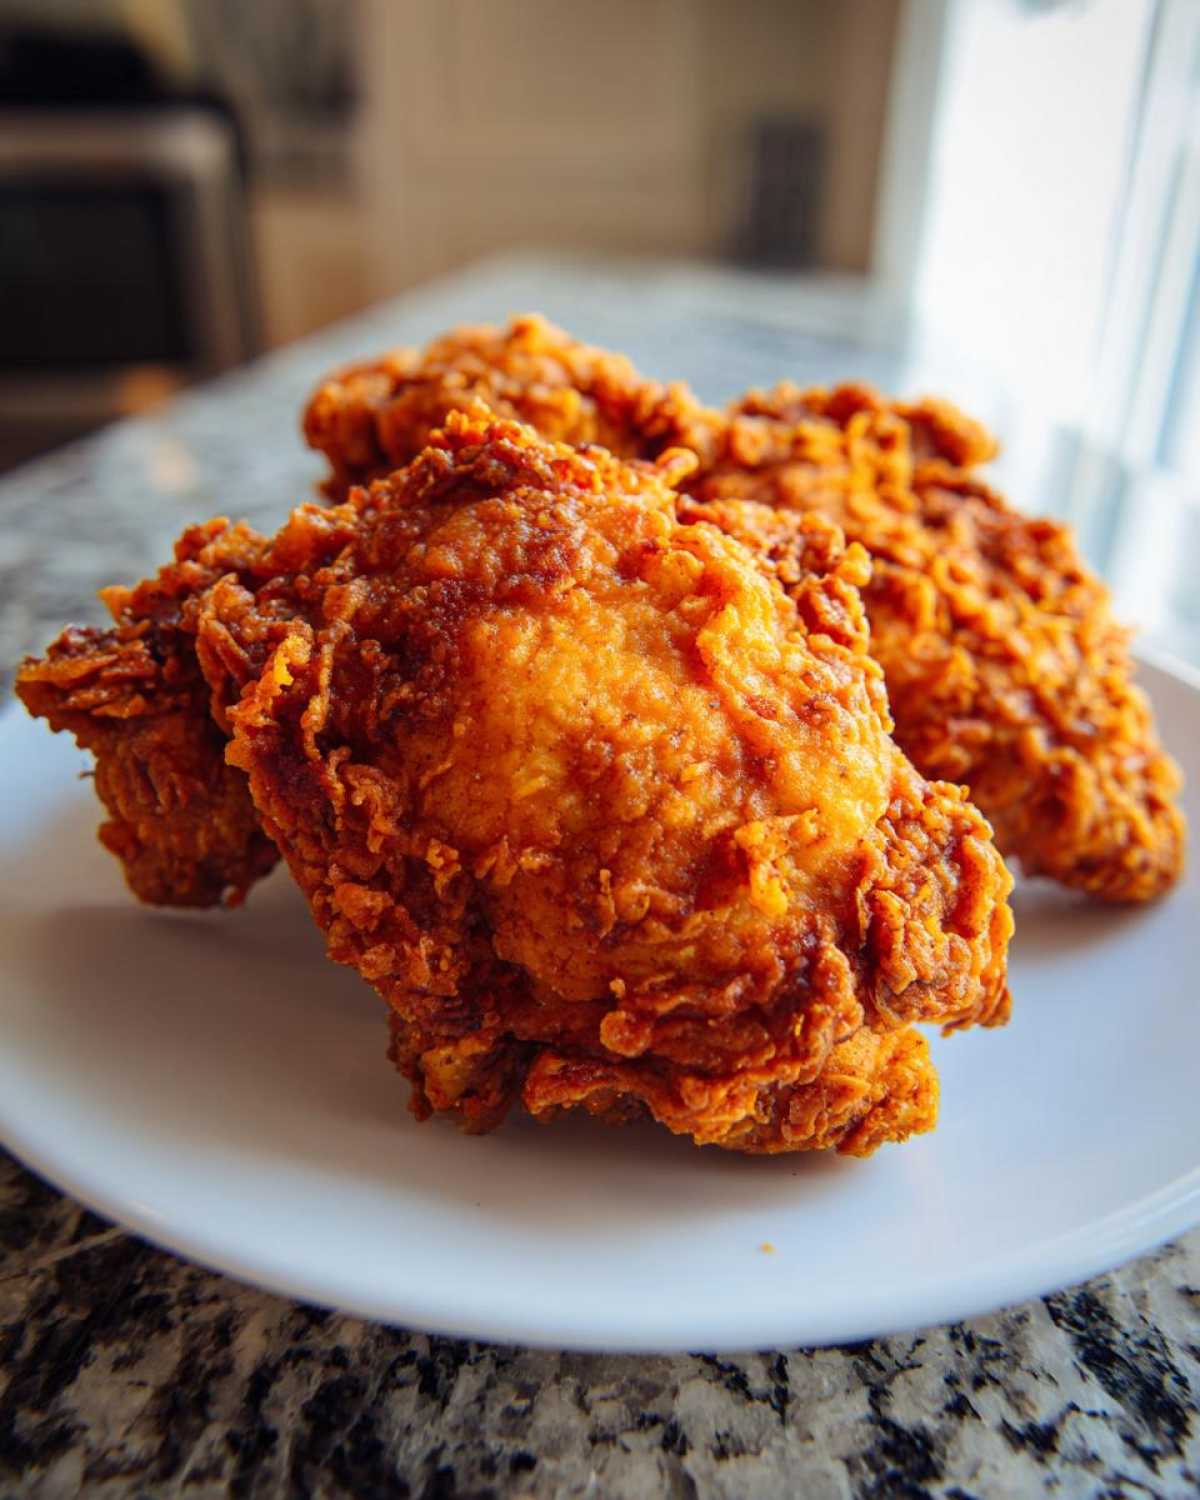
Why This Buttermilk Southern Fried Chicken Recipe Works
I know there are a million ways people tell you to make fried chicken, but this technique is different—it’s all about science and flavor layering! We stick to a few key steps that guarantee you get that incredible textural contrast every single time. It takes a little patience, but the payoff is huge. You absolutely shouldn’t settle for soggy skin when you’re putting in the work!
- The Buttermilk Brine: It tenderizes the meat from the inside out while giving the flour something perfect to cling to.
- The Double Dredge: This is the magic trick! Dipping it twice ensures those wonderful, spiky bits stick to the chicken instead of falling off in the oil.
- The Temperature Control: Keeping that oil steady is non-negotiable for achieving **Juicy and Crispy Chicken**.
The Secret to Ultra-Crispy Fried Chicken Coating
If you want that textbook, craggy texture, you have to add a couple of secret weapons to your standard flour mix. Most recipes just use flour, right? Wrong! We sneak in both cornstarch and baking powder. The cornstarch locks in the crispness, keeping the coating firm even when it cools down slightly. Meanwhile, the baking powder creates tiny little air bubbles when it hits that hot oil, which gives you that signature, ultra-crunchy, uneven surface.
Essential Ingredients for Perfect Fried Chicken
Okay, let’s get down to brass tacks. You can’t make amazing food without the right building blocks! I pulled out my trusty ingredient list—the one I use every single time—so you know exactly what you’re grabbing at the store. Don’t substitute the buttermilk; it’s too important for the flavor base! You’ll need about three pounds of bone-in, skin-on pieces—I like a mix of thighs and legs because they always stay the juiciest when we make this **fried chicken**.
I also always keep my **fluffy buttermilk pancakes** ingredients separate, but this is what you absolutely need for the chicken itself:
- 3 lbs bone-in, skin-on chicken pieces (thighs, drumsticks, breasts)
- 2 cups buttermilk
- 1 tablespoon hot sauce
- 2 teaspoons salt
- 1 teaspoon black pepper
- 1 teaspoon paprika
- 1 teaspoon garlic powder
- 1/2 teaspoon cayenne pepper
- 3 cups all-purpose flour
- 1/2 cup cornstarch (Don’t skip this!)
- 1 teaspoon baking powder
- Vegetable oil or peanut oil for frying (Make sure you have enough for deep frying!)
Seriously, getting the seasoning right in the dredge mixture here is half the battle. It brings out that wonderful savory flavor without overpowering that lovely, slightly sour tang from the soak. If you’re looking for a great breakfast side for your leftovers, check out my recipe for fluffy buttermilk pancakes!
Step-by-Step Instructions: How To Make Fried Chicken
This is where the magic happens, but don’t rush the process! If you follow these steps closely, I promise you the best homemade **fried chicken** you’ve ever tasted. We start low and slow with the brine, then we move fast when it comes to dredging and frying. Get your oil ready, because once that chicken hits the pan, you’re on deadline!
First things first, after you’ve mixed up the buttermilk and hot sauce, you need to let that chicken chill. I mean it—at least four hours, but if you can manage overnight, the flavor and texture are just worlds better. While that’s happening, go ahead and whisk up all your dry dredge ingredients in a shallow bowl. You want them totally combined so every piece gets that beautiful, seasoned coating.
Brining the Chicken for Maximum Juiciness
That long soak in the buttermilk is absolutely essential; it’s what breaks down the muscle fibers just enough. This acidity works wonders to tenderize the meat, meaning you end up with impossibly soft, fall-off-the-bone insides. It’s the number one secret to pairing that unbelievably **Juicy and Crispy Chicken** texture.
Frying Technique for Golden Brown Chicken
Once everything is ready, take the chicken right out of the brine—don’t even rinse it—and press it hard into that flour mix. Remember our double dredge trick? Dip it back in the buttermilk quickly, then back into the dry mix. This creates those jagged edges that fry up so beautifully! Heat your oil to exactly 325 degrees F. You have to maintain that heat; if it’s too low, the chicken gets greasy, and if it’s too high, the crust burns before the inside is done. Fry until it’s perfectly **Golden Brown Chicken**, checking that internal temp hits 165 degrees F. For draining, ditch the paper towels! Place it on a wire rack so the air can circulate, keeping that bottom crust perfectly crisp.
P.S.—If you’re worried about undercooked breasts, sometimes I’ll pull them out around 160°F and let them hang out in a warm oven for five minutes while the other pieces finish. If you want to dive deeper into making sauces for your next batch, you might want to check out my recipe for chicken shawarma wraps with garlic sauce!
Tips for Foolproof Fried Chicken Success
Look, even when you follow a great recipe like this one, things can sometimes go sideways when you’re dealing with hot oil and chicken. But I’ve gathered a few tips over the years that turn this into absolutely **Foolproof Fried Chicken**. My biggest non-negotiable rule is monitoring that oil temperature; if it dips below 300 degrees F because you crowded the pot, you’re asking for greasy, sad chicken. You need that consistent high heat to set that wonderful crust immediately!
If you’re dealing with huge chicken breasts, don’t stress about burning the exterior before the center is done. That’s when you bring in the oven finishing trick. After about 10 minutes in the oil, transfer those big pieces to a 350-degree oven for about five minutes. This guarantees it’s cooked through perfectly without sacrificing the crunch. This simple addition makes sure every single piece of your **fried chicken** is a winner. And hey, if you end up with some tasty leftovers, you can always try transforming them into my super easy chicken fried rice!
Making Classic Southern Fried Chicken Variations
So you’ve nailed my buttermilk method and you’re ready for round two? Wonderful! What I love about this base recipe is it’s so flexible. While this is my go-to for classic, deeply crunchy **fried chicken**, you can easily shift gears. If you’re heading into **Southern Fried Chicken** territory but want a paler, finer crust instead of the craggy bits, skip the second dip in the buttermilk. That quick dip adds so much texture, so leaving it out results in a slightly smoother coating.
Now, if you’re thinking about making something akin to Chicken Fried Steak but with poultry—that’s what we call Country Fried Chicken—the technique changes a bit. You’d typically pound the chicken thinner and serve it slathered in thick white gravy. While this recipe is designed for deep frying that hard crust, the juicy meat underneath makes it an amazing base for that gravy-smothered meal too!
Also, if you’re only using chicken thighs, you might notice they cook a touch faster because they tend to be more uniform in size than a whole collection of pieces. Remember that if you use these leftovers later, they reheat beautifully in the oven or even tossed into my chicken fried rice recipe!
Storage and Reheating Instructions for Crispy Fried Chicken
The worst feeling is having leftover **fried chicken** that tastes like sad, lukewarm cardboard the next day. We absolutely must avoid the microwave—it’s the enemy of crispiness! Instead, let that chicken cool down completely, then store it in a single layer in an airtight container lined with a paper towel, or between layers of paper towels in a Ziploc bag.
When you’re ready to eat it, get that oven hot! Reheating at about 375 degrees F on a wire rack is the best insurance policy for bringing back that crunch. If you have an air fryer, even better—it brings back that glorious crunch in about 10 minutes. Pair your reheated chicken with my easy garlic lemon asparagus for a surprisingly light dinner!
Serving Suggestions for Your Easy Fried Chicken Dinner
You’ve done the hard work, and now it’s time to enjoy that beautiful **fried chicken**, but you can’t just eat it alone, right? You need the real fixings! A perfect pairing completes the **Easy Fried Chicken Dinner** experience. Nothing beats piling a plate high with fluffy mashed potatoes drowning in gravy or a crunchy, tangy coleslaw to cut through the richness of the coating.
And obviously, you need warm, fluffy biscuits to mop up any stray juices left on your plate. If you’re feeling ambitious for a truly Southern spread, you have to try my favorite side dish, the incredible Southern shrimp and grits—it’s the ultimate feast!
Frequently Asked Questions About Deep Fried Chicken
I figured you might have a few last-minute thoughts swirling around before you tie on your apron. Frying always brings up questions, especially when you want that perfect texture! Here are the things I get asked the most about making truly **Crispy Fried Chicken Recipe** at home.
Can I use chicken breasts instead of mixed pieces?
You totally can use breasts, but you have to watch the heat carefully! Breasts are much thicker than thighs or wings, so they take longer to cook internally. If you use them, I highly recommend lowering the oil temp just slightly, maybe down to 315 degrees F, or definitely using that finishing step in the oven we talked about earlier. Otherwise, you risk burning that gorgeous **Golden Brown Chicken** coating before the inside is safe to eat.
Can I bake this buttermilk chicken instead of deep frying?
Oh, you can certainly bake it, but it won’t be the same! This recipe, with the buttermilk brine and double dredge, is specifically engineered for the crispy, craggy crust you only get from deep frying. Baking will give you a good, savory piece of chicken, but you won’t achieve that shatteringly crisp texture. If you must bake, spray the coated chicken heavily with oil and bake at 400 degrees F, but maybe grab my ultimate baked mac and cheese recipe for a truly baked comfort food experience instead!
What is the best oil to use for this Easy Fried Chicken Dinner?
For the best flavor and highest smoke point, you really want something neutral. Peanut oil is the absolute classic choice for Southern cooking because it handles the heat so well and doesn’t impart much flavor. Vegetable oil or canola oil works totally fine as a backup, but make sure you use enough—at least two or three inches deep—so the chicken is submerged enough to cook evenly and maintain a high surface temperature!
How do I ensure I get that perfect Crunchy Chicken Coating every time?
It comes down to two things we already covered! First, really press that flour mixture onto the chicken when you dredge—don’t just lightly dust it! Second, make sure you let the dredged chicken pieces rest on the rack for five minutes *before* they go into the oil. This lets the flour/buttermilk soak set up a bit, which prevents that coating from sliding off when it hits the hot fat.
Estimated Nutritional Data for This Fried Chicken Recipe
Now, I’m not a nutritionist, so take this part with a grain of salt, okay? Anytime you’re talking about deep-fried food, the numbers can swing depending on how much oil the coating soaks up, or exactly what cut of chicken you use. But based on the standard amounts in the recipe card for this **fried chicken**, here is the ballpark estimate for one serving.
I always figure this is a treat night anyway, so you just enjoy that beautiful, crunchy skin guilt-free! Here’s what the numbers generally look like:
- Serving Size: 1 piece
- Calories: 450
- Total Fat: 28g (Be sure to note that most of this is healthy unsaturated fat!)
- Protein: 30g (That’s great staying power!)
- Carbohydrates: 18g
If you’re worried about sodium, remember that a lot of that comes from the salt you add to the dredge, so you can always shave a little bit off there if needed. But for the absolute **Best Homemade Fried Chicken**, you need that salt to make the spices pop!
PrintUltra-Crispy Buttermilk Southern Fried Chicken

A recipe for classic Southern fried chicken using a buttermilk soak to keep the meat juicy while achieving an extra crunchy, golden crust.
- Prep Time: 20 min
- Cook Time: 25 min
- Total Time: 45 min
- Yield: 4 servings
- Category: Dinner
- Method: Deep Frying
- Cuisine: American
- Diet: Low Lactose
Ingredients
- 3 lbs bone-in, skin-on chicken pieces (thighs, drumsticks, breasts)
- 2 cups buttermilk
- 1 tablespoon hot sauce
- 2 teaspoons salt
- 1 teaspoon black pepper
- 1 teaspoon paprika
- 1 teaspoon garlic powder
- 1/2 teaspoon cayenne pepper
- 3 cups all-purpose flour
- 1/2 cup cornstarch
- 1 teaspoon baking powder
- Vegetable oil or peanut oil for frying
Instructions
- Place the chicken pieces in a large bowl. Pour buttermilk over the chicken, ensuring all pieces are submerged. Stir in the hot sauce. Cover and refrigerate for at least 4 hours, or preferably overnight.
- In a shallow dish, whisk together the flour, cornstarch, baking powder, salt, pepper, paprika, garlic powder, and cayenne pepper. This is your dredge mixture.
- Remove the chicken from the buttermilk, letting excess drip off, but do not rinse.
- Dredge each piece thoroughly in the flour mixture, pressing the coating onto the chicken to create a thick, craggy surface. For extra crispiness, dip the floured piece back into the remaining buttermilk for a second, quick dip, then return it to the flour mixture for a final coat.
- Heat 2 to 3 inches of oil in a deep, heavy-bottomed pot or Dutch oven to 325 degrees F. Use a thermometer to monitor the temperature.
- Carefully place 3 to 4 pieces of chicken into the hot oil, ensuring you do not overcrowd the pot, which lowers the oil temperature.
- Fry the chicken for about 6 to 8 minutes per side, turning occasionally, until deep golden brown and cooked through (internal temperature reaches 165 degrees F). Thicker pieces like breasts may take longer.
- Remove the chicken from the oil and place it on a wire rack set over a baking sheet to drain excess oil. Do not place directly on paper towels, as this steams the bottom crust.
- Let the chicken rest for 5 minutes before serving.
Notes
- For the crispiest results, maintain the oil temperature between 300 and 325 degrees F during frying.
- If you are cooking larger pieces like breasts, you can finish them in a 350 degree F oven after frying for 5 minutes to guarantee they are cooked through without burning the crust.
- Use chicken pieces that are similar in size for even cooking.
Nutrition
- Serving Size: 1 piece
- Calories: 450
- Sugar: 1
- Sodium: 650
- Fat: 28
- Saturated Fat: 7
- Unsaturated Fat: 21
- Trans Fat: 0
- Carbohydrates: 18
- Fiber: 1
- Protein: 30
- Cholesterol: 110