

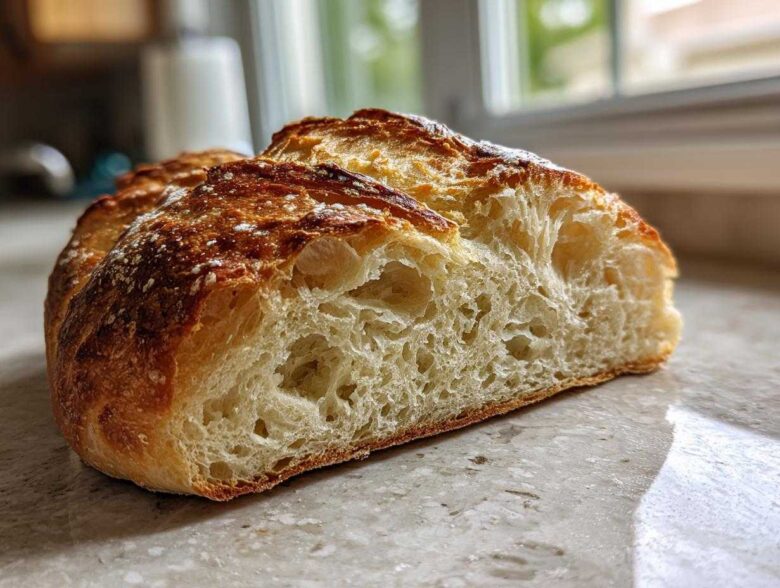
You know that sound? That gorgeous, sharp *crack* when you finally slice into a freshly baked loaf? Honestly, I live for that sound, and I used to think that only the old Italian bakeries down the street could achieve it. Not anymore! I’ve spent ages tinkering, tweaking water temps, and testing scorings, and I finally landed on something that makes show-stopping bakery style bread right on my own counter. Forget overwhelming, multi-day projects; this **Easy Crusty Italian Bread Recipe** is my secret weapon for a crispy exterior and that unbelievably soft and chewy interior everyone fights over. Seriously, making amazing italian bread doesn’t need to be scary!
Why This Easy Crusty Italian Bread Recipe Works for Beginners
I know so many people get flashbacks to sticky dough and collapsed loaves when they hear the word ‘baking.’ But that’s not what we’re doing here! This recipe is completely foolproof because we aren’t doing any complicated folds or overnight cold ferments. If you want incredible italian bread without the fuss, this is your winner.
- Only about 20 minutes of active hands-on time.
- Uses simple, everyday ingredients you probably already have.
- The first rise time is quick—less than 90 minutes total!
- It comes out looking professionally rustic, every single time. Seriously, check out my first attempt; it looked amazing!
Achieving Soft and Chewy Interior Texture
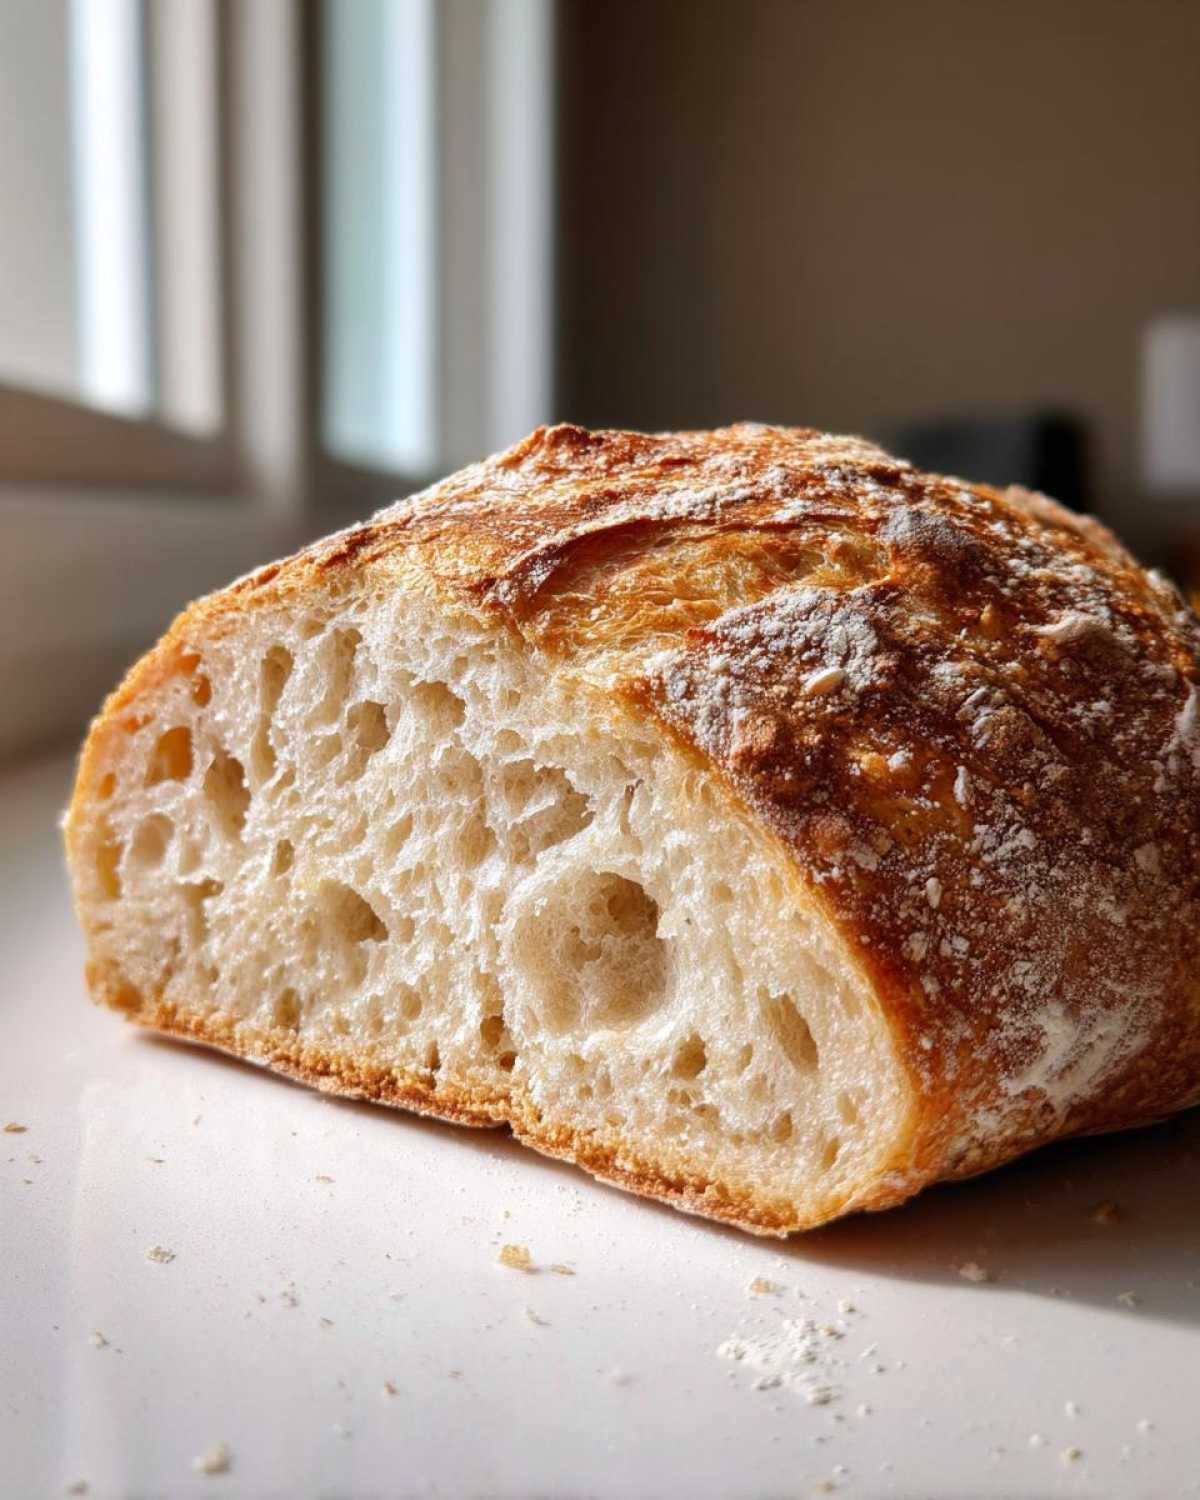
The secret to that lovely interior is twofold: the right amount of water and deliberate kneading. We use just enough water to create a well-hydrated dough, which means it stays pliable and tender. Then, kneading for that full five to seven minutes builds just enough gluten structure to give you that satisfying, slightly elastic chewiness when you bite in. It never ends up cakey!
Tips for a Perfect Crispy Crust Italian Bread Recipe
This is where we trick the oven into thinking it’s a professional deck oven! The steam is non-negotiable for that gorgeous ‘shatter’ when you slice it. You absolutely must get that hot water in the bottom of your oven just as the loaf goes in. Don’t skip this step if you want the best Crusty Italian Bread Recipe results. That burst of moisture keeps the surface soft just long enough for the loaf to expand fully before the crust sets hard and golden brown.
Simple Bread Ingredients for Your Rustic Italian Loaf
When I say this is simple, I mean it! You don’t need specialty malt or stone-ground anything for this recipe. We are focusing on pure, classic flavor, which means keeping the ingredient list short and sweet. Have these few items on hand, and you are halfway to a perfect Rustic Italian Loaf!
Here’s exactly what you need to gather before you start mixing:
- 3 cups all-purpose flour (Don’t go crazy trying to find specialty flour; this works great!)
- 1 teaspoon instant dry yeast (This is the fast-acting stuff, the key to speed!)
- 1 1/2 teaspoons salt (Crucial for flavor development!)
- 1 1/4 cups warm water (Aim for 105-115°F—just warm to the touch, not hot!)
- 1 tablespoon olive oil (Just a touch for richness.)
If you want the nitty-gritty details on where I sourced mine or other fun ingredients, check out my full shopping guide here.
Ingredient Notes and Substitutions for Italian Bread
While the ingredient list is short, paying attention to a couple of these details really makes the difference between good bread and *great* bread. Trust me, I learned this the hard way!
The flour choice is flexible. All-purpose flour works wonderfully for this loaf, giving it a nicely soft interior. If you happen to have bread flour, you can use that instead; it just adds a tad more structure. Also, regarding the yeast: if you only have active dry yeast, don’t panic! You just need to bloom it first. Mix it with a tiny bit of sugar and let it sit in the warm water for about five minutes until it gets foamy before adding it to your dry mix. That step proves your yeast is alive and ready to work its magic!
Step-by-Step Instructions for Your Homemade Italian Bread
Okay, now for the fun part! Turning sleepy ingredients into a gorgeous loaf of Easy Homemade Bread is surprisingly straightforward once you follow these steps. I’ve found that chopping up the process helps immensely, especially keeping track of those rising times. Just stay relaxed, and remember that bread loves a light touch!
First things first: Get everything mixed. You want to combine your flour, yeast, and salt in a big bowl. Then, pour in that warm water and the olive oil. Stir it all up with a wooden spoon until you get what I call a ‘shaggy mess.’ That’s the signal that it’s time to get your hands involved!
Mixing and Kneading the Italian Bread Dough
Turn that shaggy dough out onto a counter that’s just barely dusted with flour. Now, we knead! This is where you build the muscle in the dough, so dedicate about 5 to 7 solid minutes to pushing, folding, and turning. After that time, it shouldn’t stick to your hands like glue anymore; it should feel really smooth and start snapping back when you poke it. That elastic quality is what gives you that fantastic structure later on!
Proofing and Shaping the Soft and Chewy Italian Loaf
Once you’re happy with the smoothness, find a clean bowl, drizzle a little oil in the bottom, and tuck your dough ball inside. Cover it up tight—I use plastic wrap—and let it chill out in a warm spot for about an hour and a half, or until it looks seriously puffy. When it’s doubled, gently punch the air out—be gentle! You want to keep some of those air bubbles for that Soft and Chewy Italian Loaf quality. Shape it into your desired loaf size, place it on parchment, and let it rest for a quick 30-minute cozy-up before baking. Ready to see how we get that amazing crust? Head over to this post for my shaping secrets!
Baking Your Bakery Style Bread at Home with Steam
This is it! This is the make-or-break moment where we transform a nice risen dough into that jaw-dropping Bakery Style Bread at Home. Anyone can bake bread, but getting that intense, crispy crust on your italian bread takes one crucial theatrical step: steam! Trust me, getting this part right is like unlocking a secret door to professional-level baking.
Before you even think about putting the dough in, you need to preheat your oven to a ripping hot 425°F (220°C). This heat needs to be established so the steam works instantly. While the oven preheats, grab a separate, shallow metal pan—like an old broiler pan or even a cast-iron skillet—and place it right on the bottom rack.
Once you score your loaf and place it on the baking sheet, you’ll quickly pour about a cup of truly hot water into that bottom pan and slam the door shut. That trapped steam keeps the surface of your dough moist immediately, allowing it to expand fully before the thick crust sets. Bake it for 25 to 30 minutes, checking for that deep golden color. For all the extra details on how I manage the heat and steam for the crispiest shell, check out my guide to a perfect crispy crust!
Tips for Success with This Quick Italian Bread Recipe
Even with a simple recipe like this, a few little tricks can elevate your Quick Italian Bread from good to magnificent. If your kitchen is a little chilly and your dough seems stubbornly slow during the rise, try this: turn your oven light on (but keep the oven OFF!) and put your covered bowl inside. That little bit of residual warmth works wonders for waking up that instant yeast.
Also, remember that extra crispiness boost? If you really want that bakery look, right after you close the door post-steam bath, carefully open it up momentarily (be quick!) and give the oven walls a couple of quick spritzes with a spray bottle of water. I know, it sounds risky, but that extra moisture really helps dry out the crust perfectly within the first ten minutes of baking. You can dive deeper into speeding up your bake safely right here if you’re ever in a major hurry!
Serving Suggestions for Your Warm Italian Loaf
The absolute best part about pulling this incredible italian bread out of the oven is the waiting game afterward—you have to let it cool slightly, but you can’t wait to tear into it! I always have a plan ready for what I’m doing with that first loaf of the day. If you’re serving it alongside a big bowl of spaghetti and meatballs, take advantage of that crispy crust for some serious Italian Bread for Dipping in the sauce. It soaks up flavor beautifully!
But don’t just think of sauces! This makes the most incredible base for sandwiches. The structure holds up perfectly against hearty fillings, unlike flimsy supermarket loaves. My favorite way to enjoy it, though, is simple: sliced thick, slathered with butter, and eaten while it’s still steaming. There truly is nothing better than a Warm Italian Loaf straight from the cooling rack. If you’re looking for a next step on the flavor journey, check out my tips for making great dipping sauces to go with your bread here, or find ideas for the ultimate sandwich build over at my thoughts on Italian Sandwich Bread!
Storage and Reheating Instructions
Nobody wants a soft, leathery crust after waiting all day for that perfect crisp!
If you have leftover bread, the absolute best way to store it is cut-side down on a cutting board, loosely covered with a clean kitchen towel. Don’t seal it in plastic, or you’ll steam that lovely crust right off. For reheating, simply spritz the whole loaf lightly with water and pop it back into a 350°F oven for about 8 minutes. It comes out tasting freshly baked!
Frequently Asked Questions About Making Italian Bread
I get asked about this recipe constantly, and honestly, that just proves how popular homemade loaves are! Baking bread can seem intimidating, but this recipe really knocks down those beginner walls. If you have a burning question about your dough or your oven, chances are, it’s answered below. For much more detailed troubleshooting about your first few bakes, definitely check out my guide to Beginner Bread Baking!
Can I skip kneading when making this Italian bread?
Oh, I wouldn’t recommend it, sweetie! While it’s tempting to skip the 5 or 7 minutes of kneading because you’re in a rush, that physical work is what develops the structure needed for a genuine italian bread. Since we are using instant yeast and skipping a long, slow rest, the kneading is doing all the heavy lifting to give you that great, elastic dough that puffs up nicely in the oven. Skip the kneading, and you usually end up with a denser, flatter result.
How long does it take to make this bread if I skip the rise time?
If you skip the rise time, you’re skipping the whole point of yeast, unfortunately! The process we designed here is certainly a Quick Italian Bread compared to sourdough, but those rest periods are non-negotiable. The first rise (1 to 1.5 hours) allows the yeast to create air pockets, which is what gives you that lovely soft interior texture. If you rush that, you won’t get the volume you expect, and the bread will be heavy.
Estimated Nutritional Data for This Homemade Bread
Now, I always tell people that my measurements are based on my kitchen, my flour, and how much I tend to eat in one sitting (which is usually too much!). But since you asked for the details, here is a general guideline for what you’re looking at per slice. I use the data from my standardized testing batch, but keep in mind that things like the exact amount of water absorbed can change things slightly.
Remember, this is just a snapshot! For the most up-to-date information on what’s in our recipes, you can always check out the full legal stuff over at our nutrition disclaimer page.
- Serving Size: 1 slice
- Calories: 150
- Fat: 1g
- Saturated Fat: 0g
- Cholesterol: 0mg
- Sodium: 300mg
- Carbohydrates: 32g
- Fiber: 1g
- Sugar: 1g
- Protein: 4g
See? Pretty simple stuff for a loaf of honest, delicious bread! It’s such a wholesome thing to bake, and honestly, the sodium is mostly just from the salt that enhances all that gorgeous yeast flavor.
PrintEasy Crusty Italian Bread Recipe
Make bakery-style Italian bread at home with a crispy crust and a soft, chewy interior. This recipe is simple enough for beginners.
- Prep Time: 15 min
- Cook Time: 30 min
- Total Time: 2 hours 15 min
- Yield: 1 loaf
- Category: Bread
- Method: Baking
- Cuisine: Italian
- Diet: Vegetarian
Ingredients
- 3 cups all-purpose flour
- 1 teaspoon instant dry yeast
- 1 1/2 teaspoons salt
- 1 1/4 cups warm water (about 105-115°F)
- 1 tablespoon olive oil
Instructions
- In a large bowl, mix the flour, yeast, and salt together.
- Pour in the warm water and olive oil. Mix with a spoon until a shaggy dough forms.
- Turn the dough out onto a lightly floured surface. Knead for 5 to 7 minutes until the dough is smooth and elastic.
- Lightly oil a clean bowl. Place the dough in the bowl, turning to coat. Cover the bowl with plastic wrap or a clean towel.
- Let the dough rise in a warm place for 1 to 1.5 hours, or until doubled in size.
- Gently punch down the risen dough. Shape it into a round or oval loaf.
- Place the loaf on a baking sheet lined with parchment paper or in a loaf pan. Cover loosely and let it rest for 30 minutes.
- Preheat your oven to 425°F (220°C). Place a shallow pan on the bottom rack to create steam later.
- Before baking, lightly score the top of the loaf with a sharp knife.
- Carefully pour 1 cup of hot water into the shallow pan on the bottom rack to create steam, then quickly close the oven door.
- Bake for 25 to 30 minutes, or until the crust is deep golden brown and the internal temperature reaches 200°F (93°C).
- Remove the bread from the oven and let it cool completely on a wire rack before slicing.
Notes
- For an extra crispy crust, spray the oven walls with water a few times during the first 10 minutes of baking.
- If you do not have instant yeast, use active dry yeast and let it proof in the warm water with a pinch of sugar for 5 minutes before adding to the flour.
- This bread is excellent served warm with pasta sauce or butter.
Nutrition
- Serving Size: 1 slice
- Calories: 150
- Sugar: 1
- Sodium: 300
- Fat: 1
- Saturated Fat: 0
- Unsaturated Fat: 1
- Trans Fat: 0
- Carbohydrates: 32
- Fiber: 1
- Protein: 4
- Cholesterol: 0