

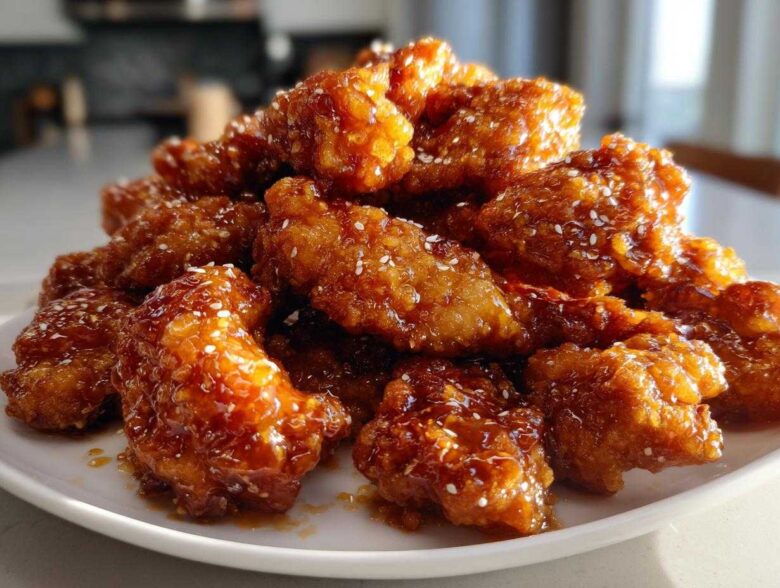
After years of ordering subpar, soggy versions, I swear I finally cracked the code for the most addictive Chinese takeout dish ever invented. Seriously, ditch the delivery app tonight! We are making my ultimate 30-minute crispy homemade orange chicken recipe, and trust me when I say this beats anything you get at the local spot. I’ve spent way too many evenings testing flour ratios and sweet tang ratios to make this flavor profile perfect. I promise you, the combination of that satisfying crunch right before you hit that perfectly sticky, glossy glaze is pure magic. Get ready for your new favorite weeknight dinner! You should definitely check out my Chicken Fried Rice Takeout Style to go alongside it!
Why This Orange Chicken Recipe Is Better Than Takeout
Okay, so why should you bother making this orange chicken recipe when you could just dial a number? Because we aren’t settling for mushy chicken swimming in overly sweet syrup! My goal with this dish was complete domination over the takeout version. That means you get serious crunch, and unbelievably juicy chicken bites, all in less time than delivery takes to drive to your house.
Here is the rundown on why this homemade version wins every time:
- Speed Is Everything: We’re wrapping this whole thing up in about 30 minutes total. It’s a genuine 30 Minute Orange Chicken that fits perfectly into any busy schedule.
- The Crunch Factor: I’ve perfected the coating so it stays crispy even after it’s tossed in the sticky orange glaze—that’s the secret sauce!
- Flavor Balance: The sweet tangy orange sauce isn’t one-note; it has that perfect acidic tang that cuts through the richness. It’s truly Better Than Panda Express Chicken, guaranteed.
You can check out my General Tso’s Copycat next, because once you master this texture, you’ll want to make everything!
Ingredients for Your Ultimate Orange Chicken Recipe
Gathering your ingredients is half the battle when you’re aiming for a quick dinner, and for this orange chicken recipe, we need two distinct lists. Don’t skimp on quality here, especially for the sauce! My biggest tip for achieving that amazing sweet tangy orange sauce is using freshly squeezed orange juice—bottled stuff just doesn’t have the right bright flavor, trust me! We want vibrant citrus coming through.
For the Crispy Chicken Bites
This mix is designed specifically to give you that durable, crispy coating that holds up to the glaze. The blend of flour and cornstarch is key for maximum crunch. We’re using about a pound and a half of boneless chicken, which is perfect for four servings.
- 1.5 lbs boneless, skinless chicken breasts or thighs, cut into 1-inch pieces
- 1 large egg
- 1/4 cup all-purpose flour
- 1/4 cup cornstarch
- 1/2 teaspoon salt
- 1/4 teaspoon black pepper
- 2 tablespoons vegetable oil (for pan-frying)
For the Sticky Orange Glaze
This is where the magic happens—the beautiful, vibrant, sticky orange glaze that coats everything perfectly. Remember, we need to keep the cornstarch and water separate until the very end, that’s our thickening secret weapon!
- 1/2 cup fresh orange juice
- 1/4 cup rice vinegar
- 1/4 cup soy sauce (low sodium preferred)
- 1/2 cup granulated sugar
- 1 tablespoon grated fresh ginger
- 2 cloves garlic, minced
- 1 teaspoon sesame oil
- 1 teaspoon orange zest
- 1 tablespoon cornstarch mixed with 2 tablespoons cold water (slurry)
- Optional: Sliced green onions and sesame seeds for garnish
How to Prepare Crispy Orange Chicken Recipe in 30 Minutes
Okay, buckle up, because this is where the action happens! We are making incredible orange chicken in under 30 minutes, which means efficiency is key. We follow simple steps designed to give you that professional texture without spending an hour standing at the stove. This entire workflow proves how fantastic a quick dinner can be.
Ready? Grab your ingredients, and let’s get cooking! And hey, if you happen to be making a big batch, check out my guide on Sweet and Sour Pork Stir-Fry for inspiration on other quick Asian dinners!
Coating and Frying the Chicken for Maximum Crunch
First things first: the coating has to be perfect. Whisk that one egg well in a bowl. In a separate dish, mix your flour, cornstarch, salt, and pepper. Take your chicken pieces—they are going for a double dip! Dip them first in the egg wash, making sure they are coated, and then transfer them immediately to the dry mixture. Really press that coating on, then shake off any super heavy excess. We need a light coat to crisp up!
Next, heat up your oil over medium-high heat. This heat needs to be right—too low and the chicken gets greasy; too high and it burns before cooking. Add the chicken in a single layer. Honestly, don’t crowd the pan! Cook in batches, about 3 to 4 minutes per side, until they look gorgeously golden brown and are cooked all the way through. Scoop those beautiful crispy pieces out onto paper towels. Don’t skip resting them!
Making the Sweet Tangy Orange Sauce
While that first batch of chicken is draining, start the sauce! This moves fast. In a saucepan, combine your fresh orange juice, that rice vinegar, soy sauce, sugar, fresh ginger, minced garlic, sesame oil, and that crucial orange zest. Bring this mixture just to a simmer over medium heat, stirring until that sugar dissolves completely. Now, for the thickness: whisk your cornstarch slurry one last time, and slowly pour it in while stirring the sauce constantly. Keep stirring until it bubbles and becomes beautifully thick and glossy. Take it right off the heat when it coats the back of a spoon!
Combining for the Perfect Sticky Orange Glaze
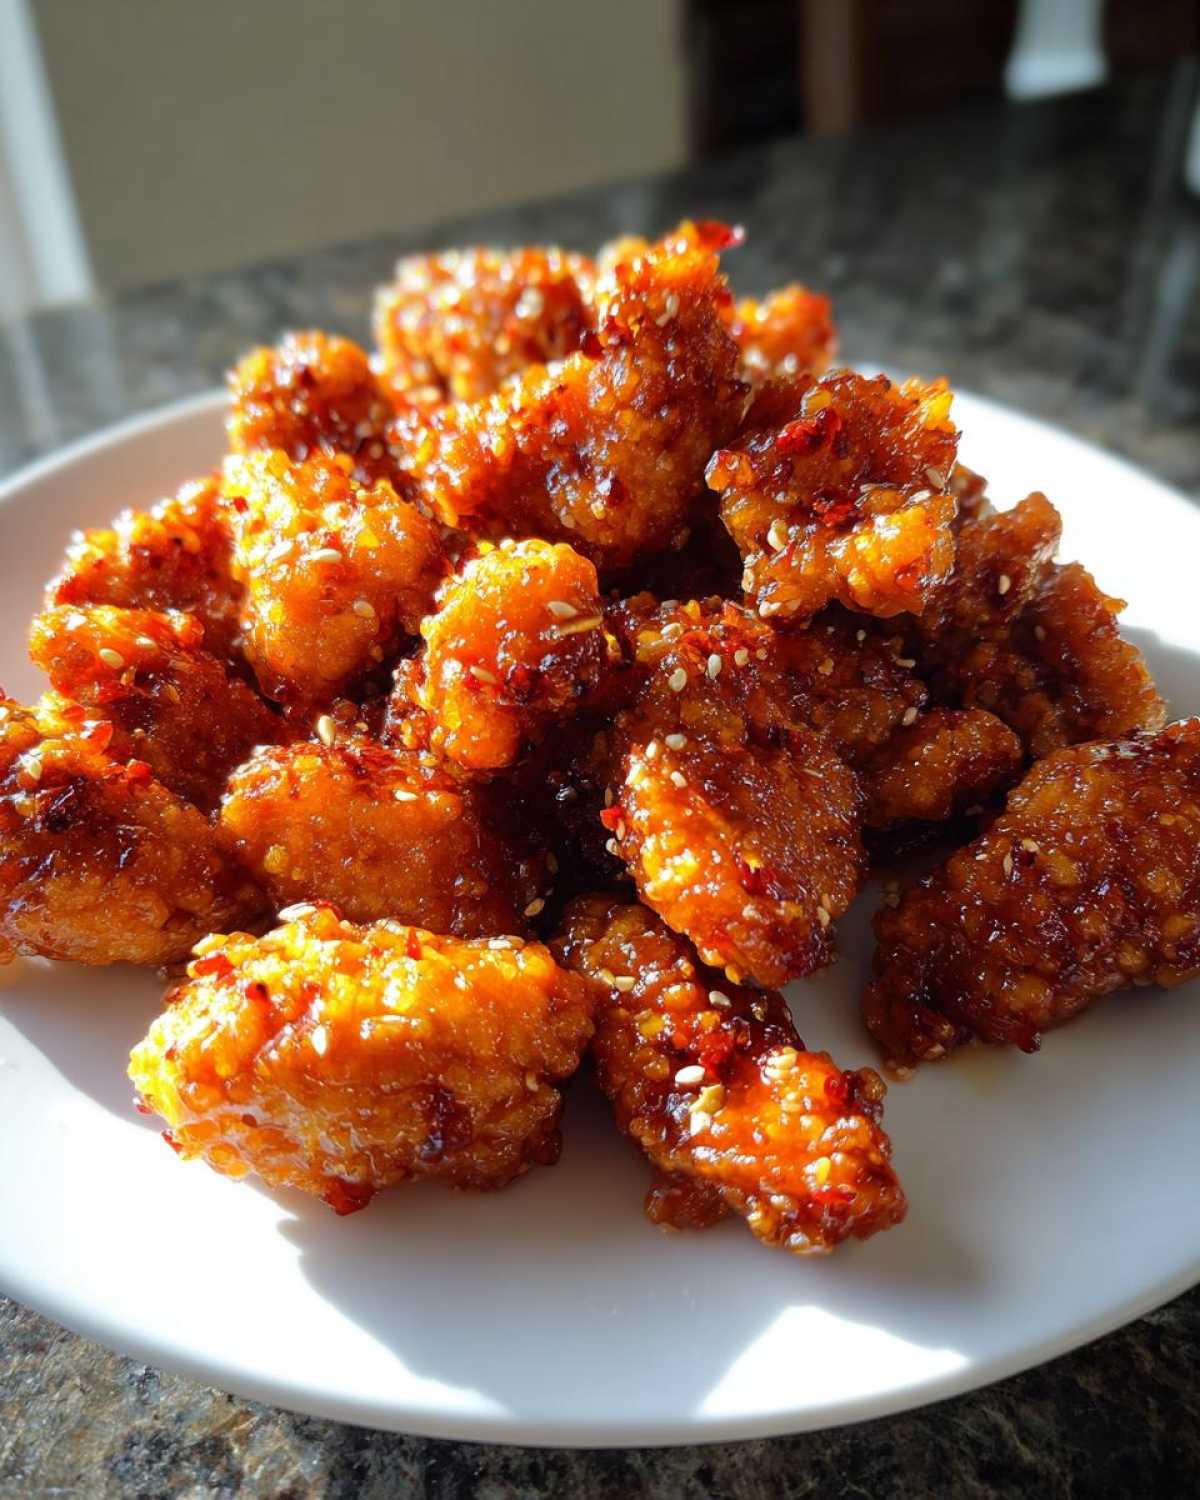
This is the grand finale! You can either return the slightly cooled chicken to the now-empty skillet (wiped clean if needed) or, my preferred method for even coating, put it all into a large, clean bowl. Pour that amazing sticky orange glaze right over the crispy chicken. You have to work fast here! Toss everything gently but thoroughly—we want every single piece swimming in that incredible glaze without soaking the crunch away. Serve this immediately while it’s hot and gloriously sticky!
Alternative Cooking Methods for Your Orange Chicken Recipe
Now, I know what some of you are thinking: that frying oil is a pain, or maybe you’re trying to skip the oil altogether. I hear you! While pan-frying gives that phenomenal, almost restaurant-level crust, adapting this orange chicken recipe for baking or air frying is super simple and cuts down on mess significantly. It still produces great results, making this a fantastic option for a busy weeknight Asian recipe.
When you switch methods, the key is making sure that light coating adheres well and gets enough direct heat to crisp up before we toss it in the sauce. Here are my personal notes:
Air Fryer Orange Chicken Tactic
This method is my go-to when I want that crisp factor without deep frying. You’re going to take those beautiful flour-and-egg-coated chicken pieces and lightly spray them all over with just a slick of cooking spray—don’t skip the spray, it helps everything brown up nicely! Arrange them in a single layer inside the basket. Cook them at 400°F (200°C) for about 12 to 15 minutes. I always set a timer for 8 minutes and flip them halfway through so they crisp evenly. Once they’re golden, pull them out and toss them right into your sauce!
Baked Orange Chicken Recipe
If you’re cooking a huge batch or just prefer to use your oven, this Baked Orange Chicken Recipe works really well. Set your oven to 400°F (200°C) too. The trick here is setup: put those coated pieces on a wire rack placed over a standard baking sheet. That rack allows air to circulate underneath, which helps prevent sogginess on the bottom. They’ll need a little longer in the oven—usually 18 to 20 minutes—until they are cooked through and nicely browned. Once they’re crisp, just transfer them straight to a bowl and coat with your glaze.
It’s amazing how versatile this coating is! You can even check out my tips for Air Fryer Buffalo Chicken Wings if you want to try a fun different flavor profile in the air fryer next week. It’s all about getting that crispy exterior first!
Tips for Achieving Juicy Chicken Bites Every Time
Even the best sauce can’t save dry chicken, right? Luckily, achieving those succulent, juicy chicken bites that melt in your mouth while maintaining that perfect crisp crust is easier than you think. It all comes down to two little decisions you make right at the start. First, if you’re worried about dryness, go for the thighs instead of breasts! Thigh meat just has a little more fat insurance, which means it stays moist even after frying.
Second, and this is critical for keeping that crunch, don’t let those crispy pieces hang out by themselves for too long before saucing. Once they are done frying or baking, they need to go straight into the glaze! Overcooking the chicken—even by a minute—sucks out the moisture we worked so hard to keep in. Toss them quickly and serve right away. For some guaranteed moisture tips on larger cuts, take a look at my advice on Juicy Garlic Herb Roast Turkey Breast.
Serving Suggestions for Your Homemade Orange Chicken
So, now you have this glorious platter of sticky, tangy, homemade orange chicken—what goes next to it on the plate? Since this is such a flavorful, big-tasting star of the meal, you want sides that are simple, fresh, and can soak up any extra sauce dripping off the chicken. This keeps the whole meal feeling balanced, especially if you’re trying to pull together a quick weeknight Asian recipe!
The classic choice, and honestly, the only choice for me, is freshly steamed white rice. Seriously, you need that fluffy bed of rice to catch every bit of that sticky orange glaze. Don’t overthink it! Just fluff it up nicely when it’s done cooking.
To balance out all that sweet richness, you absolutely need a crisp green vegetable. Steamed broccoli is the traditional absolute best friend to this dish—it takes on the sauce flavor beautifully around the edges. If you want something a little brighter, I highly recommend trying my Garlic Lemon Asparagus on the side; the lemon zest works perfectly with the orange chicken, trust me!
Finally, don’t skip the garnishes! They look pretty, and they add an extra pop of flavor and texture right at the end. When serving, sprinkle generously with thinly sliced green onions and toasted sesame seeds. That final flourish takes your family favorite chicken from “homemade” to “restaurant quality” in about three seconds flat!
Storage and Reheating Instructions for Leftover Orange Chicken Recipe
What happens when you actually have leftovers of the world’s best orange chicken recipe? That’s the best problem to have! Listen, I’m going to be honest with you: that beautiful crisp coating we worked so hard for? It’s going to soften up once it’s sitting in that glorious sauce in the fridge. That’s just physics when you mix starch with liquid overnight. But don’t you worry for one second; we can absolutely bring these sticky pieces back to life!
The key to reheating is avoiding the microwave if you can—it just turns everything tough and steamy. We want to re-crisp, not just reheat!
Reheating in the Air Fryer (Best Option!)
If you used the air fryer method before, this is your comeback machine! Set your air fryer to about 375°F (about 190°C). Spread the leftover chicken out in a single layer in the basket. You don’t even need oil, just give it about 4 to 6 minutes. Keep an eye on it because the sauce can start to burn if you forget it. When it comes out, that glaze will look shiny and slightly caramelized, and the crust will have a nice chew back to it. Total game-changer for leftovers!
Reheating in the Oven
If you’re reheating a bigger batch, the oven is your friend. Preheat your oven to 375°F (190°C). Line a baking sheet with parchment paper, and if you have one, place a wire rack on top of that baking sheet. Lay the sauced chicken out on the rack. This gets heat underneath it, preventing that soggy bottom layer. Bake for about 8 to 10 minutes. You might want to brush a tiny bit of extra soy sauce or a splash of water over them halfway through if they look too dry, but usually, the sauce holds enough moisture.
The Microwave Quick Fix (If You’re Desperate!)
Look, sometimes life happens, and you just need this in your face *now*. If you must use the microwave, here is how you minimize the damage. Place the chicken on a paper towel-lined plate. Cover the plate loosely with another paper towel to try and absorb some of the steam buildup. Heat it in 30-second bursts on about 60% power. It won’t restore the crispiness, but it will get it hot without turning the chicken completely rubbery.
No matter how you reheat it, this orange chicken recipe is always fantastic, even on day two!
Frequently Asked Questions About This Orange Chicken Recipe
I get so many questions about tweaking this orange chicken recipe, which just tells me how many people are tired of mediocre takeout! It’s so customizable once you master the core technique of getting that crispy coating. Here are the main things people ask me about making this Home Made Orange Chicken perfect for their families.
Can I make the Sweet Tangy Orange Sauce ahead of time?
Oh yes, you absolutely can! That’s part of what makes this a great weeknight Asian recipe—you can prep components ahead of time. I usually make a double batch of the sweet tangy orange sauce because I love having it on hand. You can store it covered in the fridge for up to two days. Now, here’s the catch: because cornstarch is involved, it will gelatinize and get thick when it chills!
When you are ready to use it, dump the cold sauce into a small saucepan and reheat it slowly over medium heat. Stir constantly. You’ll need to whisk in about two tablespoons of extra water or fresh orange juice until it loosens back up to a pourable consistency. Once it’s hot and moving freely again, it’s ready to coat your freshly fried chicken!
Is this a Budget Friendly Chicken Meal?
Hands down, yes! That’s one of the secret reasons this is a true family favorite chicken dish. When you compare this recipe to ordering takeout—where you pay for labor, packaging, and delivery fees—making this at home is incredibly budget-friendly. You’re using standard pantry staples like sugar, soy sauce, flour, and cornstarch, which most of us always have stocked up.
Chicken thighs, in particular, are usually one of the most economical cuts of meat you can buy, and they add extra assurance that you’ll get those juicy chicken bites we talked about. You get about four hearty servings out of this recipe for what usually costs less than one takeout order for two people. Huge win for the weekly meal plan!
If you ever need more budget meal inspiration, check out my tips on making Chicken Shawarma Wraps—another winner!
What else is on your mind? Let me know if you have other tweaks you are planning to try!
Rate Your Experience Making This Easy Takeout Orange Chicken
I am unbelievably excited for you to try this! I truly believe this is the definitive easy takeout orange chicken recipe you’ve been searching for. I put my heart into balancing that sweet tang and that satisfying crunch, and now I need to know how it worked out in *your* kitchen!
Seriously, go ahead and give this recipe a star rating down below. And listen, I really want to hear the details! Did your coating hold up to the glaze? Did you choose the pan-fry method or did you try the air fryer trick? Did you manage to keep it under 30 minutes? Your feedback is gold, not just for me, but for other home cooks looking to make the ultimate batch of Chinese American Dinner!
Drop a comment below and let me know your experience! If you ever want to explore more of my favorite quick recipes, you can always hop back to the main blog page. Happy cooking, friends!
PrintThe Ultimate 30-Minute Crispy Homemade Orange Chicken

Make crispy, tangy, and sweet orange chicken at home in under 30 minutes. This recipe delivers better-than-takeout flavor with juicy chicken pieces coated in a sticky glaze.
- Prep Time: 10 min
- Cook Time: 20 min
- Total Time: 30 min
- Yield: 4 servings
- Category: Dinner
- Method: Pan-Frying
- Cuisine: Chinese American
- Diet: Low Lactose
Ingredients
- 1.5 lbs boneless, skinless chicken breasts or thighs, cut into 1-inch pieces
- 1 large egg
- 1/4 cup all-purpose flour
- 1/4 cup cornstarch
- 1/2 teaspoon salt
- 1/4 teaspoon black pepper
- 2 tablespoons vegetable oil (for pan-frying)
- 1/2 cup fresh orange juice
- 1/4 cup rice vinegar
- 1/4 cup soy sauce (low sodium preferred)
- 1/2 cup granulated sugar
- 1 tablespoon grated fresh ginger
- 2 cloves garlic, minced
- 1 teaspoon sesame oil
- 1 teaspoon orange zest
- 1 tablespoon cornstarch mixed with 2 tablespoons cold water (slurry)
- Optional: Sliced green onions and sesame seeds for garnish
Instructions
- In a medium bowl, whisk the egg. In a separate shallow dish, mix the flour, 1/4 cup cornstarch, salt, and pepper.
- Dredge the chicken pieces first in the egg, then coat thoroughly in the flour mixture. Shake off excess.
- Heat the vegetable oil in a large skillet over medium-high heat. Add the chicken in a single layer, working in batches if necessary, to avoid crowding. Cook for 3 to 4 minutes per side until golden brown and cooked through. Remove the chicken and set aside on a paper towel-lined plate.
- While the chicken cooks, prepare the sauce. In a small saucepan, combine the orange juice, rice vinegar, soy sauce, sugar, ginger, garlic, sesame oil, and orange zest. Bring the mixture to a simmer over medium heat, stirring until the sugar dissolves.
- Whisk the cornstarch slurry one more time and slowly pour it into the simmering sauce. Stir constantly until the sauce thickens and becomes glossy, about 1 minute. Remove from heat.
- Return the crispy chicken pieces to the skillet or a clean large bowl. Pour the orange sauce over the chicken. Toss gently until every piece is evenly coated and sticky.
- Serve immediately over steamed white rice with a sprinkle of green onions and sesame seeds.
Notes
- For an air fryer option, spray the coated chicken lightly with cooking spray and cook at 400°F (200°C) for 12-15 minutes, flipping halfway, before tossing with the sauce.
- To make this a baked orange chicken recipe, place coated chicken on a wire rack over a baking sheet and bake at 400°F (200°C) for 18-20 minutes until crispy.
- Use fresh orange juice for the best flavor in your sweet tangy orange sauce.
Nutrition
- Serving Size: 1 serving
- Calories: 450
- Sugar: 35
- Sodium: 650
- Fat: 12
- Saturated Fat: 2
- Unsaturated Fat: 10
- Trans Fat: 0
- Carbohydrates: 48
- Fiber: 1
- Protein: 35
- Cholesterol: 110