


Oh my gosh, you know those moments when you are absolutely craving something hearty, comforting, and satisfying, but you want to keep it totally plant-based? I get it! For years, I struggled to find that perfect meatless patty. Most chickpea burgers just turn into mush when you try to crisp them up, or they fall apart halfway through cooking. It used to just drive me crazy, honestly!
But I finally cracked the code after what felt like a million sticky messes. I promise you, the secret isn’t some fancy binder; it’s all about pre-treating those little beans! We’re going to achieve that deeply golden, satisfying crunch every single time. This recipe for Vegan Crispy Chickpea Cutlets with Lemon Tahini is seriously life-changing. Everything comes together so quickly, and that bright, nutty lemon tahini sauce? It’s the perfect counterpoint to the savory, spiced cutlet. You’ve got to try this!

If you’re looking for more ways to integrate incredible plant-based meals into your week, you can always check out my main recipe index for inspiration!
Why This is the Best Vegan Crispy Chickpea Cutlets with Lemon Tahini Recipe
I know you’ve seen other recipes claiming to be crispy, but trust me, ours are different. We do a couple of small things that make a massive difference when you’re trying to get that perfect golden crust on something made from beans. It’s hearty, packed with flavor, and totally vegan, which feels like a win-win every time!
- We nail the texture! No mushiness here, only satisfying, deep-fried crunch that holds up under sauce.
- It’s lightning fast—we’re talking about a genuinely satisfying dinner in under 40 minutes.
- The pairing of the smoky cutlet with the zesty Lemon Tahini Sauce just hits all the right flavor notes.
For anyone who wants the full deep dive on how we make sure these plant-based patties never fail, you can check out my detailed guide on How to Make Crispy Vegan Patties.
Achieving Maximum Crispiness
This is the most important part, guys! You can’t just drain and rinse your chickpeas and expect magic to happen. If you skip the step where we roast them briefly first, you are guaranteeing a soft center that turns mushy when you mash them. That quick 15 minutes in the oven dries the chickpeas out just enough so that when we mash them, they are like little dry crumbly pieces instead of a paste.
That initial dry-out phase is the non-negotiable step that separates a good cutlet from the best vegan cutlets recipe you’ve ever made. Seriously, don’t skip it!
Bright and Creamy Lemon Tahini Sauce
If the cutlet is the main player, the Lemon Tahini Sauce is the dazzling opening act. It’s so simple, but using fresh lemon juice is everything. That bright, tart flavor cuts right through the richness of the tahini and the smokiness of the paprika in the cutlet. Honestly, I sometimes make a double batch just for drizzling on salads later in the week.
Essential Ingredients for Vegan Crispy Chickpea Cutlets with Lemon Tahini
Look, the magic here is that this recipe pulls together ingredients you probably already have in your pantry! We aren’t messing around with obscure vegan proteins or thirty different kinds of flour. It’s all about seasoning those humble chickpeas right. You’ll want to make sure you’ve got a good can of chickpeas, totally rinsed and patted bone-dry before we even start roasting them—remember Step 1!
For the binding and flavor, we keep it simple but targeted. Panko breadcrumbs are my absolute must-have here; they just give you superior crunch compared to regular crumbs. Don’t forget that little bit of nutritional yeast—it’s our secret weapon for that savory, cheesy depth without any dairy whatsoever. We pack these cutlets with flavor!

If you’re stocking up on things that boost your plant-based game, check out my roundup of Protein-Packed Vegan Recipes for some other dinner inspiration!
For the Lemon Tahini Sauce: Tahini Dressing Recipes
Now, let’s talk about the sauce that pulls this whole plate together. When I first started making this dressing, I used way too much lemon juice at once, and it seized up into this thick, un-drizzleable paste. Oh, the frustration!
The key is patience! We whisk the tahini with the lemon, garlic, and salt first, and then we add water just a tiny bit at a time. Water is what activates the smooth creaminess in tahini, but if you dump it all in, you’re guaranteed a mess. Keep whisking, keep adding a teaspoon of water until it looks like liquid silk. You want it thin enough to drizzle beautifully but thick enough that it actually tastes like tahini when it hits the cutlet!
Here’s what you need for that perfect, creamy drizzle:
- 1/4 cup tahini (use a good quality brand, it matters here!)
- 2 tablespoons fresh lemon juice (that fresh tang is key!)
- About 1 to 3 tablespoons of water, for thinning
- 1 small clove garlic, minced super fine
- A tiny pinch of salt
Step-by-Step Instructions for Vegan Crispy Chickpea Cutlets with Lemon Tahini
Okay, now that we have our superstars (the dry chickpeas and the bright sauce ready to go), it’s time to assemble these beauties! Remember, we are moving from dry bean to crispy cutlet in about twenty minutes total cooking time. Speed is key, but don’t rush the crisping steps, or you’ll lose that amazing texture.
This entire process is straightforward, but I have one massive insider tip for you that you won’t find everywhere: after you mash the chickpeas, take a clean kitchen towel and press down hard on the mixture to squeeze out any lingering moisture you missed during the initial roast. If you skip that manual press, your cutlets might get a little flaky! I learned that the hard way when I tried to rush dinner one Tuesday.
If you want to see the full range of cooking times, especially if you use an air fryer, I definitely walk through that in my How to Make Crispy Vegan Patties guide!
Prepping the Chickpeas for Crispiness
This initial step is what makes these cutlets crispy instead of soft, so pay attention! First thing, preheat your oven to 350°F (175°C). Take that 15-ounce can of chickpeas you rinsed really, really well, and spread them out on a baking sheet. They need to be as dry as possible before they hit the oven!
Pop them in for about 15 minutes. You aren’t trying to toast them dark brown; you just want to bake off that residual moisture hiding inside. Once they cool down just enough so you can handle them, they are ready for the mashing process. See? Totally simple way to guarantee a crispy exterior!
Forming and Cooking the Best Vegan Cutlets Recipe
Once those roasted chickpeas are cool, mash them up in a bowl. Don’t go totally smooth like hummus; we want some texture left, maybe chunks of bean here and there. Then, mix in your flavor boosters: the breadcrumbs, onion, garlic, nutritional yeast, and spices. Make sure you mix until it actually holds together well—if it feels too watery, add just one more tablespoon of your panko breadcrumbs.
Divide that mix into four equal portions and gently shape them into patties, keeping them about half an inch thick. Now, for the dredging: sprinkle that two tablespoons of flour on a plate and gently press each side of the patty into the flour. This creates a beautiful seal for the final crisping step!
Heat your olive oil in a skillet over medium heat. You want it hot enough that the flour coating sizzles right away! Cook them for about 4 to 5 minutes on the first side until they are deeply golden brown and feel firm when you tap them. Flip gently and do the exact same thing on the second side. You know they are done when the outside is crackly and golden brown—zero mush allowed!
Tips for Success with Your Vegan Crispy Chickpea Cutlets
I feel like every time I cook with legumes, there’s a tiny voice in my head whispering, “This is going to crumble.” It’s nerve-wracking! But trust me, once you nail the texture maintenance, these become one of your favorite savory chickpea dishes. The biggest thing is making sure you have the right amount of “glue” in there.
Early on, I tried making a batch using gluten-free oats instead of panko, and they looked amazing coming out of the oven, but the second my husband tried to put one on a bun, it just split right down the middle. Total disaster! I realized my mistake: I needed a slightly finer binder to absorb the moisture that cooked out during the heat process.
So, here’s my expert advice for texture maintenance and binding that saved my future dinners:
- Always check the mash consistency *before* adding flour or breadcrumbs. You should be able to press a small clump together, and it should hold its shape perfectly without sticky residue on your fingers. If it’s too dry, add a teaspoon of water. If it’s too wet, add one more tablespoon of panko crumbs.
- When you are dredging in the flour, don’t skip it! That thin coating acts like a crucial seal. It keeps the inner moisture locked in while the outside gets that gorgeous crust development in the hot oil.
- If you are planning to bake them or air fry them instead of pan-frying, you absolutely must spray or brush them lightly with oil. The oil helps conduct the heat evenly, ensuring that crispiness develops all over, not just on the sides that touch the pan surface. Spraying them with avocado oil before baking is my go-to trick for a fully crisp result.
Follow these little textural tweaks, and you won’t have to worry about crumbly cutlets ever again. They’ll be firm enough to handle sauce, flip easily, and they’ll hold their shape beautifully!
Variations for Your Chickpea Dinner Ideas
While the standard pan-fried method gives you that amazing, restaurant-quality crunch, I totally understand that sometimes we need to switch things up to fit our schedule or what equipment we have handy. Life gets busy, and sometimes you just don’t want to stand over the skillet!
But don’t worry, these cutlets are troopers! They adapt really well to other cooking methods, and you can even alter the inside flavor profile to make them completely new for your next rotation of easy vegan weeknight meals. I love keeping these base ingredients around because they are so versatile.
If you want to change up the flavor, try swapping out some of those spices! Replace the smoked paprika and cumin entirely with Italian seasoning and dried oregano for a much brighter, herby flavor that pairs beautifully with a vegan pesto sauce instead of the lemon tahini. Or, you can add a teaspoon of dried dill and swap the onion for finely grated carrot if you’re feeling adventurous!
Air Fryer Chickpea Cutlets Alternative Cooking Method
If you have an air fryer, this is my personal favorite way to cook these when I’m feeling lazy—and it usually results in a crisp that mimics deep-frying without all the oil! We’re still going to do the roasting step first for moisture control, of course. That part is non-negotiable for crispiness!
Once you’ve formed and floured your cutlets, lightly spray them down on both sides with your preferred cooking oil—I use avocado oil spray because of its high smoke point. Place them in the air fryer basket in a single layer. No overcrowding here, or you’ll steam them instead of crisping them!
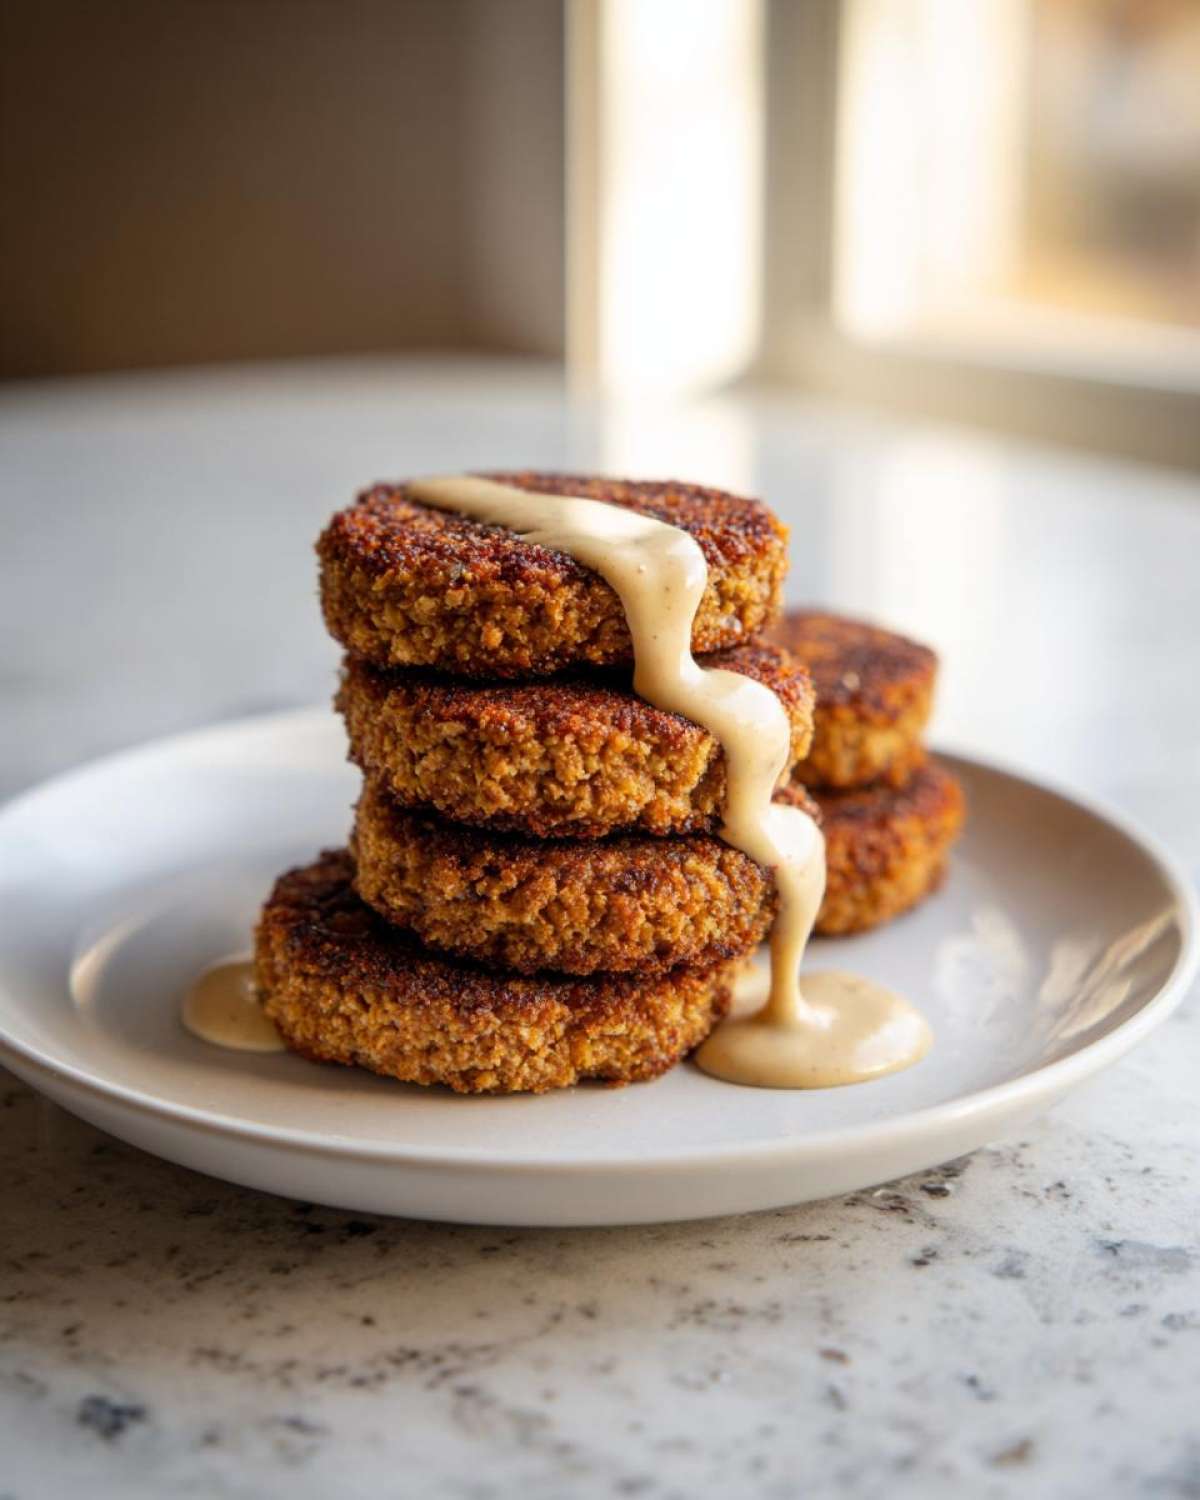
Set your air fryer to 380°F (about 195°C). They usually take about 12 to 14 minutes total. You’ll want to flip them halfway through, around the 7-minute mark, so they get golden brown evenly on both sides. They come out perfectly firm and golden!
Serving Suggestions for Vegan Crispy Chickpea Cutlets with Lemon Tahini
Okay, you pulled off the perfectly crispy patties! Hooray! Now comes the fun part: eating them! These cutlets are so versatile, you can really dress them up or keep them super casual. I usually make a big batch because the leftovers are fantastic for lunch the next day, and they reheat so well.
When they’re hot and fresh, the options are wide open. I always try to have that Lemon Tahini Sauce ready to go, because that’s what really ties the whole thing together, whether it’s soaking into a soft bun or coating grains.
Here are the three main ways I serve these amazing chickpea dinner ideas:
- The Ultimate Vegan Sandwich: My favorite way! Toast a sturdy bun (sourdough is amazing here) and spread a thick layer of tahini sauce on both sides. Layer with crisp lettuce, maybe a slice of crisp red onion, and stack two hot cutlets on top. The crispness holds up surprisingly well against the moisture of the sauce inside the bread.
- Salad Topper Power-Up: If you’re watching carbs or just want something lighter, crumble one cutlet over a big, vibrant green salad. I love pairing it with arugula or spinach. Drizzle it generously with the tahini sauce instead of a traditional vinaigrette. It turns a simple side salad into a truly filling, protein-packed main course!
- Hearty Grain Bowls: This is my go-to meal prep option. Assemble a bowl with a base of fluffy quinoa or brown rice, add some roasted root vegetables (like sweet potatoes or Brussels sprouts), and top it off with a whole cutlet or two. The combination of the savory spices and the bright lemon dressing just makes the whole bowl sing.
Honestly, once you get the crispiness down, you’ll find so many excuses to make these! They are just a fantastic, easy vegan weeknight meal.
Storage and Reheating Instructions for Meatless Cutlets Alternative
So, what happens on Day Two when you didn’t quite finish that huge batch of easy homemade fluffy rice pilaf and you still have leftovers? Don’t panic! The biggest fear with anything crispy that you store is that it turns soggy, right?
I always tell people, these chickpea cutlets store beautifully, but you have to be strategic about how you reheat them. The microwave is basically the enemy of crispiness—it’s the enemy of everything good when it comes to texture!
Here’s my system for keeping these meatless cutlets alternative tasting almost as good as fresh:
Refrigeration Guidelines
First, you have to let the cutlets cool *completely* before you even think about putting them in the fridge. If you seal them up warm, all that trapped steam instantly makes the crust soggy, and we absolutely do not want that moisture disaster!
Once they are stone cold, place them in a shallow, airtight container. Here’s the trick: Put a piece of paper towel between the layers if you stack them. That paper towel is going to wick away any condensation that might form. Stored this way, they keep perfectly well in the refrigerator for about four days. Trust me, they rarely last that long in my house, but four days is the safe maximum!
Reheating to Restore Peak Crispiness
If you try to reheat these in the microwave, they will become soft, dense, and frankly, sad. We worked too hard getting them crispy the first time to undo all that work in 60 seconds of radiation!
Your best friends for reheating are the oven or the air fryer:
- Oven Method: Preheat your oven to about 375°F (190°C). Place the cutlets directly on a wire rack set over a baking sheet. The rack allows air to circulate underneath, which is key to preventing a soggy bottom. Bake them for about 8 to 10 minutes. You’ll see them firm up and the outside will regain a lot of that original crunch.
- Air Fryer Method: This is faster! Use 370°F (188°C). Place them in the basket (single layer only!). Cook for about 4 minutes, flipping halfway if your air fryer tends to brown unevenly. They come out piping hot and super crunchy!
If you are serving them with the Lemon Tahini Sauce, only reheat the cutlets. Keep the sauce cold, and drizzle it on right before you take that first amazing, crispy bite!
Frequently Asked Questions About Vegan Crispy Chickpea Cutlets
I always get so many questions when people try this recipe for the first time, usually all centered around that crispy texture we worked so hard to achieve! It makes sense; getting a perfectly firm, non-mushy patty out of beans is the ultimate goal for any great crispy plant based patties recipe.
Here are the answers to the questions I hear most often about making these the best vegan cutlets around. If you’re worried about texture or substitutions, this section is for you!
Can I make these Vegan Chickpea Cutlet Recipe ahead of time?
You absolutely can, and I highly recommend it for busy nights! The prep—mashing, mixing, and forming the patties—is definitely something you can do a day ahead of time. Remember, you want to store them un-cooked in the fridge, just like I mentioned in the storage section, making sure they are covered and separated by parchment paper if you stack them.
However, you cannot do the *cooking* ahead of time if you want the true “crispy” experience. These cutlets are designed to be eaten warm right after they hit the skillet. If you cook them and then refrigerate them, they will soften up. But, if you assemble them ahead of time, you cut your active cooking time right in half the next day. It turns this whole process into a lightning-fast weeknight staple!
What is the best way to ensure my patties do not fall apart?
This question gets right to the heart of making successful homemade chickpea burgers! The single most important thing is Step One: drying out your chickpeas. If you skip the oven roasting step, you are leaving moisture in the bean, and that moisture needs to escape during cooking, which causes crumbling.
If your *mash* still feels too loose after mixing in the breadcrumbs, don’t be afraid to add just a little bit more binder—maybe another tablespoon of panko or even a tiny sprinkle of flour. The dough needs to feel firm enough to handle easily. If you can’t form a tight ball with the mixture, it’s too wet. A firm base prevents collapse when you flip them during the pan-frying process!
Also, remember that dredging step with the plain flour? That’s your insurance policy! It creates a hard shell that locks everything in place while the outside gets golden brown and delicious.

Estimated Nutritional Data for Vegan Crispy Chickpea Cutlets
Who doesn’t love a satisfying meal that tastes amazing AND fills you up? I love that these Vegan Chickpea Cutlet Recipe gives us so much flavor and protein without stressing about our ingredients. We’ve kept things hearty and wholesome, but of course, when you dip them in that creamy tahini sauce, the numbers shift a little!
I pulled these estimates together based on the exact ingredients listed in the recipe, assuming you divide the mixture into the four specified cutlets and include a reasonable amount of the lemon tahini sauce drizzle on each serving. But remember, these are just my best guesses!
Since we’re using different brands of tahini or maybe different oils for frying, your numbers will vary slightly. For the most accurate reporting, especially if you have dietary restrictions, you should always check the labels of the specific products you bring into your kitchen—that’s just good cooking sense!
Here is the estimated breakdown for one cutlet, served with the sauce:
- Serving Size: 1 cutlet with sauce
- Calories: 350
- Fat: 18g
- Saturated Fat: 2g
- Carbohydrates: 38g
- Fiber: 7g
- Protein: 12g
- Sugar: 3g
- Sodium: 350mg
See? That’s a fantastic protein punch from a simple plant-based meal! I always appreciate knowing roughly what I’m eating, especially when it’s something I plan to make a staple. If you want to see more details on why tracking your macros is helpful, you can check out my thoughts on nutritional reporting.
PrintVegan Crispy Chickpea Cutlets with Lemon Tahini
A recipe for making crispy vegan cutlets using chickpeas, served with a bright lemon tahini sauce.
- Prep Time: 15 min
- Cook Time: 20 min
- Total Time: 35 min
- Yield: 4 servings
- Category: Main Course
- Method: Pan Frying
- Cuisine: American
- Diet: Vegan
Ingredients
- 1 (15-ounce) can chickpeas, rinsed and thoroughly dried
- 1/2 cup breadcrumbs (panko recommended for crispiness)
- 1/4 cup finely chopped onion
- 2 cloves garlic, minced
- 1 tablespoon nutritional yeast
- 1 teaspoon smoked paprika
- 1/2 teaspoon cumin
- 1/4 teaspoon salt
- 1/4 teaspoon black pepper
- 2 tablespoons all-purpose flour (for dredging)
- 1 tablespoon olive oil (for pan-frying)
- For the Lemon Tahini Sauce:
- 1/4 cup tahini
- 2 tablespoons fresh lemon juice
- 1 tablespoon water (or more, to thin)
- 1 small clove garlic, minced
- Pinch of salt
Instructions
- Prepare the chickpeas: Place the dried chickpeas on a baking sheet and bake at 350°F (175°C) for 15 minutes to remove excess moisture. Let them cool slightly.
- Mash the chickpeas: In a medium bowl, lightly mash the roasted chickpeas with a fork or potato masher until mostly broken down but still retaining some texture. Do not make a smooth paste.
- Combine patty ingredients: Add the breadcrumbs, chopped onion, minced garlic, nutritional yeast, smoked paprika, cumin, salt, and pepper to the mashed chickpeas. Mix well until a firm dough forms. If the mixture is too wet, add 1 more tablespoon of breadcrumbs.
- Form the cutlets: Divide the mixture into 4 equal portions. Shape each portion into a patty about 1/2 inch thick.
- Dredge the cutlets: Place the flour on a shallow plate. Lightly dredge each cutlet in the flour, shaking off any excess.
- Cook the cutlets: Heat the olive oil in a large skillet over medium heat. Place the cutlets in the hot oil, ensuring not to overcrowd the pan. Cook for 4 to 5 minutes per side until golden brown and crispy.
- Make the sauce: While the cutlets cook, whisk together the tahini, lemon juice, water, minced garlic, and salt in a small bowl until smooth. Add more water, one teaspoon at a time, until you reach your desired drizzling consistency.
- Serve immediately with the lemon tahini sauce.
Notes
- For extra crispiness when baking or air frying, lightly spray the cutlets with cooking spray before cooking.
- You can substitute panko breadcrumbs with gluten-free breadcrumbs if needed.
- Serve these cutlets in a sandwich, over a salad, or alongside roasted vegetables.
Nutrition
- Serving Size: 1 cutlet with sauce
- Calories: 350
- Sugar: 3
- Sodium: 350
- Fat: 18
- Saturated Fat: 2
- Unsaturated Fat: 16
- Trans Fat: 0
- Carbohydrates: 38
- Fiber: 7
- Protein: 12
- Cholesterol: 0