

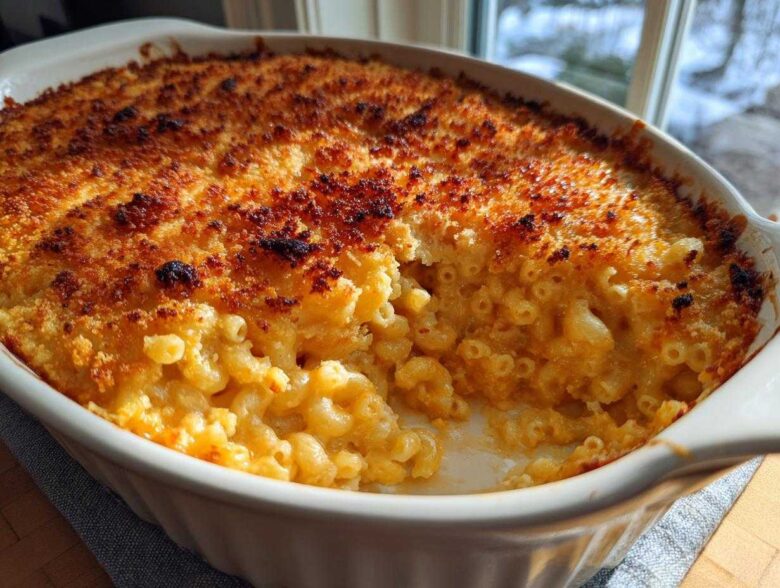
Oh, honey, let’s talk about the king of comfort food! If you’re looking for that soul-soothing, deeply satisfying hug in a bowl, you need the real deal. I’ve spent years shuffling through recipes—you know how it is—trying to find the perfect balance between a ridiculously creamy interior and that crunchy, golden top layer. Seriously, my kitchen has seen some flops, but I finally nailed it. This isn’t just *a* dish; this is The Ultimate Creamy Baked Mac and Cheese recipe, designed to be your new family favorite casserole. We’re talking rich, sharp cheddar and earthy Gruyère doing the heavy lifting here, and trust me, you won’t want to touch another recipe after you try this!
Why This is The Ultimate Baked Mac and Cheese Recipe
Listen, I’m not messing around when I say this is the benchmark for all other cheesy pasta bakes. We’re not relying on canned soup here; we’re building flavor from scratch, and it makes all the difference in the world for your Baked Mac and Cheese. This recipe hits every note: it’s luxurious on the inside and has that satisfying crunch you crave on top. Many people just use cheddar, but that’s only half the story.
What makes this version truly stand out is the cheese trio. I blend sharp cheddar for that necessary tang, Monterey Jack for stretchiness, and Gruyère for a nutty, complex depth. If you’ve been looking for that *gourmet baked mac and cheese idea* that tastes like it came from a fancy bistro, this is it!
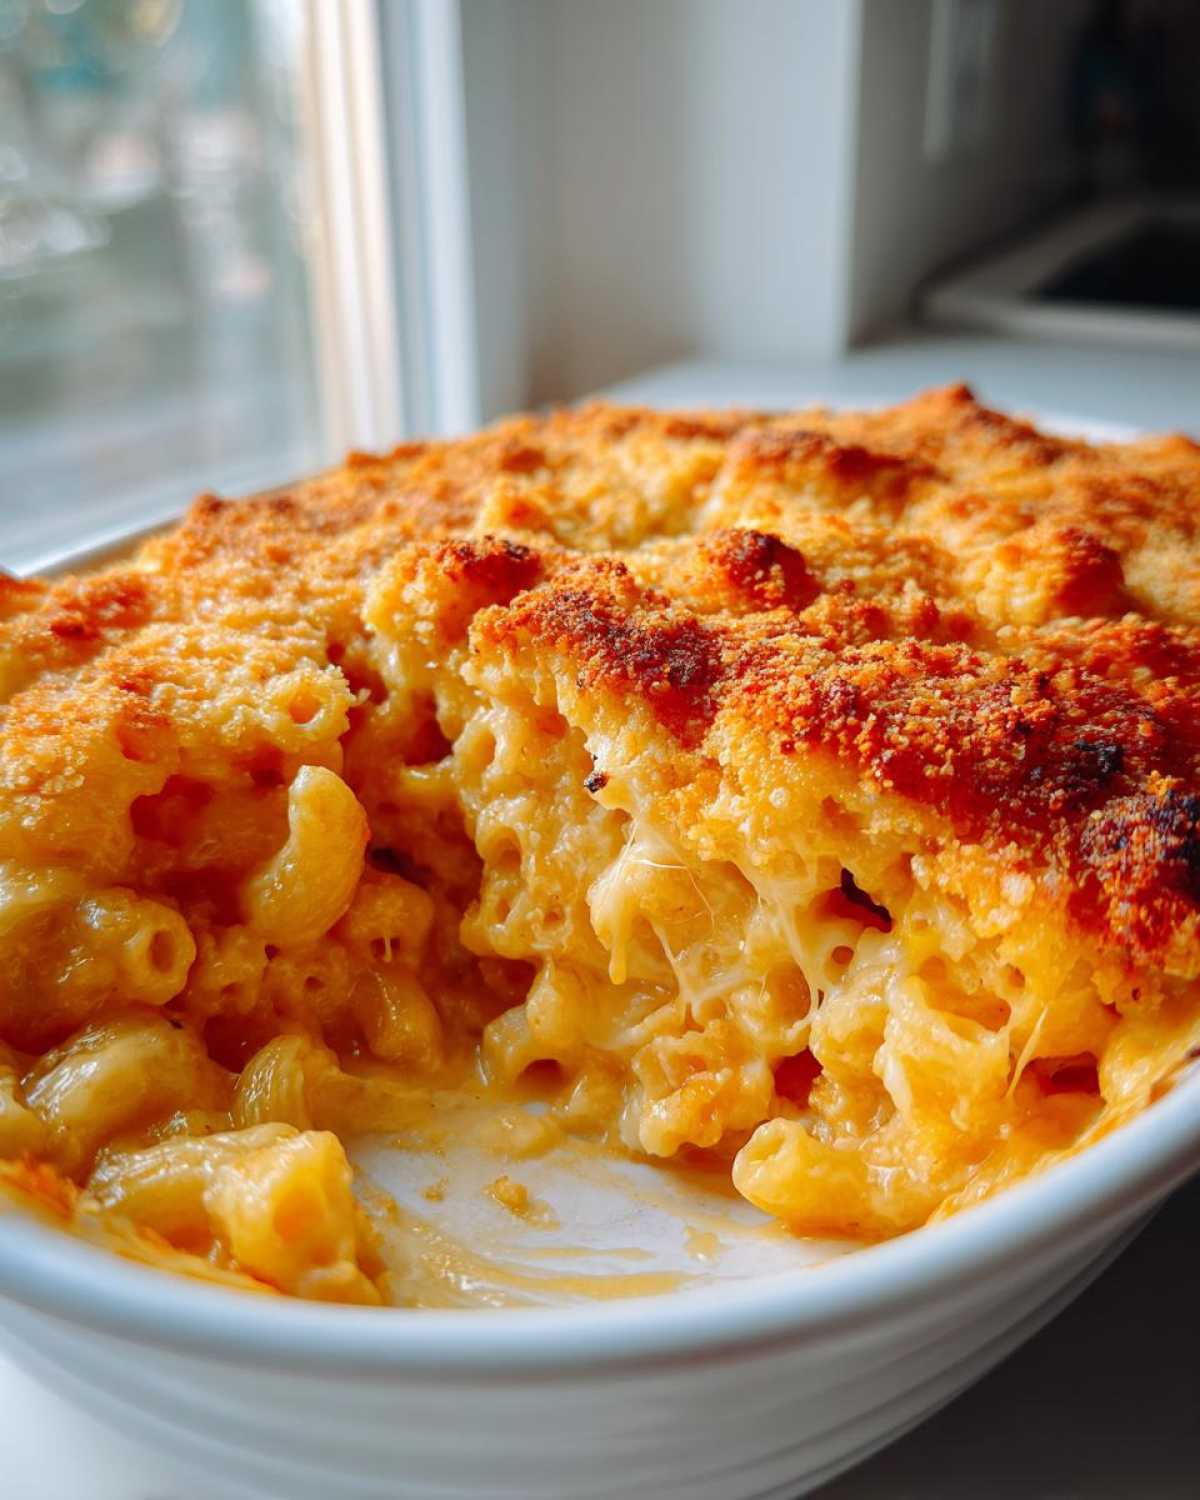
- Unbeatable Creaminess: We build a flawless béchamel base. No graininess allowed!
- Complex Flavor Profile: Sharp cheddar meets savory Gruyère for a taste that’s anything but boring.
- The Crunch Factor: We use Panko breadcrumbs tossed in butter—it creates a crust that actively fights sogginess.
If you’re ready to upgrade your comfort food game and want to see what a truly rich cheese sauce for baking tastes like, stick with me. You can even check out my ideas for a great broccoli cheese casserole when you need a veggie boost!
Achieving Peak Creaminess in Your Baked Mac and Cheese
The absolute foundation of creamy mac and cheese is the roux, which is just butter and flour cooked together. You cook it just long enough to lose the raw flour taste—about two minutes—that’s it! Then comes the milk. You *have* to use warm milk, trust me on this one! Pouring cold milk into hot roux is a recipe for lumps. Whisk slowly and steadily until the sauce coats the back of your spoon—that’s the sign it’s thickened enough.
Here’s my biggest expertise tip: once the sauce is thick, pull the entire saucepan completely off the heat before you start adding the cheese. If the heat is too high when you add the dairy, the proteins tighten up, and boom—you get grainy or greasy results. Stir your shredded cheeses in handful by handful, letting the residual heat melt everything gently until it’s perfectly smooth. That’s how you guarantee that velvety texture for your Baked Mac and Cheese.
The Secret to a Perfectly Crispy Topping for Baked Mac and Cheese
I’ve seen folks use crushed crackers or plain breadcrumbs, but those just get a little tough when baked. For the genuinely superior crunch required in classic comfort food casserole, we’re reaching for Panko breadcrumbs. They’re lighter and flakier than standard breadcrumbs.
The secret to making them brown beautifully and stay crisp is coating them generously with melted butter *before* they ever see the oven. Toss them right in the bowl until they look like wet sand. This small step soaks the crumbs in fat, insulating them from the creamy sauce below and giving you the best result for your Baked Mac and Cheese topping!
Ingredients for Rich Cheese Sauce for Baking
We need the right tools for the job, and that starts with making sure our ingredients are prepped right! Remember, this is a from-scratch dish, so precision here leads to the most amazing Baked Mac and Cheese you’ve ever made. I’ve listed everything you’ll need down below. Take a look, and maybe grab everything now so you don’t have to run back and forth later!
- One pound of elbow macaroni—make sure it’s ready to go!
- Six tablespoons of good, unsalted butter for melting into that roux.
- A half cup of all-purpose flour—that’s what builds the backbone of our cheese sauce.
- Four cups of whole milk, and this is important—it needs to be warmed up slightly before you use it.
- Seasonings! One teaspoon of salt, a half teaspoon of black pepper, a quarter teaspoon of nutmeg (that tiny hint makes it gourmet!), and just a kiss of cayenne pepper for warmth.
- The cheese blend—you need eight ounces of sharp cheddar, four ounces of Gruyère, and four ounces of Monterey Jack. Make sure these are all freshly shredded!
- For the topping, grab one cup of Panko breadcrumbs and two tablespoons of butter, melted separately.
You can see everything needed for the rich cheese sauce for baking right there. It looks like a lot, but these proportions are perfect for spreading evenly in that 9×13 dish.
If you love a smooth, savory base, you might want to check out how I make creamy southern cheese grits too! It uses a similar technique we’re using here to melt cheese perfectly.
Ingredient Notes and Substitutions for Baked Mac and Cheese
Okay, let’s talk about the most crucial step for texture: the cheese. I cannot stress this enough—do not use pre-shredded bags! They are coated in stuff to keep them from clumping in the bag, but that stuff messes up the molecular structure of your sauce and makes it gritty instead of velvety smooth. Please, take five extra minutes and shred your own sharp cheddar, Gruyère, and Jack.
This combination gives you sharpness and silkiness, which is what separates a good Baked Mac and Cheese from a great one. But hey, if you want to experiment? Maybe you’re looking for a little smoky kick in your gourmet baked mac and cheese ideas? You can absolutely swap out those 2 ounces of Monterey Jack for some smoked Gouda. It melts like a dream and adds this beautiful, woodsy flavor that just sings with the sharp cheddar. It’s a personal favorite tweak of mine!
How to Prepare The Ultimate Creamy Baked Mac and Cheese
Alright, the moment of truth! Now that we have all our gorgeous ingredients ready, it’s time to put this masterpiece together. Making Baked Mac and Cheese involves making a rich sauce on the stovetop first, then giving it that stunning finish in the oven. Don’t feel intimidated by the steps; just take your time, especially with the sauce. That’s where all the magic happens!
First things first: preheat that oven to 375 degrees Fahrenheit (190 Celsius) and get your 9×13 baking dish greased up. We don’t want any sticking drama later! Then, grab your macaroni and boil it. Here is a massive tip: cook it for one minute *less* than the package says. It should be noticeably firm—what we call “under al dente.” Since it’s going into the oven, it needs that extra cooking time without turning into mush. Drain it fast and forget rinsing it; we want a little starch sticking around!
Stovetop to Oven Cheesy Pasta Preparation Steps
Time to build the sauce! In your biggest, heavy-bottomed pot—a Dutch oven works perfectly—melt those six tablespoons of butter over medium heat. Once melted, whisk in the flour. You need to cook this roux mixture together for two full minutes, stirring like mad. It will look like thick, pale peanut butter, and it should smell nutty, not raw. Patience here avoids that ‘floury’ taste later!
Now for the béchamel: slowly, slowly start whisking in that warm milk. I mean a thin stream at a time at the very beginning. Keep that whisk moving! When all the milk is incorporated, crank the heat up slightly and whisk until the sauce visibly thickens enough to coat the back of a spoon. It should cling nicely. Once it’s coated, whisk in your salt, pepper, nutmeg, and cayenne—those spices are key for that subtle warmth in your Baked Mac and Cheese.
Next, and this is vital for that amazing smoothness, take the pot completely off the heat. Seriously, lift it from the burner. Begin adding your three cheeses in batches. You want that first handful of cheddar to melt completely before you even think about adding the next load of Gruyère or Jack. Keep stirring until every single bit is melted and luxurious. This slow addition method guarantees you avoid grainy sauce, which is the downfall of so many homemade versions!
Creamy Macaroni and Cheese Baking Instructions
Once your cheese sauce is impossibly smooth, gently fold in that slightly undercooked macaroni. You want every single noodle lovingly coated in that gorgeous sauce. Pour the whole, glorious mixture right into your prepared dish. Don’t flatten it down; keep it looking a little rustic!
For the topping, just toss your Panko with the two tablespoons of melted butter in a small bowl until they look evenly coated. Sprinkle this buttery goodness right over the top. You want full coverage for the ultimate crunch!
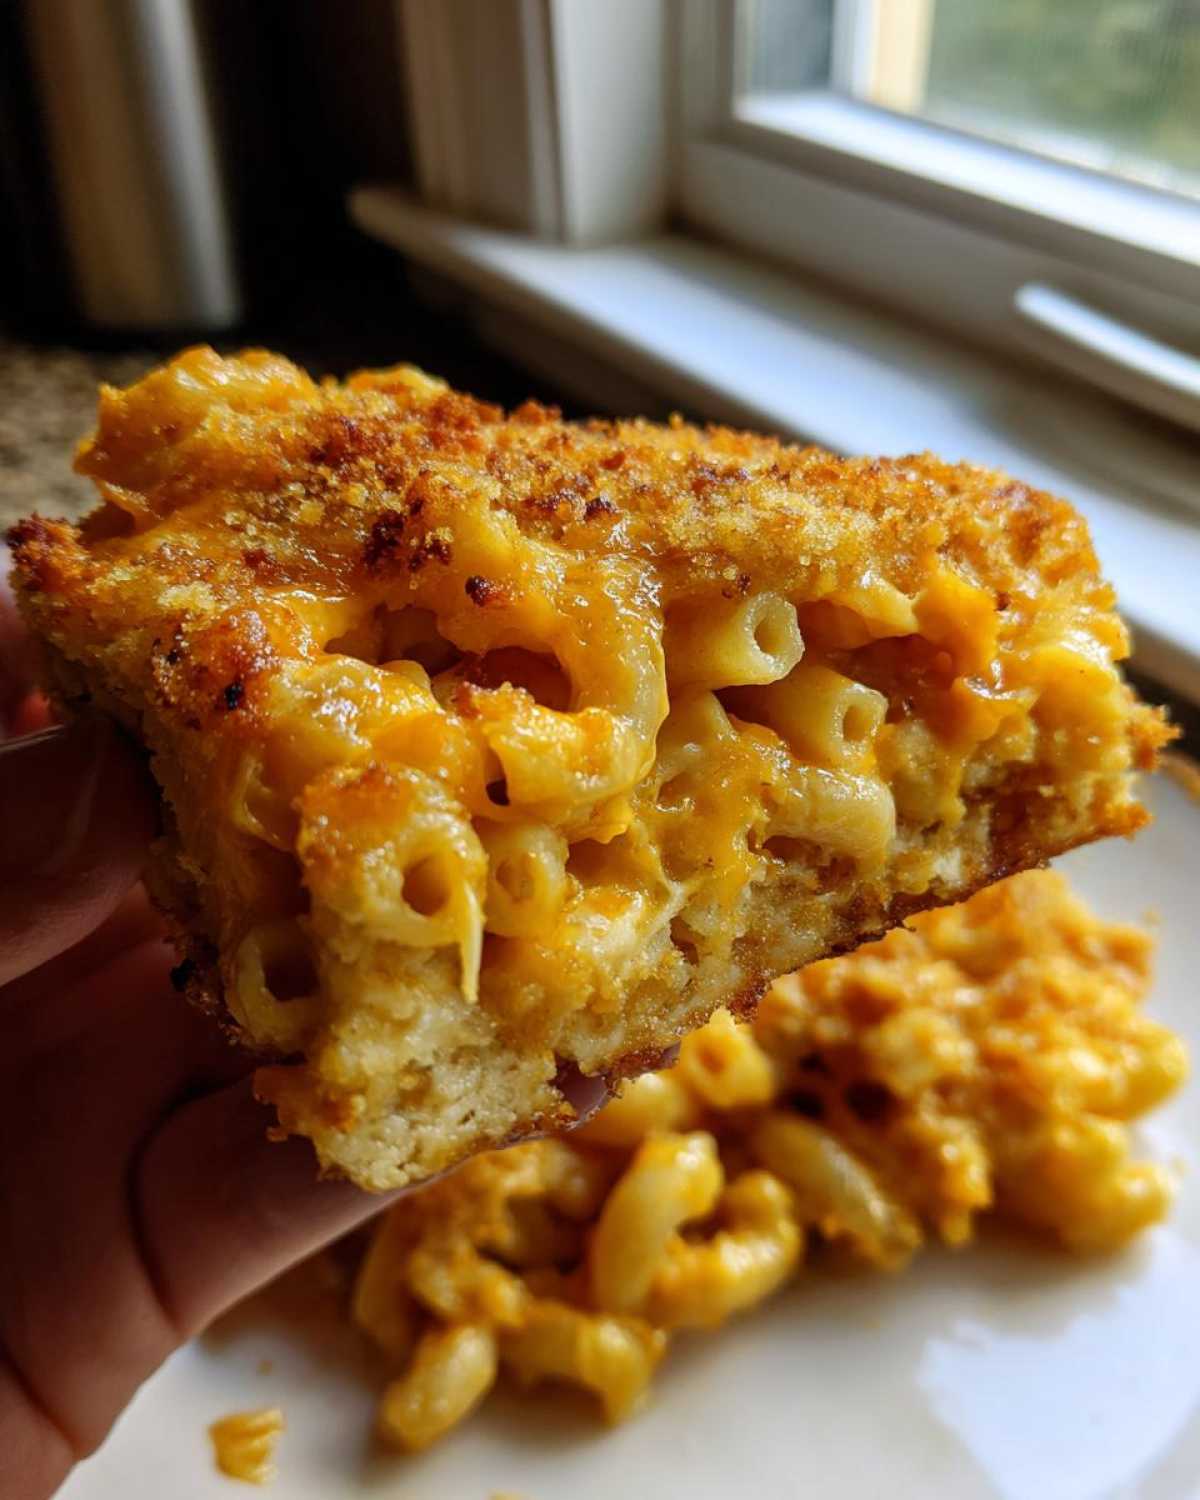
Slide it into that 375°F oven. We only bake this for about 20 to 25 minutes. Watch for the edges! When the sauce is visibly bubbling up around the sides, and that Panko topping has transformed into a deep, beautiful golden brown, you’re basically done. Take it out, but please, let it rest for 10 minutes before cutting into it. Those few extra minutes let the sauce set up perfectly, so you get clean, creamy slices instead of soup!
If you’re looking for more cheesy inspiration after you devour this, check out my recipe for easy lasagna with ricotta—another great way to use dairy for amazing texture!
Tips for Success with Your Baked Mac and Cheese
Even though this recipe is straightforward, there are a few little secrets I picked up over the years that keep my Baked Mac and Cheese from ever turning out anything less than spectacular. You want that perfect, velvety sauce every single time, right? Here are the non-negotiables from my kitchen to yours.
First up, we already talked about shredding your own cheese—that’s non-negotiable for a smooth sauce. But another thing that causes trouble is adding too much pasta. If you jam too many noodles into the sauce, the sauce can’t fully coat everything evenly, and you end up with dry patches. My rule of thumb is that the cheese sauce should look slightly loose and almost watery when you mix it with the pasta before baking. It will tighten up beautifully in the oven!
Also, never underestimate the power of nutmeg! You only need a pinch, but it’s what elevates this from a basic noodle bake to something really special. It just brings out the savory notes in the cheddar and is essential for that rich cheese sauce for baking flavor profile. It’s one of those background spices that truly makes a difference.
Finally, don’t try to rush the resting time! I know you’re hungry, and that bubbly casserole is staring at you, but those final 10 minutes after it comes out of the oven are crucial. The starches in the pasta relax and absorb just enough residual liquid, which keeps the final texture firm instead of sloppy. If you skip the rest, you’ll get sauce running everywhere. Trust me, waiting 10 minutes for perfect Baked Mac and Cheese is worth every second!
If you are really diving deep into cheese science, you might love reading about how to create other types of rich cheese sauce for baking recipes! It’s all about that temperature control.
Make Ahead Baked Mac and Cheese Tips
I totally get it; sometimes you need a truly fantastic dish ready to go for a big family dinner or potluck without having to juggle everything right before people arrive. This gorgeous Baked Mac and Cheese is fantastic for making ahead! You can absolutely assemble this up to a full day early, which gives you kitchen breathing room.
Here’s my go-to method: Get everything mixed and assembled right up through folding the pasta into the sauce and putting the Panko topping on top (that’s step 7 and 8). Cover your 9×13 dish securely with plastic wrap—I usually wrap it twice just to be safe—and pop it in the fridge. It can chill happily for up to 24 hours.
Now, here’s the catch when you bake it later: since the pasta and sauce have chilled completely, they will be much colder than room temperature. If you put a cold casserole straight into a 375°F oven, the center might stay cool while the edges overcook. So, you need to adjust the time! I generally add about 10 to 15 extra minutes to the standard bake time.
You still watch for those visual cues—bubbly edges and a golden top—but you’ll need to check the internal temperature or poke it gently in the center to make sure it’s hot all the way through. If you want to make it even easier on yourself, cover it with foil for the first 20 minutes of baking, then pull the foil off to crisp up that Panko topping! It’s a lifesaver when you’re hosting. If you enjoy overnight recipes, you should check out my tips for an overnight cream cheese bake for brunch!
Serving Suggestions for Your Perfect Baked Mac and Cheese
Okay, so you’ve got this unbelievably rich, stunningly creamy, and crunchy Baked Mac and Cheese sitting on the counter ready to go. It’s a meal all by itself, truly, but the best comfort meals always have a supporting cast, right? We need some sides that can handle how decadent this pasta bake is without getting lost.
Because this casserole is so heavy on the fat and cheese, I always lean toward something sharp, crunchy, or slightly acidic to cut through that richness. Think of it as balancing the plate!
You can never go wrong with a simple, crisp green side. A bright, slightly vinegary coleslaw is my top pick. It gives you that cool crunch contrast, and the acidity wakes up your palate after every cheesy bite. If you’re serving this during the holidays or a big Sunday supper, you absolutely need some crisp, roasted green beans tossed with garlic and lemon zest. They add color and a freshness that makes the whole plate feel complete.
When it comes to proteins, if you really want to go all-in on classic comfort food casserole territory, you can’t beat slow-cooked pulled pork or barbecue brisket alongside it. The sweet, smoky flavor of good BBQ sauce plays so nicely with the sharp cheddar in the sauce. If you want a specific pork idea, I have a fantastic marinade recipe for juicy pork steaks that would be amazing served right next to a scoop of this cheesy goodness. Honestly, once you have this Ultimate Creamy Baked Mac and Cheese recipe down, you just need a simple sidekick on the plate!
Storage and Reheating Instructions for Leftover Baked Mac and Cheese
If you somehow manage to have leftovers—and honestly, my family usually devours the whole dish—you need to know how to store it properly so that next-day mac and cheese is still amazing. We want to keep that creamy interior intact, even after chilling!
For refrigeration, make sure the Baked Mac and Cheese has cooled down for at least 30 minutes after it comes out of the oven. If you seal it up piping hot, you trap steam, which turns into condensation, and nobody wants watery mac and cheese the next day! Once slightly cooled, cover it tightly with plastic wrap, making sure the wrap doesn’t touch the surface too much, and pop it into the fridge. It’ll keep well for about four days like this.
If you need to store it even longer, freezing is your friend! You can freeze it right in the 9×13 dish if you have a freezer-safe container, or scoop individual portions into freezer-safe bags. Just let it cool completely first. It freezes beautifully for up to two months.
Reheating to Keep That Delicious Texture
Reheating is where most people mess up, turning that crispy topping sad and turning the glorious sauce into glue. Let’s avoid that, okay?
For the oven—which is my preferred method for a big batch—add a splash of milk right over the top before you bake it. Seriously, maybe two tablespoons of milk per serving you’re heating up. This replaces the moisture the pasta continues to absorb while chilling. Cover the dish tightly with foil and bake at a lower temperature, about 325°F. Bake until it’s heated through, usually 20 minutes covered, then remove the foil for another 5 minutes to try and bring back some of that Panko crispiness. If you’re reheating a single portion, try my instructions for reheating a baked potato casserole—it’s similar, just low and slow!
For a quick microwave fix (I won’t judge!), definitely add that little splash of milk first, and microwave it in short 45-second bursts, stirring well in between each burst. It won’t get that top crunch back, but you’ll keep the sauce from seizing up, and it’s super fast for lunch!
Frequently Asked Questions About Homemade Baked Mac and Cheese
I know you’ve got questions! Whenever I share this Baked Mac and Cheese recipe with people, there are always a few things that come up, usually around cheese texture or getting that perfect bubbly bake. Don’t sweat it; that’s why we’re here to troubleshoot together! I’ve answered the top ones that always pop up in my comments section.
Can I use pre-shredded cheese in this Best Baked Mac and Cheese Recipe?
Oh, please, try not to! While I totally understand the convenience, using pre-shredded cheese is the number one reason people end up with gritty sauce. Those bags have starches or cellulose added to keep them from clumping in the bag, but those additives don’t melt nicely into our beautiful béchamel. To get that truly silky texture we’re aiming for in the best baked mac and cheese recipe, you absolutely must grate your cheddar, Gruyère, and Jack fresh from the block. It only takes a couple of extra minutes!
How do I prevent my sauce from separating when making this Rich Cheese Sauce for Baking?
This is science magic time! Separation happens when the temperature gets too high right when you add the cheese. Think of it this way: if the mixture is boiling hot, the fat and solids separate, giving you that greasy, grainy puddle instead of a smooth sauce. My personal rule, and the key to a rich cheese sauce for baking, is to remove the saucepan completely from all heat before you introduce the cheese. Let the residual heat do the work. Add the cheese in small handfuls, stirring until dissolved before adding the next—that gradual introduction keeps everything emulsified and perfectly creamy.
What about making this a Southern Style Baked Mac and Cheese?
If you are craving that deeper, custard-like texture often found in Southern Style Baked Mac and Cheese secrets, you need to add eggs! Before you fold in the pasta, whisk one large egg into your finished cheese sauce once it’s off the heat. The egg acts as another binder, helping the sauce set up almost like a quiche filling while baking, which gives you that classic, incredibly tender slice! It’s a fantastic, easy way to get a richer final product.
Can I use different kinds of pasta instead of elbow macaroni?
You totally can, but you need to think about surface area! Elbow macaroni is great because the sauce gets trapped inside the little tubes. If you switch to something like shells or rotini, the sauce coats the outside better, which can be nice too! Just remember my instruction to undercook it by a minute or two regardless of the shape. If you use way bigger pasta, like jumbo shells, you might need to bump your bake time up just a bit because the heat has further to travel to cook those noodles through.
If you want more behind-the-scenes info on achieving the best results, check out my guide on the best baked mac and cheese recipe for even more expert tips!
Rate This Classic Comfort Food Casserole
Seriously, if you made it this far, you’ve just created something truly spectacular! This Baked Mac and Cheese isn’t just a dinner; it’s an event. I’ve poured my heart into making sure this recipe gives you that perfect, gooey center and that shatteringly crisp topping every single time.
Now, I need your help! Once you’ve had a chance to dig in and get totally cozy with this classic comfort food casserole, hop down to the comments section below. Leave me a rating—how many stars are we giving this Ultimate Creamy version? And please, tell me about your experience! Did you try the smoked Gouda swap? Did the 10-minute rest work its magic?
Sharing your results really helps other home cooks feel confident about trying this recipe next. If you loved it as much as my family does, would you do me a huge favor and share a picture on social media? Tag me so I can see that golden crust!
Head over to the main blog page to find your next favorite recipe. Happy cooking, and enjoy every single cheesy bite!
PrintThe Ultimate Creamy Baked Mac and Cheese with a Crispy Panko Topping
Follow this detailed recipe to create a rich, creamy baked macaroni and cheese featuring a sharp cheddar and Gruyère sauce and a crunchy panko crust.
- Prep Time: 15 min
- Cook Time: 35 min
- Total Time: 50 min
- Yield: 8 servings
- Category: Casserole
- Method: Baking
- Cuisine: American
- Diet: Vegetarian
Ingredients
- 1 pound elbow macaroni
- 6 tablespoons unsalted butter
- 1/2 cup all-purpose flour
- 4 cups whole milk, warmed
- 1 teaspoon salt
- 1/2 teaspoon black pepper
- 1/4 teaspoon ground nutmeg
- 1/4 teaspoon cayenne pepper
- 8 ounces sharp cheddar cheese, shredded
- 4 ounces Gruyère cheese, shredded
- 4 ounces Monterey Jack cheese, shredded
- 1 cup panko breadcrumbs
- 2 tablespoons melted butter (for topping)
Instructions
- Preheat your oven to 375 degrees Fahrenheit (190 degrees Celsius). Lightly grease a 9×13 inch baking dish.
- Cook the macaroni according to package directions until it is just shy of al dente (about 1 minute less than recommended). Drain the pasta and set it aside. Do not rinse.
- Prepare the roux: In a large saucepan or Dutch oven over medium heat, melt the 6 tablespoons of butter. Whisk in the flour and cook for 2 minutes, stirring constantly, until the mixture forms a smooth paste and smells slightly nutty.
- Make the béchamel: Gradually whisk in the warm milk, ensuring no lumps form. Continue whisking until the sauce thickens enough to coat the back of a spoon, about 5 to 8 minutes.
- Season the sauce: Remove the pan from the heat. Stir in the salt, pepper, nutmeg, and cayenne pepper.
- Create the cheese sauce: Add the shredded cheddar, Gruyère, and Monterey Jack cheeses to the béchamel in handfuls, stirring until each addition is fully melted and smooth before adding the next. Taste and adjust seasoning if needed.
- Combine: Gently fold the slightly undercooked macaroni into the cheese sauce until everything is evenly coated. Pour the mixture into the prepared baking dish.
- Prepare the topping: In a small bowl, toss the panko breadcrumbs with the 2 tablespoons of melted butter. Sprinkle the panko evenly over the macaroni mixture.
- Bake: Bake for 20 to 25 minutes, or until the sauce is bubbly and the topping is golden brown and crisp.
- Rest: Let the mac and cheese rest for 10 minutes before serving to allow the sauce to set slightly.
Notes
- For the creamiest sauce, shred your own cheese; pre-shredded cheeses contain anti-caking agents that can make the sauce grainy.
- To make this dish ahead of time, assemble everything through step 6, cover, and refrigerate for up to 24 hours. Add 10-15 minutes to the baking time if baking directly from the refrigerator.
- If you prefer a sharper flavor, substitute 2 ounces of the Monterey Jack with smoked Gouda.
Nutrition
- Serving Size: 1 serving
- Calories: 550
- Sugar: 5
- Sodium: 650
- Fat: 32
- Saturated Fat: 18
- Unsaturated Fat: 14
- Trans Fat: 1
- Carbohydrates: 48
- Fiber: 2
- Protein: 25
- Cholesterol: 95