


Welcome friends to my kitchen! After moving from Kyoto, I missed many things. The quiet streets were gone. But I especially missed the warm, pillowy bread from our favorite local spots.
It felt impossible at first. How could I recreate that perfect texture here?
I spent weeks testing doughs. I wanted that soft, chewy bite. I aimed for restaurant quality naan bread. You do not need a smoky tandoor oven. Kenji and I cracked the code.
This recipe uses a simple, hot skillet. It gives you amazing results fast. We call this our stovetop magic. Get ready to make the best homemade naan bread you’ve ever tasted. It truly brings comfort to our new New York home.

Why You Will Make This Naan Bread Recipe Again and Again
I promise you this recipe sticks around. It becomes your go-to flatbread. Why? Because it skips the fuss. We get incredible results easily. It’s fast, friendly, and very forgiving.
Honestly, this soft naan rivals any place we’ve eaten. You’ll love these perks:
- Quick preparation time.
- Super soft, chewy final texture.
- Uses your regular kitchen stovetop.
- Makes a generous batch, perfect for families.
Quick Prep for Perfect Naan Bread
Forget long, complicated steps. My favorite part is the fast prep work. You only spend about 20 minutes mixing everything up. That is quick work for such amazing bread!
The rising time is unavoidable, of course. But the hands-on time is minimal. You mix, knead briefly, and let the yeast do the heavy lifting.
Achieving Restaurant Texture Without a Tandoor
Many people think they need a clay oven. That’s just not true for great naan bread. I use my heavy cast-iron skillet. Heat that pan until it’s screaming hot.
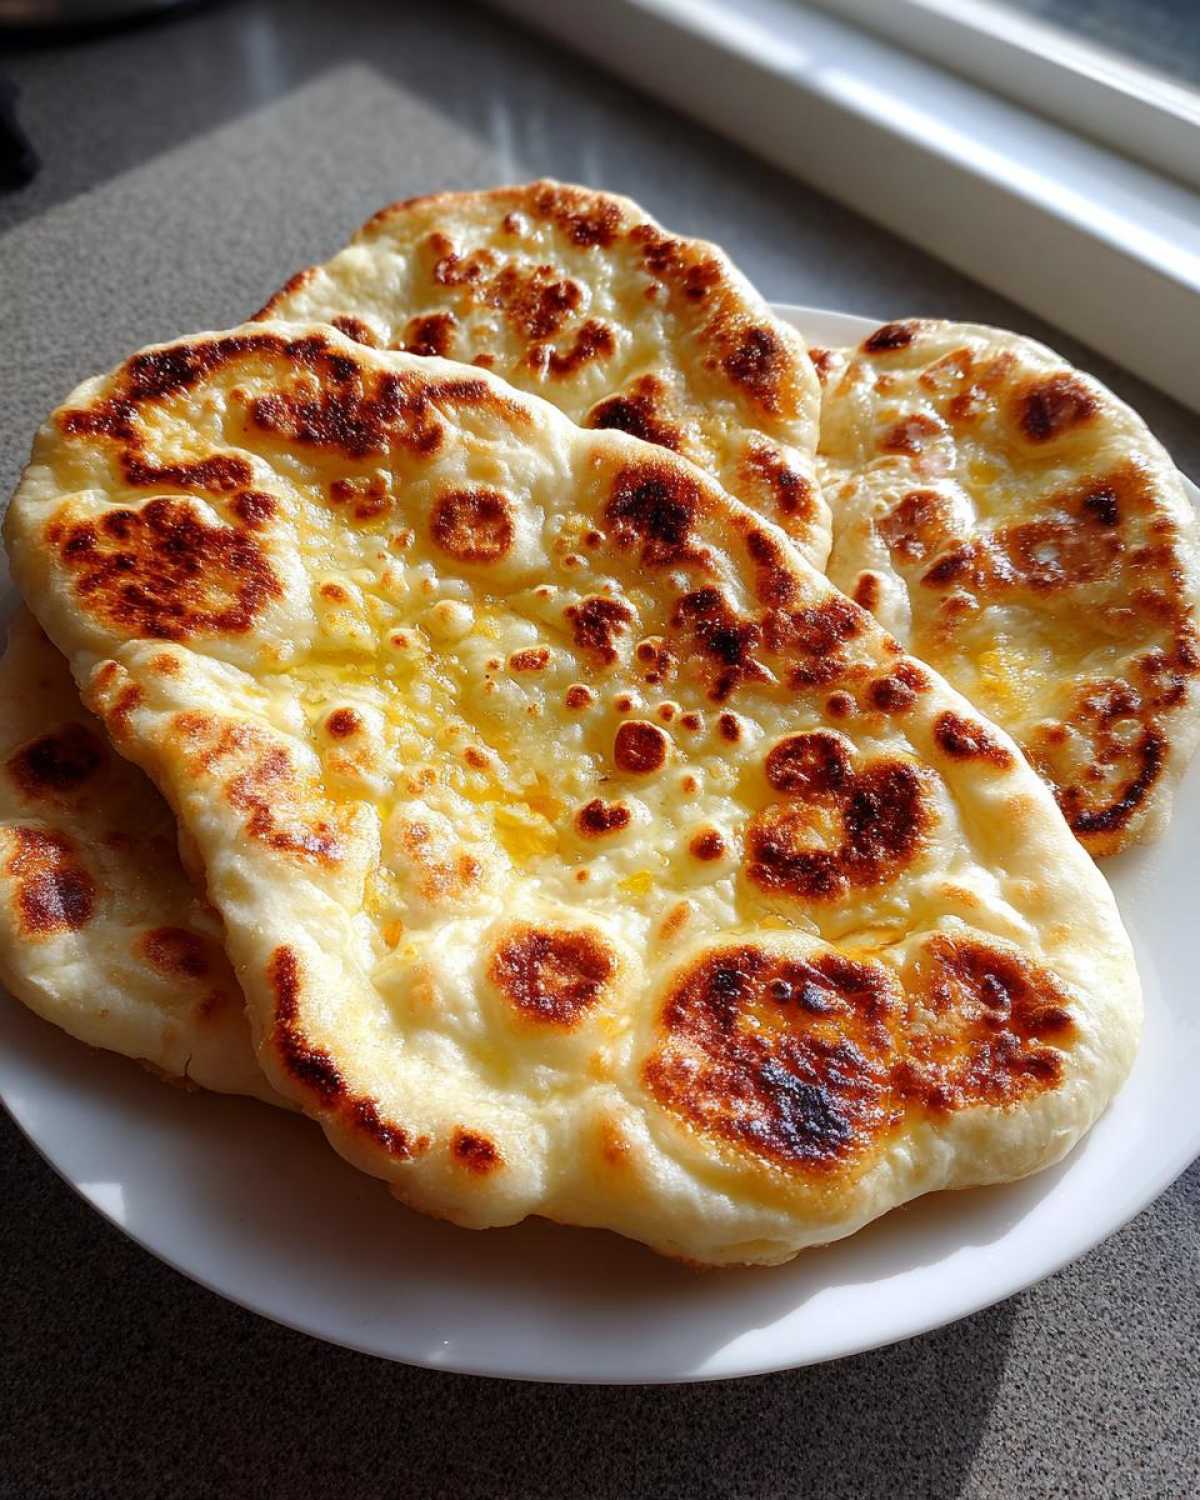
This intense, direct heat puffs up the dough pockets. It creates those beautiful leopard spots. You get that wonderful chewiness right on your stove. It’s true stovetop naan success!

Essential Ingredients for Soft Naan Bread
Creating truly soft naan bread starts here. Good ingredients make all the difference. We need simple pantry staples for this dough. Do not skip the yeast activation step! That foam is your promise of fluffiness.
Having everything ready saves time later. I always measure twice, just in case.
Flour and Leavening for Your Naan Bread Dough
You need all-purpose flour. Use about three and a half cups total. Active dry yeast is key for lift. Remember to wake up that yeast first. Sugar feeds the yeast nicely.
Salt balances the flavor perfectly well.
Wet Components and Flavor Builders
The yogurt or milk adds richness. It helps keep the final product tender. Two tablespoons is all you need. Melted butter or oil adds necessary fat. This keeps the dough pliable and soft.
Warm water activates the yeast correctly. For more information on yeast activation temperatures, see resources from food science experts like Serious Eats.
Equipment Needed for Stovetop Naan Bread
You don’t need fancy gadgets for this bread. I love simple tools. They make cooking less stressful. This recipe relies on just a few kitchen basics.
Gather these items before you start mixing. It keeps the process smooth.
- A large mixing bowl for the dough.
- Plastic wrap or a clean, damp cloth.
- A rolling pin for shaping.
- Your heavy-bottomed skillet. A cast-iron pan works best.
- Tongs for safely flipping the bread.
That hot skillet is our secret weapon. It replaces the huge tandoor oven. It gives the dough direct, fierce heat. This makes those lovely bubbles appear fast.
Keep a small pastry brush handy too. You need it for the melted butter finish.

Step-by-Step Instructions for Fluffy Naan Bread
Now for the fun part! Following these steps makes perfect naan bread every time. Read everything first. Then, put on some music and enjoy the process. We move from wet ingredients to hot cooking quickly.
Activating Yeast and Mixing the Naan Bread Base
Start by waking up your yeast. Use warm water. It should feel like a warm bath, not hot. About 110 degrees is perfect. Add the sugar to help it thrive. Wait five to ten minutes. You want foam. If it foams, your yeast is happy.
Next, stir in your yogurt and melted butter. Mix these wet things well. In another bowl, whisk your flour and salt together. Gradually pour the flour mix into the wet side. Mix until it looks shaggy. Don’t worry about perfection yet.
Kneading and First Rise for Optimal Naan Bread Dough
Turn the dough onto a lightly floured surface. Knead it firmly for five to seven minutes. You are building strength in this dough. It should feel smooth and elastic when done. A sticky dough means you need a tiny bit more flour.
Oil a clean bowl lightly. Place the dough inside. Turn it over so it coats. Cover it tightly. Put it somewhere warm to rise. I use my little trick here. Kenji laughs, but it works! Let it double in size. This takes about an hour or more.
Shaping and Cooking Your Homemade Naan Bread
Gently punch the air out of the dough. Divide it into eight equal balls. Let these balls rest for ten minutes. This relaxes the gluten. Now, heat your skillet until it is very hot. No oil in the pan!
Roll each ball thin, about an eighth of an inch thick. Work quickly now. Place one piece of naan bread on the dry, hot skillet. Watch for bubbles in one minute or two. Flip it over. Cook the second side until golden spots appear. This makes great naan bread.
Finishing Touches for Buttery Naan Bread
As soon as you pull the cooked bread off the heat, work fast. Immediately brush the top generously with melted butter. This seals in the softness. It gives you that lovely, rich flavor. That is the secret to restaurant-quality buttery naan bread.
Keep the cooked pieces wrapped in a clean towel. This traps the steam. It keeps them perfectly warm and soft for serving.
Tips for Success When Making Naan Bread
Making perfect naan bread is simple. But a few tricks help avoid common issues. I learned these through many kitchen trials. Never worry if your first one looks funny. Keep going!
These tips are about control. Control the heat and the dough itself. You are aiming for that beautiful puff.
Troubleshooting Your Naan Bread Rise
Is your kitchen chilly right now? Cold stops yeast activity completely. If the dough won’t grow, try my oven trick. Turn your oven light on only. Place the covered dough inside. That gentle warmth helps it rise beautifully.
If the dough feels too sticky, add flour slowly. A quarter teaspoon at a time works best. A slightly sticky dough yields softer results.
Perfecting the Stovetop Cooking of Your Naan Bread
The pan heat is everything here. It must be medium-high or high heat. A lukewarm pan results in flat, hard bread. You need fast, intense heat for bubbles to form.
Want that authentic char? Use tongs. Hold the cooked naan briefly over an open gas flame. Watch it puff up more. This mimics the tandoor effect perfectly. It adds great flavor too.
Delicious Variations of Homemade Naan Bread
Once you master the basic recipe, the fun begins! We love tweaking this dough. It is so versatile for flavorful additions. You can easily turn this into something special. Think beyond the plain version. These simple twists change everything.
This easy naan bread recipe adapts well. It welcomes new flavors easily. Try these popular upgrades next time you bake.
Making Flavorful Garlic Naan Bread
Garlic naan bread is my children’s top request now. It smells amazing while cooking. This variation uses the melted butter step. You just add flavor to that butter.
Mince two cloves of fresh garlic finely. Mix this into your two tablespoons of melted butter. Brush this mixture on right after it cooks. The heat releases the garlic aroma. It’s pure heaven on a warm flatbread.
You can even sprinkle a little fresh cilantro on top. It adds color and freshness.
Simple Substitutions for Your Naan Bread Dough
Sometimes diets need adjustments. This dough handles swaps quite well. Are you avoiding dairy products? I have good news for you!
For vegan naan bread, skip the yogurt. Use the same amount of water instead. You can also use a plant-based milk alternative. Just make sure it is unsweetened. The texture remains lovely and soft.
If you want a chewier texture, reduce the rising time slightly. But always keep that yeast happy!
Serving Suggestions for Freshly Made Naan Bread
What do you eat with this amazing, soft naan bread?
Honestly, I could eat it plain with butter! But it shines brightest next to hearty meals. Think about dipping it into something rich. It’s perfect for soaking up sauces.
Here are a few ways we enjoy our fresh batch:
- Scoop up rich curries, like butter chicken or chana masala.
- Use it to wrap around grilled meats or paneer tikka.
- Serve it alongside lentil soup or dal makhani.
- It’s great simply dipped in hummus or raita.
It’s a wonderful vehicle for flavor. Bring out your favorite bowls. Enjoy the connection food brings!
Storing and Reheating Your Leftover Naan Bread
Don’t let any of this wonderful bread go to waste! Leftover naan bread is still delicious. Proper storage keeps it soft for days. I always try to make extra just for this reason.
It’s important to cool the bread completely first. Trapped steam makes bread soggy later. Let it sit out for a little while.
Store the cooled naan in an airtight container. You can also use a zip-top bag. Keep it at room temperature. It stays good for about three days.
Freezing is another great option for longer storage. Wrap individual pieces tightly in plastic wrap. Then place them in a freezer bag. They last months this way!
Reheating is simple and fast. Warm them briefly in a dry, hot skillet. Just a few seconds per side works wonders. This brings back the soft texture beautifully. You can also use a toaster oven for a quick reheat.
Avoid the microwave if you can. It sometimes makes the bread tough quickly.
Frequently Asked Questions About Naan Bread
I get so many questions about this recipe! Home cooking always brings up little puzzles. People want that perfect, soft flatbread texture. Here are answers to the most common worries I hear.
Do not let small issues stop you from baking. We can fix almost anything.
Can I Make Naan Bread Without Yeast?
Yes, you can try a no-yeast version. Yeast gives the best authentic rise, though. For a quick bread, look for recipes using baking powder or baking soda. These act as chemical leaveners instead. The texture will change slightly. It will be less chewy, more like a quick flatbread.
But for true, fluffy naan bread, I suggest using the yeast. It is worth the wait for the rise!
How to Get the Softest Possible Naan Bread
Softness comes from two main things. First, do not skip the yogurt or milk. That fat content keeps the crumb tender. It really helps the final texture.
Second, proper kneading is crucial. Knead until the dough is smooth and elastic. This develops gluten correctly. Over-kneading makes it tough. Under-kneading makes it crumbly. Aim for that sweet spot of smooth stretchiness.
Also, brush it with butter immediately after cooking. That traps the moisture inside. This ensures your homemade naan stays soft.
Nutritional Estimate for Your Naan Bread Serving
When we cook at home, we control what goes in, right?
That is one reason I love making my own naan bread. You know every single ingredient used.
The figures below are just an estimate. They are based on the ingredients listed above. Your exact numbers will vary slightly.
Think of this as a helpful guide for your meal planning.
- Calories per serving: About 200.
- Carbohydrates are around 35 grams.
- Protein content is about 5 grams.
- Fat is relatively low, around 4 grams total.
This quick bread is a great accompaniment. It fits well with many balanced meals. Enjoying food is part of a good life. We should not worry too much over every number.
If you are watching sodium, be mindful of added salt. You can always reduce that amount slightly when you mix the dough.
Share Your Homemade Naan Bread Experience
Now the kitchen is yours! I hope this recipe brings warmth to your table.
Making this special naan bread connects us all. It bridges distances, just like our move here.
Tell me how it turned out for you. Did you try the garlic version?
I love hearing your stories and seeing your creations. Leave a comment below. Share your cooking successes with me.
We are building this community together. Happy cooking, friends. Come back soon!
PrintAmazing 8-Minute Stovetop Naan Bread

Make soft, chewy, restaurant-quality naan bread right on your stovetop. This simple recipe requires no special tandoor oven. You can easily adapt this dough for a delicious Garlic Naan variation.
- Prep Time: 20 minutes
- Cook Time: 15 minutes
- Total Time: 1 hour 45 minutes
- Yield: 8 pieces
- Category: Bread
- Method: Stovetop Skillet
- Cuisine: Indian
- Diet: Vegetarian
Ingredients
- 1 ½ cups warm water (about 110°F)
- 1 packet active dry yeast (about 2 ¼ teaspoons)
- 1 teaspoon sugar
- 3 ½ cups all-purpose flour, plus more for dusting
- 2 teaspoons salt
- 2 tablespoons plain yogurt or milk
- 2 tablespoons melted butter or oil, plus more for brushing
Instructions
- Combine the warm water, yeast, and sugar in a large bowl. Let it sit for 5 to 10 minutes until foamy. This shows your yeast is active.
- Stir the yogurt and melted butter into the yeast mixture.
- In a separate bowl, whisk together the flour and salt.
- Gradually add the flour mixture to the wet ingredients, mixing until a shaggy dough forms.
- Turn the dough onto a lightly floured surface. Knead for 5 to 7 minutes until the dough is smooth and elastic.
- Place the dough in a lightly oiled bowl, turning to coat. Cover the bowl with plastic wrap or a damp cloth. Let it rise in a warm spot for 1 to 1.5 hours, or until doubled in size.
- Gently punch down the risen dough. Divide it into 8 equal pieces. Roll each piece into a ball. Let the balls rest for 10 minutes.
- Heat a heavy-bottomed skillet or cast-iron pan over medium-high heat until very hot. Do not add oil to the pan.
- Working with one ball at a time, roll the dough into an oval or teardrop shape, about ⅛ inch thick.
- Place one piece of naan dough onto the hot, dry skillet. Cook for 1 to 2 minutes until bubbles appear on the surface.
- Flip the naan and cook the other side for another 1 to 2 minutes until golden brown spots appear. If you wish for more charring, briefly hold the cooked side over an open gas flame using tongs.
- Remove the cooked naan from the pan. Immediately brush the top generously with melted butter.
- Repeat with the remaining dough. Serve your soft naan warm.
Notes
- For Garlic Naan: Mix 2 cloves of minced garlic with 2 tablespoons of melted butter. Brush this mixture onto the naan immediately after it comes off the skillet instead of plain butter.
- If your kitchen is cold, place your dough bowl inside a turned-off oven with the light on to create a warm rising spot.
- If you prefer a chewier texture, reduce the final kneading time slightly.
- This basic dough can be used for vegan naan by substituting the yogurt with a plant-based alternative or extra water.
Nutrition
- Serving Size: 1 piece
- Calories: Approx. 200
- Sugar: Approx. 2g
- Sodium: Approx. 350mg
- Fat: Approx. 4g
- Saturated Fat: Approx. 2g
- Unsaturated Fat: Approx. 2g
- Trans Fat: 0g
- Carbohydrates: Approx. 35g
- Fiber: Approx. 1g
- Protein: Approx. 5g
- Cholesterol: Approx. 5mg