


Listen, I know what you’re thinking. Sourdough? Sandwich? Aren’t those two words that hate each other? Every time you try to make a loaf that’s actually soft and sliceable for your lunchbox, you end up with a beautiful, hole-filled artisan boule that shreds the tomato! Ugh. I spent years chasing that perfect, pillowy interior for my daily toast, and I nearly gave up. If you want to see what I tried before landing here, check out my ideas for whole wheat bread!
But trust me, after countless flat loaves and dense bakes, I cracked the code. This recipe delivers truly soft sourdough sandwich bread that is fluffy and holds up perfectly. It’s designed for real life—for kids’ lunches and morning toast. It might take a while for the whole process, but the steps are so straightforward, you’ll wonder why you didn’t make this soft sourdough sandwich bread sooner!
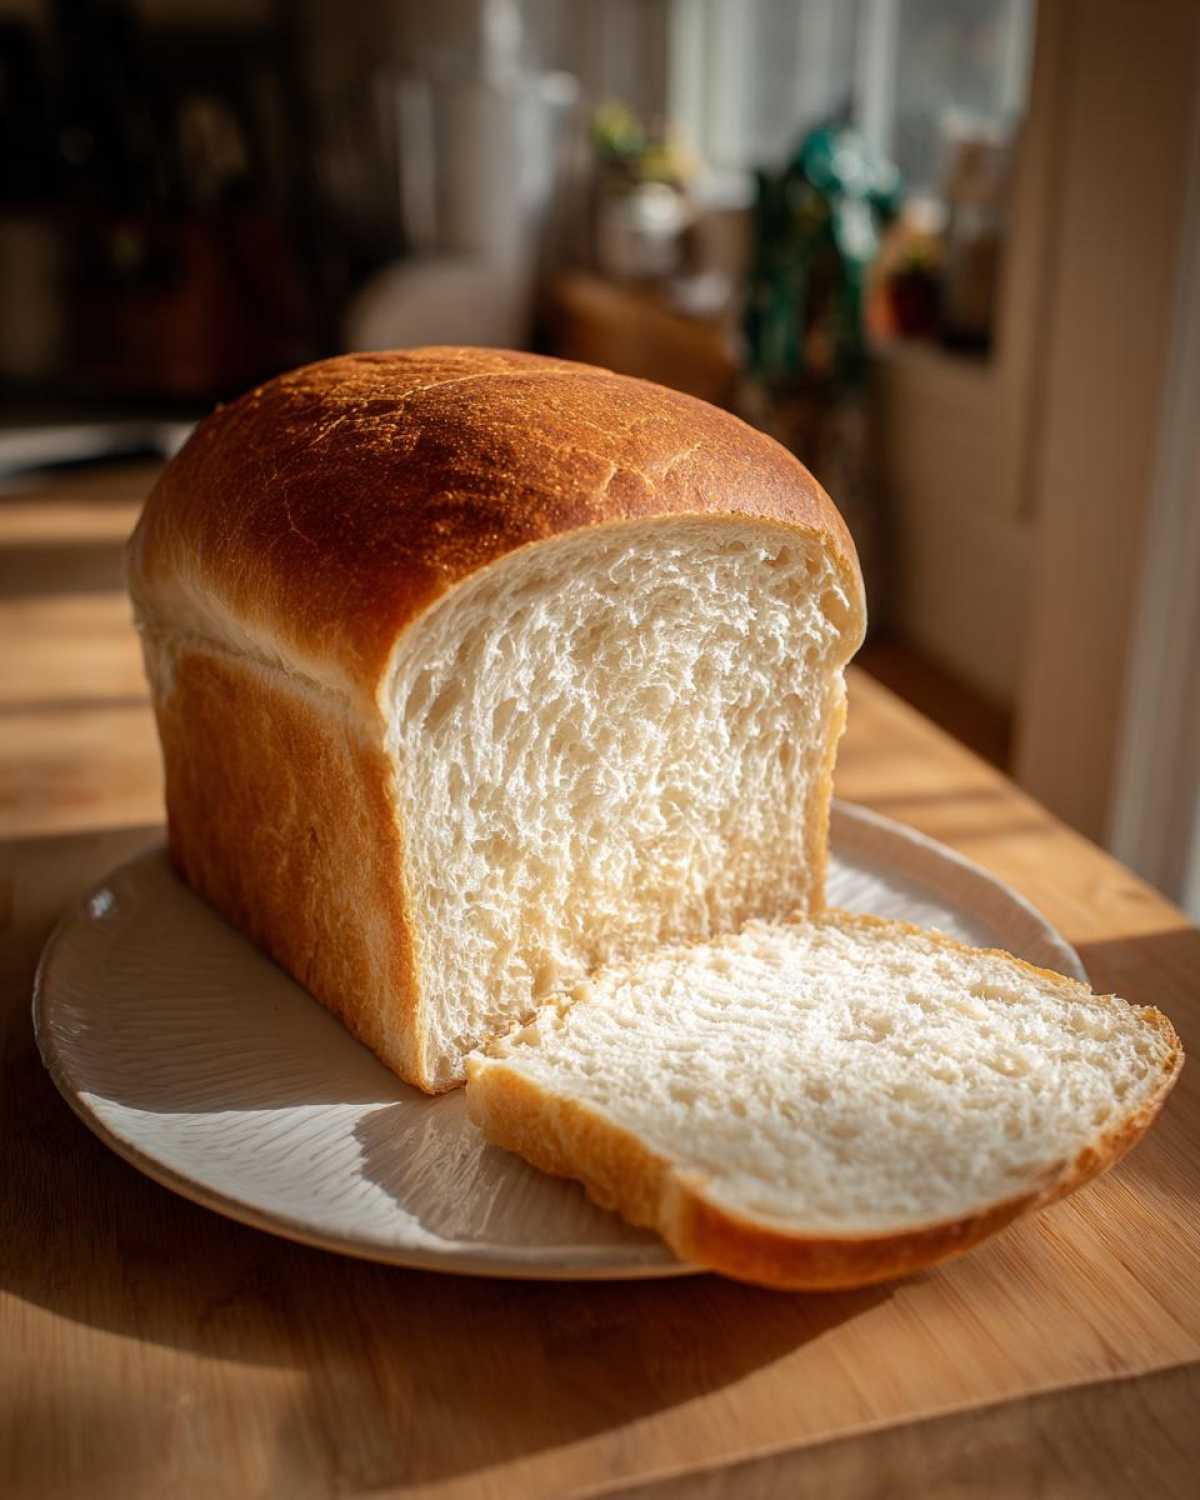
Why This is the Best Sourdough Sandwich Bread Recipe
I’ve tried lean doughs, high-hydration bakes, and fancy mixing methods, but for real sandwiches, you need structure that doesn’t fight back. This recipe is the keeper because it gives you everything you want in a sandwich loaf without requiring three days of fuss. It’s the best sourdough sandwich bread because it focuses on textures that matter for lunch.
- The crumb is unbelievably soft, not chewy or dense like some sourdoughs.
- It shapes beautifully into a tight log, perfect for a standard loaf pan.
- It’s incredibly sliceable—think thin pieces for your deli meat, not thick slabs that fall apart!
- That little bit of butter makes all the difference in richness.
You might want to check out how I handle a rustic dough when I’m not aiming for a sandwich loaf; this easy Italian bread recipe is another favorite!
Achieving a Buttery Crumb Sourdough Texture
This is where we break from the super-lean beginner recipes. That 15g of softened butter isn’t just for flavor, although it adds a lovely richness. When you gently fold it in during the bulk stage, it coats some of the gluten strands. This coat actually prevents those huge, jagged holes that ruin sandwiches. It keeps the structure tight while still giving you that luxurious, melt-in-your-mouth interior. It’s what takes this from tangy bread to true comfort food.

Tips for Beginner Sourdough Sandwich Loaf Success
If you’re new to the starter game, don’t panic. This recipe is designed to be an easy sourdough bread recipe. Instead of a multi-day cold proof, we rely on a slightly longer, temperature-controlled bulk fermentation to develop flavor quickly. The shaping in the pan does most of the heavy lifting for you during the final rise. We focus on getting that 50% rise during bulk, which is the secret to a lighter final product.
Ingredients for Your Soft Sourdough Sandwich Bread
Okay, let’s talk about what actually goes into this amazing loaf. If you want a truly soft loaf, you can’t skip these amounts. Precision is key when you’re aiming for sliceable perfection, so if you have one, grab your kitchen scale! I can’t stress enough that you need an active, bubbly starter for this recipe to behave correctly. It makes all the difference for your rise.
Here is the absolute list of what you’ll need for one perfect soft sourdough sandwich bread:
- 100g active sourdough starter (This has to be fed and bubbly—no sluggish starter allowed!)
- 350g warm water (Just warm to the touch, not hot enough to hurt your hand.)
- 500g bread flour (Bread flour has the protein structure we need to hold up that fluffy interior.)
- 10g fine sea salt (Don’t use flaky salt here; we want it to dissolve nicely.)
- 15g unsalted butter, softened (Make sure this isn’t rock hard or oily; just softened is perfect.)
This combination is exactly what allows us to pull off the *buttery crumb* we are after. If you’re looking for something to do with the discard leftover from feeding your starter before you get to this part, you should totally try my sourdough discard pancakes!
Equipment Needed for Sourdough Sandwich Bread
You don’t need a fancy deck oven or a Dutch oven for this recipe, which is part of why I love it so much for daily use! Since we are aiming for that perfect rectangular shape for slicing, your equipment list is pretty simple. But listen closely—there are two things here that you absolutely cannot cheap out on if you want consistent results with your sourdough sandwich bread.
First off, you need a scale. I know, I know, some recipes let you get away with volume measurements, but not for a soft loaf! When you’re trying to control hydration so precisely, weighing your flour and water is the only way to guarantee that perfect texture, especially since this is a fantastic recipe for French toast later!
Here’s what you need gathered before you start mixing:
- A digital kitchen scale (Non-negotiable for accuracy!)
- A large mixing bowl (Big enough for stretching and folding without making a huge mess.)
- A 9×5 inch metal loaf pan (This size is crucial for the bake time and crumb structure we’re targeting—don’t use a 1 lb smaller pan!)
- Plastic wrap or a clean kitchen towel (For covering during proofing.)
- A bench scraper or spatula (Helpful for mixing and cleaning up.)
That loaf pan is your secret weapon here. It contains the dough during the final rise and baking, forcing it up instead of out, which gives you that classic tall, sliceable shape every time. Make sure that pan is greased really well before the dough goes in!
Step-by-Step Instructions for Sourdough Sandwich Bread
This is where the magic happens, and I promise it’s much easier than a free-form boule. Since we are baking this in a pan, we don’t need to worry about super-tight tension, but we do need to mix things in a special order to keep that crumb soft. Pay close attention when we introduce the butter; that’s a crucial step that changes everything about this loaf compared to basic sourdough! So be sure to have your oven preheated and ready for that final step, maybe planning ahead by thinking about how amazing this bread will be as French toast later!
Mixing and Autolyse for the Fluffy Sourdough Loaf
First things first: wake up your starter! Mix that 100g of active starter right into your warm water until it’s cloudy. Then, dump in the flour and the salt. Just mix it loosely until there are no dry bits left, creating what bakers call a ‘shaggy mass.’ Cover that up and let it rest for 30 minutes. This autolyse period lets the flour fully hydrate on its own. It makes the dough easier to work with later, especially before we mess with the gluten development.
Incorporating Butter and Bulk Fermentation for Sourdough Sandwich Bread
Once you’ve rested the dough, it’s time for the fat! Add the 15g of softened butter right on top of the shaggy dough. Now, get your hands in there and use gentle stretch and folds to work it in completely. It feels sloppy at first, I’m not going to lie—it might actually split the dough a little as you fold, that’s fine! Once the butter is integrated, we start the bulk fermentation. You need four sets of stretches and folds, spaced 30 minutes apart. You’re looking for the dough to feel airy and look puffy, having increased in volume by about 50%. Maybe around four to six hours, depending on how warm your kitchen is.
Shaping and Final Proof for a Sliceable Sourdough Bread
When bulk fermentation looks right, turn the dough out gently onto a lightly floured counter. You want to coax it into a tight log shape. Since this is a sliceable sourdough bread loaf, we need that firmness! Pinch the seam shut tightly along the bottom. Grease your 9×5 pan really well—go heavy on the grease! Tuck that dough log in, seam-side down. Cover it loosely and let it proof for one to two hours. You want the dough to rise about one inch over the rim of your pan. If it balloons too high, it might collapse when you bake it, so watch that height!

Baking and Cooling the Classic Sandwich Loaf Sourdough
When you’re ready to bake, get that oven preheated to 375°F (190°C). Slide that pan right onto the middle rack. Bake for 35 to 45 minutes. You’re looking for a deep golden color, but the real test is temperature; aim for an internal reading of 200°F (93°C). Immediately turn the loaf out onto a cooling rack. This step—the cooling—is non-negotiable for your classic sandwich loaf sourdough! If you cut it hot, your beautiful crumb will turn gummy. Seriously, give it at least three hours. Wait until it’s totally cool before trying to slice it for your **sourdough sandwich bread**!
Tips for Making Soft Sourdough Sandwich Bread Every Time
Even with a foolproof recipe, sometimes the kitchen gods aren’t on our side, right? Whether it’s a cold morning or you just want that crust to be extra delicate, these little fine-tuning tricks are the difference between a good loaf and the perfect loaf of soft sourdough sandwich bread. Think of these as my little secrets I learned after ruining about fifty attempts!
Crust Control and Flavor Boosts
You know how sometimes the crust on a sandwich loaf can be a little tough? Here’s my favorite trick: as soon as that hot loaf comes out of the pan, brush it immediately with about a teaspoon of melted unsalted butter. This absorbs right into that thin outer layer and keeps the crust soft for days. It gives it that wonderful, slightly rich exterior feel. Also, don’t forget that your starter dictates your flavor! If your starter is super active and bubbly, your bread will have a brighter tang. If it’s been sluggish, you might end up with a milder flavor, which is actually great when you’re just making a basic lunchtime staple.
Managing Bulk Fermentation Temperature
This is the single biggest hurdle in any sourdough for beginners journey: the temperature dance. If your kitchen is chilly—say, below 68°F—your bulk fermentation is going to take forever, and you risk getting a dense final product because the yeast aren’t happy. When it’s cold, I use an old trick: I put my covered dough bowl inside the oven, but I only turn the internal light on. That tiny bit of heat is usually enough to create a perfect, warm little incubator for the dough to rise happily in four to five hours instead of eight!
For more ideas on keeping your bakes totally moist, even when they aren’t sourdough, you should take a peek at how I treat my date and nut bread—it’s all about keeping things snug!
Storing and Reheating Your Sourdough Sandwich Bread
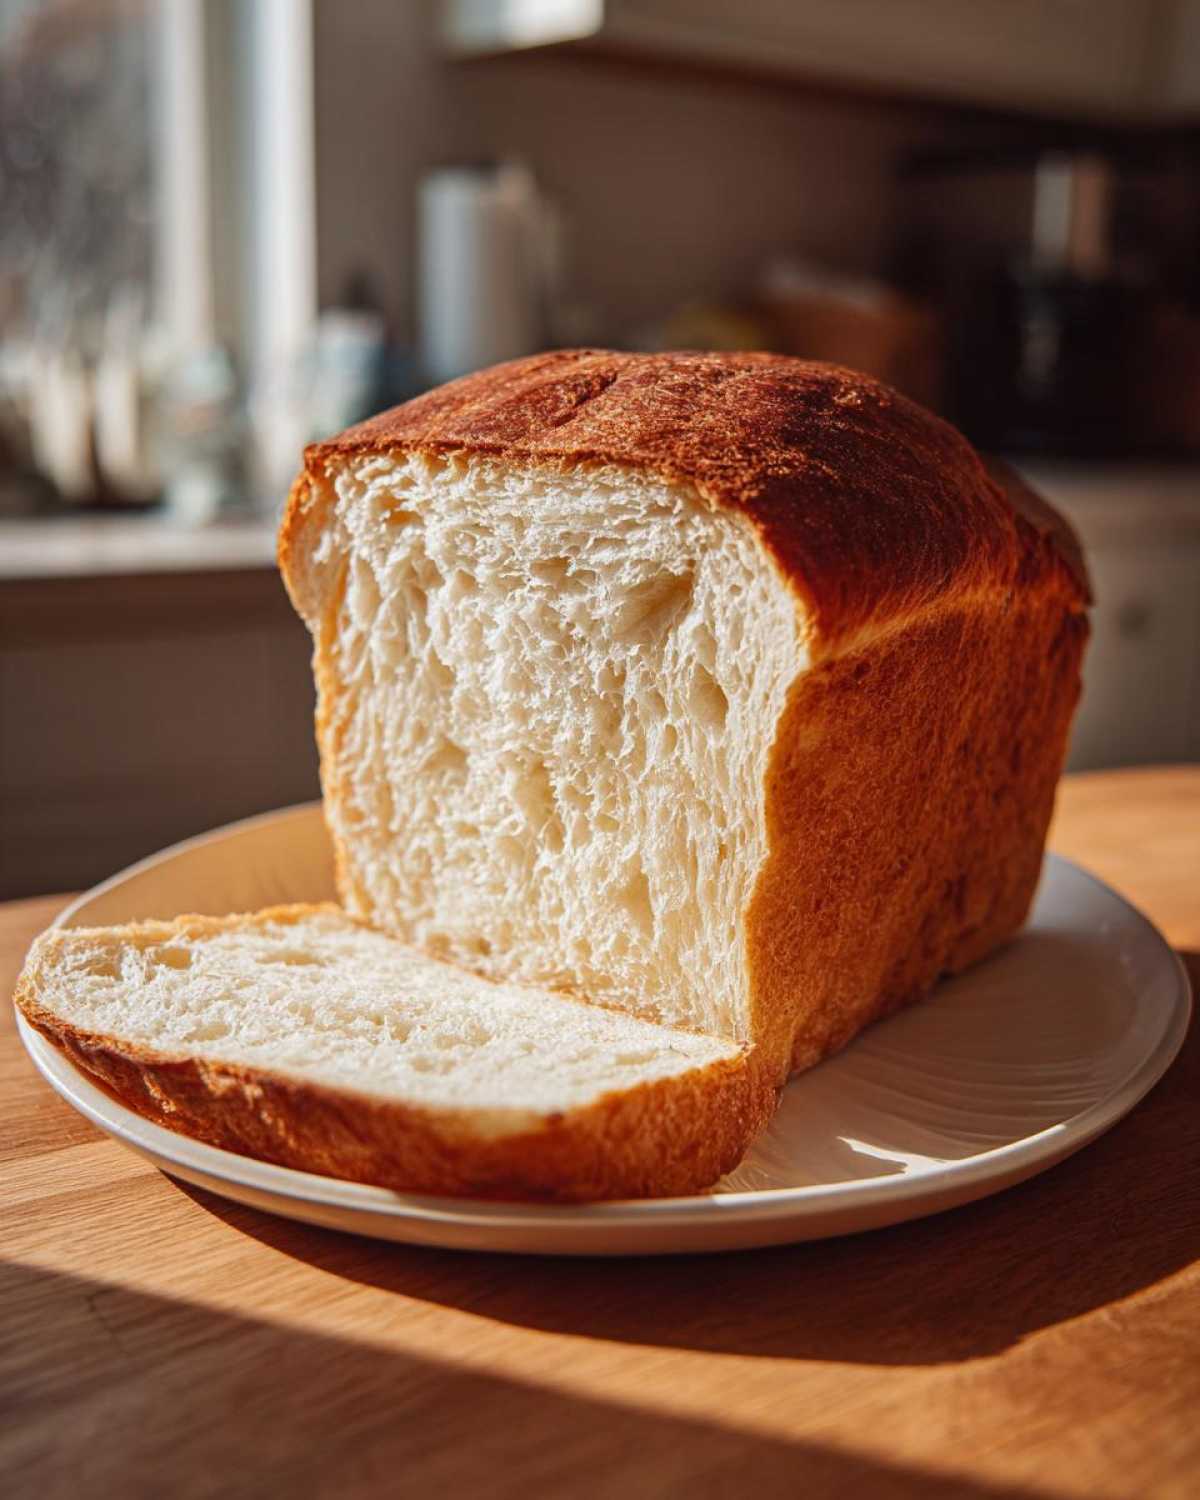
So, congratulations! You waited the agonizing three hours, and now you have this perfectly soft, sliceable masterpiece. The true test for any sourdough sandwich bread is how it holds up the next day. My biggest piece of advice? Keep it out of the fridge! I know, I know, it seems counterintuitive for preservation, but refrigeration dries out bread incredibly fast, and we went through all this trouble to avoid that stiff texture.
I always store my loaf either wrapped tightly in plastic wrap or tucked inside a dedicated bread box at room temperature. Storing it cut-side down on the cutting board helps a little too, acting like a makeshift lid. It should stay wonderfully soft for about three days this way.
Reviving Slices for the Best Toast Ever
If you wait until day four or five, or if you just want that incredible, just-baked spring back, reheating is your friend. Don’t toss those slices in the toaster as they are, because they might feel a little dry by then! Instead, take the slice and brush just one side with a tiny bit of melted butter or a drizzle of good olive oil—it brings back the moisture immediately. Pop that slice under the broiler for about 30 seconds, or into a toaster oven. It warms it through, re-activates that soft crumb, and makes it perfect for your homemade mayo, like the kind I learned to make right here!
If you accidentally baked two loaves (it happens!), an uncut, fully cooled loaf freezes beautifully. Wrap it tightly in a double layer of plastic wrap, then wrap that in aluminum foil. When you want a loaf back, just take it out the night before and let it thaw on the counter! It comes back to life wonderfully.
Frequently Asked Questions About Homemade Sandwich Bread Using Starter
I know you probably have a few lingering questions, especially if you are used to fast yeast recipes. Dealing with a wild starter is a learning curve, but once you understand the rhythm, this becomes your go-to recipe for daily bread. We’ve answered the top concerns people have when they transition from rustic loaves to a proper, soft sandwich loaf. Let’s get those last few doubts sorted out so you can get back to baking!
Can I make this Same Day Sourdough Sandwich Bread Faster?
Well, based on the natural fermentation process of sourdough, “same day” is kind of relative here! We’ve optimized the steps—like using warm water and adding the butter during bulk fermentation—to shorten the time compared to traditional methods. But if you try to force it faster than 6 or 7 hours total, you risk compromising the structure. Rushing the bulk fermentation means the yeast and bacteria haven’t done their job properly, and you’ll end up with dense dough that collapses in the oven. You want that airy crumb, so resist the urge to crank up the heat too much, or it won’t be true **soft sourdough sandwich bread**!
What if I don’t want to use butter in my Sourdough Sandwich Bread?
That’s a fair question if you are avoiding dairy! The butter is what pushes this recipe toward that wonderful, rich profile, giving you that signature **buttery crumb sourdough** texture we aimed for. If you absolutely must skip it, you can try swapping it out with about 10g of a neutral, light olive oil or even shortening. However, I have to warn you: the texture will definitely change. It will still be good bread, but it won’t have the same tender, melt-in-your-mouth quality that the butter provides. It’ll be slightly less rich, leaning a bit more toward a standard lean bread.
How do I get a perfectly Sliceable Sourdough Bread?
This question comes up constantly, and honestly, it’s the hardest part for people new to sourdough! You can have the best dough in the world, but if you cut it before it’s ready, you’ve ruined the crumb structure. The absolute, non-negotiable rule for getting a perfectly **sliceable sourdough bread** loaf that doesn’t tear or feel gummy is *patience during cooling*. You must let the loaf cool down completely—and I mean completely—which usually means leaving it alone for at least three to four hours on a wire rack. If you slice it when it’s hot, the steam inside condenses, and you create that gummy pocket of gooiness, no matter how well you shaped it.
If you are interested in seeing some other great recipes that use your starter discard, check out my fluffy pancake recipe!
Nutritional Estimate for This Sourdough Sandwich Bread
I always try to keep track of what we’re eating, though honestly, when bread is this good, I try not to think about it too hard! Keep in mind that these numbers are just a rough guide; they change based on the exact flour you use and how much water your starter really held onto. This estimate is based on dividing the entire recipe into 14 standard slices.
- Serving Size: 1 slice
- Calories: 250
- Sugar: 1g
- Sodium: 350mg
- Fat: 4g
- Saturated Fat: 2g
- Carbohydrates: 48g
- Protein: 9g
I’ve also got a super detailed breakdown for my favorite chocolate chip cookies if you want to compare nutrient profiles! It’s important to remember that these are estimates for this particular batch of **sourdough sandwich bread**.
Share Your Fluffy Sourdough Loaf Creations
Now you have all the secrets! I genuinely hope this recipe helps you stop fighting your starter and finally get that soft, tall, sandwich-perfect loaf you’ve been dreaming about. This recipe really works for my family, and I’m so excited for you to try it!
When you bake your fluffy sourdough loaf, please tell me how it went! Did the butter really make the difference? Did you get that beautiful, even rise in the pan? I love seeing your successes. Seriously, snap a picture and tag me on social media or drop a comment down below. If you loved this loaf, make sure to check out the rest of the fun things we’re baking over on the main section of the blog!
Nutritional Estimate for This Sourdough Sandwich Bread
I always try to keep track of what we’re eating, though honestly, when bread is this good, I try not to think about it too hard! Keep in mind that these numbers are just a rough guide; they change based on the exact flour you use and how much water your starter really held onto. This estimate is based on dividing the entire recipe into 14 standard slices.
- Serving Size: 1 slice
- Calories: 250
- Sugar: 1g
- Sodium: 350mg
- Fat: 4g
- Saturated Fat: 2g
- Carbohydrates: 48g
- Protein: 9g
I’ve also got a super detailed breakdown for my favorite chocolate chip cookies if you want to compare nutrient profiles! It’s important to remember that these are estimates for this particular batch of sourdough sandwich bread.
Share Your Fluffy Sourdough Loaf Creations
Now you have all the secrets! I genuinely hope this recipe helps you stop fighting your starter and finally get that soft, tall, sandwich-perfect loaf you’ve been dreaming about. This recipe really works for my family, and I’m so excited for you to try it!
When you bake your fluffy sourdough loaf, please tell me how it went! Did the butter really make the difference? Did you get that beautiful, even rise in the pan? I love seeing your successes, and honestly, knowing it worked for you keeps me motivated to share all my kitchen experiments. Seriously, snap a picture and tag me on social media or drop a comment down below. Hearing about your bake helps others who are just starting out, too!
If you loved this loaf, make sure to check out the rest of the fun things we’re baking over on the main section of the blog. Happy baking, and enjoy those perfectly soft sandwiches!
PrintSoft and Fluffy Sourdough Sandwich Bread

A straightforward recipe for making soft, sliceable sourdough bread perfect for everyday sandwiches and toast, designed for beginners.
- Prep Time: 30 min
- Cook Time: 45 min
- Total Time: 7 hours 15 min
- Yield: 1 loaf
- Category: Baking
- Method: Baking
- Cuisine: American
- Diet: Vegetarian
Ingredients
- 100g active sourdough starter (100% hydration)
- 350g warm water
- 500g bread flour
- 10g fine sea salt
- 15g unsalted butter, softened
Instructions
- Mix the active starter and warm water in a large bowl until combined.
- Add the flour and salt to the wet ingredients. Mix by hand until just combined into a shaggy mass.
- Cover the bowl and let it rest for 30 minutes (autolyse).
- Add the softened butter to the dough. Use the stretch and fold method to incorporate the butter fully, about 3 minutes of gentle folding.
- Perform four sets of stretch and folds every 30 minutes during the bulk fermentation period.
- Allow the dough to bulk ferment at room temperature (around 72°F) until it has increased in volume by about 50% and feels airy, approximately 4 to 6 hours depending on your kitchen temperature.
- Gently shape the dough into a tight log and place it seam-side down into a greased 9×5 inch loaf pan.
- Cover the pan loosely and allow for a final proof (second rise) at room temperature for 1 to 2 hours, or until the dough has risen about 1 inch above the rim of the pan.
- Preheat your oven to 375°F (190°C).
- Bake the loaf for 35 to 45 minutes, or until the crust is golden brown and the internal temperature reaches 200°F (93°C).
- Remove the bread from the pan immediately and cool completely on a wire rack before slicing.
Notes
- For a softer crust, lightly brush the top of the loaf with melted butter immediately after removing it from the oven.
- If your kitchen is cold, place the covered dough in a slightly warm spot, like inside an oven with just the light on, to speed up the bulk fermentation.
- Wait until the loaf is completely cool (at least 3 hours) before slicing to prevent a gummy texture.
Nutrition
- Serving Size: 1 slice
- Calories: 250
- Sugar: 1
- Sodium: 350
- Fat: 4
- Saturated Fat: 2
- Unsaturated Fat: 2
- Trans Fat: 0
- Carbohydrates: 48
- Fiber: 2
- Protein: 9
- Cholesterol: 8