

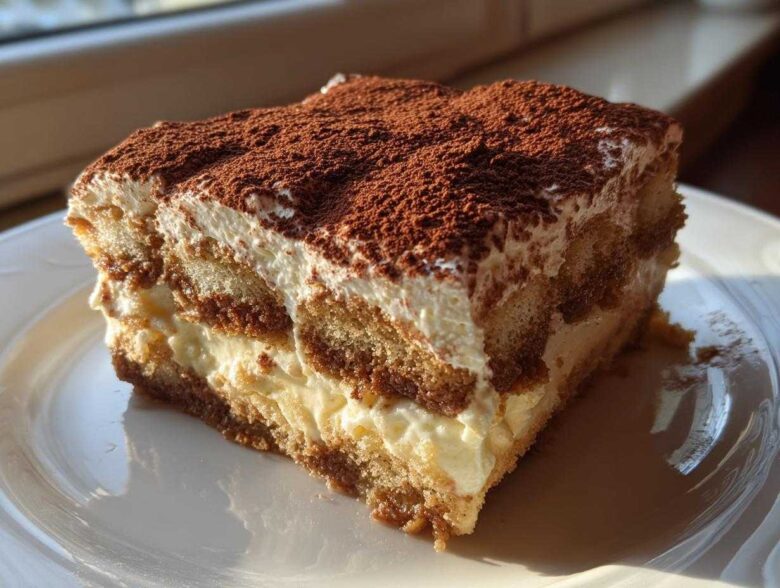
Oh my gosh, you have to try this! When people think Italian desserts, Tiramisu is always at the top of the list, right? It feels so fancy, like it took hours and probably specialized equipment, but trust me, it doesn’t! I’m sharing my absolute favorite tiramisu recipe today, and it’s legitimately the easiest, no-bake version you will ever make. We’re focusing on that unbelievably rich, smooth mascarpone cream, and honestly, you assemble this thing in under an hour. I make this for every single big celebration—birthdays, holidays, or just whenever I need a quick, elegant treat. You will be making the best layered coffee dessert of your life!
Why This is the Best Tiramisu Recipe Ever (Easy Homemade Tiramisu)
Honestly, I’ve tried a million ways to make Tiramisu, but this one—this is *my* go-to. It’s everything you want in a decadent Italian dessert, but without any fuss. If you’re looking for the Best Tiramisu Recipe Ever, stop scrolling, because you found it. It’s satisfyingly rich, ridiculously simple, and gets better overnight!
Key Features of Our Tiramisu Recipe
- No baking required! Seriously, this is pure assembly magic.
- Achieves that unbelievable, cloud-like creaminess using fresh mascarpone.
- It’s the perfect make-ahead dessert, which is a lifesaver when you have company coming.
- It’s my definitive Easy Homemade Tiramisu that always wows people.
Gathering Ingredients for Your Classic Italian Tiramisu
Okay, before you even touch a whisk, let’s talk about grabbing supplies. For a truly Classic Italian Tiramisu, the quality of your few ingredients really shines through, so don’t skimp here! I’ve listed everything down below, but listen closely to how I prep things, because that’s half the battle.
You absolutely need strong brewed coffee—and it needs to be completely cooled, otherwise you’ll melt your beautiful cream later! The coffee needs that kick; it’s what gives your Indulgent Coffee Flavored Treat its signature depth. Also, make sure your mascarpone cheese is softened up a bit so it mixes smoothly; room temperature is key for that perfect blend later on.
Now, about the eggs. This particular recipe uses yolks, which give it that traditional richness, but don’t worry if that makes you nervous! I’ve added a note further down about how you can easily skip them if you prefer a raw egg-free dessert, maybe using an extra boost of cream. While you’re shopping, grab those classic ladyfingers—the Italian ones, called Savoiardi, are always best because they soak up the liquid just right! If you’ve got any questions about assembly tools, check out my other no-bake guides for tips on preparing dishes.
Here’s what you need for 8 servings, roughly:
- 6 large egg yolks
- 3/4 cup granulated sugar
- 1 1/2 cups heavy whipping cream, *cold*
- 16 ounces mascarpone cheese, *softened*
- 1 1/2 cups strong brewed coffee, *cooled*
- 1/4 cup coffee liqueur or dark rum (this is optional, if you’re making it for kids!)
- 2 packages (7 ounces each) ladyfingers (Savoiardi)
- Unsweetened cocoa powder, for dusting (make sure it’s good quality!)
Essential Equipment for Your Tiramisu Recipe Assembly
You don’t need a stand mixer for this, but having the right tools makes the No Bake Tiramisu Instructions so much smoother! Since this is all about building delicious layers, organization is key. I suggest laying everything out before you start, trust me on this one.
For the cream making, you’ll need a couple of good-sized mixing bowls—one for whipping the cream and one for mixing the mascarpone. You’ll also need a whisk, whether it’s manual or electric, to get proper stiffness in that cream later!
Since we are gently cooking the yolks for safety (which is the expert touch, by the way!), you need a heatproof bowl that can sit snugly over a simmering saucepan—that’s your makeshift double boiler setup for the start of this Step by Step Tiramisu Guide. Finally, grab an 8×8 inch baking dish for a beautiful presentation. It holds the perfect amount of layers, and it’s easy to cover and chill!
Step by Step Tiramisu Guide: Creating the Creamy Mascarpone Dessert
Alright, this is the fun part where we actually build this incredible Layered Coffee Dessert! Don’t let the word ‘zabaglione’ scare you; we’re using a safe, beginner-friendly technique to create the base for our glorious cream. This is where Simple Dessert Assembly Basics come into play, so just focus on one step at a time.
Preparing the Zabaglione Base (Egg Yolk Mixture)
First things first: we need to thicken those yolks for safety and structure. Set up your double boiler—a saucepan with just an inch or two of simmering water, heat on medium-low, and your heatproof bowl resting comfortably on top without touching the water. Add the egg yolks and the sugar into that bowl.
Now, you whisk! And I mean *constantly*. You have to keep that mixture moving so the yolks don’t scramble. We cook this until it gets pale yellow and thickens up nicely, reaching about 160 degrees Fahrenheit on your thermometer. Once it hits that mark, pull it right off the heat immediately and keep whisking for another minute just to make sure it cools down slightly before moving on. Nobody likes warm mascarpone cream!
Assembling the Creamy Mascarpone Dessert
While that yolk base is cooling just a touch, pivot over to your cold heavy whipping cream. Beat this until you get stiff peaks. You know it’s ready when you can lift the whisk and the cream just stands up straight—that’s pure volume! Set that bowl aside somewhere safe.
Next, take your softened mascarpone cheese and give it a quick gentle whisk until it’s silky smooth; lumps are the enemy here. Now, fold the slightly cooled yolk mixture into that smooth mascarpone. Gently, gently fold! Once that’s just combined, you introduce your whipped cream. Again, fold! We are trying to keep all that beautiful air we whipped into that cream, so be patient as you incorporate it all into one luscious component.
Dipping Ladyfingers and Layering Your Tiramisu Recipe
Time for the coffee bath! Pour your cooled, delicious coffee (and any liqueur if you’re using it) into a shallow dish. Now, this step is critical for the whole Tiramisu recipe structure—quick dip only! Take a ladyfinger and just kiss it in the coffee mixture for maybe half a second on each side. If you soak them too long, your dessert turns soupy, and that is a tragedy. I am serious, only a quick dunk!
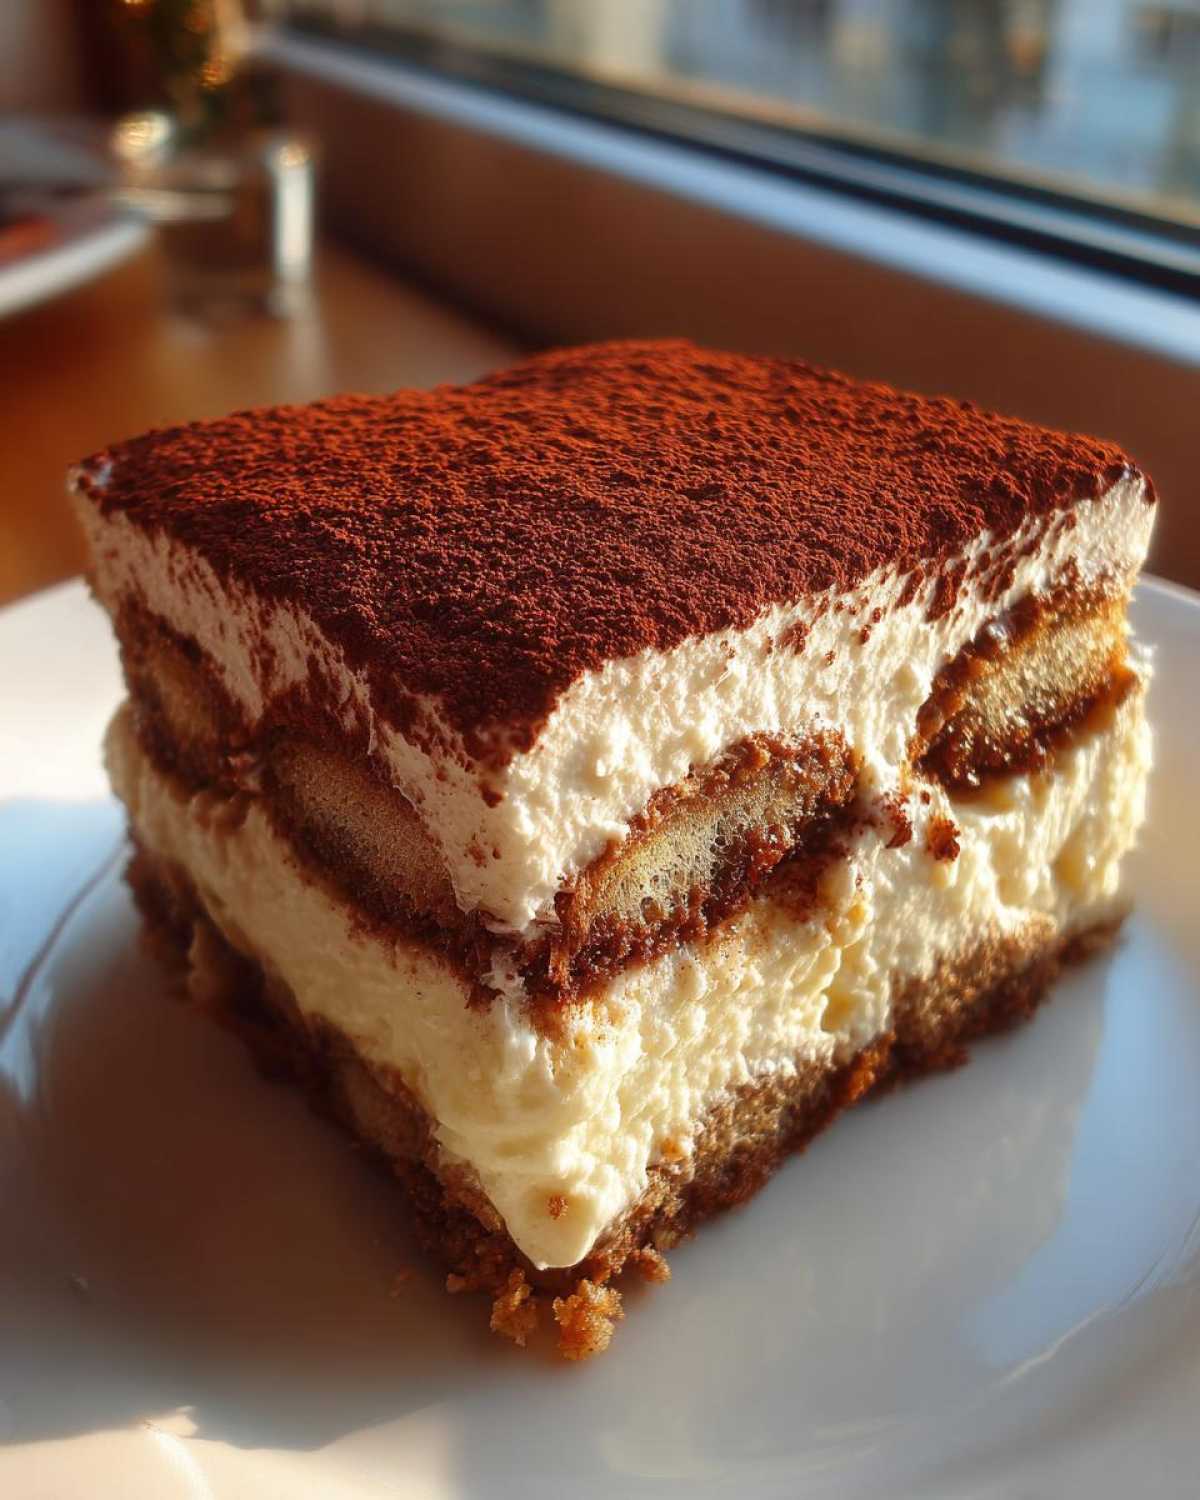
Lay a single layer of those barely-moistened ladyfingers across the bottom of your 8×8 dish. Spread exactly half of your gorgeous mascarpone cream right over the top; smooth it out evenly. Then, repeat the process: quick coffee dip, ladyfinger layer, and finish by topping everything with the rest of your incredible cream. Smooth that top out nicely because this is the surface everyone will see!
You can find more specific tips on this assembly process over at my guide to making the real deal here!
Setting and Finishing Your Rich Chocolate Dusting Dessert
We are almost there! You’ve done the heavy lifting by creating that light-as-air cream and layering everything perfectly. But listen up, this Tiramisu needs a nap. You MUST cover that dish tightly with plastic wrap—no peeking!—and get it into the fridge for a minimum of six hours. I always insist on overnight if I can manage it.
Why the long chill? Because this dessert needs time for the coffee to permeate the ladyfingers just right, and for the mascarpone cream to firm up properly. If you cut it early, it turns into a floppy mess; we want clean, beautiful squares for serving!
The very last thing you do, right before you bring this showstopper out to wow everyone, is the dusting. Don’t dust it hours before! The cocoa powder will absorb moisture from the cream and look patchy and sad. Grab your finest sieve—I use a tiny little one—and give the top a generous coating of unsweetened cocoa powder. That contrast between the dark, slightly bitter cocoa and the sweet, creamy inside? That’s what makes this the ultimate Rich Chocolate Dusting Dessert. Now go enjoy your victory!
Ingredient Notes and Tiramisu Without Raw Eggs Substitutions
I know sometimes people get nervous about using raw yolks in the cream, and that’s totally fair! So, let’s talk about making this Tiramisu Without Raw Eggs. If you want to skip that heating step, you can substitute the yolks entirely by whipping up just a little extra cream! You’ll want about one extra cup of heavy whipping cream and maybe a quarter cup of powdered sugar. Whip that extra cream until stiff peaks form, and then gently fold it into your mascarpone cheese along with the regular portion of whipped cream. It makes the cream layer slightly lighter, but it’s still unbelievably delicious and totally safe!
Also, I can’t stress this enough: the coffee you use makes or breaks this dessert. You need a deep, dark, strong brew—aim for something close to espresso strength. If you want to skip the alcohol, just use that strong coffee and perhaps add a tiny dash of vanilla bean paste to give it a bit of extra aromatic oomph. For more tips on baking things ahead of time, check out some of my granola cluster recipes; similar prep ideas apply!
Tips for Success with Your Tiramisu Recipe
You’ve got the steps down, but here are a few little secrets I learned through trial and, well, a couple of soupy messes when I was first learning! Following these tips will guarantee a stable, amazing final product every time you make this Tiramisu recipe.
Number one: Your heavy whipping cream absolutely HAS to be ice cold. I mean, stick it in the freezer for ten minutes before you whip it if your kitchen is warm. Warm cream just doesn’t whip up stiff, and without stiff cream, your whole dessert collapses!
Next, remember that mascarpone cheese we softened? Make sure it’s *just* softened, not melted or warm. If it’s warmer than room temperature, it will weep moisture into the cream layer as it chills, making the whole thing loose. I usually leave the tub out for about 20 minutes max.
And finally, my favorite tip for any Simple Coffee Soaked Dessert: Taste your coffee mixture before you dip! It should be strong enough to enjoy on its own, but perhaps a little bolder since the ladyfingers will dilute it slightly. If it’s too weak, your dessert will taste bland. You want that coffee flavor to really punch through!
Serving Suggestions for This Dessert for Dinner Party
This Dessert for Dinner Party deserves a fantastic send-off, don’t you think? Because Tiramisu is naturally so rich and deeply flavored with coffee and cocoa, you don’t need heavy sides! My absolute favorite way to serve it is alongside a teeny little shot of fresh, bitter espresso right after you dust that top layer.
That strong coffee cuts through the richness of the mascarpone perfectly. If you feel like you need something lighter on the side, go for a few fresh raspberries or perhaps some thinly sliced orange segments. The tartness of the fruit is such a wonderful contrast to the sweet, creamy center. It looks beautiful on the plate if you artfully arrange a few berries next to the slice. For more inspiration on drinks to pair with your meals, check out my smoothie recipes—different vibes, but great ideas for balancing rich flavors!
Storage and Make Ahead Dessert Ideas for Tiramisu
One of the best things about this Make Ahead Dessert Idea is that it actively gets better the longer it sits! Once you finish that final layer of cream, wrap it up tight and get it into the fridge. Seriously, give it at least six hours, but overnight is when the magic really happens. That’s when the ladyfingers fully absorb that lovely coffee soak and the whole dessert settles into a perfect sliceable structure.
It keeps wonderfully in the refrigerator for about three to four days after assembly. Just remember that final cocoa dusting needs to wait until just before serving, otherwise, it gets soggy from the moisture! If you want more great prep-ahead treats, take a peek at my ice cream recipes—sometimes simple assembly is the key to great desserts!
Frequently Asked Questions About This Tiramisu Recipe
I get so many questions after people try this tiramisu recipe for the first time! It’s the kind of dessert people want to get just right, and that’s wonderful. Here are some of the most common things folks ask me about getting that perfect, creamy result every time.
Can I make this tiramisu recipe without using alcohol?
Absolutely, 100% yes! If you aren’t using the liqueur or rum, don’t panic about missing flavor. Just omit it completely! Alternatively, if you want that aromatic depth that the alcohol brings, you can just put a teaspoon of good quality vanilla extract right into your cooled coffee mixture. It still gives that lovely warm background note without any booze. Easy fix!
What is the best coffee to use for this Simple Coffee Soaked Dessert?
This is non-negotiable for me! For a truly flavorful Simple Coffee Soaked Dessert, you need strong coffee. I mean seriously strong—I usually brew up a double batch of espresso just for this. If you don’t have an espresso maker, brew a small amount of very dark roast coffee using a Moka pot or French press so it’s super concentrated. Make sure it is completely and totally cooled down before you start dipping your ladyfingers, or you’ll end up with a soggy mess!
My ladyfingers aren’t softening right; what did I do wrong?
This usually comes down to dipping time. Remember what I said? Just a quick kiss! If you’re using the classic hard, dry *Savoiardi* ladyfingers, they can soak up liquid really fast. Don’t let them sit in the coffee bath for more than a second or two on each side—they should still feel firm when you place them in the dish. They’ll continue to soften as the dessert chills overnight!
Should my mascarpone be room temperature or cold?
This is a super important detail for your Creamy Mascarpone Dessert! You want the mascarpone cheese itself to be softened—leave it on the counter for maybe 20 minutes before you start—because if it’s straight from the fridge, it will crumble and won’t mix smoothly with the yolks. However, the heavy whipping cream you use needs to be ice cold. This contrast in temperature helps everything blend into that perfect, silky texture we are aiming for. If you want more general baking advice, I always post little tips over on my main blog page!
PrintEasy No-Bake Classic Tiramisu Recipe
Follow these simple steps to make an authentic, creamy Italian Tiramisu dessert without baking, using rich mascarpone cream.
- Prep Time: 30 min
- Cook Time: 0 min
- Total Time: 30 min
- Yield: 8 servings
- Category: Dessert
- Method: No-Bake Assembly
- Cuisine: Italian
- Diet: Vegetarian
Ingredients
- 6 large egg yolks
- 3/4 cup granulated sugar
- 1 1/2 cups heavy whipping cream, cold
- 16 ounces mascarpone cheese, softened
- 1 1/2 cups strong brewed coffee, cooled
- 1/4 cup coffee liqueur or dark rum (optional)
- 2 packages (7 ounces each) ladyfingers (Savoiardi)
- Unsweetened cocoa powder, for dusting
Instructions
- In a heatproof bowl set over a saucepan of simmering water (double boiler), whisk the egg yolks and sugar constantly until the mixture is pale yellow and thick, reaching 160F. Remove from heat and let cool slightly.
- In a separate large bowl, whip the cold heavy cream until stiff peaks form. Set aside.
- In another bowl, gently whisk the softened mascarpone cheese until smooth. Fold the cooled egg yolk mixture into the mascarpone until just combined.
- Gently fold the whipped cream into the mascarpone mixture until fully incorporated, creating the cream.
- Combine the cooled coffee and liqueur (if using) in a shallow dish.
- Quickly dip each ladyfinger, one at a time, into the coffee mixture. Do not soak them too long or they will become soggy.
- Arrange a single layer of dipped ladyfingers in the bottom of an 8×8 inch baking dish.
- Spread half of the mascarpone cream mixture evenly over the ladyfingers.
- Repeat the layering process: dip the remaining ladyfingers and arrange them over the cream layer.
- Spread the remaining mascarpone cream over the second layer of ladyfingers.
- Cover the dish with plastic wrap and refrigerate for at least 6 hours, or preferably overnight, to allow the dessert to set.
- Before serving, dust the top generously with unsweetened cocoa powder.
Notes
- For a recipe without raw eggs, you can substitute the egg yolks with 1 cup of heavy cream whipped with 1/4 cup of powdered sugar, then fold into the mascarpone.
- Use high-quality, strong coffee for the best flavor.
- This dessert tastes better when made a day ahead, as the flavors meld together.
Nutrition
- Serving Size: 1 slice
- Calories: 450
- Sugar: 30
- Sodium: 120
- Fat: 32
- Saturated Fat: 18
- Unsaturated Fat: 10
- Trans Fat: 1
- Carbohydrates: 35
- Fiber: 1
- Protein: 9
- Cholesterol: 250