

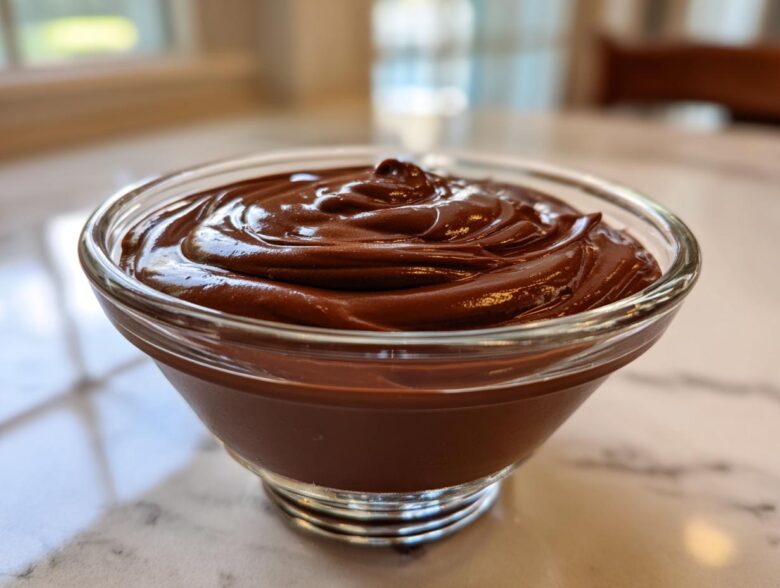
Oh, you know those nights? The ones where you just need something warm, rich, and totally comforting to wrap your hands around? That’s when I turn to my absolute favorite stovetop creation. Forget those little blue boxes crowding the pantry shelf; making **homemade chocolate pudding** from scratch is unbelievably fast and tastes a million times better.
Seriously, I’ve tested this method countless times, and it never fails. This isn’t just pudding; it’s the ultimate creamy dessert, guaranteeing that silky smooth texture you dream about. I used to think only high-end restaurants could achieve this velvety perfection, but nope! It’s all done right on the stove in under 20 minutes, and it quickly became my go-to quick homemade dessert when company unexpectedly drops by.
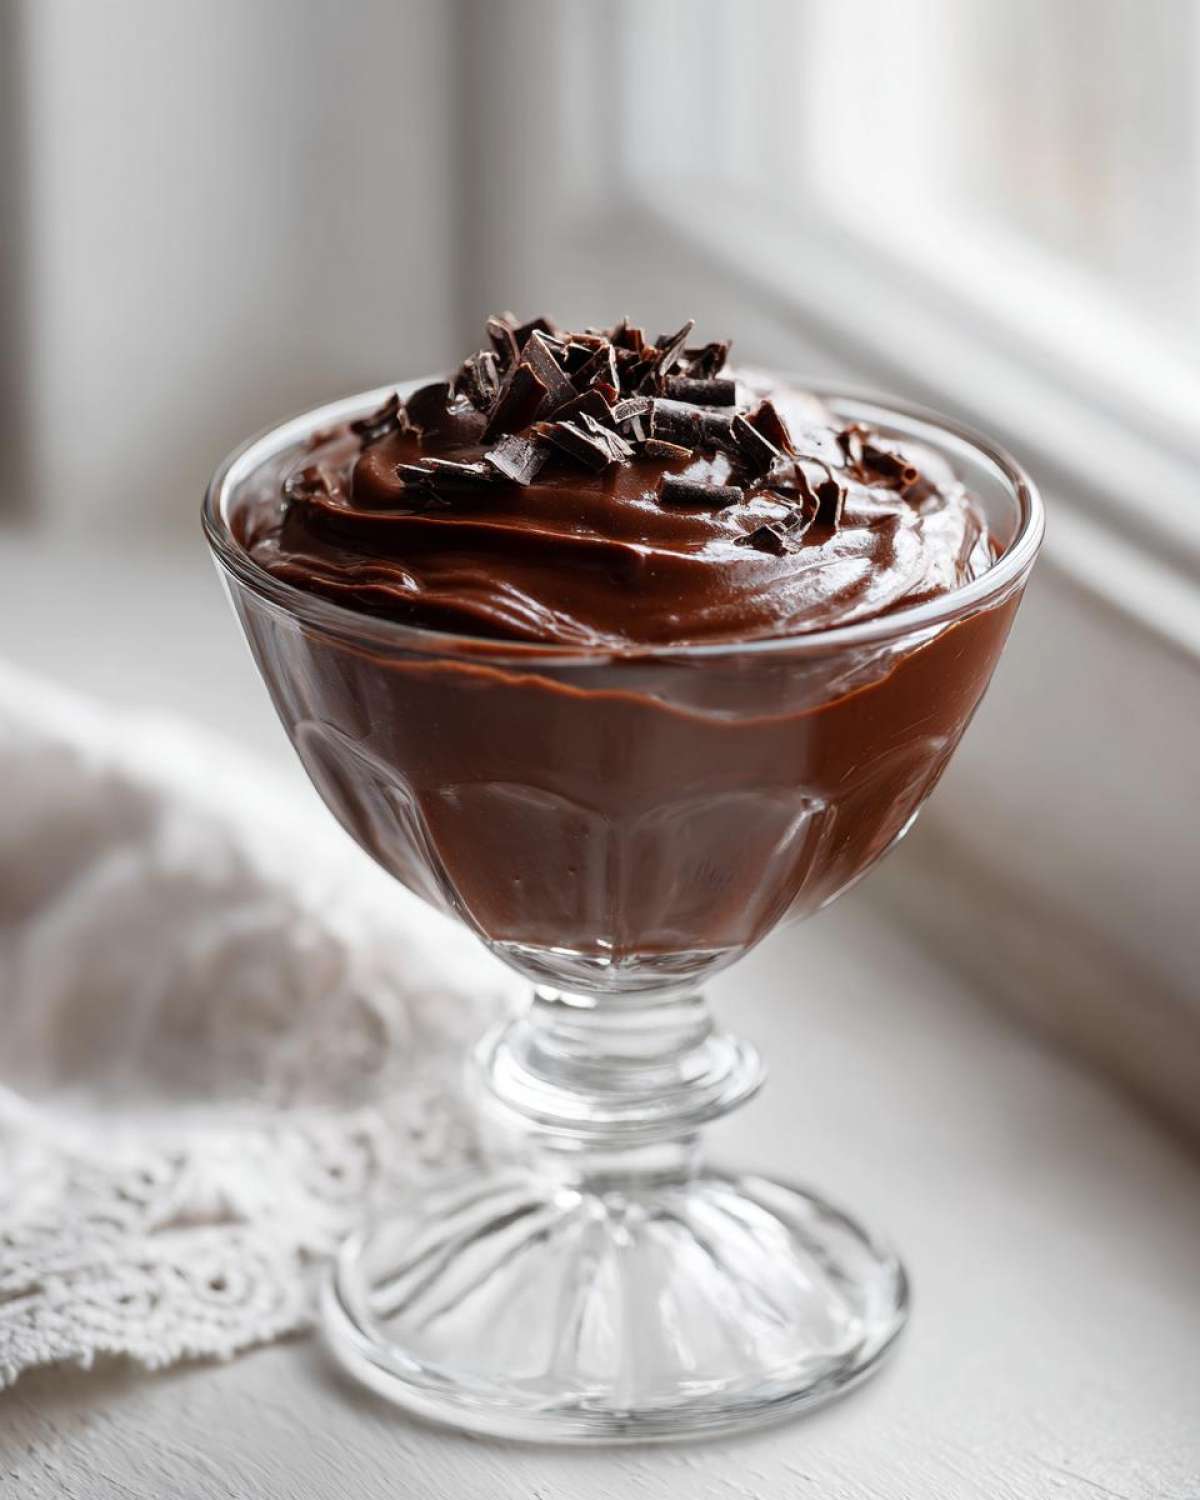
If you are worried about using raw eggs, don’t be! We cook it just long enough to make it safe and utterly decadent. Trust me on this one; once you try this recipe, you’ll never look back. My little secret is that I sometimes sneak in a tiny splash of strong coffee just before taking it off the heat—it just deepens that cocoa flavor beautifully.
If you’re curious about mastering other classic, slightly more involved desserts, you should really check out my tips on classic French crème brûlée, but today is all about the smooth, dreamy chocolate goodness.
Why This is the Best Homemade Chocolate Pudding Recipe From Scratch
What makes this *the best homemade chocolate pudding* recipe? Honestly, it’s the texture. You get that incredible, luxurious mouthfeel—truly a velvety chocolate pudding—because we are skipping the artificial stabilizers found in mixes. This is a genuine creamy chocolate pudding recipe, and the magic is split between two key players: cornstarch and egg yolks.
The cornstarch is our workhorse; it thickens everything up quickly over the heat, giving it that necessary body, but it’s the egg yolks that give us that rich, almost custard-like finish that just coats your tongue. It’s the difference between eating flavored starch water and digging into a rich chocolate dessert.
If you loved sneaking fudgy treats, this recipe delivers that same intense flavor, but cleaner and fresher. Speaking of intense flavor, if you ever want to compare this rich base to something baked, my recipe for fudgy triple chocolate brownies uses similar techniques for deep cocoa notes!
Achieving Silky Smooth Pudding Texture
Listen, nobody wants lumps in their comfort food, right? The secret to that perfect silky smooth pudding is getting those dry ingredients totally combined before the milk even thinks about coming near them. You need to whisk that sugar, cocoa, and cornstarch together until you can’t see any dry pockets.
Next, the eggs! We’re going to learn the technique called tempering. It’s just a fancy word for slowly introducing gradual heat to the yolks so they don’t seize up and scramble when they hit the hot milk. If you nail the tempering, you nail the creaminess; that’s how you get a truly beautiful chocolate pudding recipe from scratch.
Ingredients for Your Ultimate Homemade Chocolate Pudding
Okay, gathering your supplies is half the fun, right? I love that this recipe relies mostly on pantry staples. When people ask me how to make homemade chocolate pudding that blows boxed mixes out of the water, I tell them it starts here, with quality ingredients. Every single measurement matters when you’re making something this simple.
You’ll be using sugar, cocoa, cornstarch, salt, milk, egg yolks, butter, and vanilla. Simple! But pay attention to the details I’m about to mention—that’s where my reliability factor comes in. You want everything measured perfectly so your stovetop time is quick and drama-free. We’ll list the full ingredients below the tips, but before we move on, let’s talk cocoa.
Ingredient Notes and Substitutions for Homemade Chocolate Pudding
Listen up: I insist on Dutch process cocoa powder for this. Why? Because it gives you that deep, dark color and a smoother, less acidic chocolate flavor. If you only have regular unsweetened cocoa, you can use it, but the resulting pudding won’t have that classic, profound richness we are aiming for in this rich chocolate dessert recipe.
Also, make sure that butter is unsalted! We are adding salt separately for better control. As for the milk, whole milk is the best call for that classic creaminess. If you want to take your pudding to the max—make it truly decadent—feel free to swap out half a cup of the whole milk for heavy cream. It makes the final product even more luxurious. You won’t regret this little addition for a superior dessert from scratch!
We’ll put the full list together next, but if you’re looking for a non-dessert option using some of these same power ingredients, check out my chocolate peanut butter smoothie recipe for a morning boost!
How to Make Easy Stovetop Pudding for the Best Homemade Chocolate Pudding
This is where the magic happens! Because this is a chocolate pudding recipe from scratch, we are doing it right on the stovetop. Don’t rush this part, but trust me, the cooking process itself is so fast! We’re only talking about ten minutes of active cooking time total, making this the easiest quick homemade dessert ever.
First things first: Grab your medium saucepan. You need to whisk your sugar, that gorgeous Dutch cocoa, cornstarch, and salt together dry. You absolutely must spend a good minute doing this well because if you don’t, guess what? Lumps! Once those dry ingredients make friends, slowly whisk in the nice cold milk until the mixture is completely smooth. No excuses on that front!
Now, turn the heat on to medium. You have to stir constantly while it heats up. I mean it! Keep that whisk moving around the bottom and sides of the pan for about five to eight minutes. Keep watching; you’ll notice it starts getting thick, and then, right before it bubbles vigorously, that’s your cue. It needs to thicken significantly—it should coat the back of a spoon nicely.
The Crucial Step: Tempering the Egg Yolks
Okay, pull the saucepan off the heat for just a second. This is the most important moment for ensuring you get that creamy chocolate pudding recipe texture instead of scrambled eggs! In a separate, small bowl, take your two egg yolks and whisk them lightly. Now, grab about half a cup of that hot milk mixture from the pan and slowly, *slowly* drizzle it into those yolks while whisking the yolks non-stop. This slowly coaxes the yolks up to temperature.
Once they look happy and warm, gently pour that tempered yolk mixture back into the main saucepan. Put it back on the heat for just one more minute, whisking like crazy. This finishes the cooking process. Don’t let it come to a rolling boil now—just stir gently until everything is unified and perfect. Then, smash in the butter and vanilla until it melts right in. Perfection!
Chilling Your Rich Chocolate Dessert
Once the butter is gone, divide your decadent chocolate treat into bowls or a serving dish. Now for a non-negotiable step for that silky smooth pudding: You must press a piece of plastic wrap directly onto the surface of the pudding. Seriously, no airspace allowed! This prevents that thin, rubbery skin from forming on top while it cools. It ruins the whole vibe of a great homemade chocolate pudding.
Pop it in the fridge. You really need at least two solid hours for it to chill and fully set up. If I’m serving this the next day, I leave it the whole time, covered tightly. The patience pays off when you finally dig in!
If you’re looking for one of my favorite easy stovetop pudding variations (a lighter lemon one!), check that out next for a spring treat!
Tips for Success When Making Homemade Chocolate Pudding
Every time I make this, I feel like the tips I share really cement this as the best homemade chocolate pudding tutorial out there. You don’t need fancy equipment; you just need to respect the heat and the ingredients!
My first major tip is about the cocoa again: use the best Dutch process cocoa you can find. It makes such a difference in the depth of flavor. Low-quality cocoa will result in a thin, one-note taste, and we are aiming for a decadent chocolate treat here!
Secondly, stir constantly on the stove, but don’t walk away during the tempering step. If you’re worried about scorching the bottom, use a heat-proof spatula to scrape the very bottom of the pan every few seconds—that’s where the starch likes to settle and get crusty. That’s an important pro move for any classic chocolate pudding.
Finally, don’t cheat the chill time! While it’s tempting to eat it warm—and believe me, it smells divine cooling on the counter—it won’t set up properly. You need those full two hours for the texture to reach that heavenly state. If you happen to have extras, they pair wonderfully with my recipe for ultimate moist zucchini muffins if you want another great comfort food dessert!
Variations on Classic Chocolate Pudding
Once you master the base recipe—the one that creates our unbelievably rich and classic chocolate pudding—you’re ready to start playing around! That’s the fun part about making desserts from scratch; you become the expert and can tweak things to your preferred level of decadence.
We want to keep this list simple because this recipe is already pretty fast, but here are three ways I elevate this homemade chocolate pudding for different moods:
- The Bittersweet Boost: If you like your chocolate desserts bordering on intense, melt about two ounces of good quality 70% or bittersweet chocolate right into the pan after you stir in the butter at the very end. Make sure the saucepan is off the heat! This really deepens the color and makes it feel incredibly sophisticated. It moves it straight into decadent chocolate treat territory.
- Extract Swap: Vanilla is classic, of course. But try swapping that teaspoon of vanilla out for a half teaspoon of peppermint extract when the holidays roll around. Instantly, you have a completely different, festive pudding that nobody will expect! It really leans into that pantry staple desserts vibe since you’re only swapping one small thing.
- A Hint of Spice: This is barely a variation, more of a whisper. When you are whisking your dry ingredients together, toss in about a quarter teaspoon of instant espresso powder or even a tiny pinch of cayenne pepper. You won’t taste coffee or spice directly, but it mysteriously makes the chocolate flavor pop; it really brightens up this simple dessert recipe.
These little additions really show you how versatile this base recipe is. If you’re looking for another way to use chocolate and zucchini together in an unexpected but tasty way, you have to try my recipe for double chocolate zucchini muffins!
Serving Suggestions for Your Homemade Chocolate Pudding
Okay, your perfect homemade chocolate pudding is chilled, it’s set, and it’s unbelievably creamy. Now, dessert time means toppings, right? We don’t just slap plastic wrap on and serve it plain! Presentation is half the fun when you’ve made such a beautiful rich chocolate dessert from scratch.
I’m a traditionalist at heart, so my first suggestion is always the same: a massive, fluffy cloud of freshly whipped cream. I mean, don’t even bother with the aerosol cans. Whip heavy cream with just a tiny bit of powdered sugar until it holds stiff peaks. That light, airy texture is the absolute perfect contrast to the heavy, velvety chocolate pudding underneath. You get the hot/cold dynamic, too, if you scoop it right out of the fridge!
If you want to add a little color and tang, fresh fruit is your best friend. Bright red raspberries or sliced strawberries cut through the richness of the chocolate so nicely. They make the whole thing feel less heavy and more sophisticated. If you’re using berries, be sure to check out my recipe for fresh strawberry shortcake—it’s full of tips on how to treat those fresh berries right!
For a purely chocolate-on-chocolate experience, grab a vegetable peeler and shave off curls of dark chocolate over the top. They look elegant, and when they melt slightly from the residual coolness, it’s pure heaven. You can use milk chocolate, but I prefer using the same high-quality bittersweet stuff we talked about earlier to keep that intense flavor profile going. Enjoy this truly decadent chocolate treat you worked so hard to make!
Storage and Reheating Instructions for Homemade Chocolate Pudding
Since we put in the effort to make this the best homemade chocolate pudding ever, we definitely want to make sure it lasts! The good news is that because this recipe relies on egg yolks and cornstarch—and not gelatin—it keeps beautifully in the fridge. Remember that crucial step where I told you to press plastic wrap directly onto the surface? That’s your secret weapon for longer storage!
If you seal it up tight like that, this pudding will stay fresh, vibrant, and wonderfully creamy for about four days in the refrigerator. Any longer, and you risk losing that perfect texture; the cornstarch can start to break down just a little bit, so four days is my firm cut-off point for the best experience.
Now, a serious question: Can you reheat it? Honestly, I advise against it for this specific chocolate pudding recipe from scratch. Since it thickens beautifully as it cools, reheating tends to make the texture gummy or runny, depending on how much you heat it. It’s designed to be a cool, comforting dessert, so just let it sit on the counter for about ten minutes if you’re dying for it not to be ice-cold when you eat it.
If you are looking for something you *can* reheat later, like my recipe for no-bake Oreo cheesecake cups (which are served cold, admittedly!), maybe try heating up some thick, fudgy brownies instead! For this pudding, cold and smooth is definitely the way to go.
Frequently Asked Questions About Making Chocolate Pudding From Scratch
I get so many messages about this simple dessert recipe, and that’s awesome! It means people are taking the plunge and making their own homemade chocolate pudding. Most confusion happens around those tricky stovetop steps, especially tempering. Don’t sweat it; these are the things I learned the hard way so you don’t have to!
Can I use regular milk instead of whole milk for this homemade chocolate pudding?
You can, and I know sometimes all you have is 2% or skim milk in the fridge. If you use that, the pudding will definitely still set up because of the cornstarch, but it won’t have that deep, luxurious richness that makes this the best homemade chocolate pudding. Whole milk has the fat needed to carry that great chocolate flavor and help create that beautiful body. If you use skim, it will feel a little lighter, less creamy, and maybe a touch more gelatinous.
How do I prevent lumps in my easy chocolate pudding?
This goes back to the very first step of this chocolate pudding recipe from scratch! You have to thoroughly whisk your dry ingredients—the sugar, cocoa, salt, and cornstarch—together *before* any liquid goes near them. If the cornstarch is clumped up when you add the cold milk, you’ll spend the whole heating time trying to break apart those tiny, stubborn dry pockets on the bottom of the pan.
Also, when you introduce the milk, pour it in slowly, whisking constantly until it’s completely smooth *before* you turn the heat on. If you follow those two steps religiously, you’ll achieve that silky smooth pudding every single time. No lumps, no stress!
If you are looking for a completely dairy-free alternative to this classic chocolate pudding, sometimes people have great success with avocado instead of eggs and starch! You might want to check out the method I found for making vegan chocolate avocado mousse if dairy isn’t an option for you!
Estimated Nutritional Data for Creamy Chocolate Pudding Recipe
Now, I know some of you out there are counting things, and while this is definitely a decadent chocolate treat, it’s good to know where we stand! Remember, this information is just based on the recipe details I have, using whole milk and standard measurements for the sugar and cocoa. Every pantry ingredient is slightly different, so consider these numbers a helpful guide rather than gospel truth!
I just needed to share this because, honestly, compared to some store-bought options, this homemade chocolate pudding—made with real butter and eggs—is pretty reasonable for a comfort food dessert. If you’re looking for something specifically geared toward higher protein, my recipe for chocolate protein muffins might be what you’re after next!
Here’s the breakdown of what you’re looking at per serving, assuming this recipe makes four generous bowls:
- Calories: Approx. 280
- Total Fat: Approx. 14g (and yes, most of that is the good stuff from the butter and yolks!)
- Carbohydrates: Approx. 33g
- Sugar: Approx. 30g (Yes, it’s dessert, folks!)
- Protein: Approx. 7g
See? It’s a perfectly balanced, rich ending to any meal. Enjoy every spoonful of that creamy chocolate pudding recipe!
PrintThe Ultimate Creamy Homemade Chocolate Pudding from Scratch: Rich, Quick, and Better Than Boxed
Make rich, velvety chocolate pudding from scratch on the stovetop. This easy recipe yields a silky smooth, decadent dessert that surpasses any boxed mix.
- Prep Time: 10 min
- Cook Time: 10 min
- Total Time: 20 min
- Yield: 4 servings
- Category: Dessert
- Method: Stovetop
- Cuisine: American
- Diet: Vegetarian
Ingredients
- 1/2 cup granulated sugar
- 1/4 cup unsweetened cocoa powder (Dutch process recommended)
- 2 tablespoons cornstarch
- 1/4 teaspoon salt
- 2 cups whole milk
- 2 large egg yolks
- 2 tablespoons unsalted butter
- 1 teaspoon vanilla extract
Instructions
- In a medium saucepan, whisk together the sugar, cocoa powder, cornstarch, and salt until combined.
- Gradually whisk in the milk until the mixture is smooth.
- Place the saucepan over medium heat. Cook, stirring constantly with a whisk, until the mixture thickens significantly and just begins to bubble. This takes about 5 to 8 minutes.
- In a small bowl, lightly whisk the egg yolks. Temper the yolks by slowly whisking about 1/2 cup of the hot milk mixture into the yolks.
- Pour the tempered yolk mixture back into the saucepan, whisking constantly. Continue to cook for 1 minute, ensuring you stir the bottom of the pan to prevent scorching. Do not let it boil vigorously after adding the yolks.
- Remove the saucepan from the heat. Stir in the butter and vanilla extract until the butter is fully melted and incorporated.
- Pour the pudding into individual serving bowls or a single large dish. Press plastic wrap directly onto the surface of the pudding to prevent a skin from forming.
- Chill in the refrigerator for at least 2 hours, or until completely cold and set.
Notes
- For an extra rich flavor, substitute 1/2 cup of the milk with heavy cream.
- Use high-quality cocoa powder for the best chocolate taste.
- If you prefer a less sweet pudding, reduce the sugar to 1/3 cup.
Nutrition
- Serving Size: 1 serving
- Calories: 280
- Sugar: 30
- Sodium: 150
- Fat: 14
- Saturated Fat: 8
- Unsaturated Fat: 6
- Trans Fat: 0
- Carbohydrates: 33
- Fiber: 2
- Protein: 7
- Cholesterol: 85