

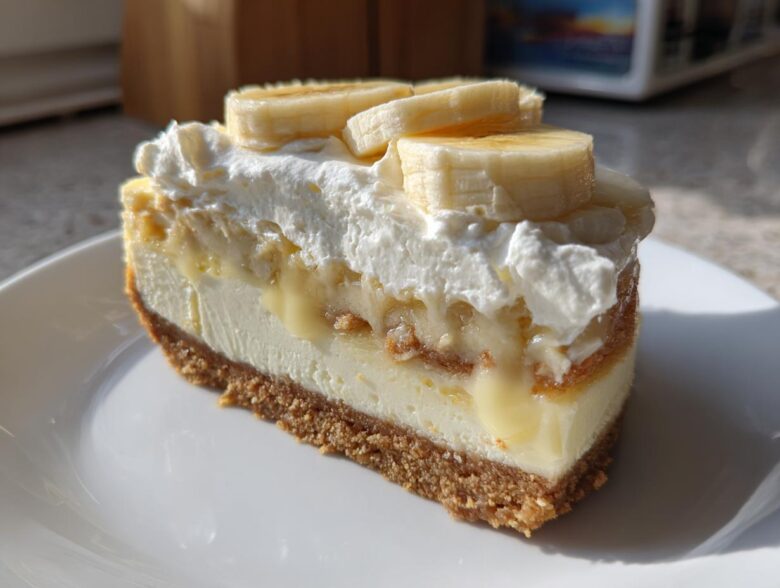
Oh, honey, if you think you’ve had good dessert, just wait until you bite into this masterpiece. I’m talking about the kind of Southern dessert that makes people stop talking mid-sentence when they take the first bite. For years, I couldn’t decide if I wanted the comforting wobble of true banana pudding or the tangy, sturdy richness of a New York-style cheesecake. So, naturally, I decided to put them in a fight to the death, and everyone wins!
After probably six different failed attempts involving runny pudding layers that sank right through the base—don’t ask how many times I had to re-wrap that springform pan!—I finally cracked the code. This Banana Pudding Cheesecake with Vanilla Wafer Crust isn’t just a recipe; it’s an achievement. It takes that nostalgic flavor we all love and gives it the elegant structure it deserves. If you want to know more about the classic inspiration, check out my recipe for Old-Fashioned Southern Banana Pudding, but this cheesecake takes it to a whole new level.
If you’re looking for the ultimate showstopper that tastes like the best parts of a Sunday dinner fused with the best parts of a cool summer evening, congratulations, you’ve found it. We get that gorgeous crunch from the vanilla wafers, followed by the velvety cheesecake, and then the sweet creaminess of the banana layer. Trust me, this layered beauty is worth every minute of the chilling time!
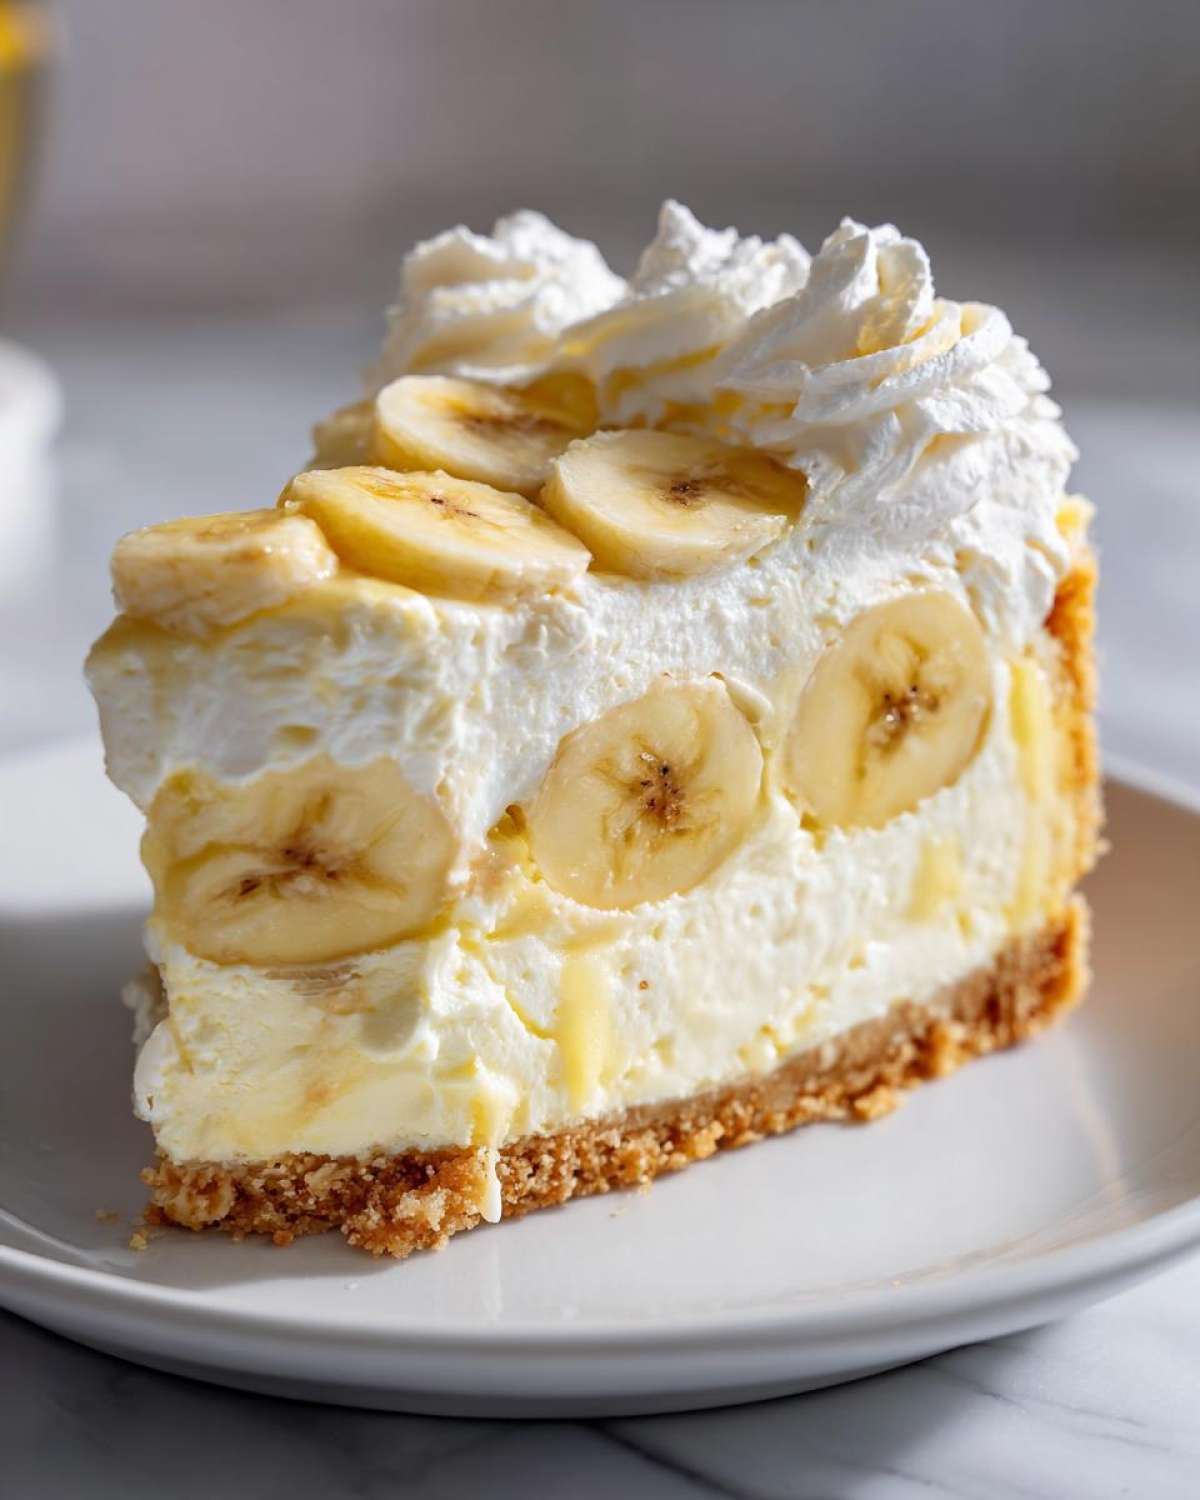
Why This Banana Pudding Cheesecake with Vanilla Wafer Crust is a Showstopper Dessert
I truly believe this dessert earned its spot as the star of any celebration. It’s not just rich; it’s *intricate* in the best possible way. Forget making separate dishes; here, they get their happy ending all in one glorious pan. This recipe makes people stop asking what’s in it and just focus on eating it!
You get all the best reasons to love this hybrid:
Perfect Southern Dessert Fusion
We take the nostalgic tang of cream cheese—the heartbeat of any great cheesecake—and marry it perfectly with the creamy, sweet comfort of homemade banana pudding layers. It’s a proper Southern Dessert Fusion you just can’t beat.
The Ultimate Vanilla Wafer Crust Dessert Texture
Texture is everything! You get the buttery, crisp snap of that baked base, which is way more interesting than plain old graham crackers. That contrast against the smooth filling and soft fruit makes this the Ultimate Vanilla Wafer Crust Dessert. It’s truly a Showstopper Banana Dessert, and honestly, it looks much harder to make than it actually is. If you like getting compliments, you need this recipe on your book. If you want to see another showstopper I worked on, check out my guide on the moist carrot cake!
Essential Ingredients for Your Banana Pudding Cheesecake with Vanilla Wafer Crust
Okay, gathering your components for this layered beauty is where you set yourself up for success! This Banana Pudding Cheesecake with Vanilla Wafer Crust is a triple threat, so we need ingredients for three different textures, and quality really matters here. Don’t even think about rushing the softening process for the cream cheese—lumpy batter means a sad cheesecake, and we are aiming for decadent perfection!
For the best results, make sure everything that needs to be room temperature (like the cream cheese and eggs) has been sitting out for at least an hour. It really helps everything blend into that silky texture we’re after. If you’re looking for general baking wisdom, sometimes my tips for creamy egg salad—like letting eggs come to temp—apply everywhere!
For the Vanilla Wafer Crust Dessert Base
This base needs to be sturdy enough to hold up that heavy filling! For the most compact Vanilla Wafer Crust Dessert, pulse your wafers until they feel like fine sand:
- 1 1/2 cups vanilla wafer crumbs (about 60 wafers)
- 1/4 cup granulated sugar
- 6 tablespoons unsalted butter, melted
For the Rich Banana Custard Cheesecake Filling
This is the main event! Remember, room temperature cream cheese is non-negotiable for a smooth outcome. We’re using eggs sparingly here so the pudding can shine through, too.
- 3 (8 ounce) packages cream cheese, softened
- 1 1/2 cups granulated sugar
- 1 teaspoon vanilla extract
- 1/4 teaspoon salt
- 4 large eggs
For the Layering and Topping Components
This section provides the classic banana pudding flavor that elevates the dessert. Don’t skimp on the fresh bananas!
- 1 (3.4 ounce) package instant vanilla pudding mix
- 1/2 cup cold milk
- 1 cup heavy cream, whipped
- 2 ripe bananas, thinly sliced
- 1/2 cup prepared banana pudding or custard (optional swirl)
Step-by-Step Instructions: How to Make Banana Pudding Cheesecake
Alright, here’s where the actual magic happens! This process seems long because we have layers, but trust me, working step-by-step keeps everything super manageable. Watching this Banana Pudding Cheesecake with Vanilla Wafer Crust come together is really satisfying. If you’ve ever felt intimidated by cheesecakes, I promise you, the water bath technique—which we cover below—is your secret weapon against cracks. Let’s dive into How to make Banana Pudding Cheesecake!
Preparing and Baking the Vanilla Wafer Crust Dessert
First things first: get that oven set to 325 degrees F. Now, grab your 9-inch springform pan and wrap the outside *tightly* with a couple of layers of heavy-duty foil. This is mandatory for the water bath later, so make sure it’s sealed well—we don’t want any leaks! For the crust, just mix those wafer crumbs, that 1/4 cup of sugar, and the melted butter until it looks like wet sand. Press it firmly and evenly into the bottom of that foil-wrapped pan. Bake it for just 10 minutes, then pull it out and let it sit while you tackle the filling.
Creating the Creamy Cheesecake Filling
Time to bring out the mixer! Beat that softened cream cheese with the 1 1/2 cups of sugar, vanilla, and salt until it looks totally smooth—no lumps allowed! Then, add those four eggs, but listen closely: add them *one at a time*. Mix just until the yellow disappears after each addition. Seriously, stop mixing once it’s incorporated. Over-beating eggs brings in too much air, which is the enemy of a crack-free, dense cheesecake. This careful creaming is almost as important as the batter in my brown butter chocolate chip cookies!
Assembling the Layered Cheesecake Pudding Structure
Now for the fun part: layering! Pour half of your gorgeous cheesecake batter right over that cooled crust. Next, make your quick pudding mix using the instant pudding and cold milk until it thickens slightly, then gently fold in the whipped cream. Spread half of that lighter pudding mixture over the cheesecake layer. If you’re doing the optional swirl, dollop dollop half of your extra banana custard over everything now. Then, top with half of your fresh banana slices.
Gently pour the remaining cheesecake batter on top to seal everything in. Then, repeat the process: remaining pudding, remaining bananas, and the rest of that optional swirl! Your layering is done for the Layered Cheesecake Pudding structure.
Baking the Banana Pudding Cheesecake with Vanilla Wafer Crust Using a Water Bath
This step is why your cheesecake will be silky, not crumbly. Place your foil-wrapped springform pan directly inside a larger roasting pan. Carefully pour hot water into the roasting pan until it comes about halfway up the side of your springform pan. This is the water bath!
Bake this setup for 60 to 75 minutes. You know it’s done when the edges are firm, but the very center still has a gentle wiggle when you nudge the pan—it will set up fully while cooling. Don’t take it out yet! Turn the oven off, crack the door open just a smidge, and let it cool in that humid environment for a full hour. This slow descent prevents temperature shock, which is the main cause of cracking, just like I explain in my guide for crack-free New York Cheesecake. After an hour, carefully remove it from the bath, take the foil off, and let it cool completely on a rack before refrigeration. You need at least six hours—overnight is always best!
Tips for the Best Homemade Banana Cheesecake Texture
Look, getting that perfect smooth, creamy vibe is everything when you’re making the Best Homemade Banana Cheesecake. We don’t want grainy, and we definitely don’t want a cracked top that looks like the Serengeti! Success here comes down to two things: temperature control and patience during the bake and cool.
I spent so much time figuring out the physics of the pudding layer, too. If you follow the directions exactly and use the pudding when it’s just thickened—not fully set—it settles beautifully without dissolving completely into the cheesecake batter below it. It’s all about that balance!
Preventing Cracks in Your Banana Pudding Cheesecake with Vanilla Wafer Crust
Seriously, revisit those ingredient temperatures! If your cream cheese is cold, you *will* beat it too much trying to smooth it out, and that incorporates air bubbles that turn into cracks later. Also, be very mindful of the water bath cool-down period. That slow cooling is non-negotiable; drastic temperature drops cause contraction, and contraction causes cracks. It’s physics, and it always wins!
Achieving Perfect Layer Separation
When you mix the whipped cream into the instant pudding—that’s what makes our pudding layer light enough to hold its shape. If you let that mixture set up too much before layering, it becomes too dense and might just sit on top without slightly embedding itself. You want that beautiful swirl, not two separate entities fighting for attention! A little guidance on temperature helped me out when I was learning, much like I learned when perfecting my creamy egg salad recipe.
Ingredient Notes and Substitutions for Ultimate Banana Vanilla Wafer Dessert
I know baking often means staring into your pantry wondering what you can switch out, especially when a recipe calls for something super specific like vanilla wafers. Don’t panic! While this Ultimate Banana Vanilla Wafer Dessert is definitely best with the wafers, we can make smart swaps without ruining the whole thing. My goal is always to get you to bake this, even if your pantry isn’t perfect.
Let’s talk about the pudding first. We are using instant pudding mix because it sets up quickly and is lighter than a slow-cooked custard, which is perfect for folding into whipped cream. If you only have the cook-and-serve kind, you absolutely *can* use it, but you must cook it first according to package directions, let it cool completely in the fridge until chilled (not just room temp!), and then gently fold it into the whipped cream. It takes longer, but the flavor is richer!
Now, for the base. If you are out of vanilla wafers—oops!—your next best bet is a classic graham cracker crust. Use the same amount of crumbs, but you might want to add an extra splash of vanilla extract (maybe half a teaspoon) to the melted butter mixture to mimic that sweet, vanilla flavor we lose by skipping the wafers. You can see how I adjust ingredients often in my guide to creamy egg salad, too; baking is flexible!
And for the bananas? Use them when they look spotty but aren’t brown yet. If they are getting too soft before you get a chance to layer them in, slice them and toss the slices with a tiny squeeze of lemon juice to stop them from browning before they hit the batter. It keeps your layers looking fresh and vibrant!
Serving Suggestions for Your Decadent Banana Cream Cheesecake
The moment this beautiful creation is fully chilled and released from that springform pan, you have to decide how to present it. Since this is already a full meal in dessert form—we have crust, cream cheese, and pudding—you don’t need much, but presentation is everything for a Decadent Banana Cream Cheesecake!
When I made mine for my cousin’s birthday party, I kept the sides clean so people could really see the layers, but I went over the top with the plating. A light touch of something crunchy or salty just cuts through that incredible richness perfectly. It’s all about that final flourish!
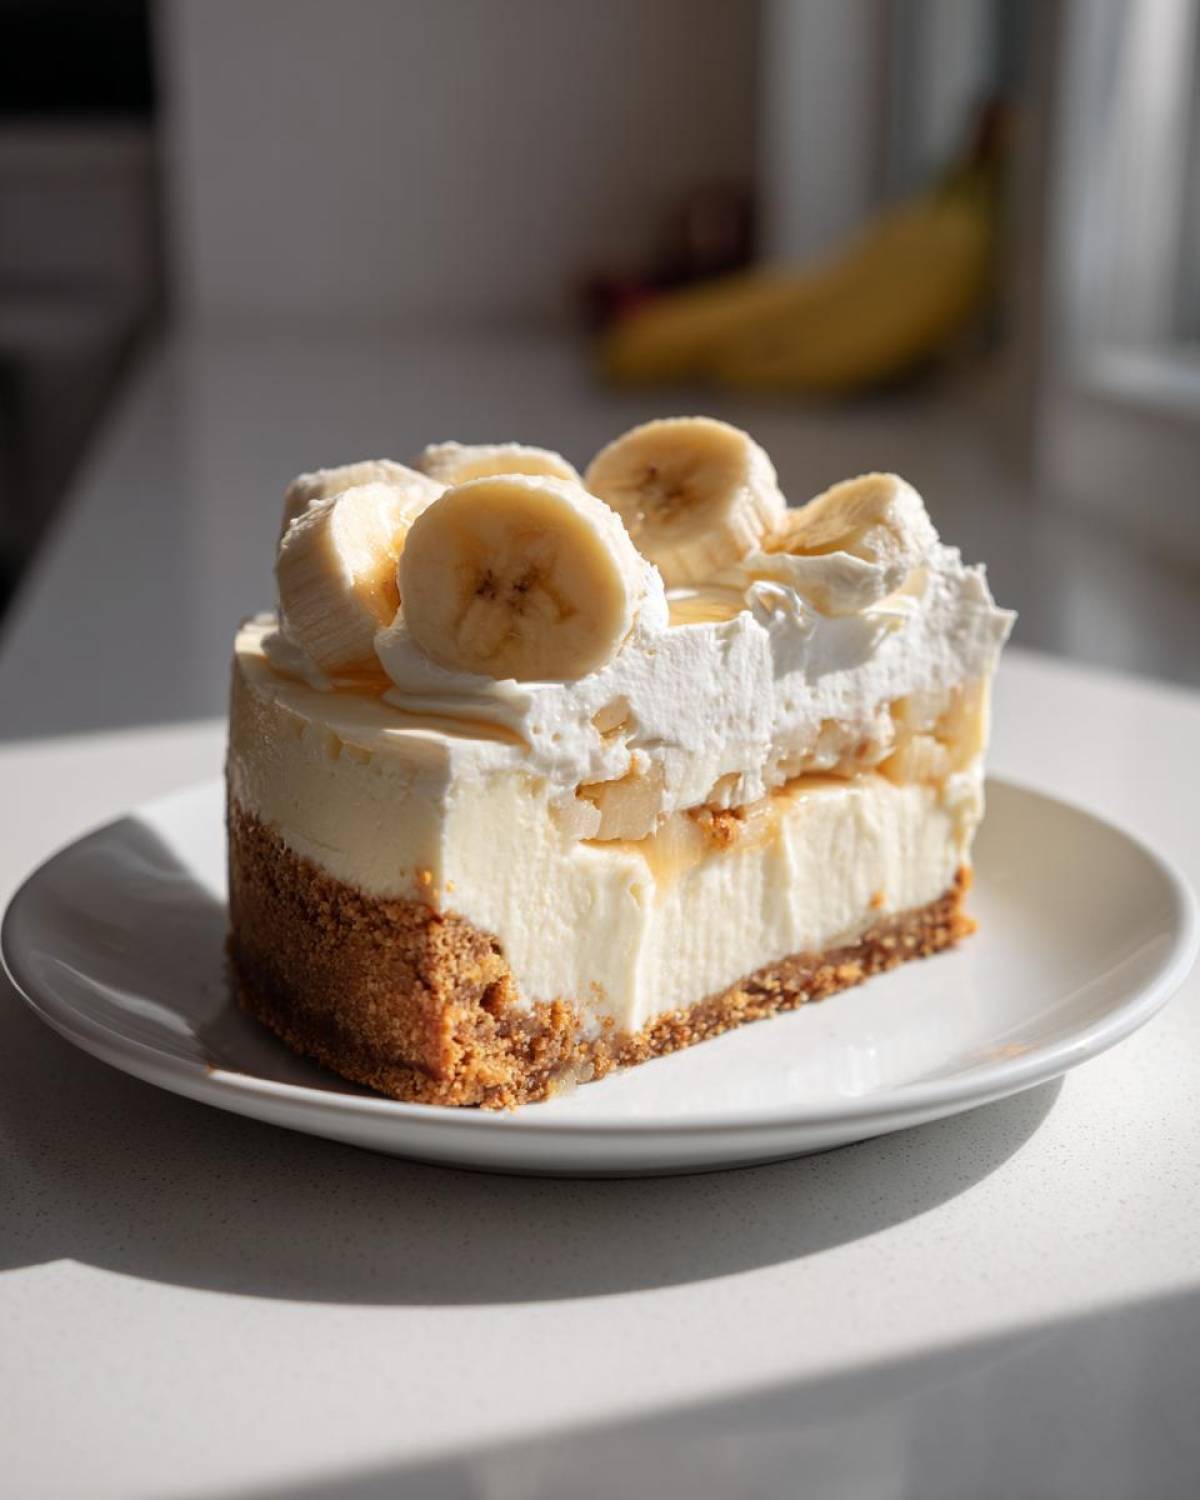
Here are a few ways I like to finish this showstopper:
- Extra Whipped Topping: Before serving, whip up another half cup of heavy cream with just a teaspoon of powdered sugar until soft peaks form. Dollop this in elegant swirls around the edges or right in the center.
- Nutty Crunch: Lightly toast some pecans or walnuts. You don’t want them too dark, just enough to bring out their oils. Roughly chop them and sprinkle them over the whipped cream. This adds fantastic texture contrast!
- Caramel Drizzle Finish: If you’re feeling extra indulgent, a very light drizzle of high-quality caramel sauce tastes amazing with the vanilla and banana notes. But go easy! A little goes a long way here. If you want to attempt a homemade drizzle, check out my tricks in this cinnamon roll apple pie recipe guide; the sauce technique is similar.
- Wafer Crumble Border: Take about ten extra vanilla wafers, crush them finely, and use them almost like decorative snow around the very edge of the plate or crust line. It’s a visual nod back to the base!
Remember, since the pudding layer tends to soften at room temperature, you want to slice and serve this pretty quickly after you pull it out of the fridge. Don’t let it sit out waiting for guests for too long, or the layers might start getting a little too cozy with each other!
Storage and Reheating Instructions for Banana Pudding Cheesecake with Vanilla Wafer Crust
Now for the hard part: waiting! Since this Banana Pudding Cheesecake with Vanilla Wafer Crust has both a baked cheesecake component *and* a fresh pudding/whipped cream topping, chilling is non-negotiable. You absolutely must let this set up for a minimum of six hours, but I’m telling you now, overnight is when it truly shines.
When you chill it, the flavors mingle; the vanilla wafer crust firms up perfectly, and the slightly softer pudding layer tightens right into the cheesecake filling without feeling dense. It’s like the dessert is thanking you for your patience. When it comes to storage, you need to protect those beautiful layers!
You must cover this cheesecake, but you can’t just slap plastic wrap directly onto the top, especially if you added whipped cream. That wrap will stick and ruin all your pretty swirls! The easiest trick is to use toothpicks—stick a few evenly spaced around the top rim of the springform pan before you cover it. This lifts the wrap up so it doesn’t touch the topping. If you don’t have those bits of advice handy, check out my general storage tips over on my creamy egg salad guide; keeping things covered properly applies everywhere!
As for reheating? Don’t even think about it! Cheesecakes really don’t like heat once they’ve set. If you try to warm this up, that lovely pudding layer will turn soupy and slide right off your perfect base. This dessert is meant to be served cold, straight from the fridge. If you’re worried you made too much, don’t be—it keeps wonderfully cold for three to four days, IF you manage to keep any leftovers away from other people! If you still have a slice left after 24 hours, you’re doing better than I ever do.
Frequently Asked Questions About Layered Cheesecake Pudding
It’s totally normal to have questions when you’re mixing two big desserts into one! This recipe for Layered Cheesecake Pudding is definitely an investment of time, but the results are worth it. I get asked the same things all the time when people start planning their bake. Let’s clear up the sticking points so you can avoid any kitchen dramas.
If you’re looking for an easier path, sometimes folks skip the baking entirely. You can find inspiration for no-bake styles, though this baked version really gives you that perfect creamy set. I did a quick overview of a no-bake style in my guide on no-bake pie cups if you need ideas!
Can I skip the water bath when making this Banana Pudding Cheesecake with Vanilla Wafer Crust?
Oh gosh, I really, really wouldn’t recommend it! I know it seems like a fussy extra step, but the water bath is the secret weapon to eliminating stress. Without it, the air in your oven is super dry and hot, causing the edges of the cheesecake to bake much faster than the center. That causes the cheesecake to pull away from the sides and crack wide open when it cools. The water bath creates a moist, steamy, gentle heat, which is *exactly* what the creamy filling needs for that silky, smooth texture you want in a Banana Pudding Cheesecake with Vanilla Wafer Crust. It just guarantees that gorgeous, unblemished surface.
How far in advance can I prepare this Ultimate Banana Vanilla Wafer Dessert?
This is the best part about a big baked cheesecake: it tastes better the next day! For the true melding of flavors—so the banana comes through but the cream cheese tang is still present—you really need to chill this for at least 12 hours, meaning overnight is ideal for this Ultimate Banana Vanilla Wafer Dessert. Six hours is the absolute bare minimum if you’re desperate, but honestly, chilling it overnight lets the moisture from the pudding layer gently redistribute into the cheesecake, making every bite even softer and richer. If you make it the day before your party, all you have to worry about the day of is taking it out of the fridge half an hour before slicing!
Can I convert this to a No Bake Banana Pudding Cheesecake?
That’s a great question! You certainly could go the no-bake route, but the structure will change quite a bit. If you go no-bake, you need to treat the filling more like a mousse that relies solely on the gelatin/pudding/whipped cream to set up instead of eggs. You would skip the oven entirely and let the base and filling chill until firm. The crust would be different, too—you’d probably mix the wafers with melted butter and sugar and chill it for an hour instead of baking it for 10 minutes. It’s a faster recipe, but you lose that dense, baked indulgence that makes this particular cheesecake so special!
Estimated Nutritional Data for This Rich Banana Custard Cheesecake Filling
Okay, let’s talk numbers for a minute. Because this Rich Banana Custard Cheesecake Filling has cream cheese, butter, sugar, and wafers, it is definitely a treat, not an everyday snack! I always tell people that a slice of this deserves a spot right next to your favorite things, like my broccoli and cheese casserole—delicious, but save it for special occasions!
Please keep in mind that these numbers are very rough estimates based on using standard grocery store brands for the ingredients listed. When you use heavier cream or a different brand of wafer cookies, things shift around a bit. But this gives you a solid ballpark figure for one generous slice, assuming you cut it into 12 servings as directed.
Here’s what you can generally expect per slice:
- Serving Size: 1 slice
- Calories: 450
- Sugar: 45g (Yep, more than a few teaspoons!)
- Fat: 28g
- Saturated Fat: 17g
- Carbohydrates: 45g
- Protein: 7g
If you are watching sodium, that comes in around 300mg. I know that sounds like a lot, but remember we are working with butter, cream cheese, and processed wafers here! It all balances out when you realize how amazing this Banana Pudding Cheesecake with Vanilla Wafer Crust tastes. You skip the nutritional breakdown when you are eating something this fantastic, right?
Share Your Banana Pudding Cheesecake with Vanilla Wafer Crust Creations
Whew! You made it! Now that you’ve baked, layered, and waited through the agonizing chill time for your Banana Pudding Cheesecake with Vanilla Wafer Crust, I desperately need to know how it turned out!
Honestly, seeing your photos is my favorite part of running this site. Did you get beautiful layers? Did your vanilla wafer crust hold up like a champ? Did you add a fun topping I didn’t even think of? Don’t keep all that glory to yourself! Drop a comment below and tell me everything—how long you chilled it, how many slices disappeared first, and anything you might change for next time.
If you snapped a picture of your beautiful Decadent Banana Cream Cheesecake (and let’s be real, it’s totally decadent), please share it on Instagram or Facebook and tag me! I love seeing this recipe come to life in different kitchens. It makes me feel like we’re all in this beautiful, sweet baking adventure together.
Also, if you followed the steps and truly loved the results, please click those little stars up top and leave a rating! Your feedback helps other bakers feel confident trying this masterpiece. If you’re ready for your next challenge, you can always browse through the rest of the sweet things I’ve been working on over on my main recipe page. Happy baking, friends!
PrintBanana Pudding Cheesecake with Vanilla Wafer Crust
A rich, layered dessert combining a creamy baked cheesecake filling with classic banana pudding flavors and a crunchy vanilla wafer crust.
- Prep Time: 30 min
- Cook Time: 75 min
- Total Time: 8 hours 45 min
- Yield: 12 servings
- Category: Dessert
- Method: Baking
- Cuisine: American
- Diet: Vegetarian
Ingredients
- 1 1/2 cups vanilla wafer crumbs (about 60 wafers)
- 1/4 cup granulated sugar
- 6 tablespoons unsalted butter, melted
- 3 (8 ounce) packages cream cheese, softened
- 1 1/2 cups granulated sugar
- 1 teaspoon vanilla extract
- 1/4 teaspoon salt
- 4 large eggs
- 1 (3.4 ounce) package instant vanilla pudding mix
- 1/2 cup cold milk
- 1 cup heavy cream, whipped
- 2 ripe bananas, thinly sliced
- 1/2 cup prepared banana pudding or custard (optional swirl)
Instructions
- Preheat your oven to 325 degrees F. Wrap the outside of a 9-inch springform pan tightly with heavy-duty aluminum foil.
- Prepare the crust: Combine vanilla wafer crumbs and 1/4 cup sugar in a bowl. Pour in melted butter and mix until evenly moistened. Press the mixture firmly into the bottom of the prepared springform pan. Bake for 10 minutes. Set aside to cool.
- Prepare the cheesecake filling: In a large bowl, beat the softened cream cheese, 1 1/2 cups sugar, vanilla extract, and salt until smooth. Beat in the eggs one at a time, mixing just until combined after each addition. Do not overmix.
- Pour half of the cheesecake batter over the cooled crust.
- Prepare the pudding layer: In a separate small bowl, whisk the instant vanilla pudding mix and cold milk for 2 minutes until slightly thickened. Gently fold in the whipped cream.
- Spread half of the sliced bananas over the cheesecake layer. Dollop half of the prepared pudding mixture over the bananas. If using, swirl in half of the optional banana pudding/custard.
- Pour the remaining cheesecake batter over the pudding layer. Top with the remaining sliced bananas and the remaining pudding mixture. If swirling, add the remaining optional custard.
- Place the foil-wrapped springform pan into a larger roasting pan. Carefully pour hot water into the roasting pan until it reaches halfway up the sides of the springform pan (water bath).
- Bake for 60 to 75 minutes, or until the edges are set but the center still has a slight jiggle.
- Turn off the oven, crack the door open slightly, and let the cheesecake cool in the oven for 1 hour.
- Remove the cheesecake from the water bath and let it cool completely on a wire rack. Refrigerate for at least 6 hours, preferably overnight, before serving. Remove the foil before chilling.
Notes
- For the smoothest crust, process the vanilla wafers in a food processor until fine crumbs form.
- Use room temperature ingredients for the cheesecake batter to prevent lumps.
- If you skip the water bath, watch the cheesecake closely to prevent cracking.
- Top with extra whipped cream and wafer crumbs just before serving.
Nutrition
- Serving Size: 1 slice
- Calories: 450
- Sugar: 45
- Sodium: 300
- Fat: 28
- Saturated Fat: 17
- Unsaturated Fat: 11
- Trans Fat: 0.5
- Carbohydrates: 45
- Fiber: 1
- Protein: 7
- Cholesterol: 95