

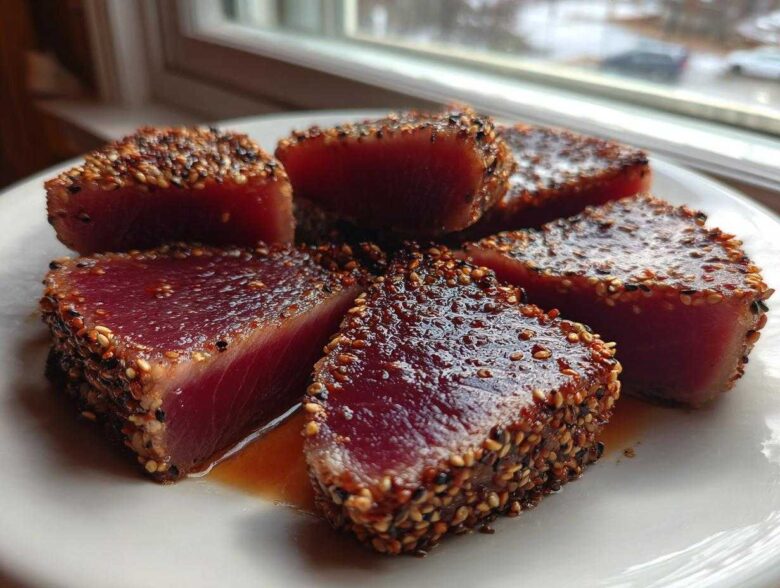
Oh my gosh, you have to try this! For years, I was terrified of searing fish at home. I thought that beautiful, perfect crust with that cool, raw center—the kind you get at those fancy Japanese spots—was impossible without professional equipment. Trust me when I say that struggle is over! This recipe for **Seared Ahi Tuna** is total magic. We’re talking restaurant quality, maybe even better, and you can have it on the table in less than 15 minutes. It took me way too long to figure out the secret to that high heat, but now that I have it down, I make this healthy dinner at least once a week. If you loved my tips for the poke bowl, you are going to adore how simple this is: click over here for those poke secrets. It’s just that good.
Why This Sesame Crusted Seared Ahi Tuna is Your New Favorite Quick Seafood Recipe
What makes this recipe more than just another fish dish? It just works, every single time, and fast! You absolutely have to try this for a busy weeknight when you want something that feels gourmet but takes almost no effort.
- It’s lightning fast—we clock in under 15 minutes total time.
- The Asian-inspired crust gives it such a fantastic crackle and flavor punch.
- That texture, oh my goodness, that perfect cool, rare center against the hot sear? Unbeatable.
- Plus, it’s a powerhouse! High in protein but super low fat. Check out my other quick, healthy dinner ideas for more inspiration.
Essential Ingredients for Perfect Seared Ahi Tuna
Okay, listen up, because the quality of your ingredients here is *everything*. Since we cook this so fast, there’s no hiding low-quality fish. You absolutely must buy **sushi grade tuna**. Seriously, don’t even attempt this with regular supermarket yellowfin tuna steak—it’s not safe, and it won’t taste right!
Here’s what you need for just two servings:
- Two beautiful 6-ounce ahi tuna steaks, about one inch thick—no excuses on thickness!
- 1 tablespoon of sesame oil (the toasted kind, please!).
- 1 tablespoon of soy sauce or tamari if you’re going gluten-free.
- 1 teaspoon of fresh ginger, grated right there on your microplane.
- 1 clove of garlic, minced super tiny.
- A beautiful mix: 1 tablespoon each of black sesame seeds and white sesame seeds for that incredible crust.
- Just a tiny pinch of black pepper.
If you want some more amazing recipes using these flavors, check out my best sesame crusted tuna steak recipe!
Ingredient Quality and Sourcing
The absolute must-have here is your tuna. You are looking for **sushi grade tuna**, or sashimi-grade if you can find it. For the best **yellowfin tuna**, look for steaks that have a really deep, almost ruby-red color. If they look pale or have a lot of those thick, milky white fat lines running through them, put them back. Those fatty bits won’t sear nicely; they just melt awkwardly. Since this cooking time is so short, you aren’t actually ‘cooking’ all the way through, so that raw center needs to be top-notch quality. That’s why ‘sushi grade’ is non-negotiable for this technique, okay?
Step-by-Step Instructions for Seared Ahi Tuna
This is where the magic happens, and honestly, it moves fast! Seriously, be organized because the moment that tuna hits the pan, you only have maybe two minutes tops before you need to flip it. The goal is a beautifully brown crust, but we want the center cold and nearly raw, which means you have zero margin for error on timing. Don’t worry if your first attempt feels rushed; after you’ve done it twice, you’ll be a master. Make sure you have everything measured out and ready to go before you even look at the stovetop. If you want to see other ways I cook tuna quickly, check out my recipe for grilled soy ginger tuna steak—it’s another winner!
Preparing the Tuna and Sesame Crust
First things first: drying! This is non-negotiable. Take your beautiful, cold tuna steaks and use paper towels to pat them down until they are completely, totally dry on every surface. Moisture is the enemy of the sear; damp fish steams, it doesn’t crust! Next, in a little bowl, go ahead and whisk up your marinade: the sesame oil, soy sauce (or tamari), that fresh ginger, and the minced garlic. Brush this yummy mixture evenly all over the steaks. Don’t be shy, but don’t let them soak! Then, mix your black and white sesame seeds on a plate. Press each side of the tuna steak firmly into that seed mix until it’s fully coated. I press down hard so those seeds stick tight, which prevents them from burning later.
Achieving the Ideal Seared Ahi Tuna Crust
Now, the heat test! You need a heavy skillet—cast iron is my absolute favorite because it holds heat like a champion. Get that pan screaming hot over high heat. I mean smoking hot, almost impossibly hot. You’re not adding oil to the pan itself, just to the marinade, because we want a dry, screaming-hot surface for the crust. Once the pan is radiating heat, gently place your crusted tuna steaks in there. For that perfect rare result we are aiming for, you are searing for just 60 to 90 seconds per side. If you want it just a tiny bit more cooked, maybe push it to two minutes, but that’s it! Once off the heat, let the tuna rest on a cutting board for about three minutes. This lets the juices settle before you slice it. Seriously, slicing against the grain is crucial for tenderness later!
Tips for Mastering Your Asian Tuna Recipe
Even though this recipe is wonderfully quick, mastering the sear takes a little practical know-how. It moves so fast, you have to anticipate the next step! I’ve picked up a few tricks over the years that make the difference between a good piece of fish and a showstopper of a plate. Here are my must-know secrets for turning out consistently amazing **Seared Ahi Tuna**.
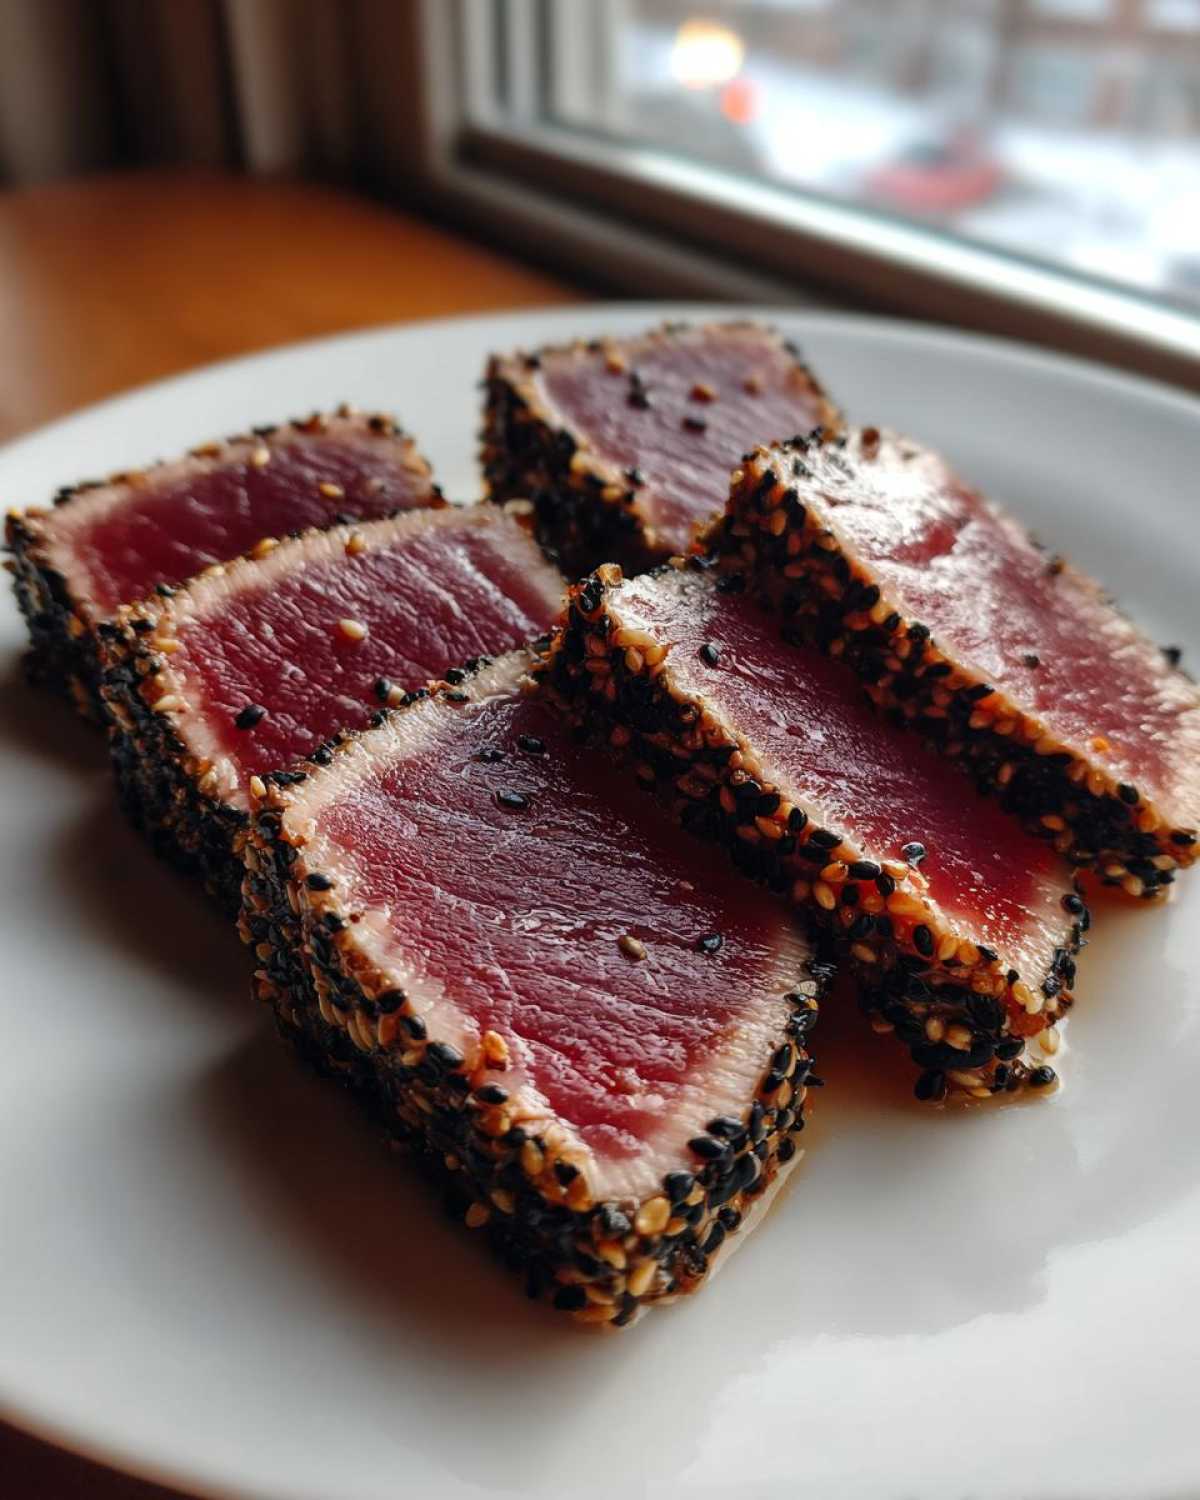
First, let’s talk about slicing. Once your tuna has rested—don’t skip that rest, even if it’s short—you have to slice it correctly to keep those lovely texture benefits we worked so hard for. Always slice your **yellowfin tuna** against the grain. Look closely at the steak; you’ll see white lines running across it. You want to cut perpendicular to those lines. This shortens the muscle fibers so every bite feels wonderfully tender, not chewy. If you cut parallel to the grain, you end up with long strands of tough fish, and nobody wants that!
My biggest pro-tip for heat management is this: clean your pan between batches if you’re cooking more than two steaks. Those tiny sesame seeds and caramelized bits of soy sauce are delicious, but they burn incredibly fast. If you leave them on the pan for a second batch, they’ll scorch the second round of tuna before it even gets a chance to crust up. Wipe the cast iron out with a paper towel—carefully, it’s hot!—and bring the heat back up before adding the next steak.
Also, don’t be afraid of the high heat, but respect it! If you see smoke pouring out of your kitchen and things are looking frantic, turn the heat down *just* a hair. We aren’t trying to burn the seeds off; we are trying to flash-sear the outside. If you smell burning instead of just hot sesame oil, pull it back a little. It’s a balancing act, but once you nail that pan temperature, you won’t look back. This technique is perfect for creating a stunning **healthy dinner** accompaniment, maybe served over some rice like in my quinoa bowl recipe: see the tuna quinoa bowl here!
And one last thing: don’t over-season after slicing. The marinade does most of the heavy lifting flavor-wise. A tiny sprinkle of flaky salt or that black pepper we mentioned is plenty. You want the clean flavor of the tuna and the nuttiness of the sesame to shine through!
Serving Suggestions for Your Gourmet Tuna
So, you nailed the sear? Fantastic! Now we have to make sure the rest of the plate lives up to that perfectly cooked **gourmet tuna**. Since this shines with those bright Asian flavors, keep your sides in that same wheelhouse. I rarely serve this without something starchy to soak up any rogue soy drizzle.
My top pick is always jasmine or sushi rice, maybe with a tiny bit of rice vinegar mixed in after cooking. But if you want greens, don’t just steam some broccoli! Try a quick, light sear on some asparagus or thinly sliced bok choy. Even better? A simple bed of shredded cabbage tossed with a tiny splash of lime juice and sesame oil.
If you feel like making a whole evening of it, ditch plain rice and whip up my stir-fried udon noodles—they are quick enough to make while the tuna rests! The goal is complementary textures: soft rice, crisp veggies, and that firm, tender fish on top. Enjoy!
Storage and Reheating Instructions for Leftover Seared Ahi Tuna
Okay, if you actually have leftovers of this **Seared Ahi Tuna**, you are ahead of the game because frankly, there rarely are any in my house! This **quick seafood recipe** is truly at its peak texture the second it comes off that hot skillet. That delicate crust and that cool, almost raw center just disappear when you try to reheat it later. So, here’s my strict advice: don’t reheat it!
If you absolutely must store some, treat it like high-quality cold cuts. Wrap the slices tightly in plastic wrap or tuck them into an airtight container. Keep it in the coldest part of your fridge for no more than one day. I’m talking one day, tops. That perfect sear is going to soften up significantly overnight, and we lose that amazing contrast.
Instead of trying to warm it up in a pan or microwave—which would honestly ruin its beautiful texture—use the leftover tuna cold! It makes a fantastic, impromptu addition to a fresh salad the next day. I often chop up the cold slices and toss them directly into a bowl with greens and a light vinaigrette. It’s a different experience, but still surprisingly delicious and much better than trying to bring back that initial sear. If you are looking for another great cold tuna lunch idea, I have a solid recipe for a Mediterranean tuna bowl that works great with any leftover cooked fish!
Frequently Asked Questions About Seared Ahi Tuna
I totally get it; when you’re working with such a high-quality product like **sushi grade tuna**, you want to make absolutely sure you nail the technique. People always ask me the same few things when they try this **healthy dinner** for the first time. Let’s go over the biggest questions I get about getting that perfect sear!
Can I use frozen tuna steaks for this Asian tuna recipe?
Oh, that’s a sticky one. My honest advice? No, try to avoid frozen if you can for this specific recipe. Because the searing time is so incredibly short—we are talking 90 seconds a side—the tuna has to be perfectly dry and starting at a consistent temperature. If you try to sear a partially frozen or unevenly thawed steak, you end up with some sides that are completely grey and overcooked while the center is still icy cold and raw. It’s just a recipe for disaster if you rush the thawing process!
If you absolutely *must* start from frozen, you have to thaw it perfectly in the fridge overnight, and then, you must place the steaks on paper towels well ahead of time and gently pat them dry multiple times until zero moisture comes off. Seriously, you have to treat that thawed fish like it’s been sitting out in the sun if you want a crust!
What is the safest way to check if my Seared Ahi Tuna is done?
This is probably the most important question since we want that rare center! Since the goal for **Seared Ahi Tuna** is usually rare to medium-rare, safety is tied directly to your cook time—you trust the time more than anything else here. If you followed the 60 to 90 seconds per side rule, you are almost certainly good to go.
Visually, you’ll know it’s ready because the color change only goes about a half-inch inward from the edges. The outside should look opaque and deeply colored by the sesame seeds, but when you look at the very center of the thicker part of the steak, it should still look deep red and almost glistening. If you happen to have a fast-read thermometer—which isn’t traditional for this method but is helpful for beginners—you’re aiming for an internal temperature right around 115°F to 120°F before resting. But honestly, trust your eyes and the clock on this one; it happens so fast!
For more great ways to serve tuna when you nail the sear, check out my easy spicy tuna wrap recipe—great for using up leftovers cold!
Estimated Nutritional Snapshot for This Healthy Dinner
I always include this because I know so many of you are counting macros or just making sure you’re putting good fuel in your bodies! This **Seared Ahi Tuna** recipe is truly a fantastic option when you’re looking for a protein-packed, low-fat meal. It just feels so luxurious, but the nutrition panel is surprisingly clean.
Keep in mind that these numbers are just estimates, right? They are based on using the exact measurements in the recipe and the standard values for **yellowfin tuna**. Your actual numbers might shift slightly depending on the brand of soy sauce you use or exactly how thick your steaks end up being. So, take this as a nice guide rather than an unbreakable law!
Here’s the breakdown per serving (which is one steak):
- Calories: Around 250—that’s incredibly reasonable!
- Protein: A huge 32 grams! Amazing for keeping you satisfied.
- Fat: Just about 12 grams total, which is really low considering the sesame oil we brush on.
- Carbohydrates: Very minimal, only about 3 grams.
- Sugar: Practically zero, only 1 gram!
It’s a fantastic foundation for a **healthy dinner**. You can load up your plate with non-starchy veggies, and you are golden. Because we aren’t frying these steaks, we keep the saturated fat super low along with the carbs. Remember what I always say: food this good should taste incredible *and* make you feel great afterward!
Share Your Perfect Seared Ahi Tuna Results
Now that you’ve conquered the high heat and learned the secret to that perfect crust, I absolutely want to hear about it! Cooking is all about community, and sharing our kitchen wins makes the next time even better, right? Did you manage that 90-second sear? Did your **yellowfin tuna** turn out that perfect rare shade in the middle?
Don’t be shy! Pop down to the comments below and leave me a rating. Seriously, your feedback helps other hesitant home cooks give this technique a try, and I love seeing when you master something that used to intimidate me!
If you took a picture of your stunning final plate—maybe you paired it with some rice or a light salad—I would be thrilled if you tagged me on social media! Show off that gorgeous edge-to-edge sear. Seeing your masterpieces is honestly the best part of running this blog. If you are always looking for my newest experiments and recipe failures (and successes!), make sure you check out my main blog page for everything new happening in my kitchen!
Happy searing, and I can’t wait to see your incredible results!
PrintSimple Seared Ahi Tuna Steaks
A quick recipe for perfectly seared sushi-grade ahi tuna with an Asian-inspired crust.
- Prep Time: 10 min
- Cook Time: 4 min
- Total Time: 14 min
- Yield: 2 servings
- Category: Dinner
- Method: Pan-Searing
- Cuisine: Asian-Inspired
- Diet: Low Fat
Ingredients
- 2 (6-ounce) ahi tuna steaks, about 1 inch thick
- 1 tablespoon sesame oil
- 1 tablespoon soy sauce or tamari
- 1 teaspoon grated fresh ginger
- 1 clove garlic, minced
- 1 tablespoon black sesame seeds
- 1 tablespoon white sesame seeds
- Pinch of black pepper
Instructions
- Pat the tuna steaks completely dry with paper towels.
- In a small bowl, whisk together the sesame oil, soy sauce, ginger, and garlic. Brush this mixture evenly over all sides of the tuna steaks.
- On a plate, mix the black and white sesame seeds. Press each side of the tuna steaks into the seed mixture until well coated.
- Heat a heavy skillet (cast iron works well) over high heat until very hot.
- Place the crusted tuna steaks in the hot, dry skillet. Sear for 60 to 90 seconds per side for rare (cool, raw center) or up to 2 minutes per side for medium-rare.
- Remove the tuna from the skillet and let it rest on a cutting board for 3 minutes.
- Slice the tuna against the grain into half-inch thick pieces. Season lightly with black pepper before serving.
Notes
- Use only sushi-grade or sashimi-grade tuna for this recipe.
- Adjust searing time based on your desired doneness.
- Serve immediately with soy sauce or wasabi on the side.
Nutrition
- Serving Size: 1 steak
- Calories: 250
- Sugar: 1
- Sodium: 350
- Fat: 12
- Saturated Fat: 2
- Unsaturated Fat: 10
- Trans Fat: 0
- Carbohydrates: 3
- Fiber: 1
- Protein: 32
- Cholesterol: 70