

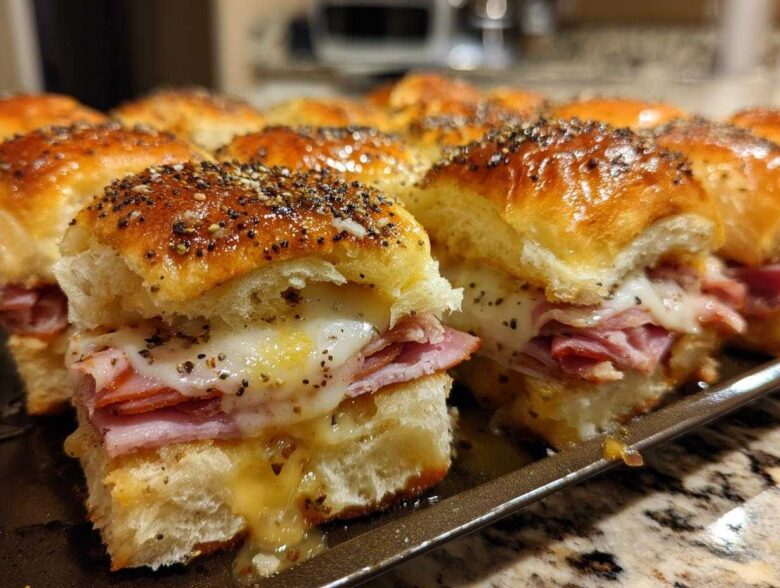
Okay, I’m going to let you in on a secret snack that has saved my skin during every single potluck, holiday gathering, and random Tuesday night that suddenly felt fancy. Forget fussy appetizers; we are talking about the glorious, barely-any-effort magic of Ham and Cheese Sliders made on Hawaiian rolls. Seriously, these party sandwiches are foolproof. The real superstar here isn’t just the sweet rolls or the melty Swiss; it’s the buttery mustard glaze I brush right over the top. I first made these Ham and Cheese Sliders for a huge tailgate party last fall, and I swear they disappeared before the fourth quarter even started. They are just so addicting!
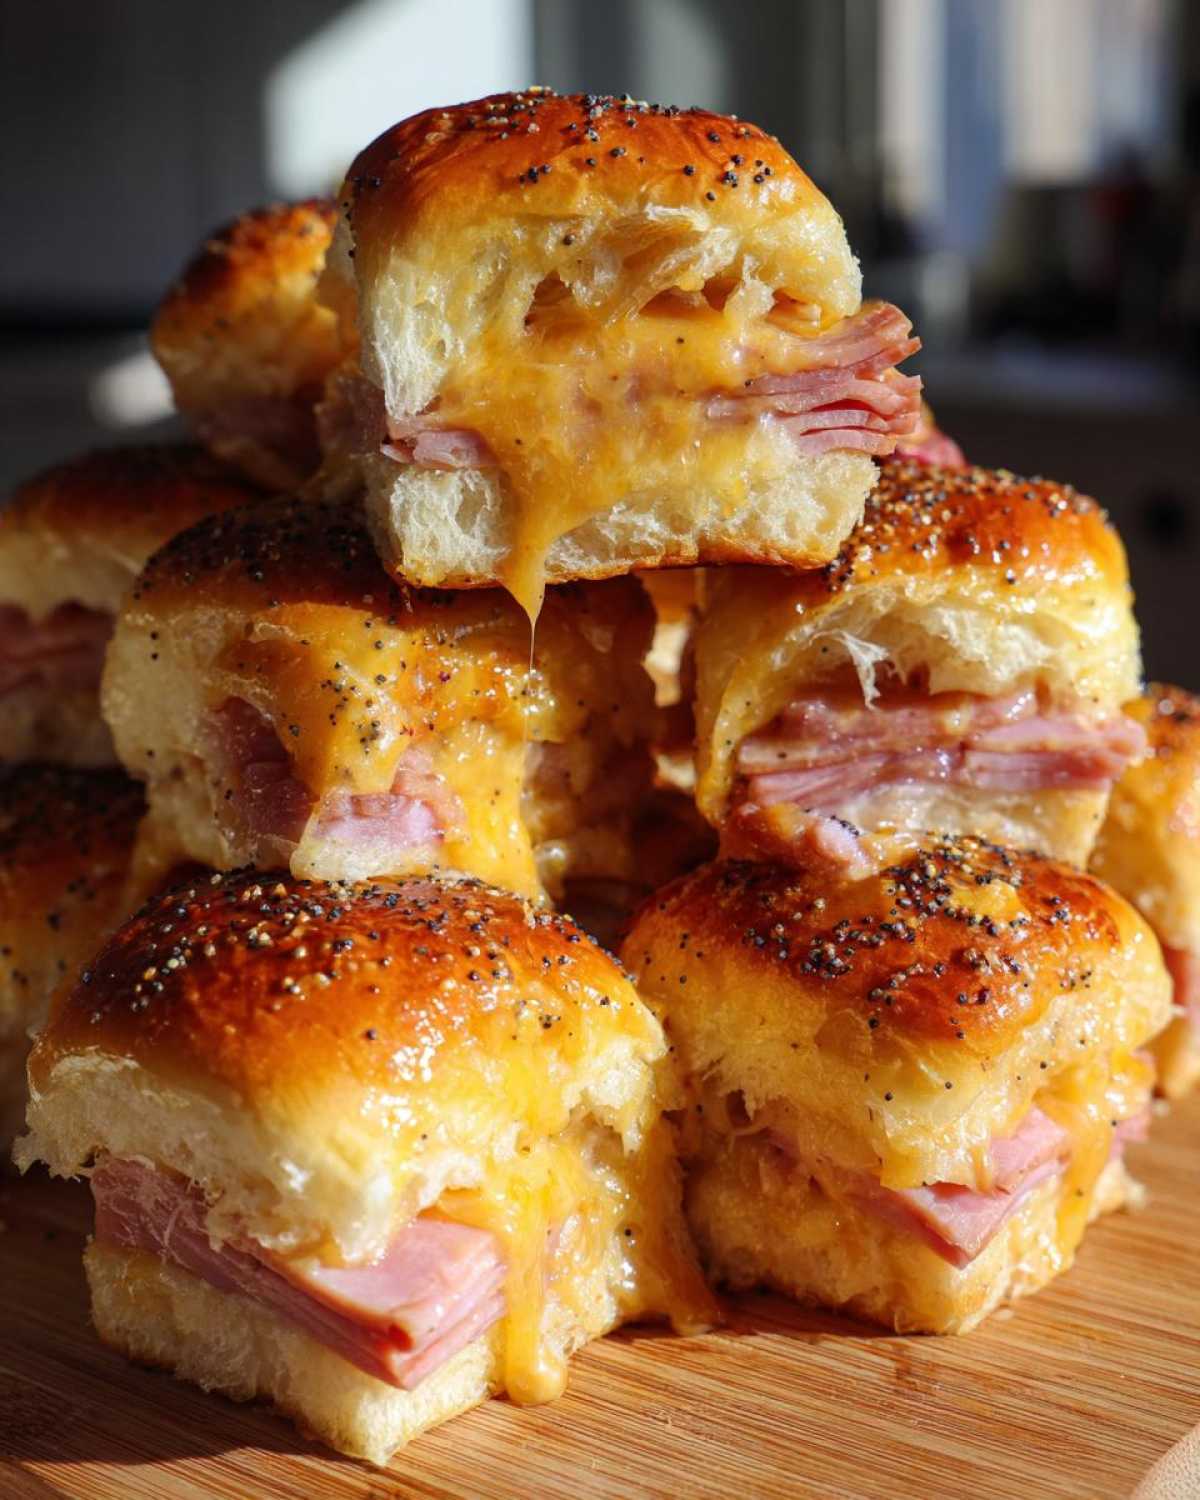
Why You Will Make These Ham and Cheese Sliders Again and Again
Look, I get it. Party planning is chaos. That’s why these baked sliders keep ending up on my menu rotation. They really solve so many problems at once, which is exactly what you need when you’re rushing to get out the door.
- They are lightning fast. Prep takes maybe ten minutes flat!
- Cleanup is practically non-existent—just one baking dish.
- You can assemble the whole thing the day before!
- The buttery, sweet-and-savory flavor combination is universally loved by everyone, from tiny toddlers to my picky uncle.
If you want to impress without stressing, these are your go-to recipe. I always bookmark the instructions on my favorites list so I don’t even have to search for them next time!
Essential Ingredients for Perfect Ham and Cheese Sliders
You only need a handful of things, which is part of the budget-friendly fun here! Since these are so simple, the quality of your core ingredients really sings through, so don’t skimp on the rolls.
- Get one full package of those soft, sweet Hawaiian sweet rolls—the whole 12-count package is what we need to keep them connected.
- For the meat, you need about a pound of ham, and I mean thinly sliced deli ham. I like to layer it so it’s just covering the bread completely.
- Cheese-wise, a pound of very thinly sliced Swiss cheese is my go-to. We need that nice nutty flavor to balance the sweet roll!
- The glaze is the secret sauce! You’ll need one stick of unsalted butter, and make sure it’s fully melted down before you start whisking things together.
- Don’t forget two generous tablespoons of Dijon mustard—it adds the necessary little zing.
- We round out the glaze with one tablespoon of Worcestershire sauce, one teaspoon of onion powder, and the real crowd-pleaser: one teaspoon of poppy seeds sprinkled on top at the very end!
Expert Tips for Assembling Your Ham and Cheese Sliders
This is where we move from just putting bread and meat together to creating something truly spectacular. The magic in these party sandwiches lies in how you handle the rolls. You absolutely must slice the entire package of Hawaiian rolls horizontally in one go, like you’re cutting a giant loaf of bread open. Don’t try to separate them first!
Keeping them connected in the pan is key for that perfect, pull-apart experience later. And when you layer your Swiss cheese, take a second to really make sure it covers the ham edge-to-edge. Nobody wants a dry, cheeseless bite around the perimeter when those gooey centers are calling your name. If you want to check out another great appetizer idea while the oven heats up, I always keep the recipe for these amazing garlic knots handy!
Creating the Signature Buttery Mustard Glaze for Ham and Cheese Sliders
This glaze, folks, this glaze is the heartbeat of the whole operation for these tailgate foods. In a small bowl—I usually just use a ramekin—you combine that melted butter, the Dijon mustard, the Worcestershire sauce, and the onion powder. Whisk it up until it looks smooth and shiny. You want to brush this mixture over the entire top surface of the upper layer of rolls. Don’t be shy, but try to get it mostly even. Right after that, sprinkle your poppy seeds liberally over the top. They toast up beautifully!
Step-by-Step Instructions to Bake Your Ham and Cheese Sliders
When it comes to getting these baked sliders into the oven, it flows exactly like a well-rehearsed dance. You’ll be amazed how quickly everything comes together, especially after you’ve prepped your layers!
- First things first: crank that oven up to 350 degrees Fahrenheit. While it’s warming, take a quick second to lightly grease whatever 9×13 inch baking dish you are using.
- Now for the big move! Take that whole package of Hawaiian rolls and carefully slice them horizontally right through the middle. Keep them connected as one giant sheet—that’s the trick! Place the bottom half right in your prepared dish.
- Layer all that beautiful, thinly sliced ham evenly across those bottom rolls, making sure you cover everything up nice and neat.
- Next, the Swiss cheese goes on top of the ham. Again, try to get the coverage as even as you can so every bite is cheesy!
- Gently place the top half of your rolls right back over that cheese layer. They should sit perfectly.
- It’s time for the glaze we just whisked up. Use a pastry brush—or the back of a spoon if you’re me sometimes—and brush that buttery mustard mixture evenly all across that top layer.
- After the glaze is spread, sprinkle those poppy seeds right on top! They just toast up perfectly.
- Now, cover the whole dish tightly with aluminum foil. We want to trap that steam so everything gets nice and soft.
- Bake it covered for 15 minutes at 350°F. Then, carefully remove the foil and let those amazing ham and cheese sliders bake for another 5 to 10 minutes until the cheese is completely melted and the tops are just starting to turn golden brown.
- Let them rest! This is important. Let them sit for about 5 minutes before you start slicing them apart so the cheese can set up just a little! If you’re looking for other great baked appetizers, you should check out my baked chicken taquitos recipe too!
Make Ahead and Storage Tips for Your Party Sandwiches
I cannot stress this enough: these are the ultimate make ahead appetizers for when you’re hosting! You can totally assemble these Hawaiian roll sliders completely—ham, cheese, glaze, the works—up to 24 hours before guests arrive. Just make sure you cover that baking dish tightly with plastic wrap or foil and stick it straight into the refrigerator.
Here’s the catch though: if you’re baking them straight from the fridge, you need to adjust the timing. Don’t panic, it’s easy! Just add about 5 to 10 extra minutes to that initial covered baking time. You need that extra warmth to bring the rolls up to temperature before the cheese busts out melting.
If you have any leftovers (which is rare in my house!), just wrap the remaining ones tightly and keep them in the fridge for up to three days. Reheat single servings in the microwave, or pop the whole dish back in the oven covered at 325°F until gooey again. If you need a no-bake option for another day, check out my trail mix bars!
Variations on Classic Ham and Cheese Sliders
While the Swiss and ham slider combination is classic for good reason, sometimes I get bored just dialing up the same recipe, you know? These party sandwiches are so sturdy that they handle substitutions like a champ! If you’re out of Swiss cheese, give provolone a shot. It melts beautifully and gives a slightly different flavor profile.
Cheddar is another winner, especially if you use a sharp kind to cut through some of that sweetness from the Hawaiian rolls. You can even swap the ham out entirely for sliced turkey breast if you’re feeling it. My absolute favorite trick, though, is adding a thin layer of pickle slices right on top of the ham layer before the cheese goes on. It gives you a little acidic pop that cuts the richness perfectly.
If you want to try serving these alongside something completely different, perhaps a great meat wrap, you should peek at the recipe for my chicken shawarma wraps! These sliders are adaptable!
Serving Suggestions for Game Day Sliders
You’ve got these incredible, pull-apart bites ready to go, but what do you serve beside them? Since these game day sliders are quite rich thanks to the butter and cheese, you want sides that are either crunchy or offer a fresh contrast. I usually bring a big bowl of crisp potato chips—always!
If I’m feeling like I need to balance out all that savory goodness, I’ll whip up a quick batch of my homemade dip recipe. Seriously, you have to try the guacamole I make with those baked tortilla chips; it’s such a winner! A simple pasta salad or some crunchy coleslaw also works great if you need something cold and refreshing to round out the spread.
Frequently Asked Questions About Ham and Cheese Sliders
I always get questions about these sliders after parties, so here are the things I hear most often about making these amazing baked sliders!
Can I use different rolls besides Hawaiian rolls for these sliders?
Well, you certainly *can*, but I wouldn’t recommend it if you want the real flavor experience! The sweetness of the Hawaiian roll sliders is what makes that buttery mustard glaze absolutely pop. If you absolutely must substitute, look for a soft, slightly sweet dinner roll, but know they won’t have the exact same texture after they bake up.
What is the best way to slice these Ham and Cheese Sliders after baking?
This is a crucial step, so pay attention! The trick is to let them rest for about five minutes after they come out of the oven. Then, grab a large serrated knife—the kind you use for bread. Instead of trying to pull them apart while they are still hot and gooey (which just makes a mess!), treat the whole block like a loaf of bread and slice straight down between the rolls. They separate perfectly every single time!
Can I freeze these fully assembled Ham and Cheese Sliders?
Yes, you can definitely freeze the assembled sliders before you bake them! Just cover that baking dish really, really well with layers of plastic wrap and then foil. Pop it in the freezer for up to a month. When you’re ready to bake them, follow the make-ahead instructions and add that extra 5 to 10 minutes to the covered baking time to let them thaw and heat through properly. It’s great for busy weeks!
Do I have to use Swiss cheese?
Nope! Swiss is my favorite because it melts so nicely and has that classic pairing with ham, but don’t let that stop you from experimenting. Provolone is fantastic and melty, and a good sharp white Cheddar is always a crowd-pleaser too. Just make sure whatever you pick is sliced thin so it melts evenly!
If you want to know more about my kitchen philosophy, you can check out the About Us page!
Estimated Nutritional Snapshot for Ham and Cheese Sliders
Okay, let’s talk numbers! Since these are packed with ham, sweet rolls, and that incredible buttery glaze, they definitely have some heft, but they are totally worth it for a party staple. I pulled these figures together based on standard ingredient brands, so keep that in mind!
- Serving Size: 1 slider
- Calories: 280
- Fat: 14g
- Saturated Fat: 8g
- Carbohydrates: 25g
- Sugar: 8g
- Protein: 15g
Remember, this is a snapshot for just one of these little beauties. If you eat three—and trust me, it happens when you’re serving them fresh from the oven—you’ll need to calculate accordingly! For more detailed information on how we come up with these numbers, you can always check out the site disclaimer page. Happy snacking!
PrintHam and Cheese Sliders with Buttery Mustard Glaze

Assemble simple ham and cheese sliders using Hawaiian rolls, topped with a savory buttery mustard glaze, perfect for baking or making ahead for gatherings.
- Prep Time: 10 min
- Cook Time: 25 min
- Total Time: 35 min
- Yield: 12 servings
- Category: Appetizer
- Method: Baking
- Cuisine: American
- Diet: Vegetarian
Ingredients
- 1 (12 count) package Hawaiian sweet rolls
- 1 pound thinly sliced deli ham
- 1 pound thinly sliced Swiss cheese
- 1/2 cup (1 stick) unsalted butter, melted
- 2 tablespoons Dijon mustard
- 1 tablespoon Worcestershire sauce
- 1 teaspoon onion powder
- 1 teaspoon poppy seeds
Instructions
- Preheat your oven to 350 degrees Fahrenheit. Lightly grease a 9×13 inch baking dish.
- Slice the entire package of Hawaiian rolls horizontally, keeping the rolls connected. Place the bottom half of the rolls in the prepared baking dish.
- Layer the ham evenly over the bottom layer of rolls.
- Layer the Swiss cheese evenly over the ham.
- Place the top half of the rolls over the cheese layer.
- In a small bowl, whisk together the melted butter, Dijon mustard, Worcestershire sauce, and onion powder.
- Brush the butter mixture evenly over the top of the rolls. Sprinkle the poppy seeds over the glaze.
- Cover the baking dish tightly with aluminum foil.
- Bake for 15 minutes covered. Remove the foil and bake for another 5 to 10 minutes, or until the cheese is melted and the tops are lightly golden brown.
- Let the sliders rest for 5 minutes before slicing between the rolls for individual servings.
Notes
- You can assemble these sliders up to 24 hours ahead of time. Cover and refrigerate until ready to bake. Add 5 to 10 minutes to the covered baking time if baking directly from the refrigerator.
- For easy slicing, use a serrated knife to cut through the connected rolls after baking.
Nutrition
- Serving Size: 1 slider
- Calories: 280
- Sugar: 8
- Sodium: 750
- Fat: 14
- Saturated Fat: 8
- Unsaturated Fat: 6
- Trans Fat: 0.5
- Carbohydrates: 25
- Fiber: 1
- Protein: 15
- Cholesterol: 40