

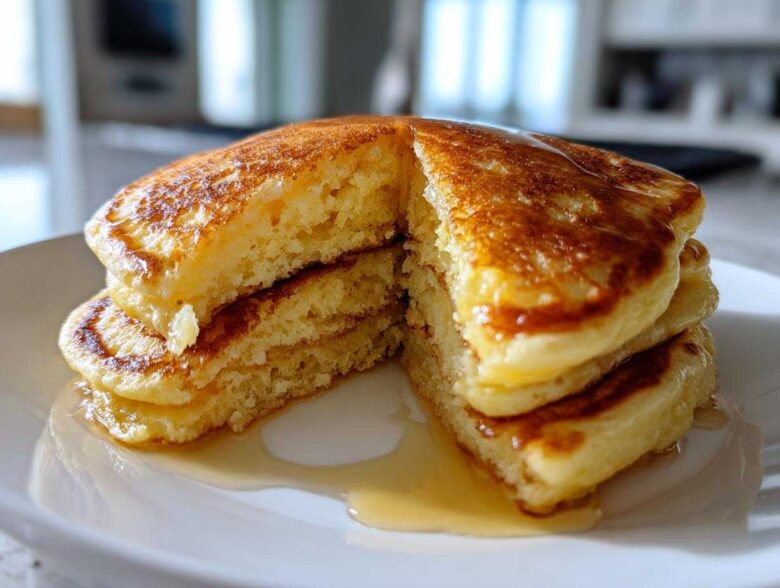
If you’ve ever stared mournfully at a stack of breakfast flatbreads, wondering where your Saturday morning dreams of towering, fluffy perfection went, then trust me, I have been exactly where you are! I spent years trying every single trick I could find for making proper, thick, airy homemade pancakes. Seriously, I tried adding whipped egg whites, using sparkling water—you name it, I tried it, and still ended up with thin excuses for discs. But folks, I finally cracked the code. This recipe for The Absolute Best Fluffy Old-Fashioned Buttermilk Pancakes is the one that changed everything. We’re talking about real, substantial, classic American pancakes that practically float off the plate. Say goodbye to sad, flat breakfasts forever!
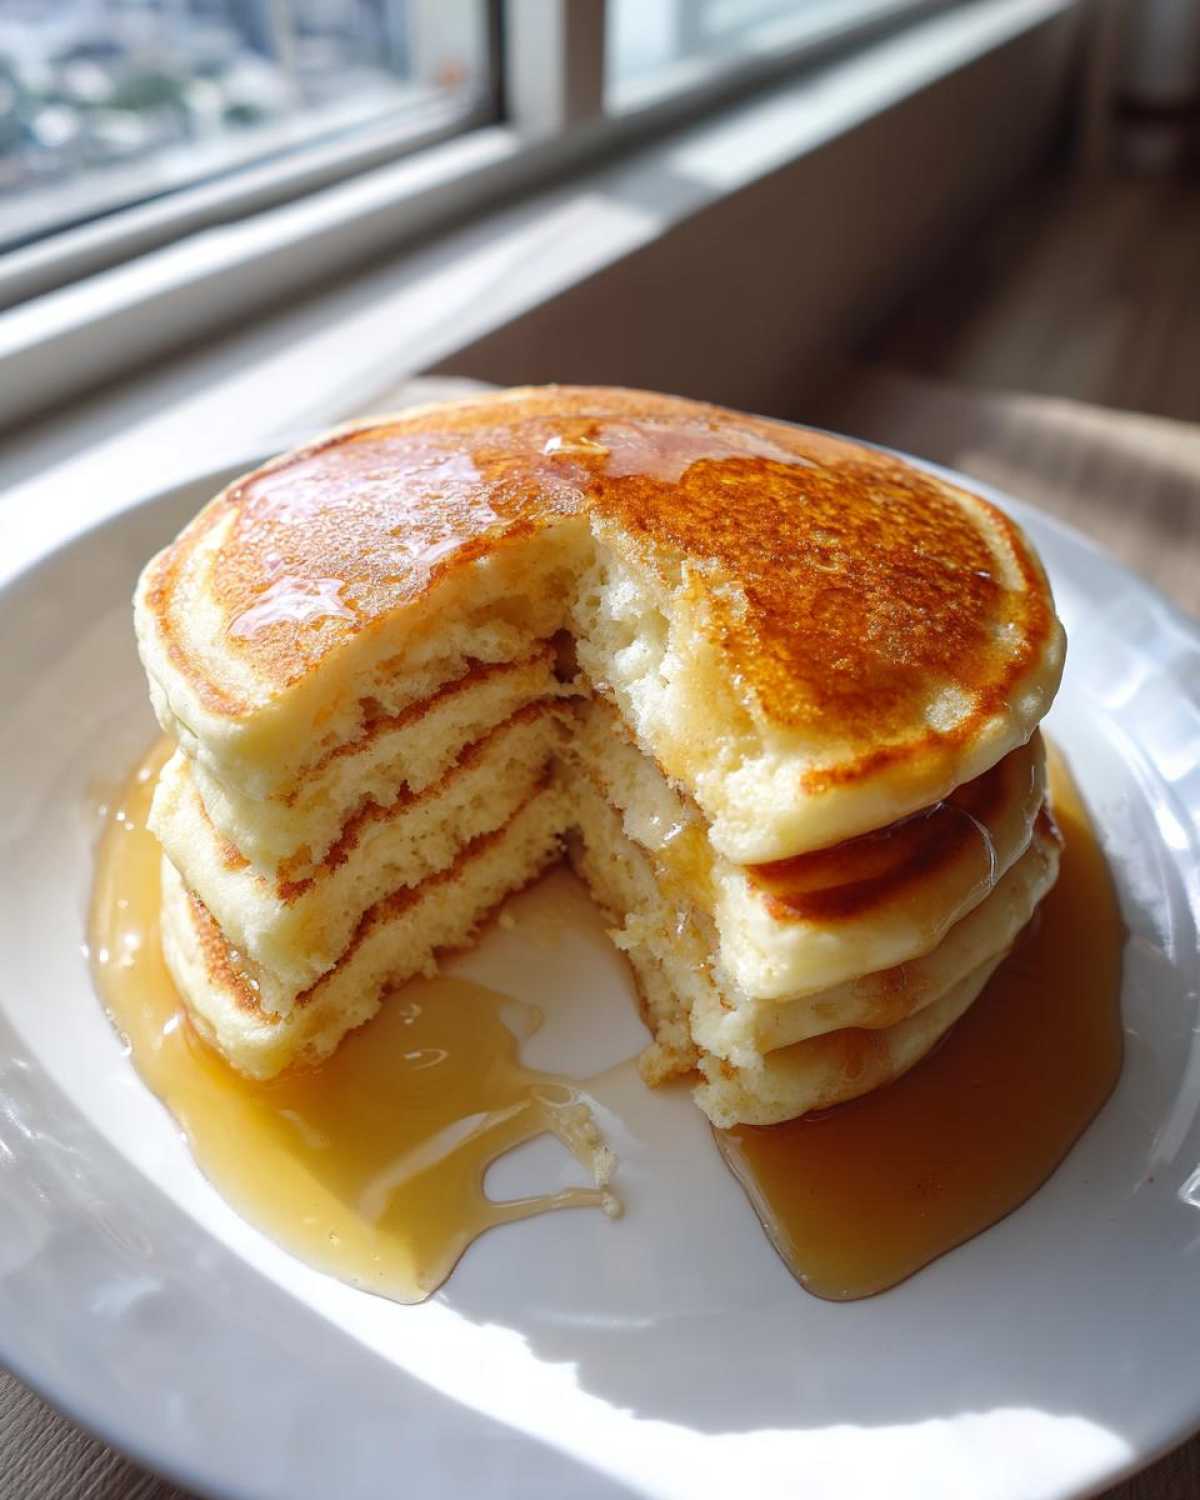
What makes these the go-to batch? It’s the buttermilk, that beautiful acidic tang that works magic with the baking soda. My first attempts at making pancakes were always disappointing until I stopped treating the batter like regular cake mix. You have to treat it gently! Once I learned the patience required for the rest period and committed to never, ever stirring out those lumps, that’s when the magic really happened. These aren’t fancy churro pancakes; this is the foundational recipe you’ll want to use every single weekend. I promise you, once you try this simple pancake batter, you won’t go back.
Why These Are The Best Fluffy Old-Fashioned Buttermilk Pancakes
I’m telling you, this recipe works because we respect the ingredients and the chemistry! We aren’t fussing with weird things here; we are focusing on creating the absolute best texture possible for your weekend brunch. These pancakes are worth bragging about.
- The reaction between the buttermilk and the baking soda gives us that immediate lift.
- We use both baking powder AND soda for a double dose of airy power!
- The rest time is non-negotiable—it lets the gluten relax so things stay light, not chewy.
Achieving Thick and Fluffy Breakfast Texture
That classic, thick and fluffy breakfast stack you see on every menu? That’s what we’re making! The secret sauce here is the team effort between our leavening agents. Baking soda loves the acid in the buttermilk, creating quick bubbles. Then, the baking powder gives those bubbles a chance to set up nice and firm while the batter rests for those crucial five minutes. It’s science, but it tastes like heaven!
Simple Ingredients for Easy Homemade Pancakes Recipe
You don’t need a trip to a specialty store for this. This is the ultimate easy homemade pancakes recipe because everything—flour, sugar, salt—is already hanging out in your cupboards. If you’ve got milk and lemon juice, you’ve got buttermilk! We rely on accessible staples to get that perfect from-scratch taste every single time.
Gathering Ingredients for Your Buttermilk Pancakes
Before we even *think* about heating up that skillet, we need to make sure our ingredient lineup is ready. Getting the measurements right is step one in making these fantastic homemade pancakes. Don’t try to eyeball this part—precision matters when you’re aiming for that perfect rise!
You’ll need the full roster for about 10 to 12 beautiful pancakes. Keep everything measured out and ready to go (mise en place, as the fancy chefs say, but I just call it being organized!):
- 2 cups all-purpose flour (The base!)
- 2 tablespoons white sugar (Just enough sweetness, not too much.)
- 2 teaspoons baking powder (For that initial lift.)
- 1 teaspoon baking soda (To react with the buttermilk.)
- 1 teaspoon salt (Flavor balance is key, don’t skip it!)
- 2 cups buttermilk (This is our secret weapon for tang and texture.)
- 2 large eggs (Room temperature is ideal, if you remember!)
- 4 tablespoons unsalted butter, melted (Plus extra for the griddle—gotta grease that pan!)
Ingredient Notes and Substitutions for Perfect Pancakes
Okay, so what happens if you wake up dreaming of pancakes but the buttermilk carton is empty? Don’t panic! You absolutely can make these from scratch. This is a classic American pancake staple, and substitutions are part of the tradition. This will still yield amazing pancakes.
If you’re out of buttermilk, here is my tried-and-true trick: take 2 cups of your regular milk—whole milk is best here, but 2% works—and stir in 2 tablespoons of white vinegar or fresh lemon juice. Let that sit on the counter for about five minutes. You’ll see it start to curdle slightly; that’s exactly what you want. That little bit of acid is what makes the baking soda giggle and ensures your pancakes puff up just right, even if they aren’t technically ‘buttermilk’ anymore!
Also, make sure that butter is melted but not scorching hot when you fold it in. Hot butter can cool down your other ingredients too fast, and we want everything ready to mingle when the time comes.
The Foolproof Pancake Recipe: Step-by-Step Instructions
Alright, this is where the real fun begins! We take those lovely ingredients we just gathered and turn them into the fluffiest pancakes you’ve ever imagined. The order of operations here is what stops you from making those sad, flat layers. Follow this sequence closely, and you’ll be flipping gold in no time!
- First things first, get your dry team together. In the biggest bowl you have, whisk up the flour, sugar, baking powder, baking soda, and salt until they look uniform. This is much better than just dumping everything in at once!
- Grab a separate, medium bowl for your wet squad. Give the buttermilk and the eggs a nice, gentle whisk. We aren’t trying to whip them into a frenzy, just get them acquainted.
- Now, pour that wet mixture right into the big bowl with the dry stuff. Here is where you need the most restraint! Gently whisk—and I mean *gently*—until the ingredients are mostly mixed. If you see a few lumps of flour still hanging around, STOP WHISKING. Seriously, lumps are your friends here.
- Once you’ve barely mixed it, it’s time for the melted butter. Just gently fold that in until it disappears.
- Crucially, let this batter rest right there on the counter for exactly 5 minutes. This rest time is key! It lets the leavening agents start working their charm without being abused by constant stirring.
- While it rests, get your cooking tool ready. Heat up a big nonstick griddle or skillet over medium heat. Don’t rush this part; the temperature has to be perfect. You know it’s ready when you flick a tiny drop of water onto the surface and it sizzles loudly and vanishes instantly. Lightly grease it with butter or spray.
- Grab about 1/4 cup of that rested batter and pour it onto the hot griddle for each circle.
- Now, go make yourself a coffee. We wait 2 to 3 minutes. You’re watching for two things: bubbles to appear all over the top surface, and the edges to start looking dry and set.
- Once you see those clear signs, slide your spatula underneath and flip! Cook for just one more minute, maybe two, until the other side is beautifully golden brown. Wipe the pan down between batches if any butter starts to burn, and repeat until the batter is gone!
Mixing the Simple Pancake Batter Correctly
I cannot stress this enough: the number one enemy of fluffy pancakes is overmixing. When you mix flour with liquid too vigorously, you develop gluten, and gluten makes bread—not light and airy breakfast treats! When I tell you to whisk until the ingredients are “just moistened,” I mean stop the second you stop seeing dry streaks of flour coating the bowl. If you have little pockets of unmixed wet and dry hiding together, that is totally fine, as long as there isn’t a dry pile of flour sitting there naked. Seriously, embrace the lumpy aesthetic of a perfect Simple Pancake Batter.
Pancake Cooking Secrets for Golden Edges
So many people cook pancakes too fast over heat that’s way too high! If you blast them on medium-high, they’ll burn on the outside before those crucial bubbles set on the inside, and you end up with raw centers. Keep your griddle set right to medium. That Pancake Cooking Secrets test where you flick water on the surface? If the water evaporates slowly, it’s too cold. If it just vanishes in a puff of steam, it’s too hot! You want that immediate, happy sizzle. When the bubbles pop and leave little craters that don’t immediately fill back up with batter, that’s your visual cue. Flip it with confidence and enjoy the gorgeous golden color!
Tips for Success with Old Fashioned Pancakes
Even when you follow the steps perfectly, sometimes you need that little nudge to take your breakfast from “good” to “make-this-every-Sunday” territory. These aren’t just standard instructions; these are the little things I learned after making mountains of less-than-perfect Old Fashioned Pancakes that turned out flat or tough!
The biggest rookie mistake I made was crowding the pan. You need space for heat circulation! If you try to cook eight pancakes at once on a regular 10-inch skillet, the temperature drops way too fast when you pour in the cold batter. Keep your batches small—three or four max on a standard size—so the griddle stays hot and you get those lovely, crisp edges we’re aiming for.
Another trick I picked up is how I handle the melted butter. I use the 4 tablespoons *in* the batter for richness, right? But for the griddle itself, I prefer quick, judicious swipes of real butter between every couple of batches. Spray oil is fine, but the tiny bit of milk solids in butter creates those perfect little golden-brown spots that just scream “homemade.” Wipe the pan quickly between batches with a paper towel to scrape off any burnt bits, then add a fresh smear of butter.
Now, let’s talk about what happens when you’re trying to feed a crowd. If you’re making a huge batch of these Old Fashioned Pancakes, you can’t just stack them up immediately, or the steam gets trapped, and you’re back to square one with soggy bottoms! My solution is super simple. Get a baking sheet—the rimmed kind works best—and lay a clean kitchen towel over it. Pop the oven light on in your oven (don’t actually turn the heat on!) or set the oven to its lowest possible temperature, around 200 degrees F. As each perfect batch comes off the griddle, place the finished pancakes in a single layer on that towel-lined sheet. The ambient heat keeps them piping hot and fluffy until you’re ready to stack them high for the table. It’s a lifesaver for those busy Saturday brunches!
Remember, these are designed to be substantial and comforting, like the best country breakfast you can remember. If you ever feel like experimenting with toppings, I love making my own crunchy brittle—you can check out my homemade granola clusters recipe and sprinkle those crunchy little gems over the top instead of just syrup. It adds fantastic texture!
Make Ahead Pancakes and Storage Instructions
I know, I know. The idea of making these beautiful, fluffy pancakes from scratch sounds like a labor of love, and honestly, it is—but that doesn’t mean you have to do all the work on a Sunday morning!
If you’re planning ahead, which I highly recommend for those hectic weekday mornings, you have two primary options for Make Ahead Pancakes: cooked or uncooked batter. I generally prefer cooking them first, chilling them, and then reheating. Trying to store the raw batter and waiting for it to come back to life just doesn’t give you the same aggressive puffiness in the end.
Storing the Cooked Pancakes
Once your pancakes are cooked and cooled slightly—like, warm, not piping hot—you need to get them sealed up tight. Stacking them hot creates steam, and steam equals mushy pancakes, and we just fought too hard for that “light and airy” texture to let that happen!
Lay the cooked pancakes out on a plate or small baking sheet in a single layer and pop them in the freezer for about an hour until they are completely solid. Yes, it’s one extra step, but this step prevents them from sticking together into one giant, delicious monolith. Once frozen solid, you can transfer them to a heavy-duty zip-top bag. You can easily pull out 2 or 3 pancakes whenever you need them. They keep great for about two months this way.
The Best Way to Reheat Your Make Ahead Pancakes
For reheating, forget the microwave unless you are in a *dire* emergency and don’t care about texture! The microwave heats those water molecules too fast, and they turn rubbery almost instantly. We want that fresh-off-the-griddle fluffiness back!
The toaster oven or a regular toaster is incredible for single servings. If they are small enough, you can pop them right in the slots! If they are too big (mine usually are, they’re thick!), use a dry, un-oiled skillet over medium-low heat. Flip them once or twice until they are heated through and you can feel them warm back up. If you are reheating a whole batch at once, use the 200-degree oven warming tray trick I mentioned earlier—it’s perfect for warming up five or six at a time without drying them out.
This system means you can have proper, made-from-scratch, fluffy buttermilk pancakes ready in under three minutes on a Tuesday morning!
Serving Suggestions for Your Weekend Brunch Recipes
Now that you’ve mastered the art of the fluffy stack, we talk about the fun stuff: toppings! These Old Fashioned Pancakes are sturdy enough to hold up to almost anything you throw at them, but because we used that lovely buttermilk tang, they pair beautifully with things that cut through the richness of the butter and eggs.
When I’m planning my big Weekend Brunch Recipes, I always put out a spread of toppings instead of just defaulting to the same old maple syrup every time. It makes the whole experience feel more special, even if the base pancakes were super quick to whip up!
For that classic flavor profile, nothing beats real, dark maple syrup warmed just slightly. I keep mine in a little gravy boat so it pours elegantly! But if you want to elevate things (and really, why wouldn’t you?), here are a few flavor combinations that work wonders with these buttermilk delights:
- Lemon Ricotta Cream: Mix whole milk ricotta with a little powdered sugar and tons of fresh lemon zest. It’s tangy and light, which beautifully complements the buttermilk flavor base of these classic American pancakes.
- Toasted Pecans and Brown Butter: If you have an extra minute, brown your butter until fragrant and toss some chopped pecans in at the very end. Drizzle that nutty, fragrant butter right over the stack. It smells incredible while you’re serving breakfast!
- Fresh Berries & Pure Vanilla Whipped Cream: This is lighter and perfect for spring or summer brunch spreads. Whip heavy cream with just a touch of sugar and a splash of real vanilla extract. The tartness of raspberries or blueberries balances everything out perfectly.
If you’re looking for a fantastic side dish to go alongside these hearty pancakes, sometimes I like to make something packed with protein to balance out the sweetness. Have you ever checked out my recipe for the chocolate peanut butter smoothie? It’s a surprisingly great pairing for a deep, rich breakfast spread, offering something cool and smooth next to the hot cakes.
Ultimately, the joy of these Weekend Brunch Recipes is making them your own. Whether it’s a simple dusting of powdered sugar or a mountain of toppings, these foundational pancakes will be the best base you’ve ever worked with!
Frequently Asked Questions About Making Pancakes
I know you’ve got questions! Whenever I give someone my secret recipe for pancakes, there are always a few things folks get nervous about, usually centered around texture or substitutions. We want everyone to succeed in making these From Scratch Pancakes on their first try, so let’s tackle the common hurdles right here. Getting the texture right is the difference between a standard breakfast and the Best Fluffy Pancakes!
Can I use regular milk instead of buttermilk for these pancakes?
Absolutely, you can! We talked about it briefly in the ingredient notes because I know not everyone keeps buttermilk stocked. If you just have regular milk, go ahead and make the mixture—2 cups of milk plus 2 tablespoons of white vinegar or lemon juice. Let it sit on the counter for five minutes until it looks slightly curdled. That reaction is super important because it activates the baking soda perfectly. It won’t be *exactly* the same deep tang you get from true buttermilk, but it still gives you fantastic, pillowy results for your classic American pancakes!
How do I get my pancakes to be light and airy?
This is the million-dollar question, isn’t it? The key to achieving those unbelievably Light and Airy Pancakes isn’t just one thing; it’s a team effort among three specific steps. First, make sure your baking powder and baking soda are fresh. If they’re old, they won’t create lift—that’s an instant pancake fail.
Second, that mixing rule is non-negotiable: mix *just* until the dry ingredients disappear. Lumps are good! Seriously. If you mix it until it’s perfectly smooth, you’ve already lost the fluff factor because you’ve started developing gluten.
And finally, the 5-minute rest period! This waiting time allows those initial bubbles created by the acid and leavening agents to strengthen. When you pour that rested batter onto the hot griddle, those strengthened pockets turn into incredible height. Follow those three things—fresh agents, minimal mixing, and resting—and I guarantee you’ll have the Best Fluffy Pancakes you’ve ever made!
If you want to learn more about how all of our recipes come together, feel free to check out our About Us page to see the philosophy behind our kitchen!
Estimated Nutritional Data for These Pancakes
Because I know some of you like to track macros or just want to know what you’re diving into on a weekend morning, I pulled together the estimated nutritional information for these buttermilk pancakes. Remember, these numbers are just great estimates based on the ingredients listed for a standard serving size. If you drown them in salted butter and chocolate chips, your totals are obviously going to climb higher!
Here’s the breakdown per serving of two pancakes:
- Serving Size: 2 pancakes
- Calories: 280
- Sugar: 6g
- Sodium: 450mg
- Fat: 10g
- Saturated Fat: 6g
- Trans Fat: 0g
- Carbohydrates: 40g
- Fiber: 1g
- Protein: 9g
- Cholesterol: 75mg
It’s a balanced start to your day—enough carbs and protein to feel satisfied, especially if you top them with some fresh fruit or Greek yogurt! We try to keep our from scratch pancakes as wholesome as possible.
Share Your Classic American Pancakes Experience
Look, reading instructions is one thing, but seeing your beautiful final product is what really makes my day! I’d absolutely love to see your stacks of Classic American Pancakes. Did you get that perfect golden-brown color? Were they as fluffy as you always dreamed? Don’t keep all that breakfast glory to yourself!
Please jump down to the comments and let me know how this recipe worked out for you. If you rate this one, it helps other folks trying to decide if this is *the* recipe they should try—and trust me, it is! I check our contact page often, so feel free to send photos or ask any final lingering questions you might have about getting that ultimate fluff. Happy flipping!
Estimated Nutritional Data for These Pancakes
Because I know some of you like to track macros or just want to know what you’re diving into on a weekend morning, I pulled together the estimated nutritional information for these buttermilk pancakes. Remember, these numbers are just great estimates based on the ingredients listed for a standard serving size. If you drown them in salted butter and chocolate chips, your totals are obviously going to climb higher!
Here’s the breakdown per serving of two pancakes:
- Serving Size: 2 pancakes
- Calories: 280
- Sugar: 6g
- Sodium: 450mg
- Fat: 10g
- Saturated Fat: 6g
- Trans Fat: 0g
- Carbohydrates: 40g
- Fiber: 1g
- Protein: 9g
- Cholesterol: 75mg
It’s a balanced start to your day—enough carbs and protein to feel satisfied, especially if you top them with some fresh fruit or Greek yogurt! We try to keep our from scratch pancakes as wholesome as possible.
Share Your Classic American Pancakes Experience
Look, reading instructions is one thing, but seeing your beautiful final product is what really makes my day! I’d absolutely love to see your stacks of Classic American Pancakes. Did you get that perfect golden-brown color? Were they as fluffy as you always dreamed? Don’t keep all that breakfast glory to yourself!
Please jump down to the comments and let me know how this recipe worked out for you. If you rate this one, it helps other folks trying to decide if this is *the* recipe they should try—and trust me, it is! I check our contact page often, so feel free to send photos or ask any final lingering questions you might have about getting that ultimate fluff. Happy flipping!
PrintThe Absolute Best Fluffy Old-Fashioned Buttermilk Pancakes
A simple, foolproof recipe for making thick, light, and airy buttermilk pancakes from scratch for a classic breakfast.
- Prep Time: 10 min
- Cook Time: 15 min
- Total Time: 25 min
- Yield: 10-12 pancakes
- Category: Breakfast
- Method: Griddling
- Cuisine: American
- Diet: Vegetarian
Ingredients
- 2 cups all-purpose flour
- 2 tablespoons white sugar
- 2 teaspoons baking powder
- 1 teaspoon baking soda
- 1 teaspoon salt
- 2 cups buttermilk
- 2 large eggs
- 4 tablespoons unsalted butter, melted, plus more for the griddle
Instructions
- Combine the dry ingredients: In a large bowl, whisk together the flour, sugar, baking powder, baking soda, and salt.
- Combine the wet ingredients: In a separate medium bowl, whisk together the buttermilk and eggs until just combined.
- Mix the batter: Pour the wet ingredients into the dry ingredients. Gently whisk until the ingredients are just moistened. Do not overmix; a few lumps are fine.
- Stir in the butter: Gently fold in the 4 tablespoons of melted butter. Let the batter rest at room temperature for 5 minutes.
- Heat the griddle: Heat a large nonstick griddle or skillet over medium heat. Lightly grease the surface with butter or cooking spray. The griddle is ready when a drop of water sizzles immediately.
- Cook the pancakes: Pour 1/4 cup of batter onto the hot griddle for each pancake. Cook for 2 to 3 minutes until bubbles appear on the surface and the edges look set.
- Flip and finish: Flip the pancakes and cook for another 1 to 2 minutes until golden brown and cooked through.
- Serve immediately with your preferred toppings.
Notes
- For maximum fluffiness, do not stir the batter after the initial mix. Overmixing develops gluten, resulting in flat pancakes.
- If you do not have buttermilk, mix 2 tablespoons of white vinegar or lemon juice into 2 cups of regular milk and let it sit for 5 minutes before using.
- Keep cooked pancakes warm in a single layer on a baking sheet in a 200 degree F oven while you finish the batch.
Nutrition
- Serving Size: 2 pancakes
- Calories: 280
- Sugar: 6
- Sodium: 450
- Fat: 10
- Saturated Fat: 6
- Unsaturated Fat: 4
- Trans Fat: 0
- Carbohydrates: 40
- Fiber: 1
- Protein: 9
- Cholesterol: 75