

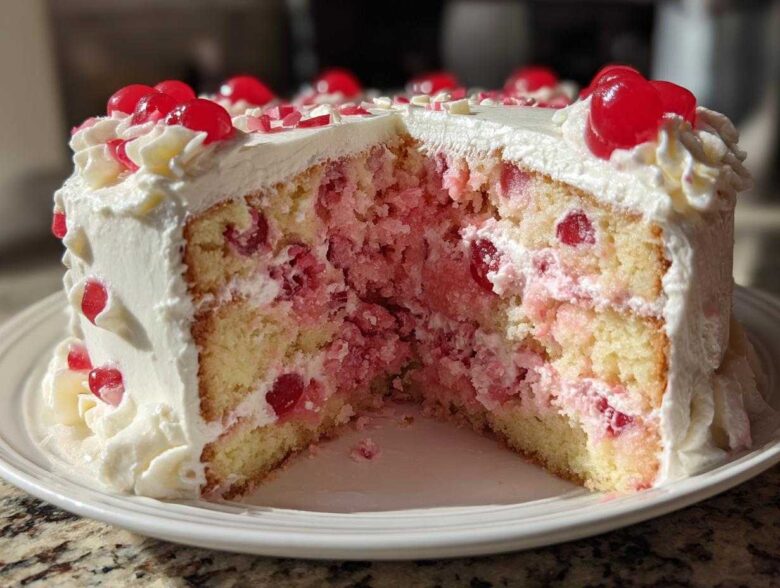
Oh, you know how sometimes you just need a cake that screams happy colors? I live for those vibrant desserts that just make you smile before you even take a bite! This recipe, my friends, is my absolute go-to when I need something special that comes together quickly. We’re making the Moist Maraschino Cherry Chip Cake, and trust me, the combination of bright, sweet cherries mixed with creamy white chocolate chips is just magical. I’ve tweaked this over the years, perfecting that tender crumb so it never, ever turns out dry. If you’ve been searching for the ultimate, foolproof spring or summer cherry cake that tastes like a bakery classic, well, stop looking! You know I only share what I bake again and again.
I learned a lot about balancing sweetness when developing this one. I often use this recipe when I need a quick treat that still feels celebratory, making it one of my favorite showstoppers. You can get a head start on the assembly, too, if you’re busy, which I always appreciate. Be sure to check out my guide on creating the perfect moist cake base if you love this texture!
Why This Moist Cherry Cake Recipe Stands Out
There are so many ways to make a cake, but this one just hits different, honestly. People always ask me how I keep my cakes from drying out, especially when they involve fruit, and this is the secret weapon. It really is the premium Moist Cherry Cake Recipe you’ve been looking for. It’s got that perfect balance—sweet enough from the cherries, but not sickly sweet because of the buttermilk cutting through everything. It just comes together so easily; it’s truly an Easy Cherry Cake Recipe, which earns it a permanent spot in my rotation.
I love how much character this cake has, even when I’m rushing. If you like this level of fluffiness, you absolutely have to check out my thoughts on making super moist and fluffy vanilla cupcakes!
Achieving Ultimate Moisture in Your Cherry Cake
The moisture level in this layer cake is spectacular, and that comes directly from using buttermilk and the maraschino cherry juice mixed right into the batter. Those two liquids keep the crumb incredibly tender as it bakes. If you’re ever out of buttermilk, don’t panic! Just take a regular cup of milk—any kind will do—and stir in one tablespoon of white vinegar or lemon juice. Let it sit on the counter for about five minutes until it starts to look a little curdled. That’s your perfect substitute, and you won’t even taste the difference, I promise.
Festive Cherry Cake Ideas: Color and Distribution
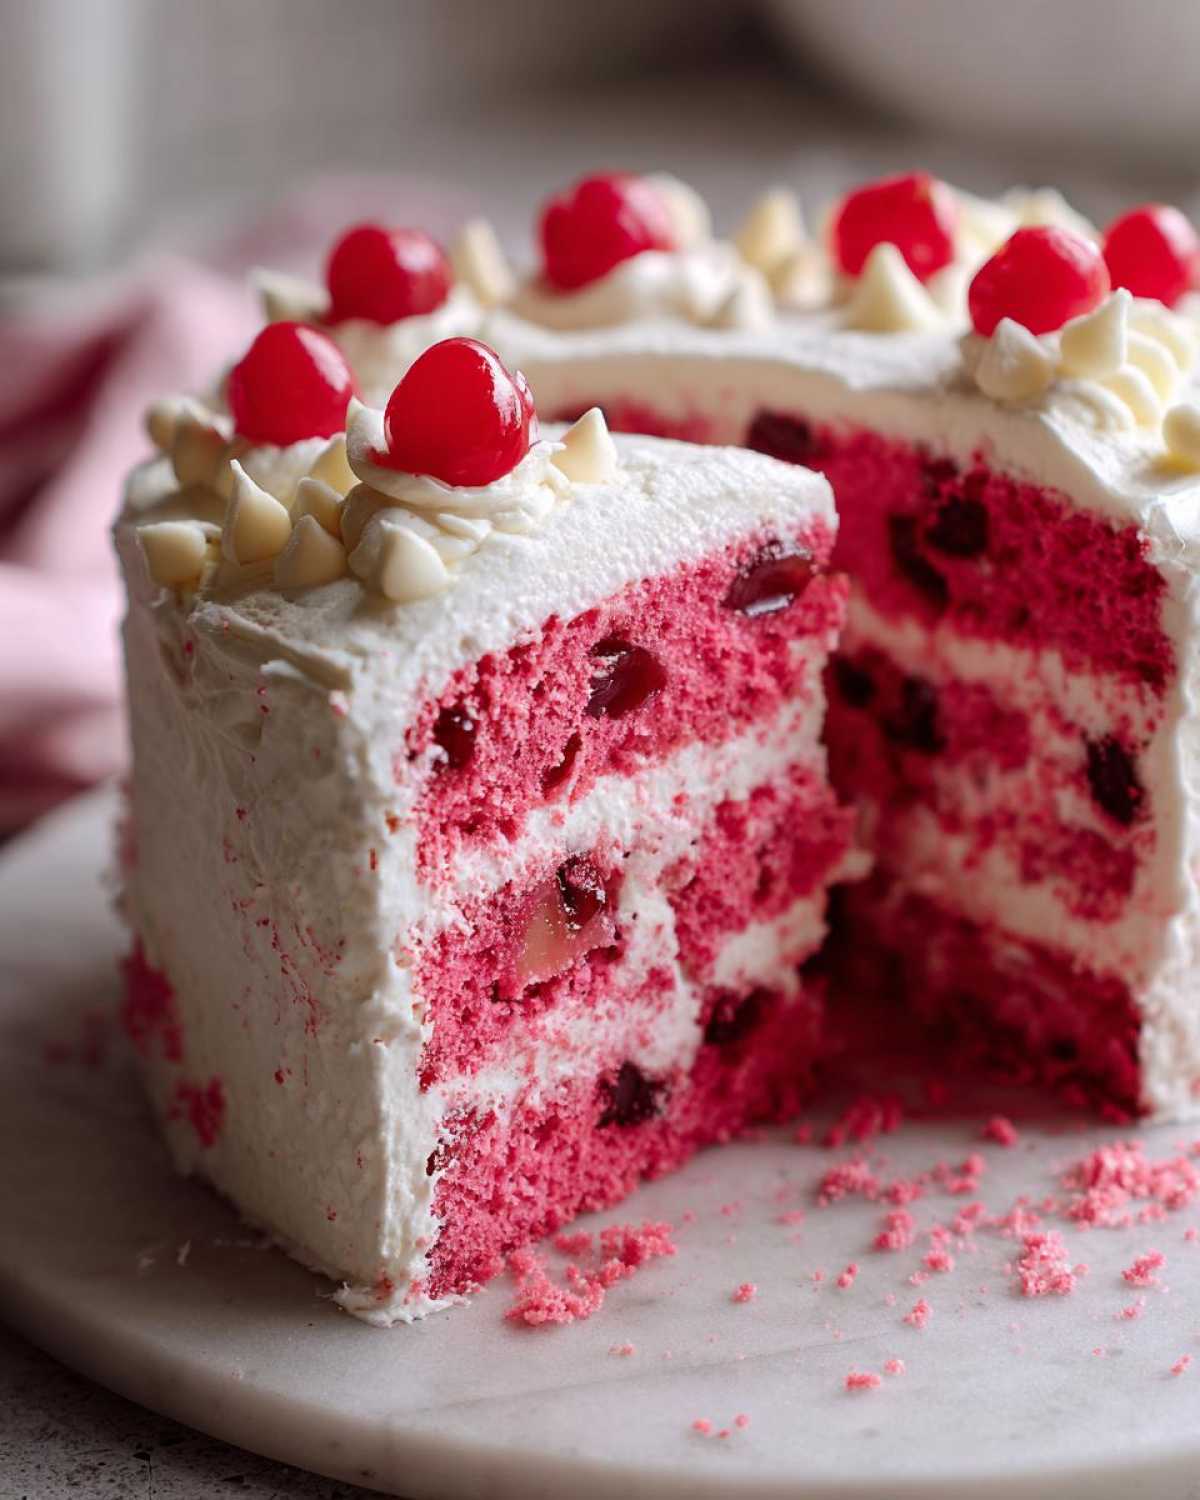
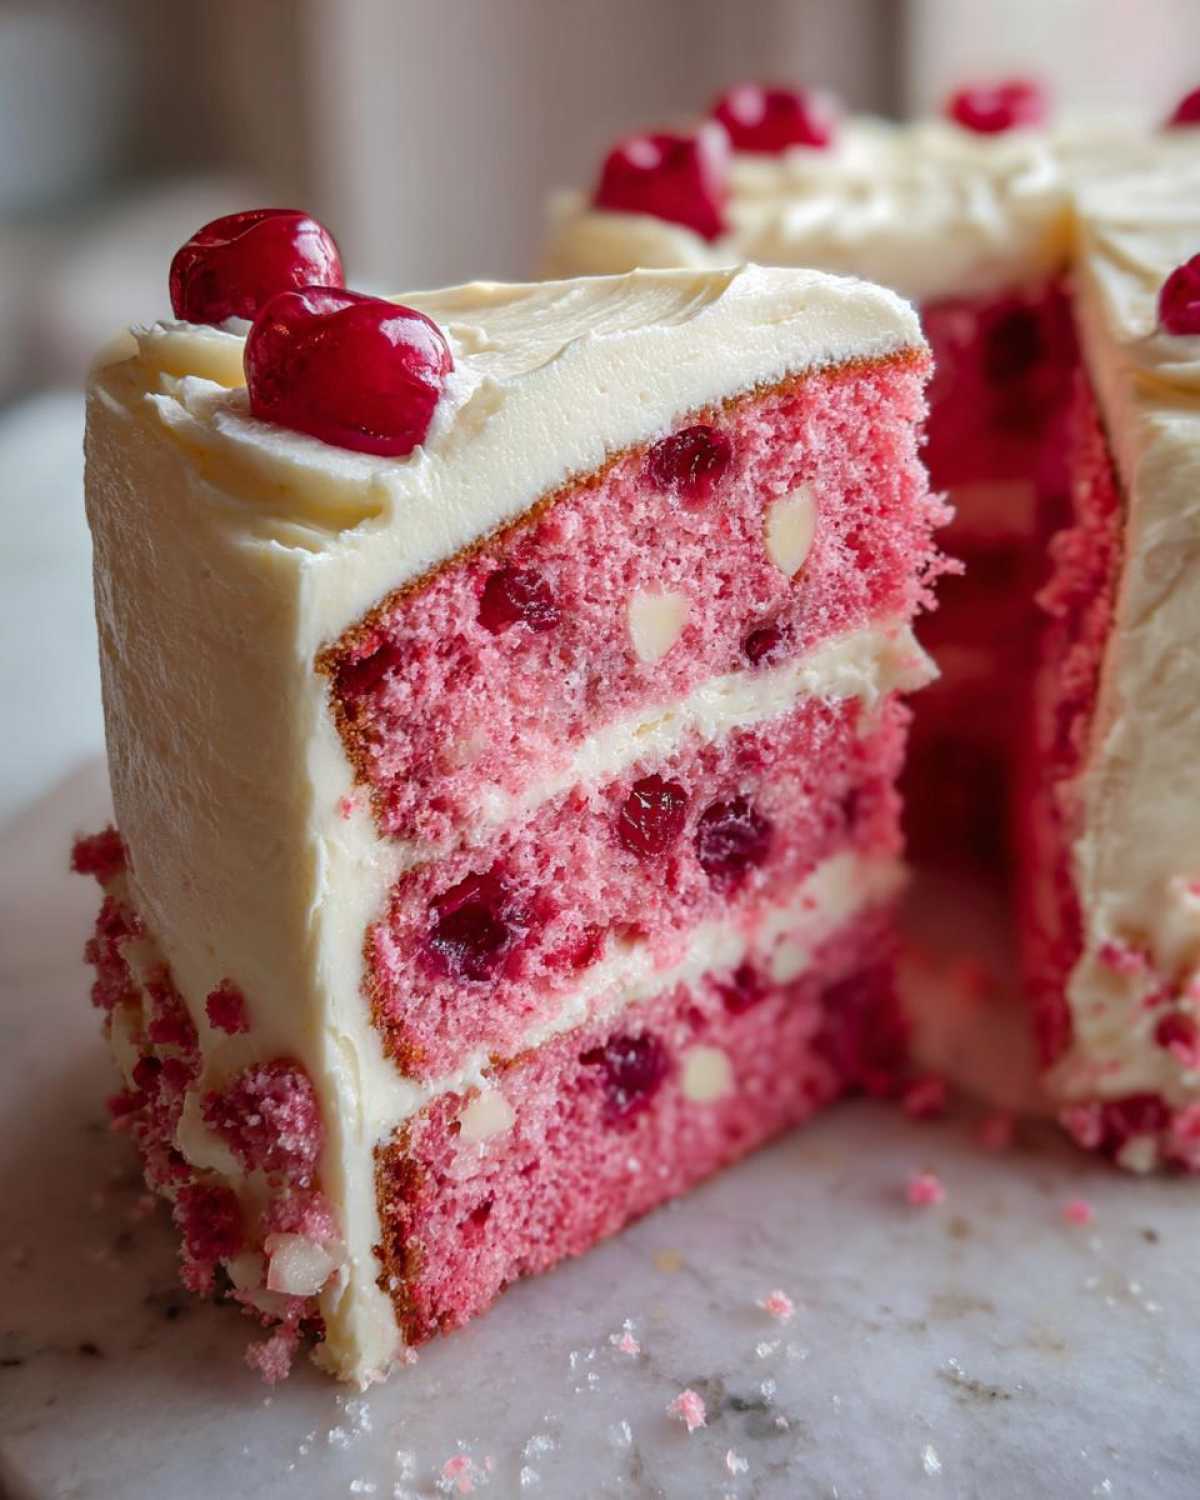
Visually, this cake is a winner, too! The maraschino cherries give you those pretty little pops of red, but if you want a really show-stopping color for a birthday or a holiday gathering, you can add just one or two drops of red food coloring to the batter. It turns the whole cherry cake a gorgeous, soft pink that everybody loves. Then you have the random sparkle of the white chocolate chips scattered throughout—it’s just stunning when you slice into it!
Ingredients for the Best Cherry Chip Cake
Okay, gather everything up! Baking success is all about having your space prepped and all your ingredients measured before you even turn the mixer on. You’ll see I’ve broken this into two chunks because the frosting deserves its own special moment. Don’t skimp on softening that butter, otherwise, the creaming process just won’t happen right!
I highly recommend reading up on my guide for making the Best Classic Cream Cheese Frosting if you want to master that technique separately, but the ingredients below work perfectly together.
For the Cake Batter
- 1 3/4 cups all-purpose flour (make sure you spoon and level it!)
- 1 1/2 cups granulated sugar
- 1 teaspoon baking soda
- 1/2 teaspoon salt (don’t leave this out, it balances the sweetness!)
- 1/2 cup unsalted butter, making sure it is softened completely to room temperature
- 2 large eggs
- 1 teaspoon vanilla extract
- 1 cup buttermilk
- 1/2 cup maraschino cherry juice (keep that jar handy!)
- 1 cup maraschino cherries, make sure those are well-drained and then chopped
- 1/2 cup white chocolate chips (these melt just a little when baking—heavenly!)
For the Cherry Cream Cheese Frosting
- 8 ounces cream cheese, softened (make sure it’s soft, but not melty!)
- 1/2 cup unsalted butter, softened just like the cake butter
- 3 cups powdered sugar (sifted if you’re feeling fancy, but I usually skip it)
- 1 teaspoon vanilla extract
- 2 tablespoons maraschino cherry juice (this gives it that lovely hint of flavor)
How to Make This Easy Cherry Cake Recipe Step-by-Step
This is where the magic happens! I promise that following these steps will give you an incredibly satisfying result for this Easy Cherry Cake Recipe. The key here is patience at the mixing stages—don’t rush the blending!
Preparing the Cherry Cake Batter
First things first, make sure your oven is humming along at 350 degrees F (175 degrees C), and those two 8-inch pans are greased and floured perfectly. We start by whisking all the dry stuff—flour, sugar, soda, and salt—in a big bowl. Then, we add the softened butter, eggs, and vanilla right into that dry mix. Start the mixer on low, just until everything is barely coming together. Now, this is important: mix your buttermilk and the first half cup of cherry juice in a smaller bowl. Slowly, drizzle that wet mixture into the dry ingredients while the mixer is running low. Stop mixing the minute it looks smooth; seriously, overmixing is the enemy!
Last but not least, take your bowl off the mixer and grab a spatula. Gently fold in those chopped maraschino cherries and the white chocolate chips. You want them evenly spread but you don’t want to deflate all the air we just worked so hard to incorporate!
Baking and Cooling Your Homemade Cherry Cake
Divide that gorgeous batter evenly between your two prepared pans. Pop them into the preheated oven for about 30 to 35 minutes. How do you know when they are done? The toothpick test is your friend—if it comes out clean, you’re golden. But wait! Don’t just dump them out! Let the two layers rest in the pans on a cooling rack for a good 10 minutes. This gives the structure time to firm up just enough so when you flip them over, your beautiful cherry cake layers come out intact. They need to cool completely on the rack before you even *think* about frosting.
Whipping the Cherry Cream Cheese Frosting
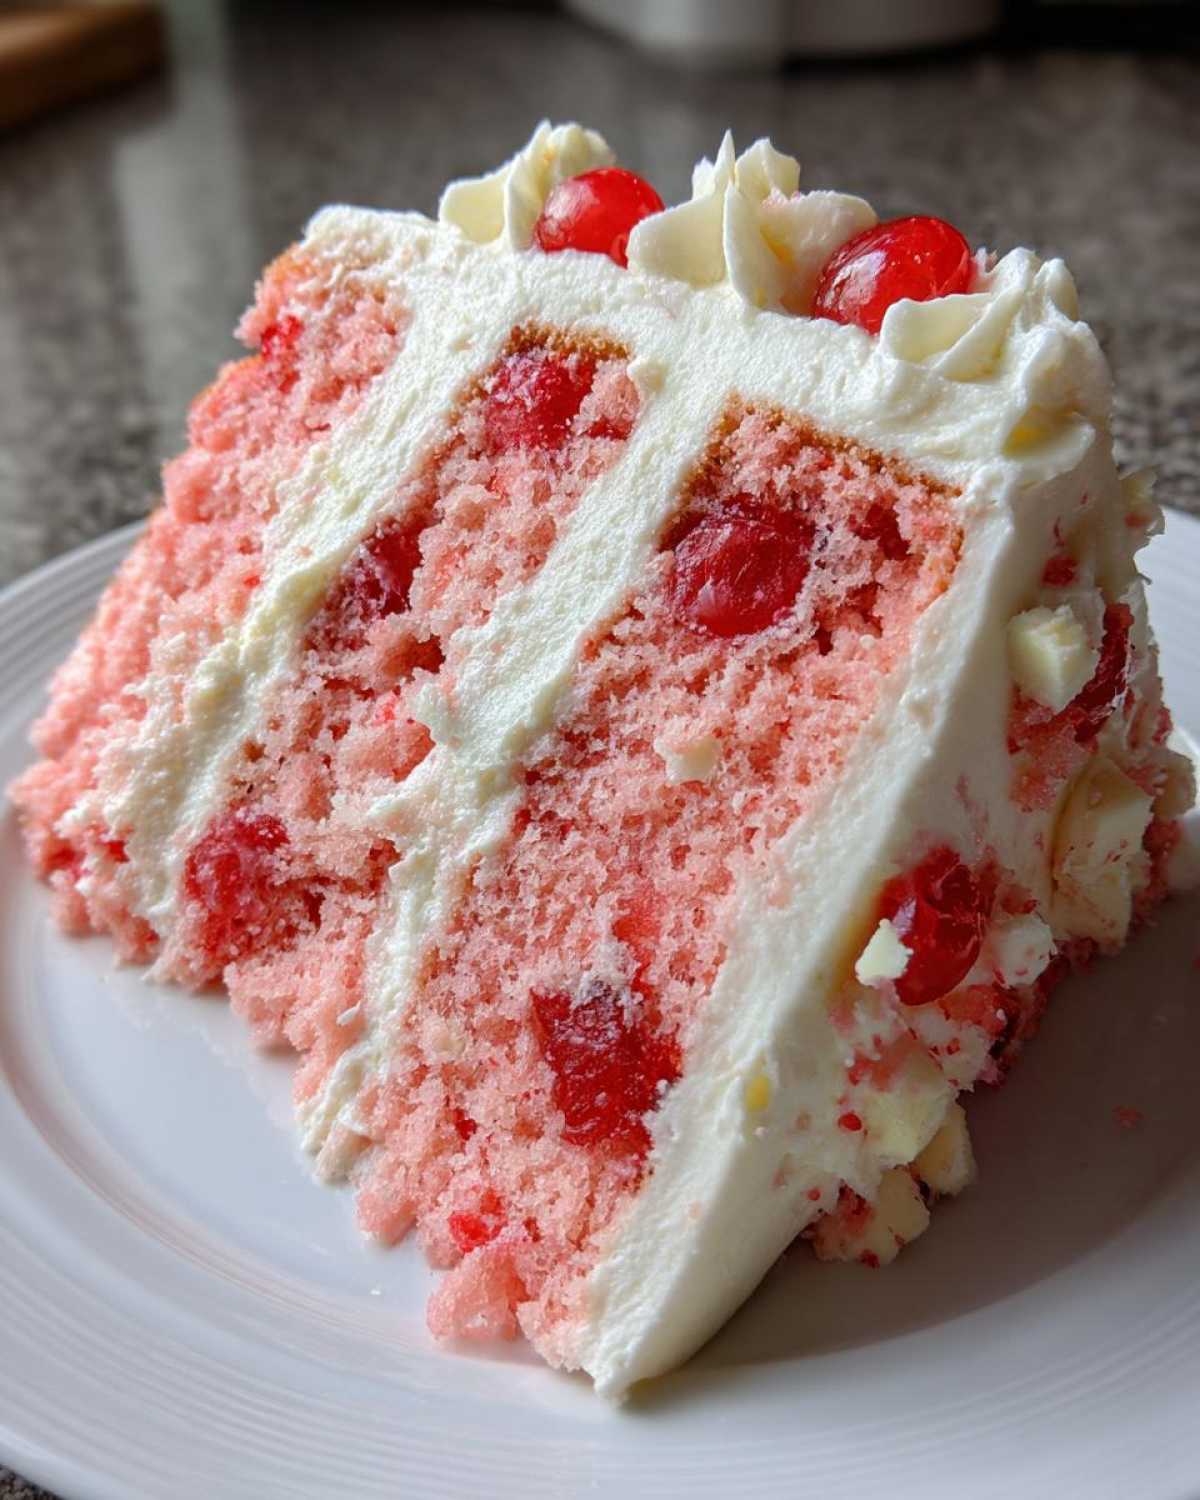
While those layers are chilling out, let’s make the topper! Use your stand mixer (or a hand mixer) to beat the softened cream cheese and butter together until it looks super smooth and fluffy—no lumps allowed! Then, you start adding the powdered sugar one cup at a time, mixing slowly at first so you don’t create a sugar cloud in your kitchen! Once that’s incorporated, drip in the vanilla extract and those final two tablespoons of reserved cherry juice. If it feels too stiff, add a tiny splash more juice until it’s easy to spread but still thick enough to look substantial on your layers.
If you’re interested in alternative frostings, you might want to check out my take on making easy vanilla buttercream sometime!
Tips for a Bakery Style Cherry Cake Success
Getting that professional look and taste at home is totally possible with this recipe, I promise. It really comes down to a few little tricks I learned over the years—the same kind of detail you’d expect at a top-notch bakery! This is what helps us achieve that amazing Bakery Style Cherry Cake finish.
First, let’s talk about those maraschino cherries. They are pre-soaked, sure, but draining them isn’t enough! You need to chop yours up slightly smaller than the white chocolate chips. Why? Because you want the flavor distributed evenly in every single bite, not one giant chunk of fruit in one corner. Also, don’t forget that buttermilk substitute tip I gave you earlier if you ran out—that simple step saves the texture of the whole crumb!
If you want to see more moisture secrets, like the ones that make my coffee cake so fudgy, peek at my tips for sour cream coffee cake!
Variations: From Pink Cherry Birthday Cake to Vintage Cherry Cake
One of the things I love most about this base recipe is how adaptable it is! It’s like a little chameleon of the dessert world. You can use this very same batter to create totally different looks depending on what you’re celebrating. It’s my favorite kind of recipe—one that works hard for you!
If you are looking for something super festive, you can lean into the color. Adding those couple of drops of red food coloring, as I mentioned, turns this into what I call my Pink Cherry Birthday Cake. That bright color, especially when paired with the white-on-white frosting, just screams party time. It’s a stunning look that always gets compliments before anyone even tastes it.
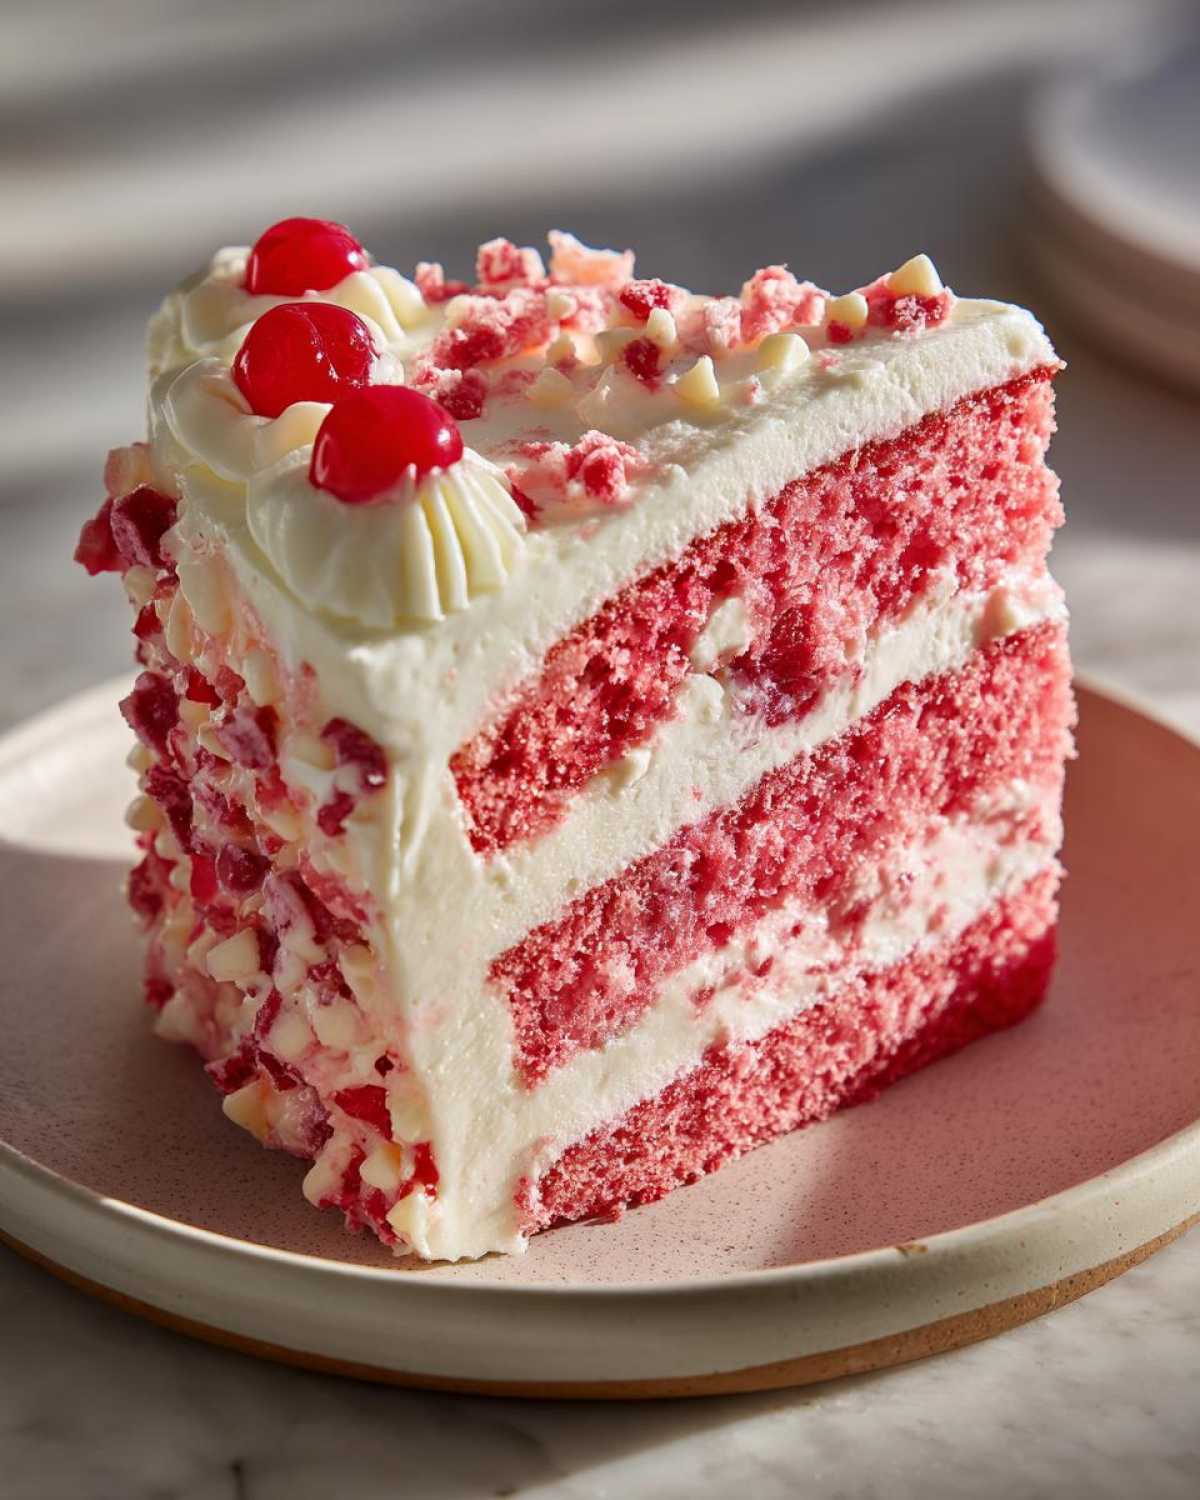
For those who prefer a more classic, less vibrant look—maybe something reminiscent of grand gatherings—you can definitely aim for a Vintage Cherry Cake style. That means skipping the extra food coloring completely so the cherries just speckle through naturally. For the vintage vibe, skip the cream cheese frosting and go for a simple, lovely application of plain vanilla buttercream piped in classic borders. It gives it that old-school charm! If you love adapting classics, you might want to compare notes with my famous red velvet cake recipe, which shares some of the same color-changing magic.
And listen, the biggest substitution question I always get is about fresh versus canned cherries for this cherry cake. If you want to use fresh cherries—which I love during peak season—you absolutely can! Just make sure you pit them and rough chop them by hand. Since fresh fruit has more moisture than the preserved maraschinos, you might need a tiny bit less buttermilk, or just be prepared for the batter to feel slightly wetter. You’ll get a more tart flavor, which is delicious in its own way!
Storage and Reheating Instructions for Your Cherry Cake
This cake is so moist that keeping it fresh is actually pretty easy, which is great news because I always end up with leftovers! How you store it really depends on whether you frosted it or not, and what your kitchen temperature is like.
If you are keeping the cake unfrosted—just the baked layers sitting on the rack—wrap them up tightly in plastic wrap once they are completely cool. You can keep those layers on the counter at room temperature for maybe two days, but don’t push it past that. They truly stay best if wrapped and frozen for up to three months; just thaw them overnight on the counter before you plan to frost them.
Once you have that gorgeous cream cheese frosting on there, things change a little bit. Cream cheese frosting prefers the cold! If you’re not going to eat the whole thing within 24 hours, you absolutely need to store it in the refrigerator. Pop it under a cake dome or cover it loosely with foil, making sure the foil doesn’t smash the frosting design. It will keep beautifully in the fridge for up to four days.
The best part about dealing with a refrigerated cake is that it tastes so much better if you let it warm up just a touch before serving. Take it out about an hour before you plan to eat it. That little bit of time lets the butter and cream cheese in the frosting soften beautifully, and the crumb of the cake recaptures that perfect tender texture we worked so hard to achieve. You don’t really need to reheat it, just let the chill come off!
Frequently Asked Questions About Making Cherry Cake
I figured you might have a few questions swirling around after reading all those steps. I know I did when I first started tackling this bake! Baking is all about troubleshooting, so let’s clear up any worries you have about achieving that perfect texture and color for your gorgeous cherry cake.
If you love learning the little tricks behind moist loaves, you really should check out my guide on perfecting moist date nut bread next!
Can I use fresh cherries instead of maraschino cherries in this Cherry Cake?
Oh, absolutely! If fresh cherries are in season, go for it—they add such a wonderful, slightly tart depth that you just don’t get from the jar. The main thing you need to remember is preparation. You have to pit every single one of them, and then you should rough chop them, kind of like we did with the jarred ones. Now, here’s the caveat: fresh cherries hold more water than the preserved ones. When you mix them in, you might notice your batter seems a touch wetter than expected. Don’t sweat it! Your oven will handle it, but just be aware that your baking time might creep up by a minute or two.
How do I get the ‘Pink Cherry Birthday Cake’ color?
That bright, happy pink is one of the best parts about this version! If you look back in the notes section of the recipe, I tell you exactly how I achieve that lovely shade. Since the maraschino juice only gives a very pale tint, if you want that signature, vibrant Pink Cherry Birthday Cake look, you just need to add one or two drops of red liquid food coloring directly into your batter when you are mixing in the liquids. Start with one drop, mix it gently, and see how you like the shade. It’s that easy to turn a regular bake into something totally festive!
Nutritional Estimates for This Cherry Cake Slice
I always get asked about the health side of things, especially since this cake is so rich and delicious! Now, listen, this is a dessert, designed for celebration, so it’s certainly not a low-sugar health food. But I believe in knowing what you are eating, so I ran the numbers based on my recipe yields. Please remember these are just estimates, like any general recipe calculation, and they can change depending on what brand of butter or cream cheese you use.
We based this calculation on getting 10 generous slices, so if you cut bigger pieces—which I definitely won’t judge for—your numbers will shift! If you’re tracking things closely, this gives you a really good baseline for enjoying this fantastic cherry cake responsibly.
Here are the estimated numbers per slice:
- Serving Size: 1 slice
- Calories: 410
- Sugar: 55g
- Sodium: 280mg
- Total Fat: 18g
- Saturated Fat: 10g
- Carbohydrates: 62g
- Protein: 4g
- Cholesterol: 75mg
See? That sugar content is what tells you it’s a party! But you can clearly see the fat content comes mostly from the butter and cream cheese, making for a satisfying richness. Enjoy it, my friend, because you certainly earned it!
Share Your Moist Cherry Cake Creations
Now that you’ve whipped up this beautiful, tender, pink-hued dream, I absolutely want to hear about it! Seriously, you making my favorite recipes, seeing them come to life in your ovens, that’s the best part of running this whole blog! I pour my heart into making sure every recipe, especially this Moist Cherry Cake, turns out perfect for you.
Did you make the cream cheese frosting? Did you add the extra food coloring? Maybe you experimented and used fresh sour cherries instead? Don’t be shy! Tell me everything in the comments below.
Take a photo! Seriously, snap a picture of your finished layer cake and share it on social media—tag me if you can! Seeing that vibrant slice of cherry goodness makes my day brighter. If you love what you made, please, please drop a rating down below. Five stars means so much to me and really helps other bakers find this fantastic recipe. I’m always looking for new ways to improve or new frosting ideas, so your feedback on this cherry cake is worth its weight in powdered sugar!
If you want to stay updated on all the latest bakes, frosting tips, and comfort food inspiration I’m testing out every week, make sure you sign up for my newsletter! You can catch up on all the behind-the-scenes action right over here: my main blog page.
PrintMoist Maraschino Cherry Chip Cake
A simple recipe for a moist cake featuring maraschino cherries and chips, topped with a cream cheese frosting.
- Prep Time: 20 min
- Cook Time: 35 min
- Total Time: 55 min
- Yield: 10 servings
- Category: Dessert
- Method: Baking
- Cuisine: American
- Diet: Vegetarian
Ingredients
- 1 3/4 cups all-purpose flour
- 1 1/2 cups granulated sugar
- 1 teaspoon baking soda
- 1/2 teaspoon salt
- 1/2 cup unsalted butter, softened
- 2 large eggs
- 1 teaspoon vanilla extract
- 1 cup buttermilk
- 1/2 cup maraschino cherry juice
- 1 cup maraschino cherries, drained and chopped
- 1/2 cup white chocolate chips
- For Frosting: 8 ounces cream cheese, softened
- 1/2 cup unsalted butter, softened
- 3 cups powdered sugar
- 1 teaspoon vanilla extract
- 2 tablespoons maraschino cherry juice
Instructions
- Preheat your oven to 350 degrees F (175 degrees C). Grease and flour two 8-inch round cake pans.
- In a large bowl, whisk together the flour, sugar, baking soda, and salt.
- Add the softened butter, eggs, and vanilla extract to the dry ingredients. Mix on low speed until just combined.
- In a separate bowl, mix the buttermilk and 1/2 cup of cherry juice. Gradually add this wet mixture to the dry ingredients, mixing until the batter is smooth. Do not overmix.
- Gently fold in the chopped maraschino cherries and white chocolate chips.
- Divide the batter evenly between the prepared cake pans.
- Bake for 30 to 35 minutes, or until a toothpick inserted into the center comes out clean.
- Let the cakes cool in the pans for 10 minutes before inverting them onto a wire rack to cool completely.
- To make the frosting, beat the cream cheese and butter together until smooth. Gradually add the powdered sugar, mixing until light and fluffy.
- Beat in the vanilla extract and 2 tablespoons of cherry juice until the frosting reaches your desired consistency. Add more powdered sugar if too thin, or more juice if too thick.
- Once the cakes are completely cool, frost and assemble the layer cake.
Notes
- For extra moisture, use the full amount of buttermilk specified.
- If you do not have buttermilk, mix 1 cup of milk with 1 tablespoon of white vinegar or lemon juice and let it sit for 5 minutes before using.
- Chop the maraschino cherries slightly smaller than the white chocolate chips for even distribution.
- If you want a pinker cake, add 1-2 drops of red food coloring to the batter.
Nutrition
- Serving Size: 1 slice
- Calories: 410
- Sugar: 55
- Sodium: 280
- Fat: 18
- Saturated Fat: 10
- Unsaturated Fat: 8
- Trans Fat: 0
- Carbohydrates: 62
- Fiber: 1
- Protein: 4
- Cholesterol: 75