

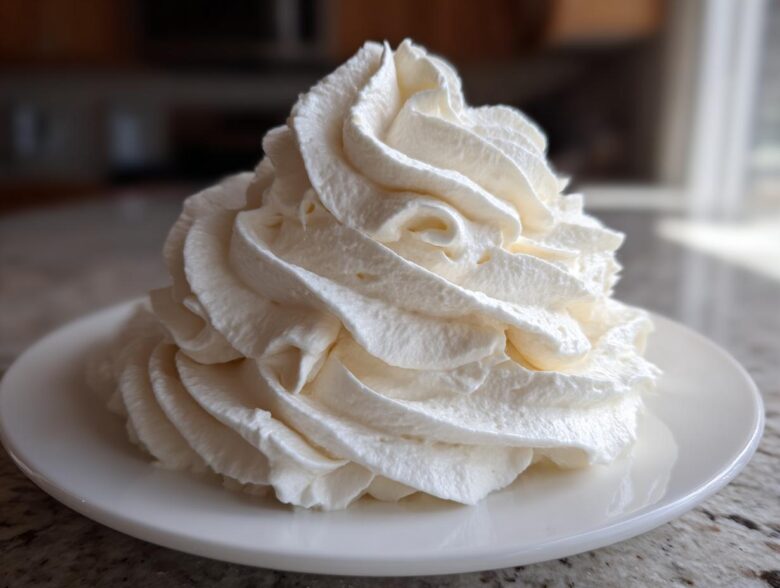
Oh, trying to frost a birthday cake only to have your icing melt or slide off is the absolute worst, isn’t it? You want something reliable! Something you can whip up in under fifteen minutes that tastes miles better than the stuff in a tub. Well, stop your search right now because I’m giving you my absolute go-to: the best vanilla buttercream frosting recipe you’ll ever need. I’ve been relying on this specific vanilla buttercream frosting formula for every tiered cake and giant batch of cupcakes I’ve made for the last decade. It’s sturdy, it’s incredibly creamy, and trust me, it tastes like heaven!
Why This Creamy Vanilla Buttercream Frosting Recipe Works (American Buttercream Tutorial)
This recipe is pure magic because it gives you professional stability without any fuss. Seriously, we’re talking 10 minutes total, no cooking, no complicated steps—it’s the definition of an easy buttercream frosting recipe. You get that beautiful, rich texture that everyone talks about because we use real butter and beat the dickens out of it!
That’s how we achieve the perfect creamy vanilla frosting recipe texture that’s fluffy enough for a cloud but stiff enough to hold swirls. If you are looking for a quick cupcake frosting that rivals any bakery, this is your keeper. I learned so many tricks just from watching bakers showcase their amazing techniques over at their site. It means you can finally pipe those detailed borders for birthdays without worrying about everything collapsing on you mid-celebration. It just *works* every time!
Ingredients for the Best Vanilla Buttercream Frosting
Getting the right ingredients ready is half the battle won when making this simple cake decorating frosting. You just need a few basics, but how you prep them makes all the difference in getting that smooth finish. You’ll need one cup of unsalted butter—and please, make sure it’s actually softened, not melted liquid—along with four cups of powdered sugar which absolutely must be sifted first! Don’t skip the sift! We also add one tiny teaspoon of pure vanilla extract for amazing flavor and just a pinch of salt to balance out the sweetness of this homemade vanilla frosting.
Finally, the liquid component! You’ll start this recipe needing just two to four tablespoons of heavy cream or regular milk. The exact amount depends on the humidity that day, which is crazy, I know, but that’s baking! We keep the quantities small at first so we can control the final structure for that perfect buttercream for layer cakes.
Ingredient Notes and Substitutions for Perfect Vanilla Buttercream Frosting
Okay, a few pro warnings that’ll save you headaches later. First, that butter temperature is crucial—it should be cool enough that if you press it, it leaves an imprint, but not soft enough to look shiny or greasy, otherwise, your creamy vanilla frosting recipe will turn out soupy.
When we talk liquid, heavy cream is always my first choice. It has a higher fat content, which keeps the frosting a little richer and more stable for piping. If you only have milk on hand, it works just fine for spreading, but you might need slightly less of it if you’re aiming for that stiff piping consistency frosting we love.
And I can’t stress this enough: sift that sugar! Powdered sugar clumps up like nobody’s business, and trying to mix out those little hard balls of sugar by hand is just frustrating. Sifting guarantees that beautiful, smooth outcome we’re aiming for in this classic dessert topping.
How to Prepare Fluffy Buttercream Icing: Step-by-Step Instructions
Alright, let’s get mixing so we can see some fluffy buttercream icing coming together! This is where the electric mixer earns its keep. First thing you need to do is take that softened butter—remember, just soft, please!—and beat it alone until it looks light and creamy. I usually give it a solid two minutes just to get some air in there before anything else happens.
Then, you add the sugar, but go slow! Add that sifted powdered sugar one cup at a time, mixing on the lowest speed so you don’t create a sugar cloud that attacks your kitchen ceiling. Once it’s all mixed in, throw in your vanilla and salt. Now, crank that speed up to medium-high for a full three minutes! This is vital for maximum fluffiness—don’t skimp on the mixing time here.
Next, we introduce the liquid. Start with two tablespoons of heavy cream—I prefer the cream for richness—and mix for another minute. If it’s looking like it needs more wiggle room, add the rest, just a tiny splash at a time. Finally, beat it on high speed for two more glorious minutes to incorporate all that air. You’ll be amazed at the volume difference! See, this patient beating is what makes the difference between ordinary and the kind of fluff you get from recipes like their amazing pancakes.
Achieving Perfect Piping Consistency Frosting
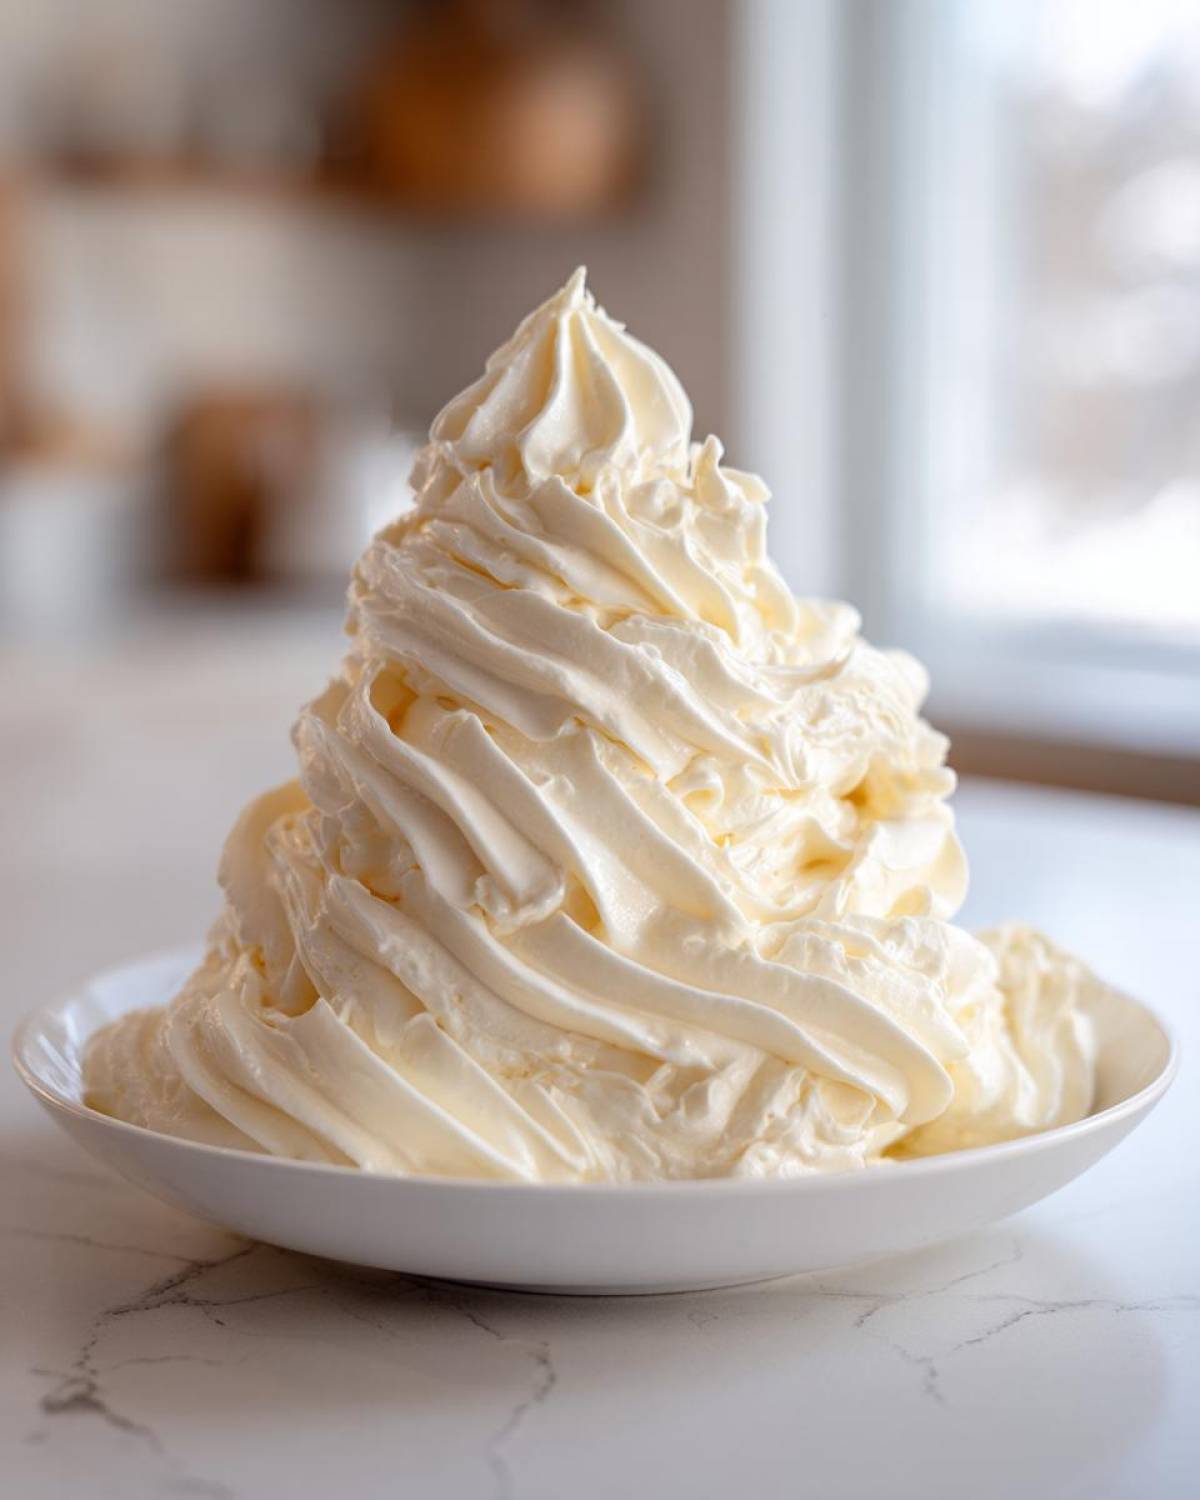
Sometimes, even after careful measuring, your frosting just isn’t quite right for those gorgeous swirls shown in all those amazing cake photos you see online. If your batch seems too stiff to move easily through the piping bag tip, you just need a teaspoon of extra liquid—milk or cream—mixed in slowly until it loosens up enough. Remember, we’re looking for that beautiful piping consistency frosting here.
On the flip side, if you overshot and it’s too soft or greasy—maybe your kitchen was hotter than you realized—don’t panic! Just sift in a half-cup more powdered sugar while mixing on low speed. It firms it right back up! You can use this technique to continually fine-tune it until it’s exactly what you need for those detailed decorating jobs without turning into glue. It’s all about small adjustments until you get that smooth, perfect texture.
Tips for Success with Your Homemade Vanilla Frosting
People often ask me why their frosting doesn’t hold up as well as mine, and honestly, it usually comes down to two tiny, easily fixed mistakes. The absolute biggest hurdle is butter temperature. If your butter has even a hint of melting, you are going to end up with a greasy mess that separates later. I always take mine out an hour before I start, but if you test it and it’s too soft, chill it for five minutes! That little bit of control makes this the best vanilla frosting for cakes.
You also need patience when adding the sugar, which ties into the lumpy issue. If you dump it all in at once, the mixer can’t incorporate it properly, leaving you with gritty spots. Slow and steady wins this race, folks. Once you nail the temperature and the mixing pace, you simply can’t go wrong with this recipe. For more simple baking wisdom, you might want to check out the tips they share over at their French toast article; it seems unrelated, but the mixing principles are the same!
Variations on Classic Vanilla Buttercream Frosting
While this classic vanilla buttercream frosting is my absolute favorite—it’s perfect on everything from sugar cookies to wedding cakes—sometimes you just need a little change of scenery, right?
The best part about this simple flour-based frosting is how easily it becomes a host for other flavors! If you are craving chocolate, you don’t need a whole new recipe or a complicated process. It’s as simple as swapping out a little bit of the sugar for cocoa powder.
For instant chocolate deliciousness, take about half a cup of your sifted powdered sugar quantity and replace it with the same amount of unsweetened cocoa powder. You *must* sift the cocoa powder with the sugar, too, otherwise, you’ll get dry pockets of dusty chocolate in your otherwise perfect batch. A quick mix, and voilà! You have an incredible chocolate version. You can also swap out the vanilla for almond extract, or even add a tablespoon of lemon zest for a tangy twist. It’s so simple to whip up one of these flavor changes when you’re decorating, like when you’re making brownies or maybe even whipping up a classic chocolate chip banana bread!
Storage and Make-Ahead Tips for Vanilla Buttercream Frosting
So you made a huge batch because, frankly, you should always make a double batch of this creamy vanilla frosting recipe just in case! Don’t worry about leftovers, because this frosting keeps beautifully. If you aren’t using it immediately, you need to get it into an airtight container. I just use my regular plastic storage bowls, but make sure you press a layer of plastic wrap right down onto the surface of the frosting before sealing the lid.
This prevents that weird, thin crust from forming on top, which is just a tragedy when you want to use it later for your fancy buttercream for layer cakes. You can absolutely keep this in the fridge for up to a week. It firms up like a rock, but don’t panic!
When you’re ready to frost again, pull it out about an hour ahead of time to let it come back up toward room temperature. Once it’s pliable again, you *must* put it back into your stand mixer and beat it on medium-high for a good four or five minutes. This re-aerates the fat and sugar, making it fluffy and smooth all over again. If you’re prepping for a big event, you can even freeze leftover frosting for up to three months. Just thaw it overnight in the fridge first, then beat it up strong! If you need some quick inspiration for other make-ahead sweets, you should check out the non-bake snacks on this page!
Serving Suggestions for This Classic Dessert Topping
So you have this absolutely perfect, stable, and gorgeous batch of vanilla buttercream frosting. What now? Well, cupcakes are the obvious choice, but this is too good to stop there!
I love dolloping a generous swirl onto warm, fudgy brownies right after they cool slightly. The frosting melts just a tiny bit underneath, creating this amazing, soft layer of sweetness. It’s also fantastic if you make sandwich cookies—use this amazing classic dessert topping as the creamy filling between two shortbread cookies. Trust me, they’re addictive!
Honestly, you don’t even need a baked good sometimes; just spreading some on a banana half works in a pinch! If you’re looking for other appetizer or side dish inspiration after you’re done with the sweets, I always check out the recipes over at their deviled egg post when I’m planning a party menu. This frosting is versatile—use it everywhere!
Frequently Asked Questions About Vanilla Buttercream Frosting
I figured you’d have some questions buzzing around your head! Dealing with frosting can be tricky, but once you know the little secrets, this vanilla buttercream frosting becomes ridiculously easy. Here are the things I get asked most often about making this topping perfect for cakes and cookies.
Can I make this American buttercream tutorial recipe ahead of time?
Yes, you absolutely can! That’s one of the best things about this sturdy American style. You can whip up a batch of this homemade vanilla frosting, cover the surface tightly with plastic wrap so it doesn’t dry out, and pop it in the fridge. It’ll last about a week in there. When you need it, just let it sit on the counter until it’s room temperature—we don’t want cold, hard butter!—and then beat it again in your mixer for about five minutes until it’s light and fluffy again. It completely revives it!
How do I ensure my vanilla buttercream frosting is perfectly smooth?
Smoothness is all about preparation, honey! The two biggest culprits for graininess are un-sifted powdered sugar and butter that’s too warm. Make sure you sift that sugar right before you add it to the butter so you don’t have any hard lumps hiding in there. And remember what I said before: the butter needs to be just soft enough to press a finger into, but not greasy or melty. If the butter is melted, the frosting will just turn into an oily mess, no matter how long you beat it! Also, don’t forget that final high-speed beat—that’s what introduces the air to make it truly fluffy buttercream icing.
If you need to get in touch for any other obscure baking advice, you can always find the contact info over at this page!
Can I make this recipe without heavy cream? What if I need a recipe for buttercream without heavy cream?
No problem at all! That’s a super common question, especially for folks who don’t keep heavy cream stocked. You can definitely use regular whole milk instead. If you’re using milk, you might need slightly less of it compared to the heavy cream, so start with just one tablespoon and add more slowly. The texture will be slightly less rich, but it will still be wonderfully creamy vanilla frosting recipe material.
If you’re out of both, a tiny splash of water (like half a teaspoon!) can get you going, but you have to be extremely careful with your mixing times after adding water, as it can thin things out quickly. But generally, yes, milk is a perfect substitute for the heavy cream in this easy recipe.
Estimated Nutritional Data for Vanilla Buttercream Frosting
Now, I’m not a nutritionist, so please take these figures with gigantic salt shakers! Everything I share here is just an estimate based on the core ingredients we used—a cup of butter, four cups of sugar, and just a splash of cream. Since we’re aiming for the best vanilla frosting for cakes here, you know it’s going to be rich!
The serving size is about one quarter-cup, which is a generous amount for topping a cookie or a cupcake. For that typical serving, you’re looking at about 380 calories, which, let’s be real, is worth every single bite of this homemade vanilla frosting. Most of those numbers are coming straight from the sugar and the fat in that butter, of course!
- Serving Size: 1/4 cup
- Calories: 380
- Sugar: 50g
- Sodium: 65mg
- Fat: 19g
- Saturated Fat: 12g
- Carbohydrates: 52g
- Protein: 1g
Remember, if you switch out the heavy cream for milk or add extra vanilla, these numbers change slightly! For official, deep dives into nutrition, you should always check out the fine print over at their site. But in my kitchen, we focus on the fact that this vanilla buttercream frosting makes every celebration taste incredible!
PrintBest Classic Vanilla Buttercream Frosting for Piping
Make a simple, creamy, and fluffy American vanilla buttercream frosting that holds its shape perfectly for piping decorations on cakes and cupcakes.
- Prep Time: 10 min
- Cook Time: 0 min
- Total Time: 10 min
- Yield: About 3 cups
- Category: Dessert Topping
- Method: Mixing
- Cuisine: American
- Diet: Vegetarian
Ingredients
- 1 cup unsalted butter, softened
- 4 cups powdered sugar, sifted
- 1 teaspoon pure vanilla extract
- 1/4 teaspoon salt
- 2 to 4 tablespoons heavy cream or milk
Instructions
- Beat the softened butter in a large bowl with an electric mixer until it is light and creamy, about 2 minutes.
- Gradually add the sifted powdered sugar, one cup at a time, mixing on low speed until combined.
- Add the vanilla extract and salt. Increase the mixer speed to medium-high and beat for 3 minutes until the mixture is fluffy.
- Add 2 tablespoons of heavy cream or milk. Beat again for 1 minute.
- If the frosting is too stiff for spreading or piping, add the remaining cream, one teaspoon at a time, until you reach your desired smooth and pipeable consistency.
- Beat on high speed for a final 2 minutes to incorporate air for maximum fluffiness.
Notes
- For a stiffer frosting suitable for detailed piping, use less liquid or substitute milk with heavy cream.
- If the butter is too warm, the frosting will be greasy; ensure the butter is just softened, not melted.
- Sift your powdered sugar to prevent lumps in your finished frosting.
- To make chocolate frosting, substitute 1/2 cup of powdered sugar with 1/2 cup of unsweetened cocoa powder, sifted with the sugar.
Nutrition
- Serving Size: 1/4 cup
- Calories: 380
- Sugar: 50g
- Sodium: 65mg
- Fat: 19g
- Saturated Fat: 12g
- Unsaturated Fat: 7g
- Trans Fat: 0.5g
- Carbohydrates: 52g
- Fiber: 0g
- Protein: 1g
- Cholesterol: 50mg