

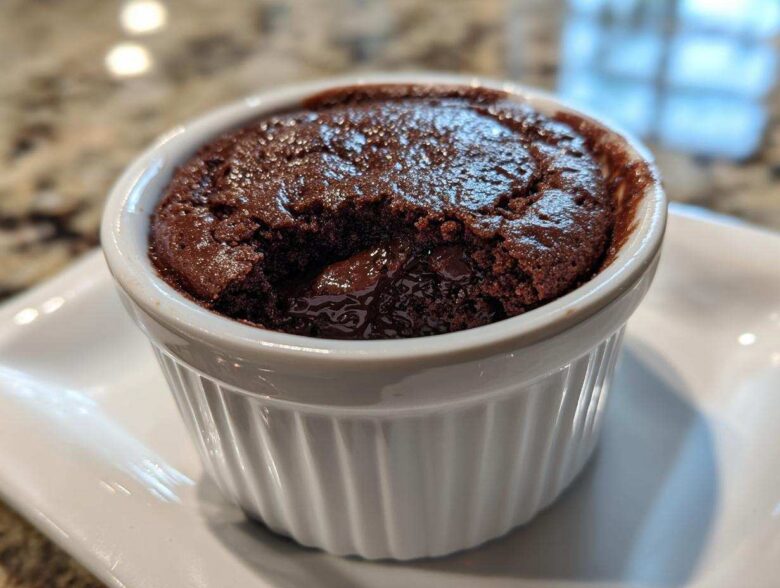
Listen to me, sometimes you hit that 4 PM wall and absolutely need chocolate, but you’re too busy, or you’re trying to keep things fitness-focused and can’t justify bringing out the flour and butter. Oh, I’ve been there! That’s exactly why I perfected this recipe. Trust me when I say this Cottage Cheese Microwave Brownie changed my life.
It’s fudgy, it’s packed with protein, and you clean up using just a mug and maybe a tiny blender cup. Seriously, I whip this up right after my lifting sessions when I need something fast and satisfying. It’s the ultimate easy protein dessert snack, and it proves healthy treats don’t have to take an hour!
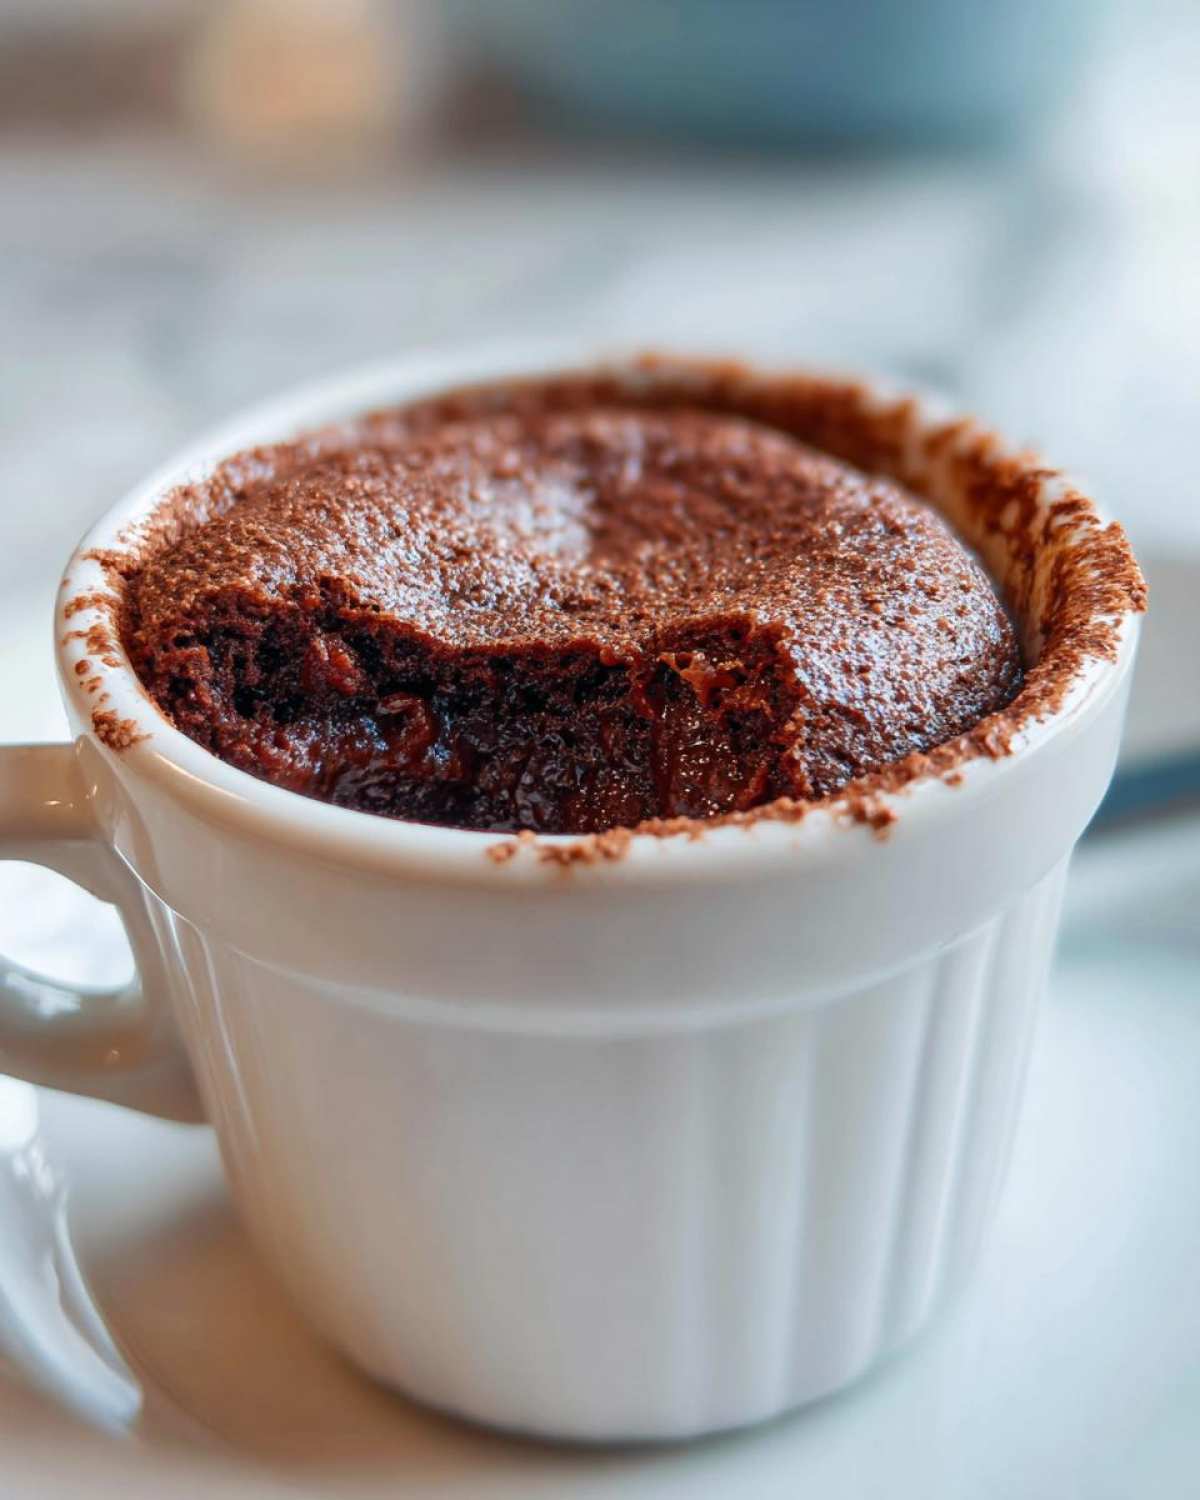
Why This Cottage Cheese Microwave Brownie Recipe Works for You
This isn’t just another mug cake; this is the real deal when you need speed, serious protein, and almost zero cleanup. If you’re busy but still focused on your goals, this Cottage Cheese Microwave Brownie is your new secret weapon. It really cuts down on that desire for cardboard-tasting fitness snacks.
- Minimal ingredients, maximum flavor payoff.
- Cooks faster than your microwave preheats!
- Protein packed to keep you full.
High Protein Content from Cottage Cheese
Okay, let’s talk about the star—the cottage cheese! It gives you a huge protein kick without adding any weird taste, I promise. The absolute key here, though, is that you must blend it until it’s totally silky smooth first. If it’s gritty, you’ll feel it, and that ruins the whole fudgy experience.
The Magic of Microwave Cooking for a Quick Single Serving Brownie
Nothing beats the speed here. We’re talking maybe 90 seconds max in the microwave. This turns a dessert craving that might normally take you 30 minutes of baking and cooling into something you can eat before your afternoon slump even hits. It’s the ultimate Quick Single Serving Brownie solution.
Gathering Ingredients for Your Cottage Cheese Microwave Brownie
Alright, time to get your supplies together! Since this is a single-serving recipe, the measurements are tiny, but they have to be precise, especially when you’re making a Cottage Cheese Microwave Brownie. You’ll need five key things, plus cocoa and your binder. Remember, the very first step—before you mix anything else—is blending that cottage cheese until it looks like thick, creamy yogurt. Don’t skip that!
If you are prepping these for meal prep, I highly recommend checking out my recipe for Chocolate Protein Muffins next week, because that batch uses similar ingredients but bakes into a tray!
Ingredient Notes and Substitutions for Your Microwave Protein Brownie
I’ve got a few tricks for choosing your ingredients here. If you can find small-curd cottage cheese, go for it; it blends slightly smoother, but regular works fine if you give it a good whirl. For the flour, I usually use almond flour, but if you’re out, oat flour is a fantastic swap for this Microwave Protein Brownie.
Sweeteners are tricky in microwave recipes. If you’re using a granular sugar substitute like erythritol, give it an extra thirty seconds in the microwave, because granular sugar takes longer to melt than liquids. If you use maple syrup or honey, that’s fine, but just know you might need slightly less liquid overall next time you bake it!
Step-by-Step Instructions for the Fudgy Cottage Cheese Microwave Brownie
Getting this right in the microwave is all about timing and preparation. Brownies cooked this fast can go from fudgy perfection to hockey puck in about five seconds, so you have to watch them! If you followed the ingredient list, you’re already halfway there. If you want those amazing chewy edges I love, check out my guide on fudgy triple chocolate brownies for baking tips, although those are for the oven, the texture goal is the same!
Preparing the Smooth Base: Blending the Cottage Cheese
This is non-negotiable, people! Grab your little immersion blender or a mini food processor. Put that 1/4 cup of cottage cheese in and blend, blend, blend until it looks unrecognizable—smooth, creamy, and lump-free. We’re aiming for something that looks like thick sour cream. If you see any little white specks when you transfer it to the mug, stop and blend again! We aren’t having a gritty Cottage Cheese Microwave Brownie on my watch, trust me.
Microwaving Time Adjustments for the Perfect Microwave Protein Brownie
Once your batter is mixed in your microwave-safe mug, get ready. Microwaves are wildly different—mine is 1100 watts, but yours might be 700 or 1200. That’s why we start low! Pop it in for 60 seconds first. Then, watch it. If the edges look completely firm but the very center still looks slightly wet and dark, pull it out. That small bit of gooiness is what gives you that rich, Fudgy Cottage Cheese Dessert texture when it settles.
If it still looks liquidy after 60 seconds, give it another 15-second blast and check again. Never go straight for 120 seconds unless your microwave is seriously ancient! A perfect Microwave Protein Brownie is done when it’s set but still soft to the touch in the middle.
Tips for the Best Cottage Cheese Microwave Brownie Texture
Texture is everything when you’re relying on a microwave for baking, especially with something as temperamental as a Cottage Cheese Microwave Brownie. We want fudgy—not rubbery, not dry, and definitely not gritty. Achieving that perfect melt-in-your-mouth experience is all down to a couple of tiny technique adjustments that I learned by burning a few sad little brownie pucks early on!
If you are aiming for that dense, classic fudgy bite that feels decadent, don’t touch the baking powder. Keep it at the half-teaspoon listed. That small amount helps it set just enough so it holds its structure, but it doesn’t create enough lift to turn into a fluffy cake. The protein and the liquid from the blended cottage cheese do most of the heavy lifting for structure.
Now, if you sneak a peek at the recipe notes, you’ll see I mentioned adding an extra 1/2 teaspoon of baking powder if you prefer a cake-like result. Go for it! That extra lift incorporates more air when it hits the heat, and you’ll end up with something closer to a High Protein Chocolate Mug Cake. It’s still delicious, but it’s a completely different sensation in the mouth.
Here’s my biggest personal tip, and please listen to this part: let it rest! I know you’re dying to dig in right after it comes out, but you must let it sit in that warm mug for at least sixty seconds—ideally two minutes. The residual heat finishes the cooking process gently and, most importantly, it allows the delicate structure to fully set. When you rush it, it collapses into a puddle. Patience equals fudgy perfection, my friends!
Customizing Your High Protein Chocolate Mug Cake
We’ve got the perfect fudgy base recipe, but why stop there? This Cottage Cheese Microwave Brownie is honestly a perfect little canvas for adding extra flavor when you’re making your High Protein Chocolate Mug Cake. Since the volume is so small, a little bit of extra flavor goes a long way, and we aren’t worried about keeping the texture perfect because we are adding chunky mix-ins!
If you want to jazz it up, I always suggest going for spices first. A tiny pinch—maybe an eighth of a teaspoon—of ground cinnamon blends beautifully with the cocoa powder and makes the chocolate taste deeper. If you are really trying to maximize your energy boost, try a small dash of instant espresso powder; it doesn’t make it taste like coffee, it just makes the chocolate sing!
For mix-ins, think small since this is just one serving. A tablespoon of sugar-free chocolate chips is my favorite move—they melt right into fudgy pools on top. If you have some chopped nuts lying around, like walnuts or pecans, throw in a teaspoon. They add a little needed crunch against the soft batter.
If you’re looking for more grab-and-go ideas after you finish this amazing snack, you have to check out my recipe for No-Bake Trail Mix Granola Bars—they use pantry staples and require zero oven time, just like this brownie!
Remember, since we aren’t baking for long, anything you add should be able to cook through quickly. Chopped dried fruit is usually too tough unless you soak it first, so stick to melting chips or small, finely chopped nuts for the best results!
Serving Suggestions for Your Easy Protein Dessert Snack
Okay, your Cottage Cheese Microwave Brownie is out of the microwave, it’s set up just perfectly, and now you have this incredible, warm, high-protein chocolate treat sitting right in front of you. You could totally eat it straight out of the mug with a spoon—and I *do* that often when I’m feeling lazy—but if you have an extra 30 seconds, you can make this little single-serving dessert look fancy!
When I know I’m actually going to sit down and savor this Easy Protein Dessert Snack instead of eating it standing over the counter, I always jazz up the top. Since the brownie itself is already rich and slightly dense, you want toppings that add a little tang or extra creaminess.
My absolute favorite way to top it is with a tiny dollop of plain Greek yogurt. It’s cold, tangy, and it’s another huge protein boost, which feels great after a workout. If you don’t have Greek yogurt, even a spoonful of light whipped cream works wonders to break up that intense chocolate flavor.
Another simple trick is just a light dusting of powdered sweetener right before I serve it. It catches the light and makes it look like a restaurant dessert, even though it took less than two minutes to make! If you’re feeling truly ambitious, you could even swirl in a tiny bit of warmed-up nut butter on top.
Speaking of decadent-tasting but easy treats, if you ever need something cooler, you have to see how my recipe for Avocado Chocolate Chip Ice Cream tricks people into thinking they are eating super-rich dessert when it’s actually full of healthy fats!
Ultimately, the best way to enjoy this little powerhouse is however you can eat it fastest while it’s still warm. Enjoy this speedy payoff for all your hard work!
Storage and Reheating Instructions for Leftover Cottage Cheese Microwave Brownie
Now, this is where things get interesting. Let’s be real; I usually make mine for one serving and devour it immediately. It’s a craving crusher! But if you’re smart and you decide to double the batch of this Cottage Cheese Microwave Brownie, or maybe you just made one too large for your current hunger level, you absolutely can save some for later.
Because we are using cottage cheese and an egg white, this isn’t a shelf-stable cookie. It absolutely needs refrigeration if you aren’t eating it within a couple of hours. Pop that mug or ramekin right into the fridge. It’ll keep nicely for up to three days. I’ve stored mine longer, but honestly, the texture is best within the first 48 hours.
Preventing That Rubbery Texture When You Reheat
This is the most crucial part of storing any microwave brownie. When you pull it out of the fridge, it will be quite firm—that’s normal! Nobody wants a cold, dense slab of protein brownie, so reheating is essential.
Here is my hard-and-fast rule for reviving a refrigerated Microwave Protein Brownie: If you’re planning on reheating it, make sure you reheat it *before* you add any toppings like yogurt or whipped cream. Put it back in the microwave where it was cooked.
Start with short bursts! Seriously, 10 seconds is usually plenty. If you blast it for 30 seconds like you would a regular leftover dinner, you’re just going to dry out those proteins from the cheese and the egg white, and boom—instant rubber texture. I like to give it 10 seconds, check it, maybe give it 5 more if needed, and then let it sit for 20 seconds outside the microwave before tasting. That residual heat warms it up beautifully without cooking it further.
Can You Freeze Extra Servings?
Yes, you certainly can freeze these little beauties, although I usually just make two fresh ones if I know I want two! If you are freezing your Quick Single Serving Brownie, the best way is to let it cool completely first, then wrap the individual mug or ramekin tightly in plastic wrap, and then toss it into a freezer bag. Freezing it *in* the container keeps it from getting squashed.
When you want to eat the frozen one, thaw it overnight in the fridge. Then, follow the short reheating instructions above! It thaws really well, often tasting almost as good as fresh if you are gentle with the reheat.
Frequently Asked Questions About the Cottage Cheese Microwave Brownie Recipe
I know you’re probably looking at this recipe wondering if it’s too good to be true, especially when you’re tracking macros or keeping things strictly low carb! I get it. It took me a few tries to nail this down, but I’ve answered the most common questions my friends always ask me about this speedy little treat. If you want even more great baking content, wander over to my main blog page!
Can I taste the cottage cheese in this Low Carb Microwave Brownie?
This is the million-dollar question! And I love answering it because the answer is usually no! If you blend that cottage cheese until it is absolutely silky smooth—and I mean *silky smooth*—the cocoa powder and your sweetener completely take over the flavor profile. What you’re left with is delicious, deep chocolate flavor, plus the structural benefits and high protein count. You don’t taste the tang; you just get incredible moisture for your Low Carb Microwave Brownie!
What happens if I use regular cottage cheese without blending?
Oh boy, don’t do it if you want it to be good! If you just spoon regular, lumpy cottage cheese into the mug, it won’t melt or incorporate properly during that short microwave blast. What you end up with is a chocolatey, egg-bound batter with little white, slightly rubbery pockets in it. That is definitely not the lovely, unified texture we want in a Cottage Cheese Microwave Brownie. Please, please, blend it first!
Can I use regular sugar instead of a sweetener?
Yes, absolutely! If you’re not watching the sugar count, you can definitely swap out the keto-friendly sweetener for white granulated sugar or brown sugar. But here’s the key piece of advice for your E-E-A-T brownie success: sugar caramelizes and sets up differently in the microwave than sugar substitutes do.
If you use regular sugar, your brownie will likely need just a bit longer to cook—maybe an extra 15 to 20 seconds on top of the initial time. If you go straight for 90 seconds with regular sugar, you risk it drying out because it sets harder and faster than an erythritol mix. Always start low and check often, especially when you change the main sweetener!
Rate Your Quick Microwave Protein Brownie Experience
Whew! Now that you’ve managed to whip up the fastest, fudgiest, highest-protein chocolate treat imaginable, I really, really want to hear what you thought!
Did it cook perfectly in 60 seconds or did you need the full 90? Did you add cinnamon or espresso powder? Tell me everything about your new favorite Cottage Cheese Microwave Brownie creation in the comments below.
Did this recipe save your afternoon slump? Go ahead and give it a star rating right here so others can see how easy and delicious this microwave option is. If you try it, please tell me—I live for that feedback! Happy snacking!
PrintOne-Minute High-Protein Cottage Cheese Microwave Brownie
Make a quick, single-serving, fudgy brownie using cottage cheese for added protein. This recipe cooks in the microwave in under two minutes.
- Prep Time: 3 min
- Cook Time: 1.5 min
- Total Time: 4.5 min
- Yield: 1 serving
- Category: Dessert
- Method: Microwave
- Cuisine: American
- Diet: Low Fat
Ingredients
- 1/4 cup blended cottage cheese
- 1 tablespoon cocoa powder
- 1 tablespoon almond flour or oat flour
- 1 tablespoon sweetener (e.g., erythritol or maple syrup)
- 1/2 teaspoon vanilla extract
- 1/4 teaspoon baking powder
- 1 small egg white
- 1 tablespoon chocolate chips (optional)
Instructions
- Place the cottage cheese in a small blender or food processor and blend until completely smooth.
- In a microwave-safe mug or small ramekin, combine the blended cottage cheese, cocoa powder, flour, sweetener, vanilla extract, and baking powder. Mix well until just combined.
- Stir in the egg white until the batter is smooth. Fold in chocolate chips if using.
- Microwave on high power for 60 to 90 seconds. Cooking time varies based on microwave wattage; start with 60 seconds.
- The brownie is done when the edges look set but the center is still slightly soft for a fudgy texture.
- Let it cool in the mug for one minute before eating directly from the container.
Notes
- Blending the cottage cheese is necessary to achieve a smooth, non-gritty texture in the final brownie.
- If you prefer a cake-like texture, add an extra 1/2 teaspoon of baking powder.
- For a richer chocolate flavor, use dark cocoa powder.
Nutrition
- Serving Size: 1 brownie
- Calories: 180
- Sugar: 4
- Sodium: 150
- Fat: 6
- Saturated Fat: 2
- Unsaturated Fat: 4
- Trans Fat: 0
- Carbohydrates: 15
- Fiber: 3
- Protein: 18
- Cholesterol: 5