

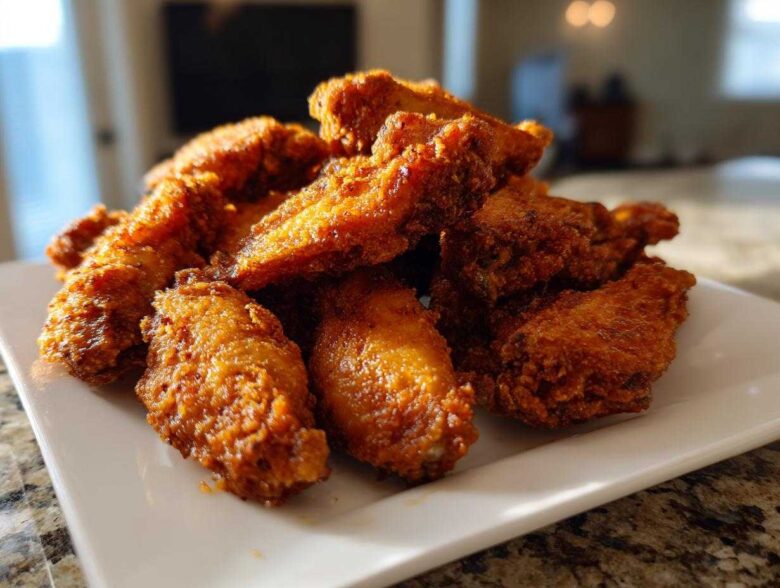
Oh, the tragedy of the soggy oven wing! I’ve been there more times than I care to admit, staring sadly at flabby, pale skin after spending 50 minutes in the oven waiting for that beautiful crunch. Forget the deep fryer; we don’t need that mess or the guilt! After years of trial and error, I finally cracked the code for genuinely **crispy baked chicken wings** that rival any deep-fried version. Seriously, this trick is so simple, it feels like cheating. It all comes down to one magical pantry staple: baking powder. Trust me, once you adopt this technique, you’ll never go back. It guarantees juicy inside, crispy outside chicken every single time! For more tips and recipes, check out my latest posts at my main blog page.
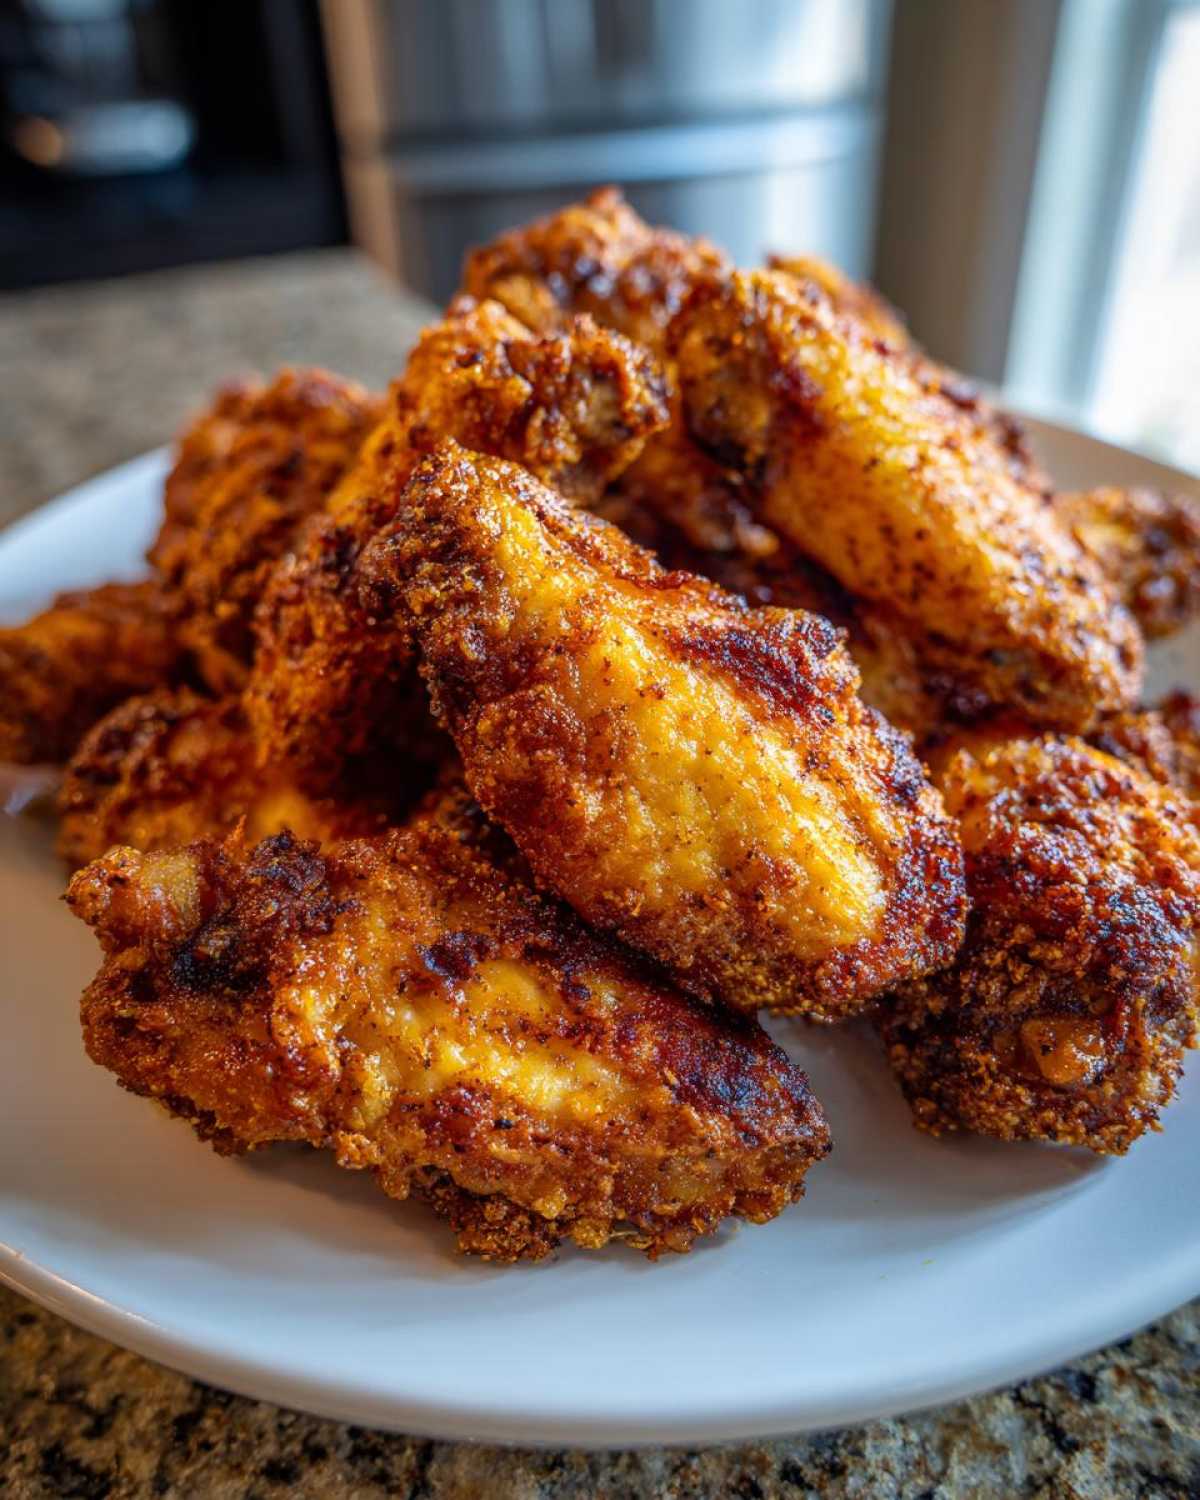
Why This Method Creates the Best Crispy Baked Chicken Wings (No Frying Needed)
Okay, so everyone knows that frying gets wings crispy, but you asked for the best technique for crispy baked chicken, and I’m going to show you why this baking powder situation is non-negotiable. It’s all science, folks! We aren’t relying on guesswork here; we are manipulating the skin to do the work for us. The goal, which we absolutely nail, is that unattainable texture: juicy inside crispy outside chicken.
When moisture is the enemy of crispiness, we need an ingredient that actively dries out that skin surface. That’s where our magic dust comes in. It’s the difference between sad, flabby wings and wings you’ll want to shout about at your next party!
The Science of the Baking Powder Chicken Wings Hack
Aluminum-free baking powder is fantastic because it’s slightly alkaline. When you toss the completely dry wings in it, the powder raises the pH level on the skin. This chemical reaction helps break down proteins, which lets the skin dehydrate much faster in the oven. Basically, it helps suck out that surface moisture so that when the heat hits, you get shattering crispness instead of steam!
Essential Ingredients for Perfect Crispy Baked Chicken Wings
Now that you know the secret weapon—that glorious baking powder—let’s get everything lined up. You don’t need five dozen fancy ingredients to roast up the best oven baked chicken wings you’ve ever had. Keep it simple, and focus on high-quality basics. I always weigh my wings, but if you don’t have a scale, two pounds is usually about 16 to 20 pieces, depending on how big your flats are!
Here is exactly what you need ready to go before you start prepping:
- 2 lbs chicken wings, separated into flats and drumettes – please take the time to do this; it helps them cook evenly!
- 1 tablespoon baking powder – and please try to grab the aluminum-free kind; it just tastes cleaner.
- 1 teaspoon salt
- 1/2 teaspoon black pepper
- 1/2 teaspoon garlic powder
- 1/4 teaspoon cayenne pepper (only if you like a little kick!)
- 1 tablespoon olive oil (optional, I sometimes skip this, but it helps the seasoning stick if your wings are super dry).
That’s it! No weird flours, no complicated gluey mixtures. Just pure crispness waiting to happen.
Step-by-Step Instructions: How to Make Crispy Baked Chicken Wings
Alright, this is where the magic really happens! Following these steps is the best way to learn how to make wings crispy in oven without wrestling with a deep fryer. The exact temperature and the setup are more important than you might think, so follow along closely. We are aiming for that perfect rendering of fat and drying of the skin!
Preparation and Coating for Crispy Baked Chicken Wings
First things first, preheat your oven. We need serious heat for this: 425 degrees Fahrenheit. Don’t even think about starting with a cold oven! Next, grab a standard baking sheet and line it with foil—this saves you scrubbing later, trust me. Then, you absolutely must place a wire cooling rack right on top of that foil. This rack is crucial because it allows heat to circulate 360 degrees around the wing, meaning no soggy bottoms whatsoever.
Now, the most important, non-negotiable task: drying the wings. Pull out every paper towel you own. Pat, pat, pat those wings dry until there is zero visible moisture on the skin. Seriously, if the skin is even a little damp, the baking powder won’t work its magic. Once dry, toss them into a bowl with your dry seasoning mix—that salt, pepper, garlic powder, cayenne, and the hero, baking powder. Toss them until they look lightly dusted, almost dusty white, and then lay them out on your glorious wire rack. Keep them spaced out; overcrowding stalls the crisping process!
Baking and Achieving the Final Crisp on Your Crispy Baked Chicken Wings
Into the 425°F oven they go for the first round: 25 minutes exactly. They’ll start looking nice and golden brown around the edges. After 25 minutes, use tongs to flip every single wing over. This ensures both sides crisp up beautifully. Then, pop them back in for another 20 to 25 minutes. You’re looking for that deep golden color and a skin that looks tight and crackly—the sign of that juicy inside crispy outside chicken we love.
For the grand finale, if you want that extra shatter, switch your oven to the broil setting right at the end. Keep the oven door slightly ajar and walk away! Broil for just 1 to 2 minutes, watching like a hawk because things go from perfect to burnt in about 15 seconds flat! Once they come out, they are ready to eat plain or toss them into your favorite sauce immediately.
Pro Tips for Unbeatable Crispy Baked Chicken Wings Every Time
Okay, you’ve mastered the baking powder coat and the wire rack setup, but I have a few final pointers to ensure you get that legendary crunch every time you try making these easy oven fried wings at home. These often-forgotten details are what separate a decent wing from an unforgettable one. Seriously, don’t skimp on the spacing!
The absolute biggest mistake people make when aiming for crispy wings no fry results is overcrowding the baking sheet. If your wings are touching, they start steaming each other! You need air flowing all around them so that beautiful baking powder crust can transform into crackly perfection. If you’re making a huge batch for game day, you might need to use two separate racks, even if it means slightly longer cooking times across the board. It’s worth the small wait!
And hey, a quick word about saucing: if you plan on using a sticky sauce like buffalo or my favorite, garlic parmesan baked wings, only toss them *after* they have fully cooked and crisped up! If you sauce them too early, all that moisture will instantly turn your hard-earned crust soggy again. Toss them right before serving, and they’ll still hold onto that crispness for a good long while. Head over to my main blog page for more game day appetizer ideas!
Choosing the Best Oven Temperature for Crispy Wings
I get asked all the time if they can go lower—maybe 375°F to be safe? Nope! We need that serious blast of heat, which is why 425°F is the sweet spot before the final broil. High heat is vital because it aggressively renders out the fat trapped under the skin quickly. Rendering the fat means less grease sitting there, which directly translates to crispier texture. It’s the intense heat that hardens that surface coating we created with the baking powder, setting us up perfectly for that final blast under the broiler to hit peak golden brown color.
Flavor Variations for Your Crispy Baked Chicken Wings
So, you’ve got the perfectly crispy base—that’s the hard part done! Now we get to have the most fun: seasoning and saucing. This base recipe is incredible plain, dusted simply with salt and pepper, but it’s screaming out for flavor! If you’re looking for that classic heat, tossing them immediately after they come out of the oven in a homemade buffalo sauce is the way to go. I like mine extra tangy, so I always add a tiny splash of vinegar to my butter/hot sauce mixture.
But my personal favorite weeknight flavor, especially when I’m serving them alongside my roasted Brussels sprouts? That’s the garlic parmesan route. Once the wings are fully cooked and crispy, melt a few tablespoons of butter with tons of fresh minced garlic, then toss the wings in that garlic butter before showering them in freshly grated Parmesan cheese. It sticks perfectly to the hot, slightly textured skin. You’ll never buy those frozen bags again, I promise!
You can also just add spices directly into the baking powder dredge. A teaspoon of smoked paprika or some onion powder mixed in before coating gives you a completely different result right out of the oven, making them fantastic party finger food chicken delights!
Serving Suggestions for Your Healthy Baked Wings Recipe
The best part about achieving these super crunchy wings without deep frying is that they feel totally guilt-free! This makes them the perfect centerpiece for any spread, especially when you’re hosting a big game day. Since they aren’t swimming or soaking in oil, they hold up so well on a platter—true star material for any party finger food chicken setup.
For dipping, skip heavy ranch and opt for something lighter to keep the whole meal on the healthier side. My go-to is a homemade creamy yogurt dip mixed with herbs, or honestly, a big bowl of my homemade guacamole is always a massive hit! For something fresh on the side, always serve these with a huge bowl of raw celery and carrot sticks. That cool, hydrating crunch cuts through the richness of the wing perfectly.
Storage and Reheating for Crispy Baked Chicken Wings
We all know leftovers are proof of a good meal, but nobody wants gummy wings the next day! If you have any **crispy baked chicken wings** remaining, don’t even think about the microwave—that heat reverses everything we worked so hard for. Storing them flat in an airtight container in the fridge for up to three days works fine.
The trick to bringing them back to life is rapid, dry heat. Pull them out and pop them straight into a 400°F oven for about 8 minutes, or better yet, toss them into your air fryer for about 4 minutes. That heat blast will reactivate that baking powder crust and make them crispy again!
Frequently Asked Questions About Crispy Baked Chicken Wings
I know when you’re hunting for that perfect **crispy wings no fry** method, a few little worries always pop up. Don’t stress! These are the questions I got all the time when I was perfecting this recipe for my game day chicken wings appetizer. Let’s clear up any last bits of confusion so your next batch of **oven baked chicken wings** comes out absolutely perfect!
Can I use regular baking soda instead of baking powder for crispy wings?
Oh, this is a big one! And the answer is a firm, enthusiastic no—you really shouldn’t swap them out. Baking powder is blended with a mild acid, which creates that gentle lift and pH change we need to dry the skin without making the wings taste weird. If you use just straight baking soda, it’s way too alkaline, and you risk your beautiful wings coming out tasting metallic or just soapy, and that is definitely not the flavor profile for a successful healthier chicken wings recipe!
What if I don’t have a wire rack? Can I still make crispy wings no fry?
I get that sometimes kitchen drawers aren’t stocked completely! The wire rack is my secret weapon because it allows that hot air to bathe the bottom of the wing, which is the main area where sogginess usually attacks. If you absolutely, positively don’t have one, your next best bet for maximizing the crisp is to place the wings on a foil-lined baking sheet, but you MUST flip them over twice as often as the recipe suggests. Even so, I’m telling you, that rack is what makes this the best technique for crispy baked chicken!
Are these healthier chicken wings recipe options truly low fat?
Compared to deep frying? Absolutely, yes! Cutting out that submersion in oil makes a huge difference in overall fat content, which is why I classify this as a healthier approach to wings. However, remember that chicken wings, especially the pieces with the skin on, naturally contain fat that renders out during cooking. The nutritional guide is an estimate based on the plain, coated wing; if you toss them in a heavy, butter-laden sauce afterwards, your fat content will naturally go up! So, for real low fat, enjoy them plain or with a yogurt dip!
If you want to see more of my favorite foolproof methods, make sure you check back often at my baking hub!
Nutritional Estimates for Crispy Baked Chicken Wings
Listen, I always tell people that because we’re baking and not deep frying, these are a much smarter choice for game day, but they still require a little awareness, right? I broke down the numbers based on using four of the uncoated wings fresh out of the oven. This gives you a real baseline before you dump a whole cup of buffalo sauce on them!
Here are the estimates for serving size (4 wings):
- Calories: 250
- Fat: 15g (with 4g saturated fat)
- Protein: 26g
- Carbohydrates & Fiber: Practically nothing!
- Sodium: 350mg (Remember, this is before you add any salt to your sauce!)
I always want to be super clear here—these figures are just an estimate based on the recipe ingredients alone. If you use a super salty spice rub, or if you decide to try my savory homemade Worcestershire sauce or a sweet glaze, those numbers are going to shift. You can find more details on ingredient sourcing and safety guidelines over on my disclaimer page, but for a guilt-free appetizer, this plain baked wing is a winner!
Share Your Crispy Baked Chicken Wings Success
Seriously, now it’s your turn! I’ve shared my absolute best secret for achieving truly **crispy baked chicken wings** without ever touching the fryer. I really, really want to know how they turned out for you. Did the baking powder trick actually work its magic?
If you loved the results—if you finally achieved that elusive juicy inside crispy outside chicken—please do me a huge favor and shoot me a five-star rating right here on the recipe card. And don’t be shy about the comments below!
Tell me everything! Did you go for the buffalo style or did you try the garlic parmesan variation? Knowing what flavor profiles you enjoyed helps me figure out what to feature next. Happy baking, and I can’t wait to hear about your game day snack!
PrintThe Ultimate Secret to Truly Crispy Baked Chicken Wings (No Frying Needed)

Follow this method using baking powder to achieve juicy inside, crispy outside chicken wings baked entirely in the oven.
- Prep Time: 15 min
- Cook Time: 50 min
- Total Time: 65 min
- Yield: 4 servings
- Category: Appetizer
- Method: Baking
- Cuisine: American
- Diet: Low Fat
Ingredients
- 2 lbs chicken wings, separated into flats and drumettes
- 1 tablespoon baking powder (aluminum-free preferred)
- 1 teaspoon salt
- 1/2 teaspoon black pepper
- 1/2 teaspoon garlic powder
- 1/4 teaspoon cayenne pepper (optional)
- 1 tablespoon olive oil (optional, for tossing after coating)
Instructions
- Preheat your oven to 425 degrees Fahrenheit. Line a baking sheet with foil for easy cleanup, and place a wire cooling rack on top of the foil.
- Dry the chicken wings thoroughly. Pat them completely dry using paper towels. Moisture prevents crisping.
- In a medium bowl, mix the baking powder, salt, pepper, garlic powder, and cayenne pepper.
- Toss the dry chicken wings in the baking powder mixture until every piece is lightly and evenly coated. Do not skip the baking powder; this is the key to crispiness.
- Arrange the coated wings on the wire rack in a single layer, ensuring space between each piece for air circulation.
- Bake for 25 minutes at 425 degrees Fahrenheit.
- Flip the wings over. Return to the oven and bake for another 20 to 25 minutes, or until the skin is deeply golden brown and very crisp.
- For extra crispness, switch the oven setting to broil for the last 1 to 2 minutes, watching closely to prevent burning.
- Remove from the oven and serve immediately, or toss with your favorite sauce (like buffalo or garlic parmesan) after baking.
Notes
- Use aluminum-free baking powder for the best flavor results.
- The wire rack allows heat to circulate underneath the wings, preventing a soggy bottom.
- Do not overcrowd the baking sheet; use two racks if necessary.
- If you plan to sauce the wings, wait until they are fully cooked and crisp before tossing them.
Nutrition
- Serving Size: 4 wings
- Calories: 250
- Sugar: 0
- Sodium: 350
- Fat: 15
- Saturated Fat: 4
- Unsaturated Fat: 11
- Trans Fat: 0
- Carbohydrates: 1
- Fiber: 0
- Protein: 26
- Cholesterol: 85