

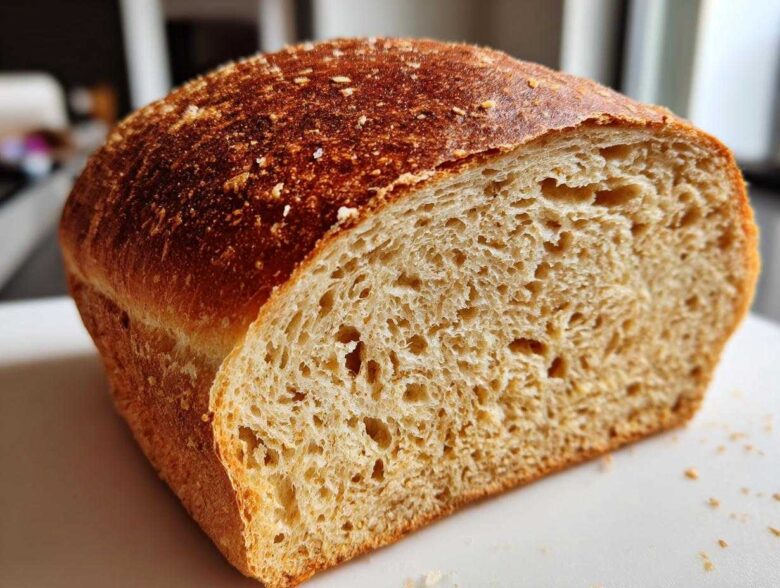
Oh, I know the struggle! You try to bake **whole wheat bread** at home, expecting that beautiful, fluffy loaf you remember, and what do you get? A brick! It’s the single most frustrating baking experience, isn’t it? For years, I thought I just wasn’t destined for hearty grain baking. But, trust me, I figured out the secret.
What you need is my **Soft & Easy Honey Whole Wheat Sandwich Bread** recipe. I’m not kidding when I say this recipe changed everything. After one too many dense loaves, I finally nailed the balance of flours and moisture that gives you that light, airy, tender crumb every single time. It’s perfectly sweetened with honey, wonderfully simple, and, yes, it’s truly fluffy!
It’s the last recipe you’ll ever need for daily sandwiches. No more supermarket sadness!
Why This Soft Honey Whole Wheat Bread Recipe Works
The biggest fear with whole grain baking is density, right? We’ve all been there, scraping gummy bread off the pan. This recipe bypasses that entirely because it respects the structure of the whole wheat flour while still delivering that light texture we crave in a Soft Whole Wheat Sandwich Bread.
It’s about treating the yeast right and balancing the heavy grain with refined flour. That’s the magic trick that gives you this wonderful Fluffy Homemade Bread. You don’t have to sacrifice flavor or texture just because you want something wholesome!
Achieving the Perfect Rise in Your Whole Wheat Bread
Yeast is sensitive, so we have to be gentle. First, that water absolutely must be warm, not hot! If it’s too hot, you kill the yeast, and your bread will be flat—end of story. You want it between 105°F and 115°F. I swear by my instant-read thermometer for this step.
The honey isn’t just for sweetening; it’s the yeast’s favorite food source! It gives the yeast the perfect power boost to create those beautiful gases needed for a tall rise.
Tips for Making Easy Whole Wheat Loaf Texture Better
Here’s the game-changer for any Easy Whole Wheat Loaf: we use a blend of flours. You can’t just swap everything to whole wheat flour; it just doesn’t have the same gluten structure as all-purpose flour. That’s why I mandate three cups of whole wheat mixed with one cup of regular flour.
Kneading is also non-negotiable here. You need that full 6 to 8 minutes to develop the gluten network. That network is what traps the gas and keeps your bread from collapsing back into a sad, squat disc. Trust me on the kneading time!
Gathering Ingredients for Your Soft Whole Wheat Sandwich Bread
Okay, listen up, because precision matters when you’re aiming for that beautifully soft texture in your whole wheat bread. This isn’t a place to eyeball things, especially not the liquid! We need to be clear about what we’re using so there are zero surprises when it comes time to mix.
Grab your scale or your measuring cups. We want everything ready to go before we even think about waking up the yeast. Here is the exact lineup I use for a perfect loaf:
- Warm water: It needs to be between 105°F and 115°F. I can’t stress this enough—that’s the sweet spot for happy yeast!
- Active dry yeast: We use 2 1/4 teaspoons. That’s one standard packet, for the folks who want an easy measure.
- Honey: 1/4 cup. This is the natural sweetener and yeasty fuel.
- Unsalted butter, melted: Exactly two tablespoons. Melt it, but don’t let it get scorching hot.
- Salt: Just a touch—1 1/2 teaspoons. It brings out the nutty flavor of the grain.
- Whole wheat flour: Three cups. This is the backbone of our healthy loaf.
- All-purpose flour: One cup. Don’t skip this part! We need this lighter flour to keep things fluffy.
If you want to see how I keep my granola clusters healthy and crunchy, check out my granola recipe—we have similar philosophies about wholesome eating!
Ingredient Notes and Substitutions for Whole Wheat Bread
Let’s talk flour first. The 3:1 ratio of whole wheat to all-purpose is key to avoiding a hockey puck. If you swap that one cup of all-purpose flour entirely for more whole wheat, you’ll end up with a much denser, more rustic loaf. It’s totally doable if that’s what you like, but you won’t get this specific soft result for your whole wheat bread.
As for the honey, that’s super flexible! If you run out or just prefer a different flavor profile, use pure maple syrup instead. It works just as well to feed the yeast and adds a beautiful, deep caramelized note. You measure it Cup-for-Cup. Easy!
Step-by-Step Instructions for This Simple Whole Wheat Recipe
This is where the real fun starts! I know looking at a list of steps can feel overwhelming, but I promise, this Simple Whole Wheat Recipe flows beautifully once you get moving. The key here is timing and watching for those visual cues—they tell you much more than the clock ever could sometimes! Keep your mind on that gorgeous, soft loaf we’re aiming for.
You don’t need a fancy stand mixer for this, either. I often do this by hand, just like the old timers. We’ll work through the major stages: yeast activation, dough formation, the two rises, and finally, baking it off.
Activating Yeast and Mixing the Honey Wheat Bread Recipe Dough
First things first: wake up that yeast. Gently mix the warm water and the yeast together in your big bowl. You absolutely must let it sit for five minutes, undisturbed. If you see foam bubbling up on top—success! That’s your visual cue that the yeast is alive and ready to work its magic for our Honey Wheat Bread Recipe dough.
Once it’s foamy, stir in the honey, the melted butter, and the salt. Now, dump in the three cups of whole wheat flour and mix that up until it looks shaggy, like a messy pile of crumbs stuck together. Don’t over-mix here; just get it combined before we move on!
Kneading and First Rise for Fluffy Homemade Bread
Time to get your hands dirty! Turn that shaggy dough out onto a lightly floured surface. This is the most important muscle work for achieving a Fluffy Homemade Bread texture. You need to knead this dough firmly but gently for a solid 6 to 8 minutes.
When you’re done kneading, the dough should look smooth, not sticky, and feel elastic when you poke it. Oil your bowl lightly, place the dough inside, and turn it over once to coat. Cover it tightly and find a warm spot—maybe near the oven if it’s running—and let it chillax for about one to one-and-a-half hours until it’s doubled in size. Don’t peek constantly, just let it grow!
If you’re ever making something that needs perfectly silky noodles, I have a great guide on stir-fried udon that requires a similar patience level in the mixing!
Shaping, Second Proof, and Baking the Whole Wheat Bread
Gently punch the air out of that big dough mound when it’s doubled. Shape it carefully into a tight log and tuck it seam-side down into your greased 9×5 loaf pan. Now, cover it again loosely.
The second rise is precise: we are waiting until the dough crests about one full inch over the top rim of the pan. Once it’s there, preheat your oven to 375°F (190°C). Bake it for 30 to 35 minutes. Pro tip: skip the twig test! Use a thermometer—when the center hits 200°F, that’s your signal that this whole wheat bread is perfectly baked but still moist inside.
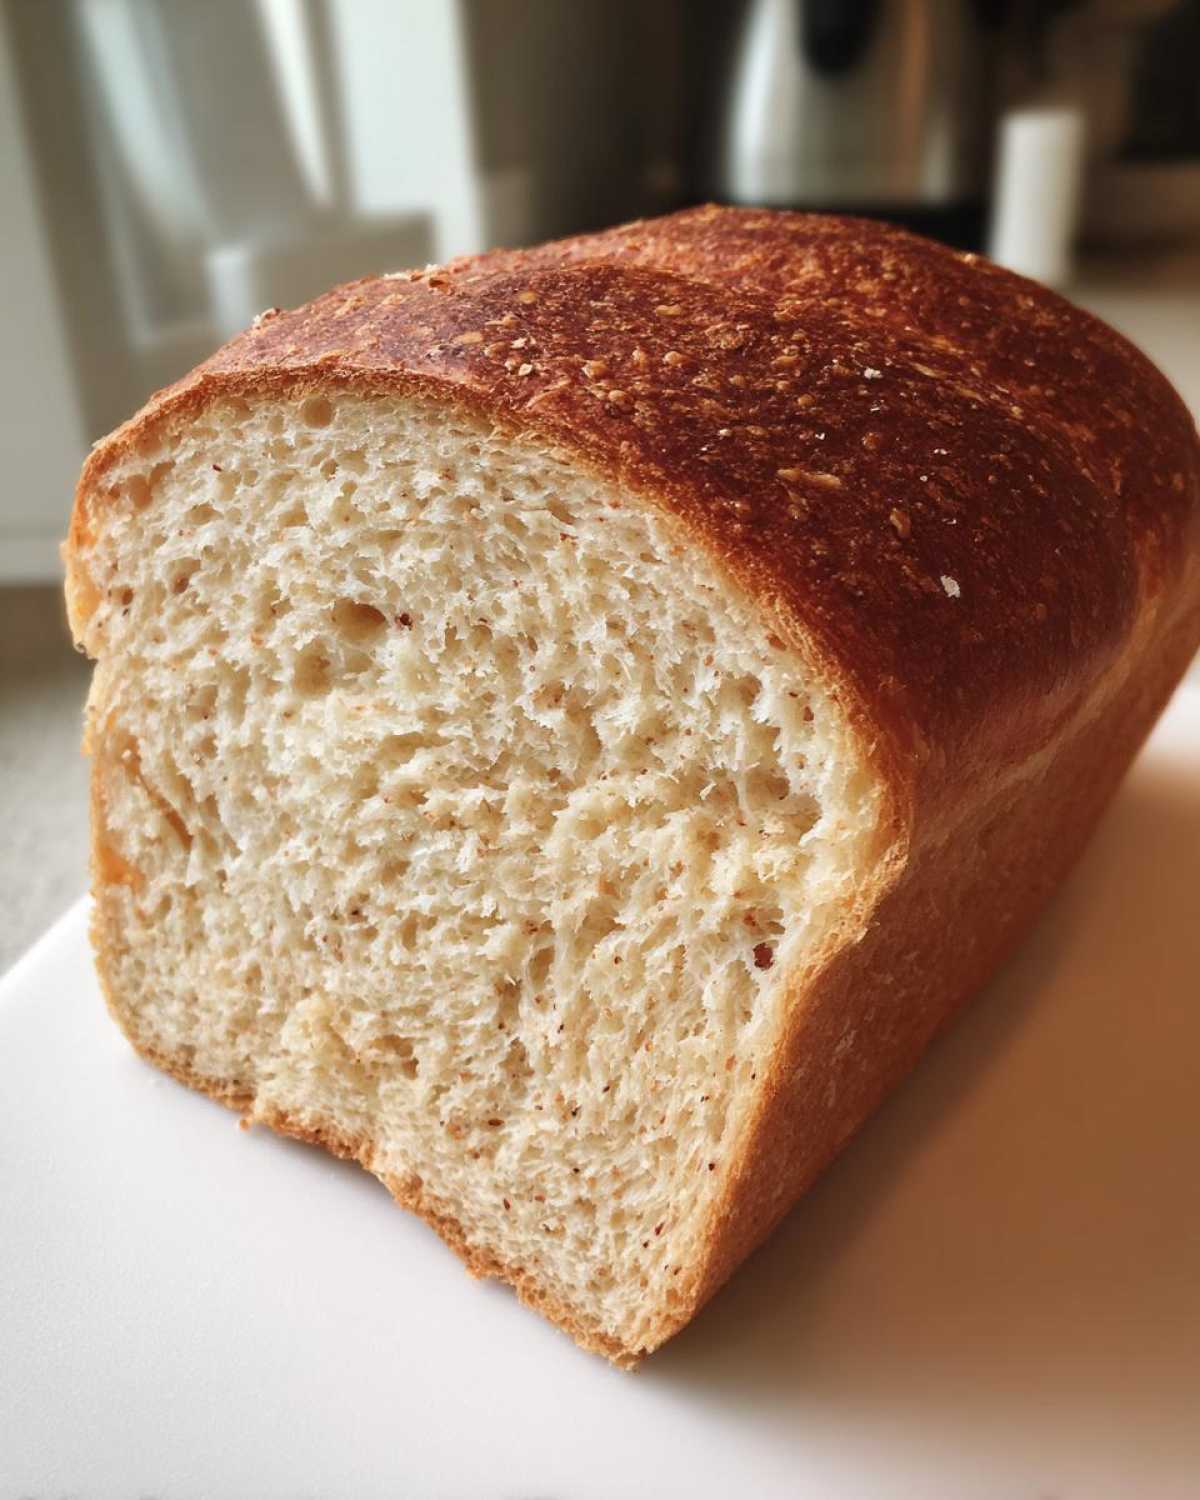
Pull it out immediately and cool it completely on a rack. If you slice it warm, you crush that beautiful soft structure we worked so hard to build!
Tips for Perfect 100 Percent Whole Wheat Baking Success
Now, let’s talk serious troubleshooting. I know some of you want to leap straight into 100 Percent Whole Wheat Baking, and I applaud that ambition! But whole wheat flour is stubbon; it doesn’t behave like the white stuff. If your loaf is coming out dense even when you follow the recipe, sit down, and let’s chat about how to fix your next batch.
This section is for the real enthusiasts, the ones ready to tackle that extra bit of complexity that comes with using only the entire grain. It’s totally achievable even if you consider yourself a Beginner Whole Wheat Bread baker!
Remember that suggestion in my notes about brushing the crust with melted butter right out of the oven? Do that! It softens the crust almost immediately, making the whole eating experience feel less heavy.
If your dough felt super sticky while kneading, don’t panic and dump in a ton of extra flour! Use the advice from the recipe notes: add that remaining all-purpose flour just one tablespoon at a time. You want just enough extra flour to handle it, not enough to change the final moisture balance.
And for the love of fluffy bread, please check that water temperature for your yeast! Seriously, for 100 Percent Whole Wheat Baking, the yeast needs every bit of help it can get to lift that heavy structure. If you miss that temperature window (105°F–115°F), you’ve basically handicapped your rise before you even started kneading. It’s the little things that turn a good loaf into a great one!
If you want to check out some other baking adventures and general kitchen tips, browse my main blog page. Happy baking!
Serving Suggestions for Your Hearty Whole Grain Baking
Now that you have this incredible, slightly sweet, wonderfully soft loaf cooling on the rack, the question becomes: what are you putting on it? Since this is such a versatile Bread for Sandwiches, the possibilities are endless. But honestly, I think the best way to appreciate all that hard work is keeping it simple first.
When the bread is just perfectly cooled—and I know it’s hard to wait—slice it thick. A good smear of good quality salted butter melting into those tiny air pockets? Perfection. It makes the best toast imaginable! The honey gives it just enough sweetness to stand up to savory toppings without tasting like dessert.
For lunch, this bread is sturdy enough for heavy fillings, unlike flimsy white bread. Think thick-cut ham and Swiss, or my favorite deli turkey. It never gets soggy too fast. If you’re looking for a great recipe to fill those sandwiches with, you should definitely check out my recipe for a classic tuna melt!
It’s also fantastic lightly toasted and served with a runny fried egg on top for breakfast. The heartiness of the grain really stands up well against the richness of the yolk. See? It’s not just for sandwiches; it’s an all-day kind of bread!
Storage and Reheating Instructions for Homemade Whole Wheat Bread
Don’t you dare ruin this beautiful, soft loaf by wrapping it in plastic wrap and shoving it in the fridge! That’s bread enemy number one. This Homemade Whole Wheat Bread is best stored at room temperature, wrapped tightly in a clean tea towel or placed in a bread box for up to three days.
If you want that fresh-baked softness back, especially on day three, use the oven! Place a slice directly on the rack at 350°F for just about 4 minutes. It warms right through, and you get that beautiful initial softness again. You can see how I handle the moistness of my zucchini loaf here, as the principle of gentle reheating is the same!
If you made a double batch—because we always do!—slicing it first before freezing is the best move. Store the slices in a freezer bag. When you want toast, you can pop the frozen slice straight into the toaster. Easy peasy!
Frequently Asked Questions About Making Whole Wheat Bread
Can I skip the all-purpose flour and make this a 100% whole wheat bread?
Oh, I know you want to! You can, but you must understand the trade-off. If you use 100% whole wheat flour, your final loaf will definitely be denser and have a heartier, nuttier texture. This recipe is formulated to use that cup of all-purpose flour to guarantee that soft, fluffy rise we talked about. If you switch, you might need an extra splash of water because whole wheat absorbs liquid differently, and you might need to knead it a little longer.
My last batch of whole wheat bread came out like a rock! Why?
That’s the million-dollar question! Usually, it comes down to two things: either your yeast wasn’t happy (water too hot or too cold), or you didn’t knead it long enough. Kneading builds the gluten structure needed to hold up the heavy grain. If you stop kneading too soon, the structure collapses during the proofing, and you get a dense whole wheat bread. You must see that smooth, elastic texture before the first rise!
Can I adapt this recipe to be a No-Knead Whole Wheat loaf?
This specific recipe isn’t ideal for the no-knead method because of how we balance the whole wheat and all-purpose flours. No-knead works best with high-protein white flour. To get a decent rise with this much whole wheat flour without kneading, you’d need a much, much longer slow-fermentation period, often overnight in the fridge. For ease, stick to the kneading method or find a recipe specifically designed for no-knead whole grain baking.
How soon should I slice the bread after baking?
Don’t even look at it for at least an hour once it’s out on the cooling rack! This is hard, I know, especially when it smells this good, but slicing warm bread releases steam too fast, and that moisture loss will immediately dry out the crumb. Let it cool completely so you preserve that soft texture we worked so hard for. If you want to know more about my baking philosophy, check out my about page!
Estimated Nutritional Information for this Whole Wheat Bread
Now, if you’re like me, you bake this whole wheat bread because it tastes amazing and you know it’s healthier than the stuff in plastic bags. But for those of you who track macros, I pulled together the approximate nutritional breakdown for a single slice. Keep in mind that this is estimation only, based on the ingredients listed.
Since whole wheat flour is heavier, the slice size matters! These numbers are based on yielding one loaf and dividing it into standard-sized slices. Don’t get stressed about getting these numbers exactly right—the whole point is that this is a much more wholesome option for your daily toast.
Here is what you can roughly expect per slice:
- Serving Size: 1 slice
- Calories: 130
- Total Fat: 2g
- Saturated Fat: 1g
- Cholesterol: 3mg
- Sodium: 180mg
- Total Carbohydrates: 25g
- Dietary Fiber: 3g
- Sugars: 4g (Mostly from the honey!)
- Protein: 5g
See that fiber? That’s that amazing whole grain working for you! That’s why I love making this whole wheat bread at home, knowing exactly what’s going into my family’s sandwiches.
Share Your Soft Whole Wheat Bread Results
Okay, I’ve shared every little secret I have about making this incredibly soft **whole wheat bread**! I truly hope this recipe eliminates the sadness of dense, heavy loaves from your kitchen forever. Now, it’s your turn to get in there and bake something wonderful.
When you pull that perfectly golden loaf out of the oven, I need to know about it! Please, please come back here and leave a rating. Five stars if you achieved that pillowy, sandwich-ready softness or even four stars if you got close! Your feedback is how I know I’m teaching this right.
Let me know in the comments exactly what you loved. Did the honey flavor come through nicely? Most importantly, did you get that fluffy texture promised? Don’t be shy—I love hearing about your baking triumphs. You can easily reach out to me through my contact page if you have specific questions!
Happy baking, friends. I can’t wait to celebrate your success!
PrintEasy Soft Honey Whole Wheat Sandwich Bread

A simple recipe for baking a soft, fluffy loaf of whole wheat bread perfect for daily sandwiches and toast.
- Prep Time: 20 min
- Cook Time: 35 min
- Total Time: 1 hour 55 min
- Yield: 1 loaf
- Category: Baking
- Method: Baking
- Cuisine: American
- Diet: Vegetarian
Ingredients
- 1 cup warm water (105-115°F)
- 2 1/4 teaspoons active dry yeast
- 1/4 cup honey
- 2 tablespoons unsalted butter, melted
- 1 1/2 teaspoons salt
- 3 cups whole wheat flour
- 1 cup all-purpose flour (plus more for dusting)
Instructions
- Combine the warm water and yeast in a large bowl. Let stand for 5 minutes until foamy.
- Stir in the honey, melted butter, and salt into the yeast mixture.
- Add the whole wheat flour and mix until just combined.
- Gradually add the all-purpose flour, mixing until a shaggy dough forms.
- Turn the dough out onto a lightly floured surface. Knead for 6 to 8 minutes until the dough is smooth and elastic.
- Place the dough in a lightly oiled bowl, turning to coat. Cover the bowl with plastic wrap and let it rise in a warm place for 1 to 1.5 hours, or until doubled in size.
- Gently punch down the risen dough. Shape it into a loaf and place it in a greased 9×5 inch loaf pan.
- Cover the pan loosely and let the dough rise again for 30 to 45 minutes, or until it crests about 1 inch over the rim of the pan.
- Preheat your oven to 375°F (190°C).
- Bake for 30 to 35 minutes, or until the top is golden brown and the internal temperature reaches 200°F (93°C).
- Remove the bread from the pan immediately and cool completely on a wire rack before slicing.
Notes
- For a softer crust, brush the top of the loaf with a little melted butter immediately after removing it from the oven.
- If your dough feels too sticky during kneading, add the remaining all-purpose flour one tablespoon at a time.
- Using a kitchen thermometer to check the water temperature for the yeast is key for a good rise.
Nutrition
- Serving Size: 1 slice
- Calories: 130
- Sugar: 4
- Sodium: 180
- Fat: 2
- Saturated Fat: 1
- Unsaturated Fat: 1
- Trans Fat: 0
- Carbohydrates: 25
- Fiber: 3
- Protein: 5
- Cholesterol: 3