

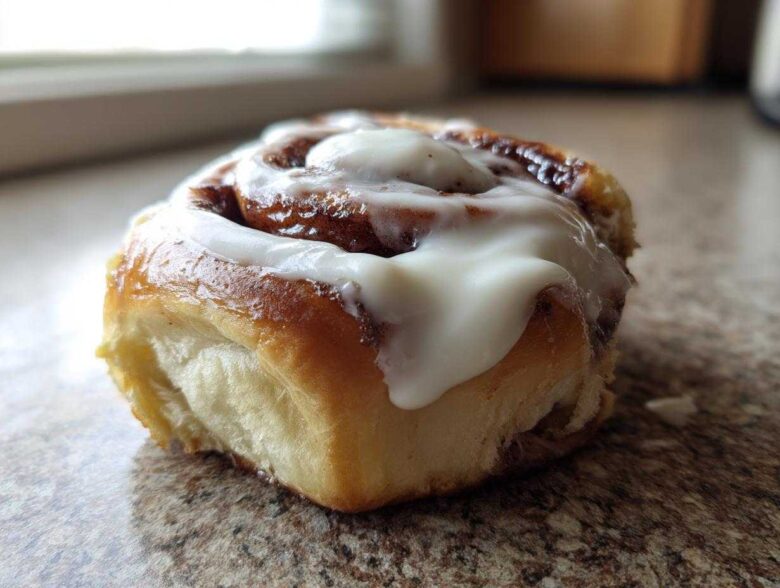
Oh my goodness, do you smell that? If you’re like me, waking up to the overwhelming, sweet aroma of cinnamon filling the entire house is pure heaven. That smell means breakfast is officially an event, not just a meal! For years, I wrestled with dry, tough rolls—the kind that make your jaw hurt. No more! I finally cracked the code for the softest, pillowy, bakery-quality cinnamon roll existence. Honestly, when I first started working with yeast dough ages ago, I thought I’d never get it right. It seemed so temperamental! But this recipe uses warm milk and just the right amount of kneading to give you that perfect, elastic dough that just begs to be rolled. Trust me, this is the sweet breakfast recipe you’ve been searching for, and you’re going to want to bookmark this one immediately. If you need a pancake fix in the meantime, I’ve got a great one over here for next weekend.
Why This is the Best Cinnamon Roll Recipe You Will Ever Make
You’re looking at about three hours total time, but trust me, most of that is just waiting for the magic to happen while the dough rests! This process is totally foolproof, designed so even if you’re nervous about yeast, you’ll end up with what I proudly call the best cinnamon roll experience outside a fancy bakery. It’s worth every second of rising time.
- You get that true pull-apart texture—no dry edges here!
- The cinnamon filling stays perfectly gooey across the whole surface.
- It’s a richer dough because we use softened butter and eggs, giving it structure.
- The cream cheese icing sinks in perfectly when you pour it over the warm pastry.
Achieving Bakery-Quality Softness in Your Cinnamon Roll
The secret weapon for softness isn’t the topping; it’s the base dough. Because we cream the butter and sugar so well, and then dedicate myself to kneading until the dough feels smooth like velvet, we are developing great elasticity. This rich environment, supported by the room-temperature eggs, lets the yeast cells thrive and creates air pockets throughout. That’s exactly what gives you that superior, light, pillowy structure in every single cinnamon roll.
Gathering Ingredients for Your Perfect Cinnamon Roll
Okay, now for the fun part: gathering your supplies! For these rolls to reach their absolute peak potential, we need to be a little precise about a couple of things. I tried making these once when my milk was lukewarm, and the yeast just sat there looking sad—total waste of time! You absolutely must have the milk warm to about 110°F; that’s the sweet spot for waking up that yeast.
Also, make sure your eggs are at room temperature! Cold eggs can shock the creamed butter mixture and make it curdle a little. When everything is cozy, the dough comes together so beautifully. I’ve listed out everything you’ll need below, but don’t skip the notes—they hold the secrets to avoiding stiff dough!
- 1 cup whole milk, warm to about 110°F
- 2 1/4 teaspoons active dry yeast
- 1/2 cup unsalted butter, softened to touch (leave this out an hour ahead of time!) plus more for greasing
- 1/2 cup granulated sugar, plus 1/4 cup reserved for the filling
- 2 large eggs, room temperature
- 4 cups all-purpose flour, plus more for dusting when you roll it out
- 1 teaspoon salt
- 1/2 cup unsalted butter, melted, for the filling layer
- 2 tablespoons ground cinnamon
- 8 ounces cream cheese, softened completely
- 1 teaspoon vanilla extract
- 2 cups powdered sugar
If you are looking for other great ways to start your day, check out all my recipes in the breakfast category right here!
Ingredient Notes and Substitutions for Your Cinnamon Roll Dough
Listen, yeast can be tricky. If you are using instant yeast, you can skip the blooming step with the milk and just mix it right into the flour, but I honestly love watching the active dry yeast foam up—it proves it’s alive! The temperature of that butter for creaming determines everything. If it’s too soft or melted, your dough won’t hold the air required for that amazing, fluffy cinnamon roll texture we want. Remember, we’re building a gorgeous, soft foundation here, so treat the butter gently!
Step-by-Step Instructions to Make Fluffy Cinnamon Rolls
Alright, now we are getting into the good stuff—the process! This is where we turn simple flour and sugar into that heavenly, fragrant pastry. Don’t feel intimidated by the yeast; it’s really just about giving it the right environment. We are going to take this slow so you end up with the absolute best cinnamon roll possible. Remember to keep your workspace tidy as we go; nothing worse than sticky dough creeping everywhere! If you’re already thinking about that icing, I have a dedicated spot for the cream cheese glaze recipe to check out later.
Activating Yeast and Mixing the Rich Cinnamon Roll Dough
First, take that warm milk (remember—110°F, not too hot!) and let the yeast bloom for about five minutes until it looks foamy and smells alive. While that’s happening, grab your softened butter and that first half-cup of sugar and cream them until they are totally light and fluffy. Once the yeast is active, slowly beat it in along with your room-temperature eggs, one at a time. Then, mix your flour and salt separately, and start adding the dry stuff to the wet mixture gradually. Trust me on this: add it slowly so you don’t end up with lumps!
Kneading and Rising: The Secret to the Best Cinnamon Roll Texture
Once the dough is shaggy, it’s time to get your hands dirty! Turn it out onto a lightly floured surface and knead it like you mean it for about five to seven minutes. You are looking for dough that feels smooth, elastic, and springs back when you poke it gently. Pop that beauty into a buttered bowl, turning it over once, and cover it up in a warm spot to rise for about 1 to 1.5 hours until it’s doubled. After that, you just press the air out—that’s the punch down—and we move right along to the filling for your incredible cinnamon roll!
Filling, Rolling, and Cutting Your Cinnamon Roll Log
This is the fun part where the gooey center comes together. Roll that flattened dough out into a nice big rectangle—aim for about 12 inches by 18 inches if you can manage it. Next, brush every single inch of the surface with that melted butter. Seriously, get it to the edges! Then, mix your reserved sugar and the cinnamon together and shower the whole thing evenly with that sweet spice mixture. Starting from the long side, roll it up as tightly as you possibly can without tearing the dough. Then, you just slice it into 12 equal pieces. Make sure those cuts are clean so the roll doesn’t squish!
Baking Your Cinnamon Roll to Golden Perfection
So, you’ve got your gorgeous log sliced up, nestled cozy-side-up in that buttered 9×13 pan. Don’t let them just sit there too long now! They need a quick second sleep, or a proof, as the fancy folks call it. Cover them back up and let them rest for about 30 minutes. They won’t double this time, but they should puff up nicely. This quick rest is critical for making sure your final pastries aren’t dense little bricks!
While they are resting, crank that oven up to 375°F. It needs to be nice and hot when they go in. I always put mine on the middle rack—you don’t want them too close to the top heating element or they burn before the middle cooks. Once they’ve had their little nap, they go straight into that hot oven for about 20 to 25 minutes. You’ll know they’re done because they will be beautifully golden brown all over, and if you gently peek, they should look puffy and set.
The absolute most important thing here is timing: you need to ice these glorious babies the second they come out of the oven. That heat melts the cream cheese icing just enough so it spreads like silk and seeps down into all those beautiful swirls. Seriously, don’t wait! Pull them out, and then move directly into making that topping. If you’re interested in other fast recipes to pair with these rolls, I’ve written about some great granola clusters that are perfect on yogurt!
Crafting the Perfect Cream Cheese Icing for Your Cinnamon Roll
If you think the baking part is the best, wait ’til you get to the icing! An amazing, fluffy, perfectly tangy cream cheese glaze is what takes these from good to absolutely legendary. Remember, the key here is that the rolls have to be warm when you spread this on. That slight residual heat melts the icing just enough so it drips down into all those gorgeous cinnamon-sugar crevices, making the whole cinnamon roll ridiculously gooey.
First, make sure that cream cheese is completely soft—if it’s cold, you’ll end up with lumps, and nobody wants a lumpy glaze, am I right? I beat the cream cheese until it’s super smooth by itself. Then, mix in the vanilla and that two cups of powdered sugar. You might think you need the whole two cups, but always add that sugar gradually!
Now, for consistency: this is where people mess up. You want it thick enough to really coat the roll, but thin enough to ooze down the sides. If it’s too stiff after you mix it, don’t panic! Just add milk, maybe a teaspoon at a time, beating well after each addition. I mean it—one teaspoon at a time! If you dump in too much, you’ll be fighting to get that thickness back, and you’ll end up making a watery mess that just slides right off the pastry. Keep beating until it looks glossy and covers the back of a spoon nicely. You can see how I approach frosting on my Red Velvet post here, which uses a similar technique for getting that perfect spreadable texture. Do this while the rolls are piping hot, and your entire kitchen will smell like a dream!
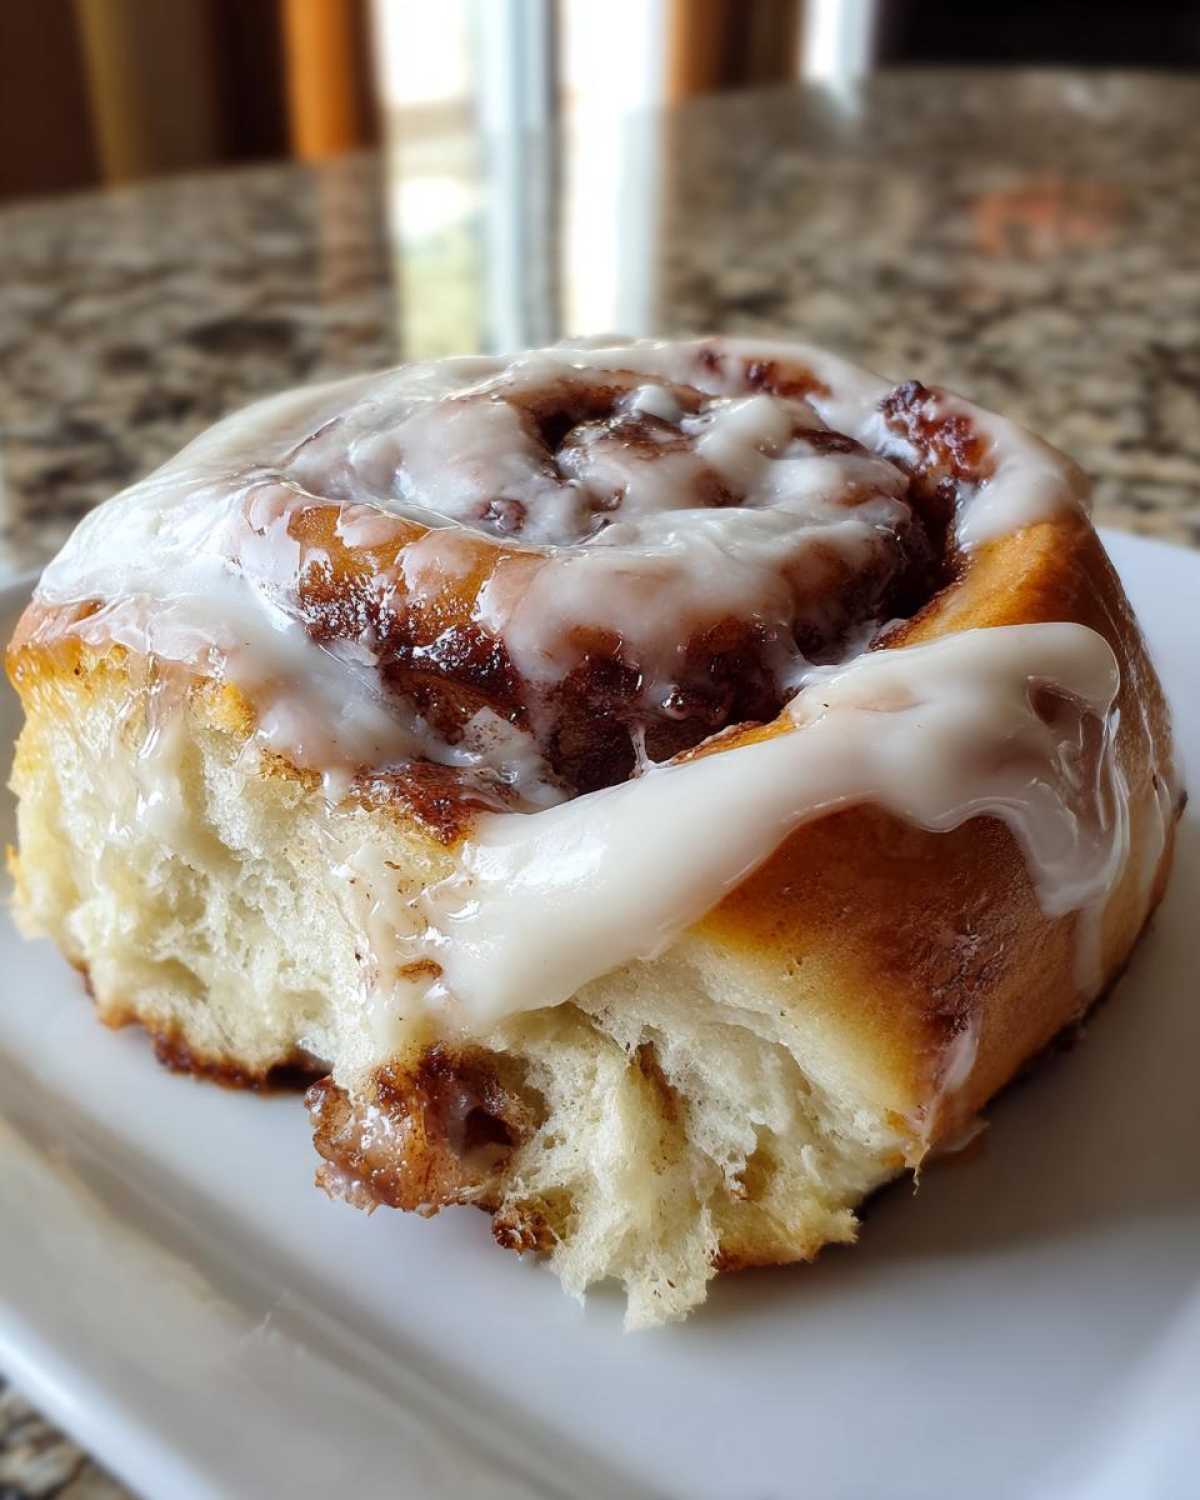
Tips for Success with Homemade Pastry: Mastering the Cinnamon Roll
Getting that picture-perfect, soft, gooey roll requires a few small tricks that I learned the hard way over years of baking flops! If you follow the main steps above, you are 90% there, but these little details in our cinnamon roll technique are what push these over the top.
First tip: Don’t skimp on the butter for the filling! I know it seems like a lot of fat, but that melted butter is what helps the cinnamon-sugar mixture stick to the dough instead of just falling off when you roll it up. If your filling leaks out during baking, it’s usually because the butter wasn’t spread edge-to-edge, leaving dry patches that separate.
Second, when you cut those rolls, use a piece of unflavored dental floss or very thin string instead of a knife! A knife squishes the delicate dough down and seals the cut, which can make the roll bake tighter. Floss slices cleanly right through the log, preserving all those airy layers you worked so hard to build during the rise. It sounds wild, but try it once!
Finally, don’t overbake. These are delicate yeast rolls, not bread! If you wait until they look deeply browned, the insides are going to be dry by the time the icing melts on top. Pull them when they are just golden and let that hot icing do the rest of the work. This guarantees the softest cinnamon roll experience ever.
If you want to learn more about my philosophy on baking and why I share these tips, you can check out my About Us page!
Serving Suggestions for Your Sweet Breakfast Recipe
You’ve done the hard work, and now it’s time to enjoy these amazing pastries! Honestly, the best thing to go with these rolls is a giant mug of strong coffee. The bitterness of the brew cuts right through the rich butter and the sweetness of the cream cheese icing perfectly. It’s the ideal pairing.
If you need something fresh on the side, I love slicing up some bright, tart berries—strawberries or raspberries work wonders because their slight acidity balances out the whole dish. Or, if coffee isn’t your thing, our classic French toast recipe makes an amazing alternative brunch centerpiece!
Storing and Reheating Leftover Cinnamon Rolls
Oh, the tragedy of having leftovers! But honestly, these delicate yeast rolls usually don’t last long around my house. If, by some miracle, you have some remaining, storage matters a lot for keeping them soft. You absolutely must keep them covered tightly; air is the enemy of soft pastry!
For leftovers you plan to eat the next day—maybe just 24 hours—you can leave them covered at room temperature in that 9×13 pan. Just make sure they are tightly wrapped in plastic wrap or foil. If you’re saving them for longer, say three to five days, the fridge is safer. Pop them into a truly airtight container before you chill them. Don’t worry, we can bring them right back to life!
The Best Way to Reheat for That Fresh-Baked Taste
The microwave is fast, yes, but it can sometimes make the edges tough if you overheat them. I recommend using the oven for the best results, especially if you have more than two rolls left. Pop your desired rolls onto a baking sheet, cover them loosely with foil so they don’t dry out on top, and heat them at about 325°F for about 10 to 15 minutes. This gentle warmth brings back that lovely soft texture.
If you are desperate and only need to revive one roll quickly, go ahead and use the microwave, but for only 15 to 20 seconds max. If it’s still a little firm, add a tiny splash of water to the plate before microwaving—that steam helps it soften up amazingly fast. You want them warm enough so the remaining icing gets a little melty, but not so hot that they turn rubbery.
Frequently Asked Questions About Making the Best Cinnamon Roll
I totally get it—when you’re tackling a big baking project like this, little questions pop up! Yeast dough can feel intimidating if you’re new to it, but don’t worry, we are going to cover all the things that used to trip me up when mastering these amazing fluffy rolls. If you have other questions while you’re baking, feel free to drop by my contact page!
Can I skip the first rise time for these easy cinnamon rolls?
Oh, please don’t! That very first rise is crucial because it gives the yeast time to produce those gases that make the dough airy. If you skip it, you’ll end up with a very dense, heavy cinnamon roll because the yeast won’t have enough time to work its magic. It won’t be fluffy, so you’d effectively be wasting your effort!
What is the best way to ensure a gooey center in my cinnamon roll?
Gooeyness comes down to two things: butter and rolling tight! Make sure you cover every bit of that dough rectangle with the melted butter—it stops the sugar from crystalizing. Then, roll that log as tightly as you humanly can without tearing the dough. A loose roll means the filling shifts during baking, leaving dry spots instead of that perfect, swirled center in your cinnamon roll.
What if I don’t have cream cheese for the sweet breakfast recipe icing?
If you’re totally out of cream cheese, which is a tragedy, you can absolutely save the rolls by switching to a simple powdered sugar glaze. Just mix the powdered sugar with vanilla extract and milk or water. You’ll need less liquid than you think! It won’t have that signature tang, but it will still be a wonderfully sweet topping for your yeast roll recipe.
Why are my homemade pastry rolls sinking after I take them out of the oven?
That usually means they were slightly under-baked in the very center. If they are still wobbly or wet when you peek at them, give them another three to five minutes. Under-baked rolls collapse as soon as they hit cooler air because the structure hasn’t fully set yet. Don’t worry, it happens to everyone, but testing doneness visually, not just with a toothpick, is key for the best cinnamon roll!
Estimated Nutritional Data for One Cinnamon Roll
Okay, so let’s talk about the delicious side effects of all that butter, sugar, and cream cheese! Because these are truly decadent, rich, homemade pastry rolls, I need to preface this by saying these numbers are very rough estimates based on exact ingredient amounts listed. Different brands of butter or sugar can change things slightly, so please treat this as a guideline, not a precise science!
If you are tracking things strictly, you can see the full breakdown below. When I make these for a special brunch, I figure they are worth every single glorious bite. I always make sure to review my nutritional disclosures over on my disclaimer page if you have specific dietary needs.
- Serving Size: 1 roll
- Calories: 450
- Sugar: 45g (Yes, a lot, but hello, it’s dessert for breakfast!)
- Fat: 24g
- Saturated Fat: 14g
- Carbohydrates: 55g
- Protein: 7g
- Cholesterol: 75mg
They really are a sweet breakfast recipe powerhouse! Don’t let the numbers scare you too much—you deserve amazing food once in a while!
Share Your Homemade Pastry Creations
Wow, you made it! You tackled the yeast, you rolled the dough, and you have a glorious, icing-drenched cinnamon roll cooling on the counter right now. I am so incredibly proud of you!
I absolutely love hearing how things turned out in your kitchen. Did you use the dental floss trick? Did your kids fight over the middle roll? Please, please, please let me know in the comments below how the recipe worked for you! Rating it helps other bakers see that this is a reliable recipe!
And seriously, if you snap a picture of your beautiful batch—especially if you caught the icing mid-drip—tag me on social media! I live for seeing your delicious results. It just proves that homemade pastry is always better than anything you can buy. Happy eating, and don’t forget to drop by my cookie policy page if you want to see how we handle visitor data!
PrintSoft Homemade Cinnamon Rolls with Cream Cheese Icing
A straightforward recipe for making soft, fluffy yeast rolls filled with cinnamon sugar and topped with a simple cream cheese glaze.
- Prep Time: 45 min
- Cook Time: 25 min
- Total Time: 150 min
- Yield: 12 servings
- Category: Breakfast
- Method: Baking
- Cuisine: American
- Diet: Vegetarian
Ingredients
- 1 cup whole milk, warm
- 2 1/4 teaspoons active dry yeast
- 1/2 cup unsalted butter, softened, plus more for greasing
- 1/2 cup granulated sugar, plus 1/4 cup for filling
- 2 large eggs, room temperature
- 4 cups all-purpose flour, plus more for dusting
- 1 teaspoon salt
- 1/2 cup unsalted butter, melted, for filling
- 2 tablespoons ground cinnamon
- 8 ounces cream cheese, softened
- 1 teaspoon vanilla extract
- 2 cups powdered sugar
Instructions
- Warm the milk to about 110°F. Stir in the yeast and let it sit for 5 minutes until foamy.
- In a large bowl, cream together 1/2 cup softened butter and 1/2 cup granulated sugar until light and fluffy. Beat in the eggs one at a time.
- Mix the yeast mixture into the butter mixture.
- In a separate bowl, whisk together 4 cups of flour and the salt. Gradually add the dry ingredients to the wet ingredients, mixing until a soft dough forms.
- Knead the dough on a lightly floured surface for 5 to 7 minutes until smooth and elastic. Place the dough in a lightly buttered bowl, turning once to coat. Cover and let rise in a warm place for 1 to 1.5 hours, or until doubled in size.
- Punch down the risen dough. On a lightly floured surface, roll the dough into a large rectangle, about 12 by 18 inches.
- Brush the surface evenly with the 1/2 cup melted butter. In a small bowl, mix the 1/4 cup granulated sugar and 2 tablespoons of cinnamon. Sprinkle this mixture evenly over the buttered dough.
- Starting from the long edge, tightly roll the dough into a log. Cut the log into 12 equal rolls.
- Place the rolls cut-side up in a greased 9×13 inch baking pan. Cover and let rise again for 30 minutes.
- Preheat your oven to 375°F. Bake for 20 to 25 minutes, or until golden brown.
- While the rolls bake, make the icing: Beat the softened cream cheese, vanilla extract, and 2 cups of powdered sugar together until smooth. Add a tablespoon of milk if the icing is too thick.
- Remove the rolls from the oven and immediately spread the cream cheese icing over the warm rolls. Serve warm.
Notes
- For the softest rolls, ensure your milk is warm enough to activate the yeast but not so hot that it kills it.
- Do not skip the second rise; this helps the rolls become light and fluffy before baking.
- If you prefer a thinner glaze, add milk one teaspoon at a time until you reach your desired consistency.
Nutrition
- Serving Size: 1 roll
- Calories: 450
- Sugar: 45g
- Sodium: 300mg
- Fat: 24g
- Saturated Fat: 14g
- Unsaturated Fat: 10g
- Trans Fat: 0.5g
- Carbohydrates: 55g
- Fiber: 2g
- Protein: 7g
- Cholesterol: 75mg