

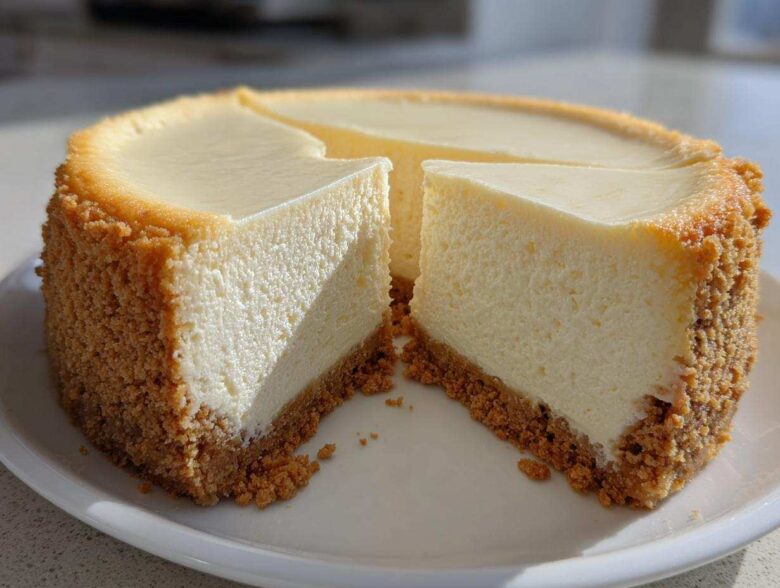
You know that moment when you bite into a slice of cheesecake that actually makes you pause? That’s the moment we’re chasing here. Forget those airy, too-sweet imitations! When I talk about the perfect slice, I mean the real deal—the legendary, dense, utterly rich New York Cheesecake. I spent years fighting this recipe, ending up with sunken middles and cracked tops that looked like dried riverbeds. Trust me, I’ve ruined plenty of expensive cream cheese batches!
But friends, I cracked the code. This is the definitive New York Cheesecake Recipe that guarantees that wonderfully creamy, velvety texture without that dreaded crack. We are going back to basics with the buttery graham cracker crust and low, slow heat. Get ready, because we’re making the best homemade cheesecake you’ve ever tasted for your next big occasion!
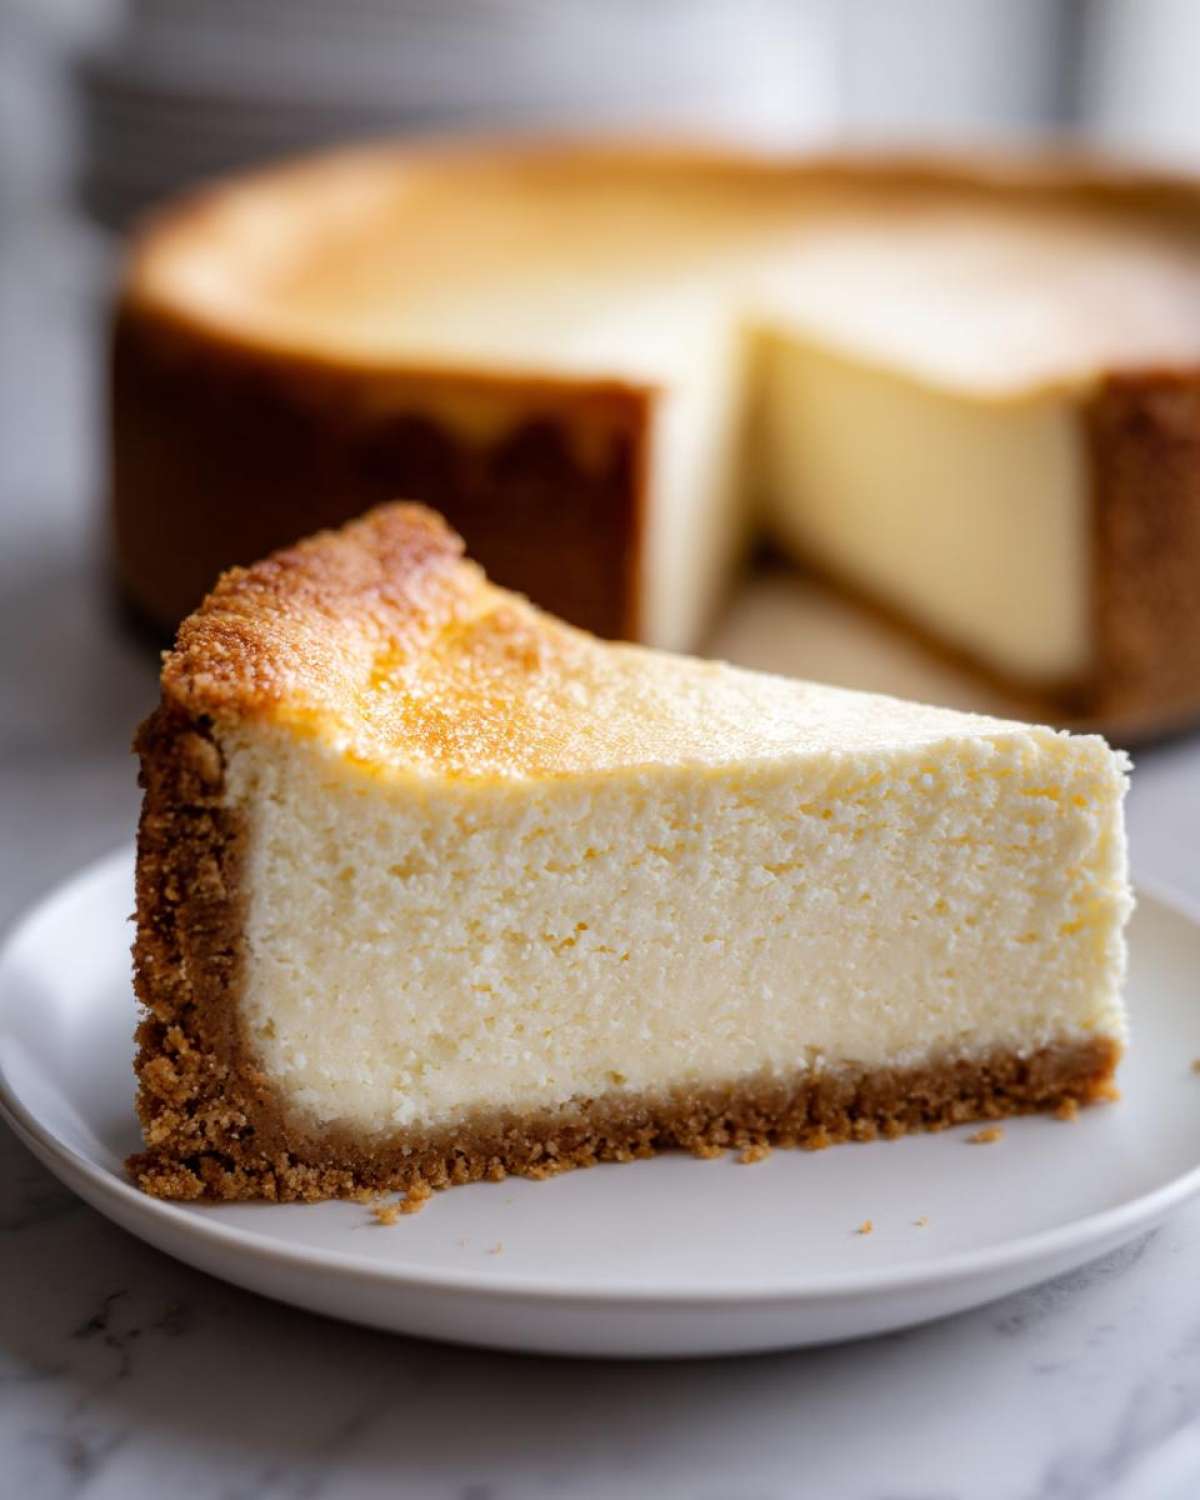
Why This Is the Best New York Cheesecake Recipe
This isn’t just any baked dessert recipe; it’s what I now call my go-to Creamy Baked Cheesecake for holidays. What makes this New York Cheesecake Recipe stand head and shoulders above the rest is its magnificent density. You’re getting that rich, heavy mouthfeel that anchors the entire experience.
We don’t want fluffy; we want decadent! Follow my lead, and you’ll see exactly how to achieve that signature slice every single time.
Achieving That Signature Silky Texture
Listen, if you try to rush this, you’re inviting texture trouble. My main piece of advice for that unbelievably silky texture? Only use full-fat cream cheese. Don’t skimp here; light versions just don’t cut it for true New York style. Also, make sure everything—I mean everything—is at true room temperature. Cold lumps spell doom for smooth batter, and nobody wants a lumpy Dense Cheesecake!
The Perfect Balance of Sweetness and Tang in Your New York Cheesecake
The secret weapon here is the sour cream. While the sugar content is generous, that little bit of sour cream cuts through the richness beautifully, giving you that classic, slightly sharp tang cheesecake lovers crave. It keeps the flavor profile complex, so it doesn’t taste like sweet brick. It’s all about balancing that rich base with a bright finish. You’ll want to check out my notes on red velvet cake too—balancing flavors is everything!
Essential Ingredients for a Classic New York Cheesecake
Okay, let’s talk about what actually goes into this glorious creation. You can’t freestyle when you’re chasing perfection in a Classic New York Cheesecake. Everything has to be just so, especially the temperature of our dairy friends! Using ingredients straight from the fridge is the fastest way to end up with a curdled mess, and we’ve already agreed we’re making a smooth Homemade Cheesecake, right?
Grab your mixing bowls; here’s the lineup. I highly recommend setting everything out about an hour before you plan to start mixing. If you’re looking for other great baked goods, you can check out my notes on date nut bread while you wait for things to warm up!
For the Graham Cracker Crust Recipe:
- 1 1/2 cups graham cracker crumbs
- 1/4 cup granulated sugar (this helps it hold together!)
- 6 tablespoons unsalted butter, melted
For the Creamy Filling:
- 3 (8 ounce) packages full-fat cream cheese, softened to room temperature
- 1 1/2 cups granulated sugar
- 1/4 cup all-purpose flour (this is a binder!)
- 1 teaspoon vanilla extract
- 1/4 teaspoon salt
- 1 cup sour cream, make sure this is at room temperature too
- 4 large eggs, also at room temperature
See? Nothing too fancy, but the execution and temperature control of these basic items are what transform them into that famous, Tall and Creamy Cheesecake.
Step-by-Step Instructions for Your New York Cheesecake Recipe
This is where the magic happens! Don’t let the water bath intimidate you; it’s the secret sauce for success and your best defense against ugly cracks. Think of this process less like baking and more like a gentle, warm spa treatment for your batter. Following these steps exactly guarantees you get that picture-perfect, silky result every time. If you’re interested in other creamy recipes, my guide to old-fashioned creamy rice pudding shows a similar dedication to texture!
We’re starting high and finishing low—this temperature shift is part of the plan to keep things stable.
Preparing the Buttery Graham Cracker Crust Recipe
First things first: get that oven hot! Preheat everything to 350°F (175°C). Now, take your 9-inch springform pan—this is non-negotiable for an easy release later—and wrap the outside bottom and sides tightly in heavy-duty aluminum foil. I recommend two full layers, crossing them over, to create a solid watertight barrier. Seriously, you don’t want any bath water seeping in!
Combine your graham cracker crumbs, the quarter cup of sugar designated for the crust, and the melted butter. Mix until it looks like wet sand. Press this mixture firmly and evenly into the bottom of your wrapped pan. We’re baking this shell for 10 minutes to set it up. Once it’s done, pull it out, let it cool a bit, and *then* drop that oven temperature down to 325°F (160°C). We’re prepping for the slow bake!
Mixing the Creamy Filling for Your New York Cheesecake
Now for the star: the filling! Use your biggest bowl. Remember how I stressed room temperature? Beat that softened cream cheese until it’s truly luxurious and smooth—no lumps allowed. Then, slowly beat in the 1 1/2 cups of sugar, the flour (this helps bind it so it doesn’t separate!), vanilla, and salt. Mix only until it’s just combined. If you whip this part too hard, you introduce too much air.
Next, gently stir in your room temperature sour cream until it smooths out. Finally, add those four eggs, but this is the most crucial part: add them one at a time, mixing on the absolute lowest speed only until you see the yolk disappear. Stop immediately after that last egg is incorporated. Scrape the bowl down one last time, pour this glorious batter over your cooled Graham Cracker Crust Recipe, and get ready for the bath!
Baking the Tall and Creamy Cheesecake Using a Water Bath
Take that foil-wrapped cheesecake pan and settle it inside a large roasting pan. Now, carefully, pour hot water into the roasting pan—NOT the cheesecake pan! You want the water to come about halfway up the sides of your springform pan. This steam prevents the edges from cooking too fast and keeps the top smooth.
Slide the whole setup—roasting pan and all—into that 325°F oven. It’s going to bake for a good 60 to 75 minutes. You’ll know it’s close when the edges look firm and set, but when you give the pan a very gentle nudge, the middle two inches still have a tiny, elegant jiggle to them. That jiggle means creamy perfection inside. Don’t overbake it!
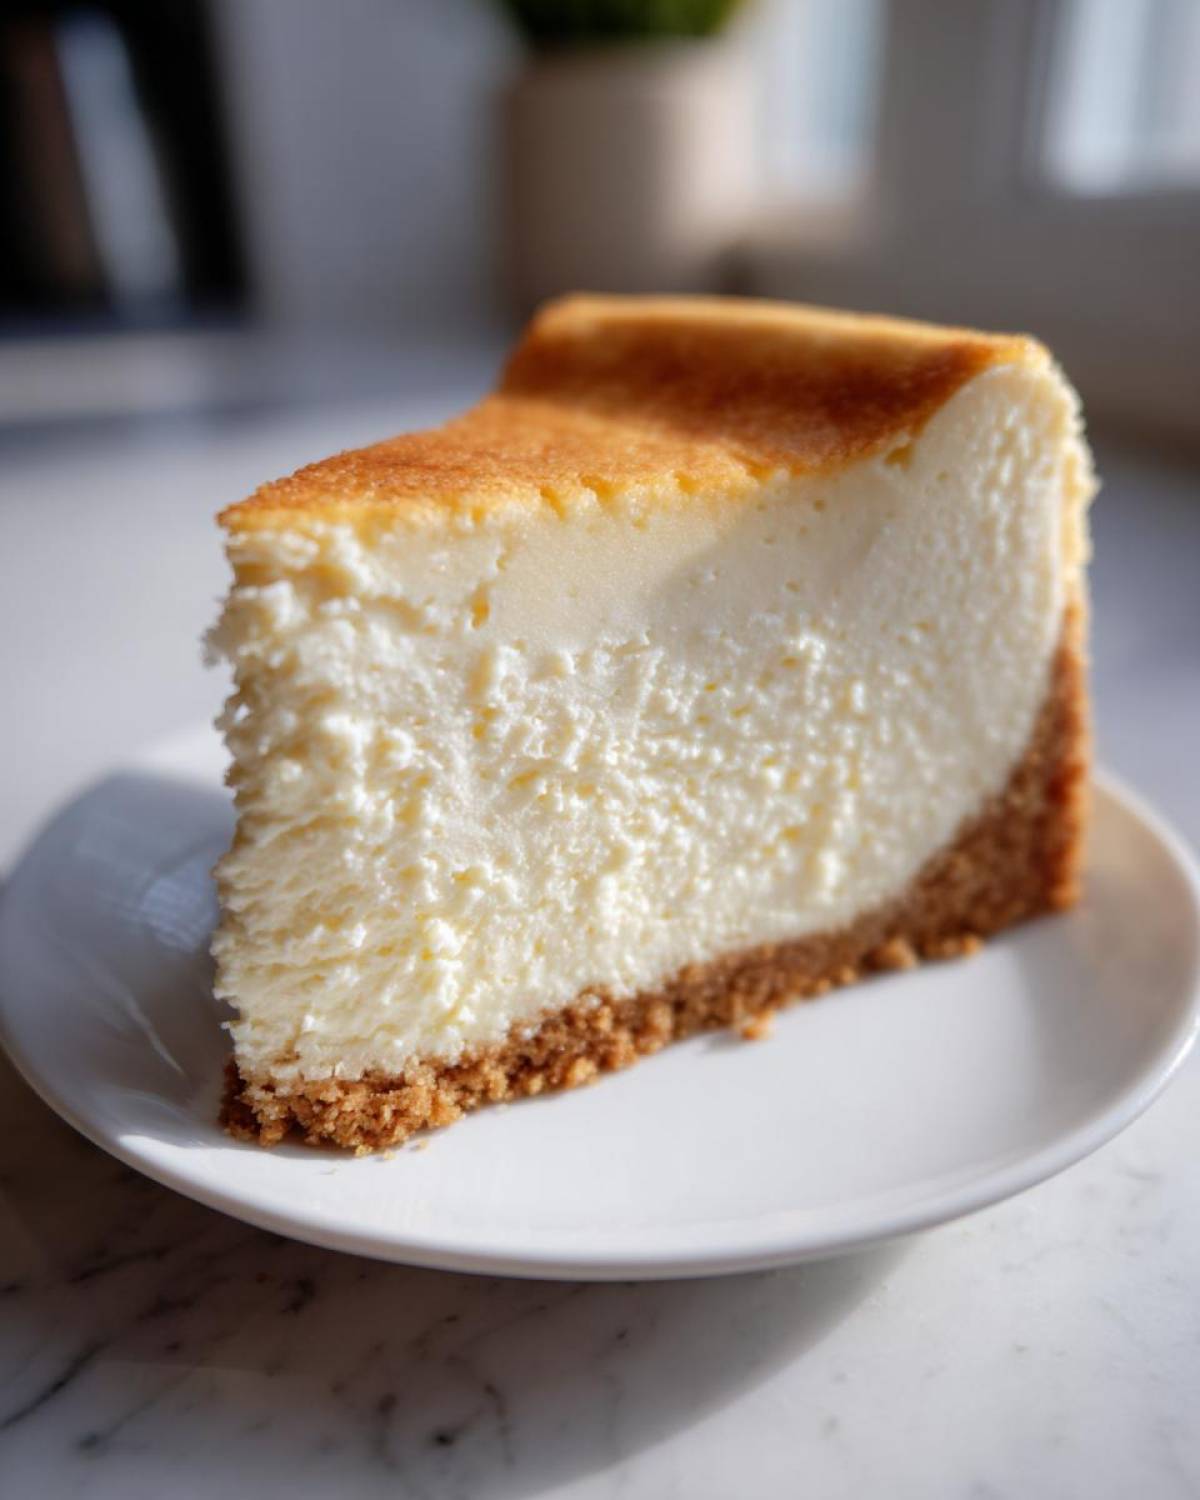
Expert No Crack Cheesecake Tips for a Perfect New York Cheesecake
Oh, the Great Crack Conspiracy! Every baker fears it, but I’m here to tell you that once you master these simple physics tricks, you’ll never see a fissure again. Following the steps above gets you 90% of the way there, but these final checks are what secure your legendary status. These aren’t just rules; these are my sworn No Crack Cheesecake Tips based on years of trial and error. I’ll never forget the first time I pulled a perfectly smooth, tall beauty out of the oven—it was sheer luck, but now, thanks to the slow cooling method, it’s reliable!
Don’t worry about your fancy chocolate chip cookies; this technique is far simpler than mastering a sourdough starter!
The Critical Slow Cooling Method for Your Homemade Cheesecake
This might honestly be the single most important step for achieving a Creamy Baked Cheesecake top. When that baking time is up and the center is just jiggling, you do *not* yank it out of the oven. That sudden temperature shock is what causes the structure to seize up and crack the top surface.
Instead, turn the oven off completely. Now, prop that oven door open about two inches—I just use a sturdy wooden spoon handle wedged right in there. Leave the cheesecake inside the warm, slightly steamy environment for a full hour. It’s cooling down so gradually, giving the proteins time to relax instead of contracting sharply. After that hour, you can carefully remove it from the water bath and foil and let it finish cooling on the counter before its long, necessary nap in the fridge.
Serving Suggestions for Your Decadent Dessert
Now that you have managed the incredible feat of creating a perfect, crack-free, gloriously rich New York cheesecake, the last thing you want to do is drown its subtle beauty under ten pounds of bright green frosting! This dessert is a Timeless Dessert all on its own. It demands respect, which means keeping the toppings simple and complementary.
My all-time favorite way to serve it is barely dressed at all. After that mandatory overnight chill, I just slice it cold. The tangy creaminess speaks for itself. If you feel you absolutely must decorate your slice, keep it light!
Think fresh fruit. A handful of perfectly ripe raspberries or a light drizzle of homemade raspberry coulis works wonders. If you want to make that coulis, it’s so easy—just simmer some fruit with a tiny bit of sugar and a squeeze of lemon, then strain it. It’s way better than anything you buy in a jar!
For something a little more indulgent—maybe for a real celebration—a dollop of freshly whipped cream on the side is divine. Don’t sweeten the whipped cream too much; let the cheesecake provide the sweetness. Honestly, if you try anything too heavy, you risk losing that silky texture you worked so hard for. Serve it alongside my moist strawberry muffins for brunch the next day, but the cheesecake itself just needs elegance!
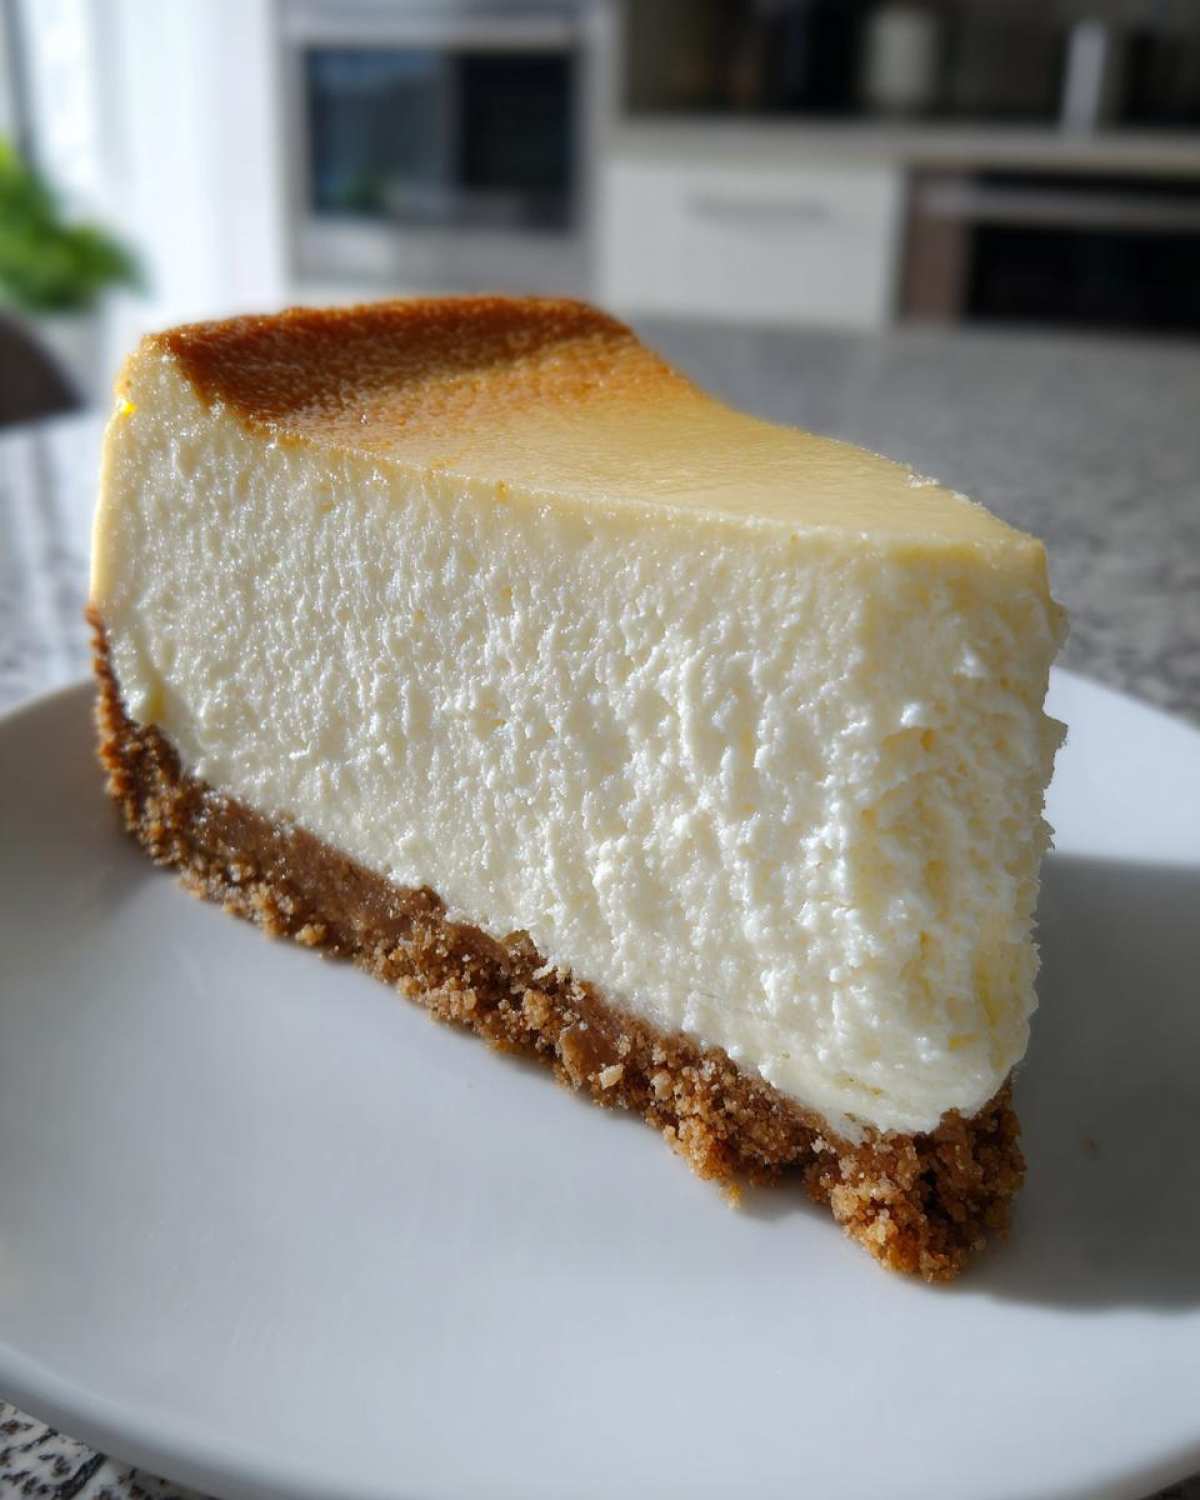
Storage and Reheating Instructions for Your New York Cheesecake
Whew! You made it! That glorious, rich dessert has been baked, cooled, and now needs a little nap before it’s ready for its debut. The most important rule for this amazing New York Cheesecake Recipe is patience during the chilling phase. You simply cannot slice into this beauty right away. We need that time in the cold so the structure fully sets up. That slight jiggle you saw when it came out of the oven needs to turn into firm, dense luxury.
You absolutely must chill this cheesecake for a minimum of six hours, but honestly, overnight is where the real magic happens. I always make mine the day before a big party. It firms up perfectly, and the flavors really mellow and meld together.
When you’re storing it, because this is such a decadent dessert, you need to protect that beautiful top, even though we took all those steps to prevent cracks! Once it’s completely cool, cover the cheesecake loosely in the refrigerator. Plastic wrap can sometimes stick to the top if it touches it directly, which can ruin that flawless surface. I find the best trick is to tent it loosely with plastic wrap, or even better, use a sturdy cake carrier if you have one large enough.
Now, about reheating? Honey, this isn’t lasagna! You don’t reheat cheesecake! The entire joy of this dessert is that cold, creamy consistency that melts ever so slightly in your mouth. Trying to warm it up will just turn it into sweet slush, and we worked too hard for that!
If you happen to have leftovers (which is rare in my house!), keep it covered in the fridge. It stays perfectly fresh like this for about five days. If you do cut a slice and decide you want it *slightly* less chilled—maybe 20 minutes on the counter before serving is all you need to take the intense cold off, but keep it cool overall. That cold temperature is crucial to keeping that dense texture intact!
Frequently Asked Questions About Making New York Cheesecake
I know recipes can sometimes leave you hanging, especially when you’re trying one as seriously important as the quintessential New York Cheesecake! It’s normal to have questions buzzing around, especially if you’ve had bad luck with cracking in the past. Don’t sweat it! These are the questions I always get when I share this recipe with my family, so let’s clear up any lingering confusion before you fire up that oven. We want every batch to look like a masterpiece from that famous bakery downtown.
If you are trying to find alternatives for dessert inspiration after this, you might want to look up my German chocolate cake recipe as well!
Can I skip the water bath when making this Classic New York Cheesecake?
Oh no, please, please don’t try to skip the water bath! I’m serious about this one. That steaming environment is not just some fancy baker’s trick; it’s crucial physics for a Classic New York Cheesecake. The moist heat protects the sides of the cake from cooking too fast, which prevents them from pulling away violently from the middle as they cool. Without that steam ensuring an even, gentle bake, you are practically guaranteeing a crack right across the top. Trust me, wrapping that springform pan in foil and giving it a nice, steamy soak is your magic ticket to a perfect, crack-free surface!
How do I get my cheesecake filling perfectly smooth?
Smoothness is everything in a Creamy Baked Cheesecake. If you see lumps, you’ve either used cold ingredients, or you overmixed the cream cheese before adding anything else! The key is patience and temperature. First, take everything out at least an hour before you start—the cream cheese, the eggs, the sour cream. They need to be flexible.
When you start mixing, always beat the cream cheese by itself until it’s completely uniform and soft before you even think about adding sugar. Then, when you mix the final product, keep your mixer on low speed. High speed whips in air, and that trapped air expands during baking, causing those awful cracks later. Low and slow ensures that velvety, silky texture we’re looking for!
I want a taller cheesecake, can I use a deeper springform pan?
That’s a great question if you like that extra-impressive height! This recipe is specifically calibrated for a standard 9-inch pan, usually about 2.5 inches deep. If you use a deeper pan—say, a 3-inch pan—the batter is fine, but the baking time will change substantially. Since the heat has further to travel to the center, you might need an extra 15 to 20 minutes of baking time. Keep checking that center jiggle; don’t trust the clock alone when you change the vessel!
My crust seems soggy after baking. What did I do wrong?
Soggy crusts are a tragedy, especially when we put so much love into that buttery base! Usually, this happens for one of two reasons. First, you might not have pressed it firmly enough when you were setting it in the pan, leaving little gaps for moisture to seep up. Second, and more likely, you didn’t pre-bake it long enough, or you poured the filling over it when it was still too warm. Remember, we bake that crust for 10 minutes at 350°F to set the butter and toast the crumbs slightly before we cool it down and cover it with the filling.
Estimated Nutritional Data for This Rich Dessert
I always feel a little awkward listing out the numbers because, honestly, when you’re making a truly decadent New York cheesecake, you’re probably not thinking about macros, right? This is a celebration dessert, a glorious, towering beacon of creamy goodness! But for those of you who like to keep an eye on things, here is the estimated breakdown for one generous slice of this Rich Dessert.
Remember, these figures are my best guess based on standard ingredients and that 12-serving yield. If you use slightly different brands of cream cheese or sugar, things might shift a bit. Think of this as a general guideline—the real measurement of success is how happy everyone is when they take that first bite!
It’s interesting to see how much fat gets packed in to give us that incredible mouthfeel. If you need a totally different kind of recipe, check out my creamy lemon chicken for dinner! But for this cheesecake, just savor it!
- Serving Size: 1 slice
- Calories: 450
- Fat: 30g
- Saturated Fat: 18g
- Trans Fat: 0.5g
- Cholesterol: 120mg
- Carbohydrates: 40g
- Sugar: 35g
- Protein: 8g
As you can see, we’ve got plenty of sugar, which is what makes it taste like heaven. The magic of this Homemade Cheesecake is that the rich texture makes even a small slice feel completely satisfying. Enjoy every single crumb!
Share Your Timeless Dessert Success
Alright, you made it! You tackled the water bath, you respected the slow cool-down, and now you have this magnificent, velvety New York Cheesecake sitting in your fridge, waiting for its big moment. I am absolutely bursting with excitement for you and what you’ve accomplished here.
Making a Classic New York Cheesecake from scratch is a serious culinary feat, and you should be proud! Now comes the best part: eating it, of course, but also getting to tell me all about it. Seriously, hearing how your Tall and Creamy Cheesecake turned out makes my day.
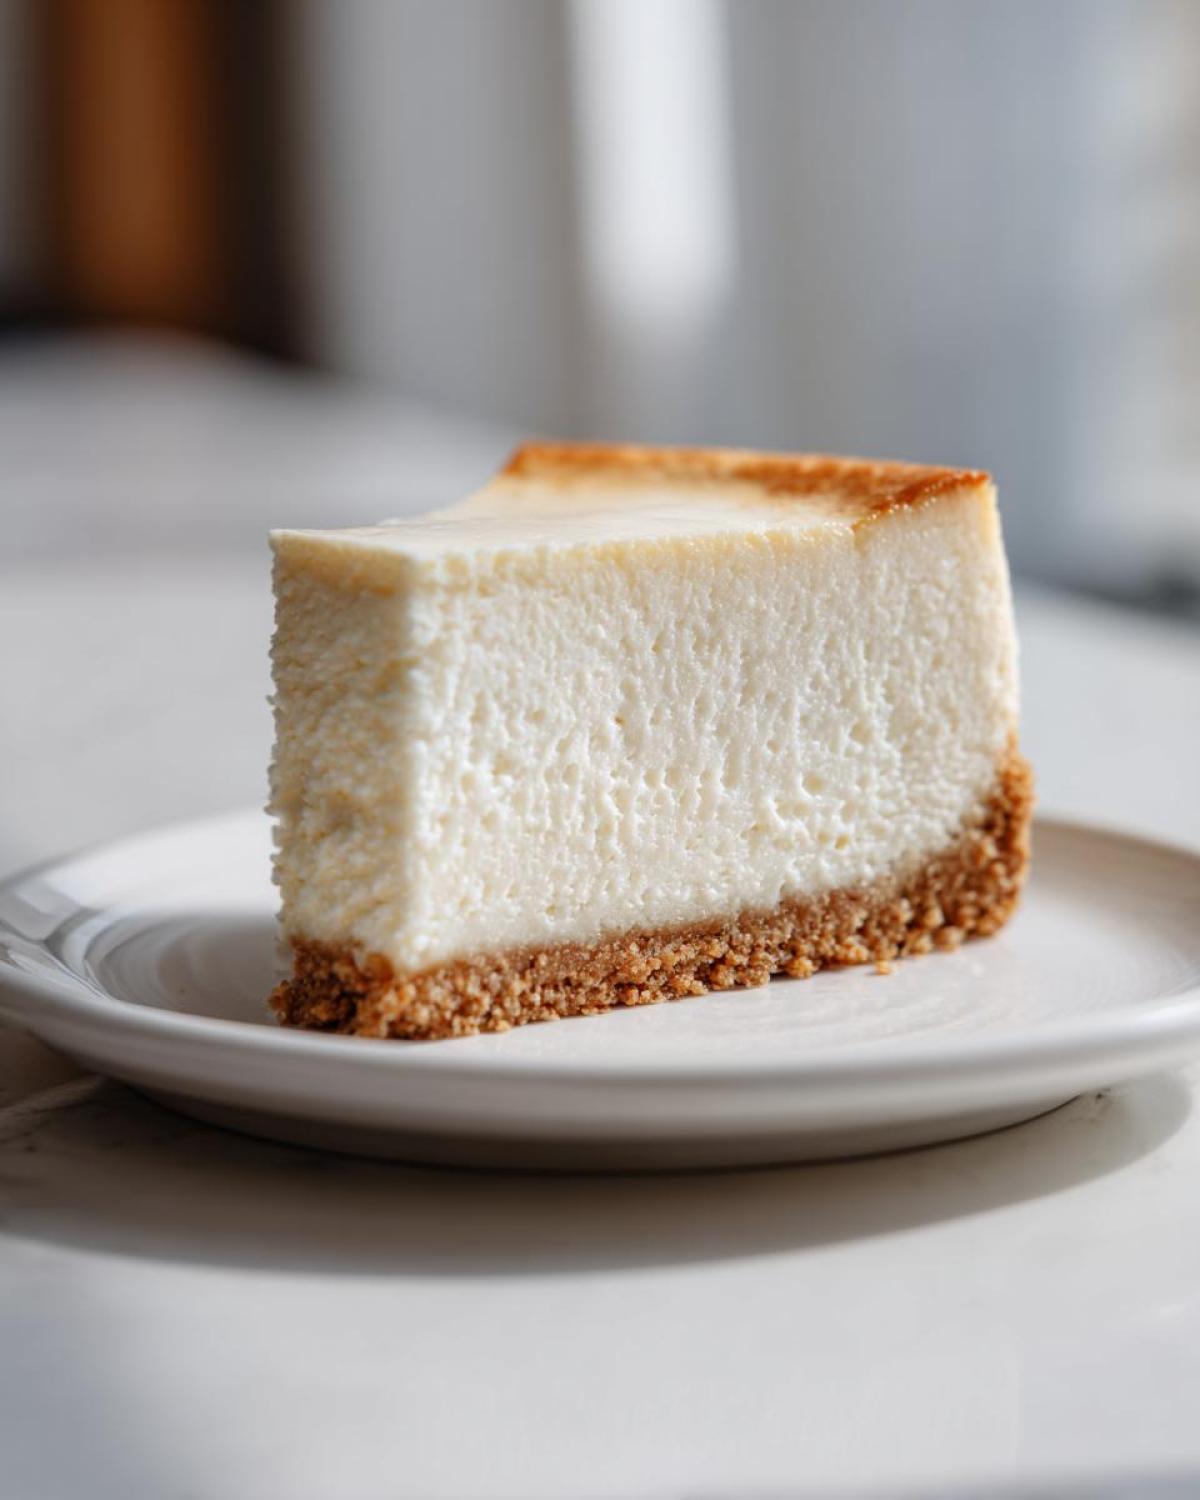
If you followed my No Crack Cheesecake Tips and ended up with a flawless top—or even if you had a little artistic crack you covered with berries—please, please leave a rating below! Your feedback is what helps other home bakers gain the confidence to attempt this amazing Timeless Dessert too.
Did you use a little extra vanilla? Did you find the perfect graham cracker brand for that buttery crust? I want to hear every detail! Don’t forget to tag me on social media if you snap a picture of your finished slice. Happy baking, and thanks for trusting me with your dessert destiny!
If you’re already dreaming about your next baking adventure, you can browse lots more tried-and-true recipes over on my main blog page. Enjoy every single creamy bite!
PrintClassic New York Cheesecake Recipe
Make a rich, dense, and creamy New York Style Cheesecake with a buttery graham cracker crust. Follow these steps for a smooth, crack-free dessert.
- Prep Time: 25 min
- Cook Time: 75 min
- Total Time: 100 min
- Yield: 12 servings
- Category: Dessert
- Method: Baking
- Cuisine: American
- Diet: Vegetarian
Ingredients
- 1 1/2 cups graham cracker crumbs
- 1/4 cup granulated sugar (for crust)
- 6 tablespoons unsalted butter, melted
- 3 (8 ounce) packages full-fat cream cheese, softened
- 1 1/2 cups granulated sugar (for filling)
- 1/4 cup all-purpose flour
- 1 teaspoon vanilla extract
- 1/4 teaspoon salt
- 1 cup sour cream, room temperature
- 4 large eggs, room temperature
Instructions
- Preheat your oven to 350°F (175°C). Wrap the outside of a 9-inch springform pan tightly with heavy-duty aluminum foil to prevent water leakage.
- Prepare the crust: Combine graham cracker crumbs, 1/4 cup sugar, and melted butter. Press the mixture firmly into the bottom of the prepared springform pan. Bake for 10 minutes. Remove and let cool slightly. Reduce oven temperature to 325°F (160°C).
- Prepare the water bath: Place the foil-wrapped springform pan inside a larger roasting pan.
- Prepare the filling: In a large bowl, beat the softened cream cheese until smooth. Gradually beat in 1 1/2 cups sugar, flour, vanilla extract, and salt until just combined. Do not overmix.
- Beat in the sour cream until smooth. Add the eggs one at a time, mixing only until each egg is incorporated. Scrape down the sides of the bowl as needed.
- Pour the filling over the cooled crust.
- Carefully pour hot water into the roasting pan until it reaches about halfway up the sides of the springform pan.
- Bake for 60 to 75 minutes. The edges should look set, but the center 2 inches should still jiggle slightly when gently nudged.
- Turn off the oven. Prop the oven door open slightly (about 2 inches) using a wooden spoon. Let the cheesecake cool inside the oven for 1 hour. This slow cooling prevents cracking.
- Remove the cheesecake from the water bath and foil. Cool completely on a wire rack.
- Chill the cheesecake in the refrigerator for at least 6 hours, preferably overnight, before serving.
Notes
- Use room temperature ingredients for the filling to ensure a smooth, lump-free batter.
- Do not overbeat the batter once the eggs are added; excess air causes cracking during baking.
- If you see any cracks after cooling, you can cover the top with whipped cream or a simple sour cream topping before serving.
Nutrition
- Serving Size: 1 slice
- Calories: 450
- Sugar: 35g
- Sodium: 300mg
- Fat: 30g
- Saturated Fat: 18g
- Unsaturated Fat: 12g
- Trans Fat: 0.5g
- Carbohydrates: 40g
- Fiber: 1g
- Protein: 8g
- Cholesterol: 120mg