

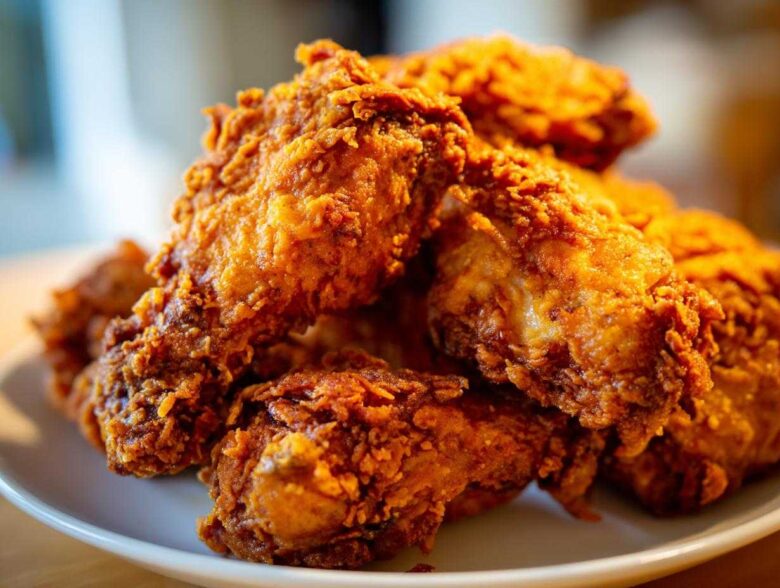
Look, I’ve wasted enough weekends biting into perfectly seasoned pieces of chicken only to have the coating fall off like wet tissue paper. You know what I mean? It’s a tragedy! But I finally cracked the code, seriously. Forget those soggy failures; my recipe for Ultimate Crispy Fried Chicken Wings is the real deal. We’re using the double-fry method here, which sounds fancy, but trust me, it’s the secret to achieving that restaurant-style crunch right in your own kitchen. Getting these perfect fried chicken wings means you master the crunch, and once you nail this technique, you’ll never look back. Get ready for juicy centers encased in pure, shatteringly crisp perfection!
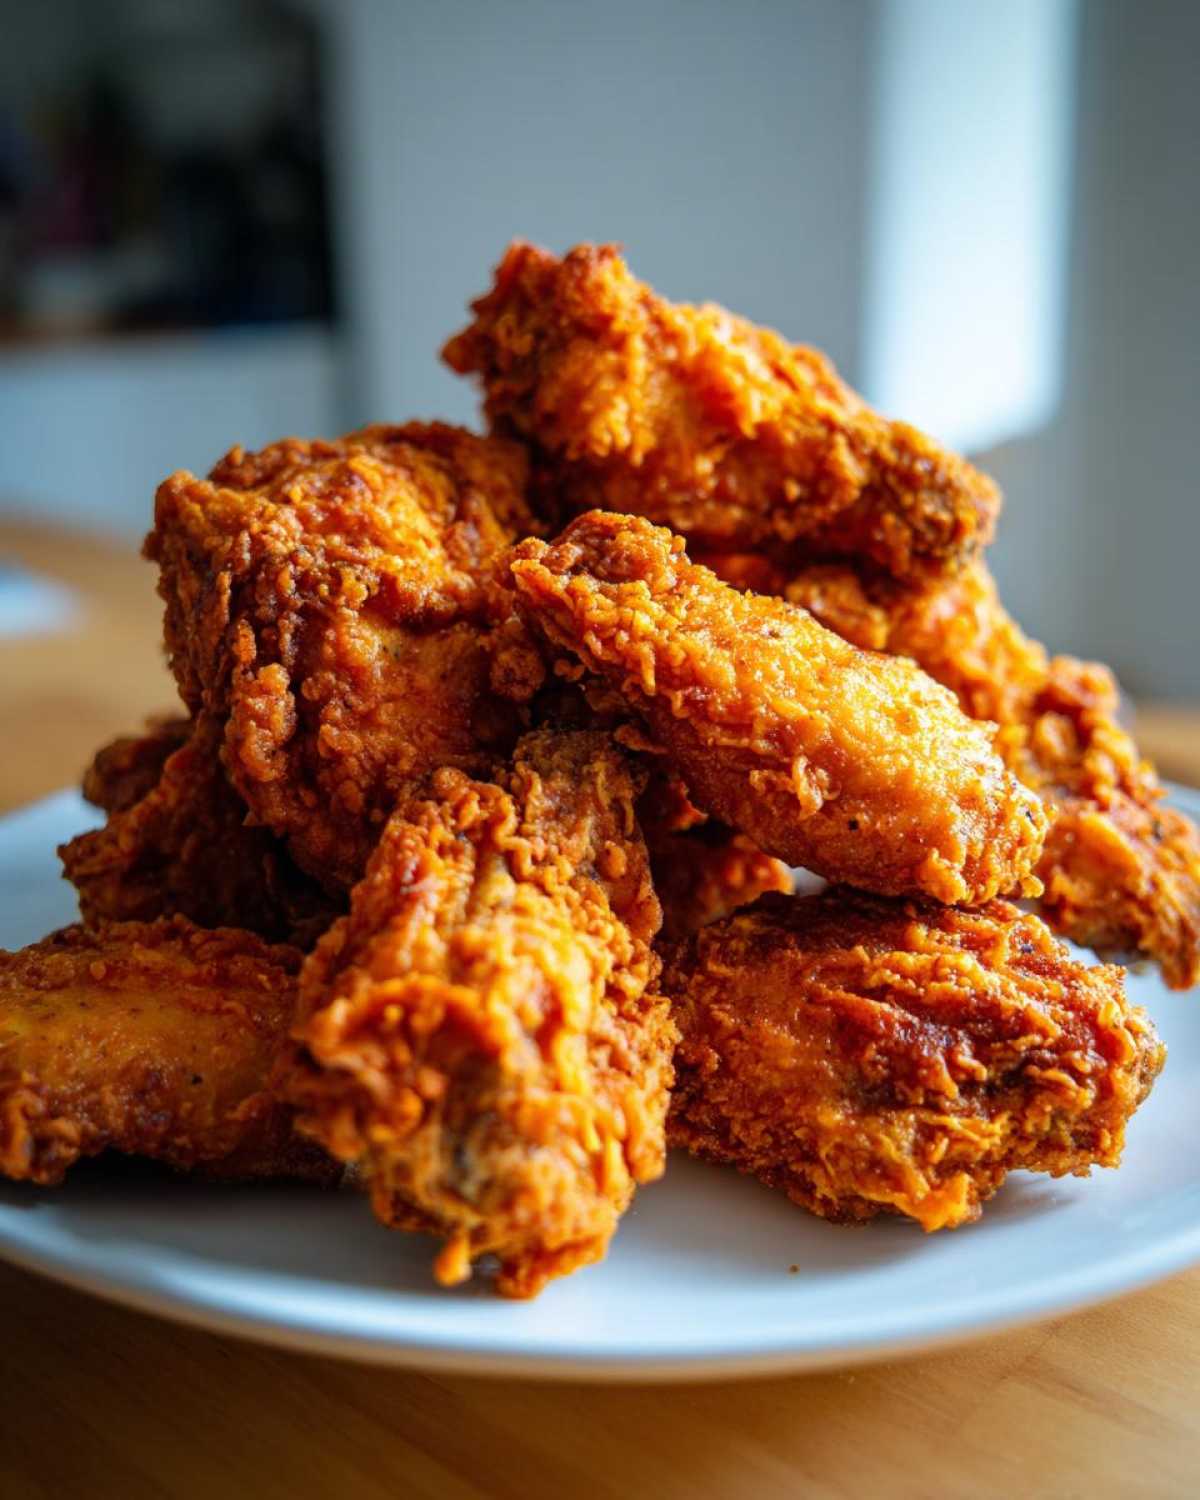
Why You Will Make The Best Fried Chicken Wings
You are going to love making these because they solve all the usual wing problems. We’ve designed this so you don’t have to choose between flavor and texture. This method ensures a satisfying experience every single time, especially when feeding a crowd.
- Serious Crunch Factor: Thanks to the cornstarch in our dredge, these wings stay crispy—even when tossed in sauce!
- Incredibly Juicy Inside: The two-step frying technique seals in all the moisture, giving you that perfect contrast.
- Perfect Party Food: They are easy to scale up for Game Day or any big gathering. Check out some of my other party wing recipes for more ideas!
Essential Ingredients for Crispy Fried Chicken Wings
You can’t rush perfection, and that starts with respecting your ingredients. Whenever I make a big batch of these wings for the Sunday football game, I lay everything out first so I know I have the power to create that amazing texture. We need a few key players here to make this happen, especially for creating that bomb coating. If you’re looking for more tips on getting the best coating, I wrote a whole piece about wing coating secrets that you should check out!
For the chicken, you definitely need 2 lbs of wings, and make sure you separate them into flats and drumettes; they cook more evenly that way. We also need 2 large eggs and about half a cup of milk for our simple wet mixture. And finally, you’ll need plenty of vegetable oil—enough to get about two inches deep in your pot for frying.
Coating Components for Perfect Fried Chicken Wings
This is where the magic of crispiness happens, so pay close attention to these measurements! We mix up all our dry goodies first: that’s 1 cup of all-purpose flour, half a cup of cornstarch, and 1 tablespoon of baking powder. That baking powder and cornstarch combo is what locks in the crunch—it just doesn’t flake off! For seasoning, I always add 1 teaspoon each of salt, black pepper, garlic powder, and paprika, plus maybe a tiny pinch of cayenne if I want to bring some heat.
The wet mixture is just the eggs and milk whisked together. When you dredge them, you want that flour mixture to really stick, so that’s why we go dry, then wet, and then back into the dry one again, pressing firmly!
The Double-Fry Method for Restaurant Style Fried Chicken Wings
Okay, don’t let the name scare you; the double-fry method is the key to these incredible, crunchy wings. This is how you get that shatteringly crisp exterior that holds up way better than a single fry. It might take an extra four or five minutes total, but trust me, the payoff for these juicy inside crispy outside wings is worth it. We are essentially cooking them through first, letting them rest, and then giving them a super hot blast to crisp everything up!
Prepping the Chicken: Drying and Dredging for Fried Chicken Wings
Before any oil even gets warm, you have to start with the driest chicken possible. Take your flats and drumettes and pat them until they are bone dry with paper towels—seriously, blot, blot, blot! Then we do the three-step coating dance: first, a good toss in that dry flour mix, shaking off the excess. Next, a quick dip in the egg and milk wash. Finally, back into the dry mix! This last coating is the most important part—press that flour onto the skin every single spot you can!
First Fry: Setting the Stage for Juicy Inside Crispy Outside Wings
Get your oil up to 325 degrees Fahrenheit. Not hotter, that’s crucial! If it’s too hot, the outside burns before the inside is safe to eat. Carefully crowd your pot—you don’t want to lower the oil temperature too much—and let them hang out for about five to six minutes. They should look pale tan or lightly golden when you pull them out. Place them on that wire rack and let them breathe for at least five minutes. This resting time lets steam escape, which sets up the crust for the big finish!
Second Fry: Achieving Maximum Crispiness on Your Fried Chicken Wings
Now we crank the heat! Bring that oil up to a screaming 375 degrees Fahrenheit. Time for the final party trick. Drop those rested wings back in the hot oil, but just for two to three minutes this time. We aren’t cooking them anymore; we’re just flash-frying them to create that deep golden color and rock-hard crunch. Pull them out when they are gorgeously browned, drain them quickly on a clean rack, and serve immediately while they are screaming hot!
Equipment Needed for Perfect Fried Chicken Wings
You don’t need a fancy deep fryer to pull this off, but you do need a few basics to handle hot oil safely and get that perfect texture. When I make these for the kids, I usually just use the biggest, heaviest pot I own. It holds the heat much better than a thin saucepan, which is vital for keeping that oil temperature steady!
First thing’s first: you absolutely need a reliable thermometer. Dealing with hot oil is no joke, and guessing the temperature will land you with greasy or burnt wings. A good clip-on candy or deep-fry thermometer is your best friend here. Trust me, getting that 325°F and 375°F dialed in makes the difference between success and a kitchen disaster.
Next, you need a way to get the wings out safely, so be sure you have a spider strainer or a slotted spoon handy. And once they are done cooking, don’t just put them on paper towels! That traps the steam and gets them soggy fast. You need a sturdy wire rack set over a baking sheet. This lets the air circulate underneath, helping them stay crisp. If you’re planning a big spread for your friends, check out my guide on easy fried chicken wings appetizers for serving logistics!
Tips for Perfectly Seasoned Fried Chicken Wings
Okay, seasoning is where you stamp your own personality onto these beauties! Since we are deep-frying, some of that seasoning can fall off in the oil, so I always tell people to be a little more aggressive than they think they need to be in that initial dry dredge. Don’t be shy with the salt and pepper in the flour mix; that’s your primary flavor layer!
My absolute favorite part of the experience is seasoning *after* the fry. As soon as those wings come out of that final 375-degree bath, they’re still glistening with hot oil. You need to work fast! If you want hot wings, this is the perfect time to toss them immediately in your favorite sauce. If you want them crispy without sauce, you should have your salt shaker or seasoned salt ready to go right over that wire rack.
Remember that optional cayenne pepper I mentioned in the dry mix? If you skip it during the dredge, you can create a super simple spicy coating right afterward. Just mix a little cayenne powder with some plain salt and dust it on while they’re hot. For more ideas on turning the heat up, my friends rave about my dedicated spicy fried chicken wings recipe collection!
Serving Suggestions for Your Game Day Chicken Wing Recipes
You made the most amazing, crunchy things on earth—now what? Well, you can’t just eat them on a paper plate alone! These are designed to be the star of any Game Day spread or party lineup. The second those wings come off that wire rack, I’m usually grabbing the sauce bottle. Toss them quickly so that hot oil residue helps the sauce stick perfectly. Don’t be shy; a good thick Buffalo sauce or even a sweet soy glaze works wonders!
But you need balance with all that crispy, salty goodness, right? That’s where the cool, crisp sides come in. Celery and carrot sticks are non-negotiable; they give your mouth a break from the heat. And you absolutely need a creamy dip. My go-to is always a classic ranch, but blue cheese dressing is what the traditionalists demand!
If you want to fill out the platter and give people alternatives that aren’t wings, check out my recipe for classic deviled eggs. They travel well, they’re super popular, and they pair great with anything fried and spicy. Honestly, once these wings hit the table, they disappear before you can even set down the dip bowls!
Storage and Reheating Instructions for Leftover Fried Chicken Wings
So, you actually managed to have leftovers? Wow, that’s a feat! These wings taste best fresh, but if you have any stragglers, we have to treat them right so they don’t turn into sad, spongy disappointments later. Store them in the fridge in an airtight container, but honestly, don’t make them sit there for more than two days, okay? They lose their structural integrity too fast.
The microwave is absolutely forbidden in my house when it comes to reheating wings. It just steams everything and ruins that beautiful crunch we worked so hard for during that double fry! The best way to bring them back to life is in the oven or, even better, the air fryer.
If you’re using the oven, just spread those gems out on a wire rack over a baking sheet—never put them directly on the pan! Heat the oven to about 375 degrees Fahrenheit and let them bake for 8 to 10 minutes until they’re hot and crispy again. If you have an air fryer, even better! Set it to 360 degrees for about 5 minutes. That high-heat air circulation dries out any residual moisture and crisps up the skin beautifully. If you need some non-wing appetizers for the party crew, check out my Buffalo cauliflower bites while you’re waiting!
Frequently Asked Questions About Making Fried Chicken Wings
I know you might have questions floating around once you get into the weeds of double-frying. It’s a technique, but once you do it once, you’ll ace it every time! People often ask me about getting the absolute best texture and how to save leftovers, so I figured I’d cover the big ones right here.
Can I make these Chinese Style Fried Wings?
Oh, absolutely! Think of this recipe as your foundation for any wing flavor you can dream up. For a Chinese style fried wings flavor, you keep the exact same dredge and double-fry method—that’s what gives you that shatteringly crisp crust! After the second fry, when the wings are super hot, you toss them in a mixture of soy sauce, ginger, garlic, sesame oil, and maybe a thick sweetness from honey or maltose. It’s amazing how well that heavy coating holds onto a sticky glaze!
How do I ensure my fried chicken wings stay crispy overnight?
This is the eternal struggle, right? If you are planning on saving some (which is unlikely, let’s be honest), the most important thing is draining them properly on the wire rack immediately after that second fry. Do NOT put them, warm or cold, into a plastic bag or sealed container. They need air circulation to stop the steam from turning your crust soggy. When you reheat them the next day—and I highly recommend checking out my thoughts on fried rice techniques for keeping things crispy in general—use a low oven or your air fryer, never the microwave!
Estimated Nutritional Information for Fried Chicken Wings
Alright, let’s talk fuel! I know we are not making these for health reasons—we are making them because they are the best appetizer on the planet—but it’s good to have a rough idea of what you’re diving into, especially if you’re serving them at a party where people are conscious of what they eat.
Keep in mind that whenever you deep fry anything, things get heavy fast! The oil absorption during that double-fry process really ramps up the numbers, especially the fat content. These figures are just my best guess based on the ingredients listed—remember, your oil quality and how much you drain will change things slightly. If you’re looking for other goodies for your snack table, swing by my general snack recipes section!
Here is the estimated nutritional breakdown for just four wings, which is a solid starting point for one person!
- Serving Size: 4 wings
- Calories: 350
- Fat: 22g
- Saturated Fat: 6g
- Protein: 22g
- Carbohydrates: 15g
- Sodium: 450mg
Just a quick word of caution, because I always have to say it: these numbers assume you’re using standard white flour and regular vegetable oil, and they don’t account for any sauces you might dunk them in later! If you load them up with Buffalo sauce, the sugar and sodium are going to jump quite a bit more, so factor that in when you’re planning the whole meal. Enjoy them, and don’t stress about the numbers too much!
PrintUltimate Crispy Deep Fried Chicken Wings
A recipe for making deeply crispy, juicy fried chicken wings using a double-fry method for restaurant-style texture.
- Prep Time: 20 min
- Cook Time: 15 min
- Total Time: 35 min
- Yield: 4 servings
- Category: Appetizer
- Method: Deep Frying
- Cuisine: American
- Diet: Low Fat
Ingredients
- 2 lbs chicken wings, separated into flats and drumettes
- 1 cup all-purpose flour
- 1/2 cup cornstarch
- 1 tablespoon baking powder
- 1 teaspoon salt
- 1 teaspoon black pepper
- 1 teaspoon garlic powder
- 1 teaspoon paprika
- 1/2 teaspoon cayenne pepper (optional)
- 2 large eggs
- 1/2 cup milk
- Vegetable oil, for deep frying
Instructions
- Pat the chicken wings completely dry using paper towels. This step is crucial for crispiness.
- In a shallow dish, whisk together the flour, cornstarch, baking powder, salt, pepper, garlic powder, paprika, and cayenne pepper. This is your dry dredge.
- In a separate bowl, whisk the eggs and milk together. This is your wet mixture.
- Dredge each wing first in the dry mixture, shaking off excess. Then dip it into the wet mixture, allowing excess to drip off. Finally, return the wing to the dry mixture, pressing firmly to coat thoroughly. Set aside on a wire rack.
- Fill a large, heavy-bottomed pot or deep fryer with enough vegetable oil to reach a depth of about 2 inches. Heat the oil to 325 degrees Fahrenheit (160 degrees Celsius).
- Carefully place a few wings into the hot oil, ensuring you do not overcrowd the pot. Fry for 5 to 6 minutes until lightly golden brown. This is the first fry.
- Remove the wings from the oil and place them back on the wire rack. Increase the oil temperature to 375 degrees Fahrenheit (190 degrees Celsius).
- Once the oil reaches 375 degrees Fahrenheit, return the wings to the hot oil in batches. Fry for an additional 2 to 3 minutes until they are deep golden brown and very crispy.
- Remove the wings and place them on a clean wire rack set over a baking sheet to drain excess oil. Serve immediately.
Notes
- For extra flavor, you can toss the hot, drained wings in your favorite sauce (like Buffalo or a sweet soy glaze) immediately after the second fry.
- If you do not have a thermometer, the oil is ready for the first fry when a small pinch of flour dropped in sizzles immediately but does not brown quickly.
- For a juicier inside, let the wings rest for 10 minutes between the first and second fry.
Nutrition
- Serving Size: 4 wings
- Calories: 350
- Sugar: 1
- Sodium: 450
- Fat: 22
- Saturated Fat: 6
- Unsaturated Fat: 16
- Trans Fat: 0
- Carbohydrates: 15
- Fiber: 0
- Protein: 22
- Cholesterol: 110