

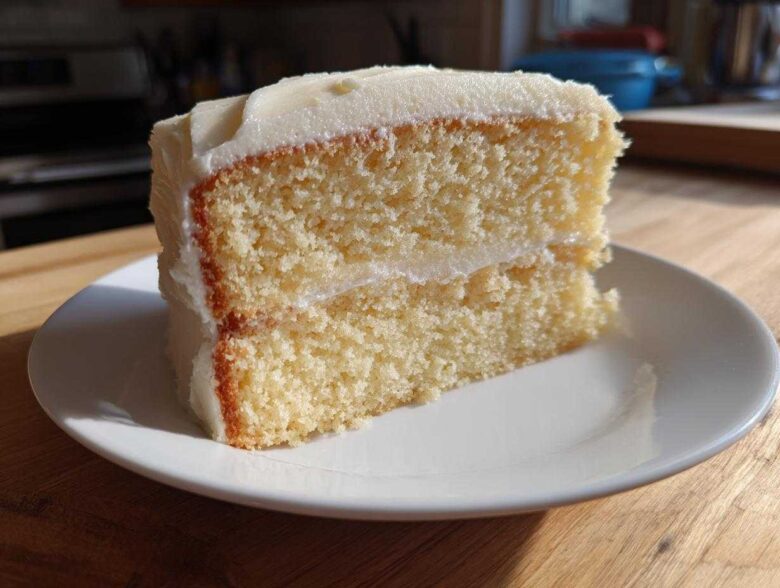
Listen up, because if you’ve ever been burned by a dry, crumbly vanilla cake that tastes like flour and regret, I have *the* solution for you. Forget every frustrating baking attempt you’ve ever made. This, my friends, is the ultimate, incredibly moist, and unbelievably fluffy vanilla cake recipe you’ve been dreaming of. It’s so straightforward, even if you’re new to baking from scratch, you’ll nail it for that next birthday party or just because Tuesday needs a little sweetness.
Truly, the magic here lies in one secret ingredient: sour cream. I know, it sounds wild, but trust me, that tiny bit of added fat and acidity does wonders to tenderize the crumb and keep this cake incredibly moist for days. It’s the secret handshake for making a dessert that tastes straight out of a high-end bakery, but you whip it up right here on your own counter!
Why This is the Best Vanilla Cake Recipe for Layer Cakes
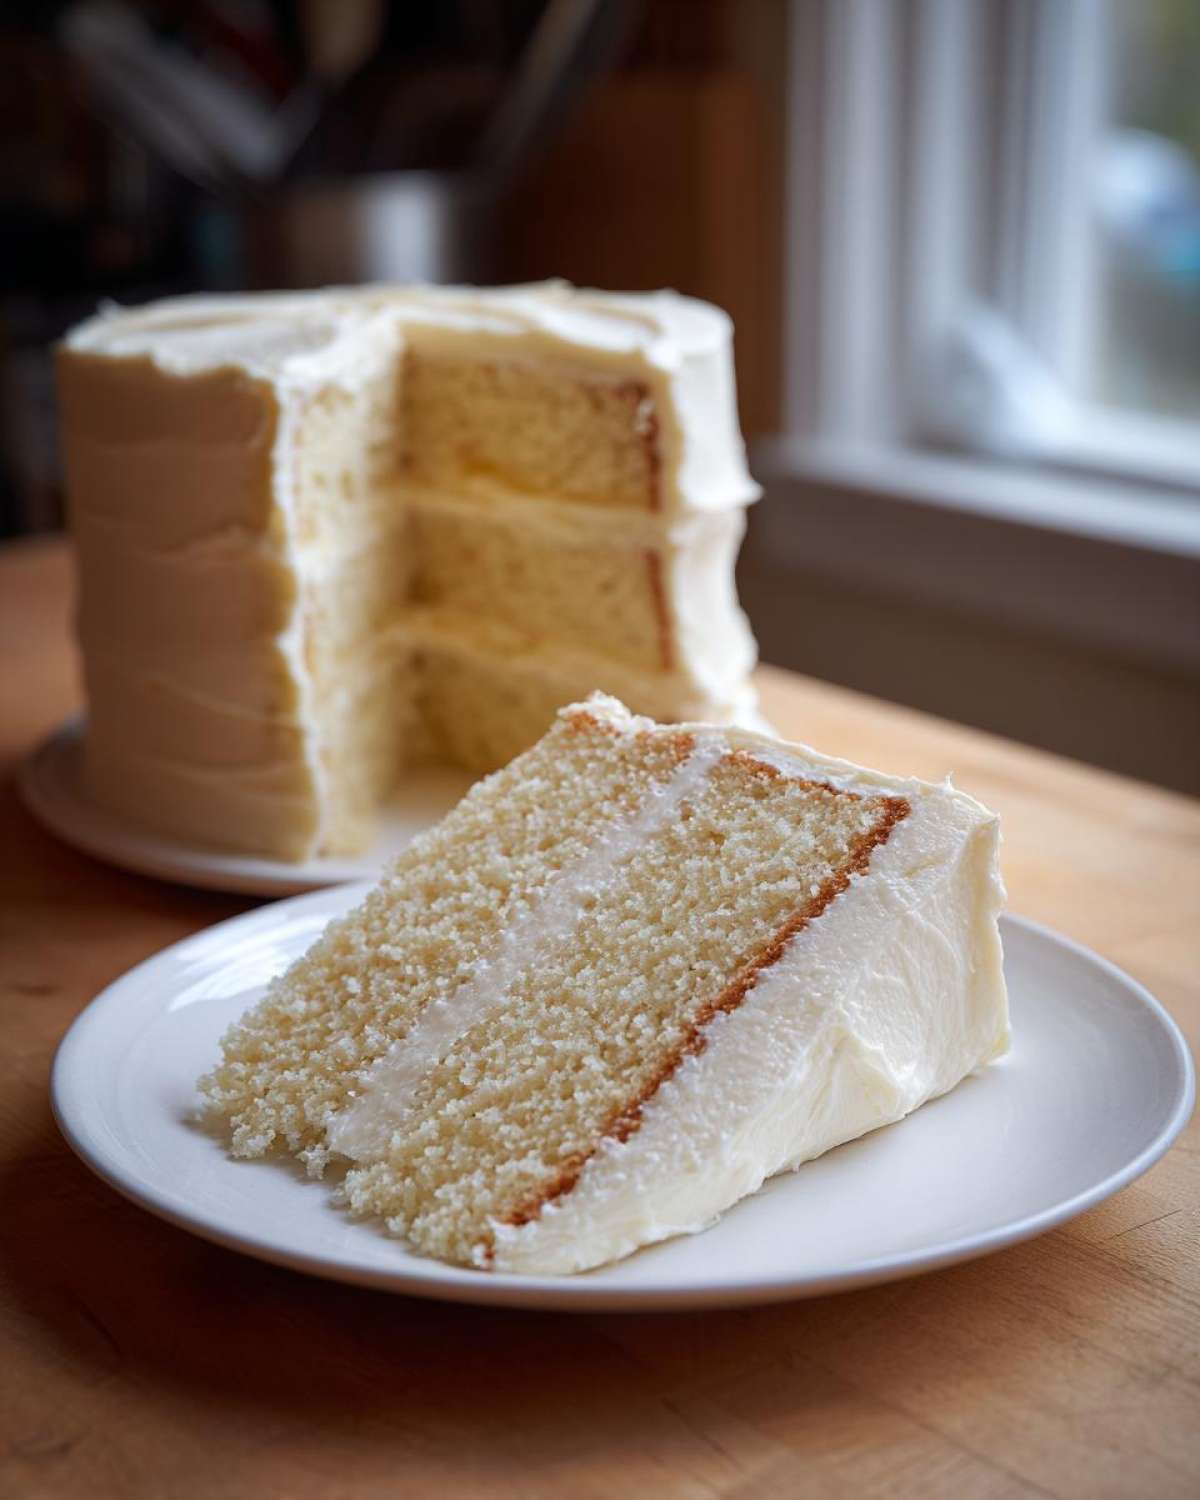
If you need a cake that stands tall and proud for stacking layers, this is it. Many recipes result in a delicate sponge that collapses under heavy frosting, but not ours! We’re aiming for that perfect balance: soft enough to melt in your mouth, but sturdy enough to handle a decent amount of my creamy homemade buttercream. This makes it the absolute gold standard for a Classic Birthday Cake Recipe.
What gives it this strength without sacrificing tenderness? It all comes down to the ratios. The specific way we combine the flour, the sugar, and yes, that crucial sour cream, locks in moisture while also building a structure that stacks beautifully. Seriously, this formula is engineered for success, not sadness!
Achieving a Soft Vanilla Sponge Cake Texture
The secret to a truly Soft Vanilla Sponge Cake texture starts before you even turn on the mixer. You absolutely must have room temperature eggs and milk—I mean it! Cold ingredients don’t emulsify properly with the softened butter, and that leads to a dense, slightly greasy cake. Cold ingredients sabotage your air pockets!
Then there’s the star: sour cream. It coats the flour particles just enough, preventing too much gluten from forming when we mix. Gluten is great for bread, but terrible for soft cake. The fat and acid in the sour cream work together to tenderize the crumb, ensuring every single bite is velvety soft, like the best bakery version you’ve ever had.
Ingredients for the Moist Vanilla Layer Cake Recipe
Okay, ingredient list time! This is where we get serious about achieving perfection. For this Moist Vanilla Layer Cake, the quality and temperature of your starting items matter more than almost anything else. Don’t substitute the room-temperature items; they make a difference that you’ll taste!
I’ve broken this down so you can tackle the cake and the frosting separately. If you want a truly killer frosting that looks professional, make sure you sift that powdered sugar. Trust me, skipping that step leads to sad, lumpy swirls.
Cake Batter Components
Remember, grab your eggs and milk out about an hour before you even think about starting. Cold equals dense, and we want airy!
- 1 3/4 cups all-purpose flour
- 1 3/4 cups granulated sugar
- 1 tablespoon baking powder
- 1/2 teaspoon salt
- 1 cup unsalted butter, softened to room temperature
- 4 large eggs, room temperature
- 1 cup whole milk, room temperature
- 2 teaspoons pure vanilla extract
- 1/2 cup sour cream (this is the secret weapon!)
Homemade Vanilla Buttercream Frosting Ingredients
This frosting sets up beautifully, but you have to beat that butter until it’s *really* light first. That’s how you get that fluffy texture everyone raves about!
- 1 cup unsalted butter, softened
- 4 cups powdered sugar, sifted (don’t skip this!)
- 1 teaspoon vanilla extract
- 3-4 tablespoons heavy cream
- Pinch of salt
Step-by-Step Instructions for Your Easy Vanilla Cake Recipe
Alright, gather your bowls! This is where the magic starts to happen, and trust me, it moves fast once you get going. We’re keeping things super simple here because this should feel like an easy vanilla cake recipe, not a science project. First things first: get that oven heating up to 350°F (175°C). I like to prepare my two 8-inch pans right away—grease them, flour them, and put down little parchment circles on the bottom. That little bit of insurance guarantees a clean lift!
Preparing the Cake Layers
In your biggest bowl, you just whisk together the flour, sugar, baking powder, and salt. Once that’s done, plop in that softened butter. You’re going to beat this mixture on low speed until it looks like coarse, sandy crumbs. This blending step is key for that Fluffy Vanilla Cake From Scratch! Next, quickly whisk your room temperature eggs, milk, vanilla, and that secret sour cream in another bowl until they’re acquainted.
Now, add the wet into the dry ingredients slowly, in about three batches, mixing on medium speed until things are *just* combined after each addition. Stop mixing as soon as you don’t see streaks of flour anymore. Overmixing is the enemy of tenderness, so scrape down the sides, give it one last gentle fold, and you are ready. Divide that gorgeous batter evenly between your prepared pans.
Baking and Cooling the Perfect Vanilla Cake Recipe
Pop those pans into the heated oven. You’re looking at about 30 to 35 minutes, but start checking around the 30-minute mark. The best way to test for your Perfect Vanilla Cake Recipe readiness is the toothpick test—if it comes out with just a few moist crumbs clinging to it, you’re golden. If it’s wet batter, give it five more minutes. Don’t forget to check out this great French toast recipe later!
When they come out, let them hang out in their pans on a wire rack for exactly 10 minutes. No more, no less! After that little rest, flip them out onto the rack so they can cool completely. If you try to frost warm cakes, you’re just asking for a buttercream puddle, and nobody wants that.
Making the Creamy Homemade Vanilla Buttercream Frosting
We’ve got the cake layers ready, now it’s time for the best part: the frosting! This Homemade Vanilla Buttercream Frosting is non-negotiable; it’s creamy, it holds its shape perfectly, and it tastes intensely of real vanilla—not that fake candy sweetness.
First, make sure your cup of butter is truly softened, but not melted or greasy. I take mine out the same time I take out the cake ingredients. We need it soft enough to whip well. Put that butter in your mixer and beat it on medium-high speed until it’s pale, light, and visibly fluffy. This takes a few solid minutes, but don’t rush it; those air bubbles are what make the frosting light!
Once it looks like whipped sunshine, start adding your sifted powdered sugar one cup at a time. I always mix on low speed initially because this stuff flies everywhere! Once it’s all incorporated, sprinkle in that pinch of salt and the vanilla extract. Now is when you crank the speed up to high. We’re looking for gorgeous peaks!
The final touch is the heavy cream. Add it one tablespoon at a time. This is where you customize everything for your vanilla cake recipe. If you want a thick, pipeable frosting for borders, stick to three tablespoons. If you like a slightly softer, maybe slather-it-on-thick style for filling layers, add that fourth tablespoon. Once it’s light, billowy, and totally smooth, stop mixing! You’ve just made the perfect companion for your vanilla cake.
Tips for Success with This Classic Birthday Cake Recipe
You’ve got the recipe and the ingredients, but if you want this cake to look like it came straight from a bakery window—you need a few insider tricks that separate good cakes from legendary ones. I’ve messed up enough layers over the years to learn these lessons the hard way, so let me save you some grief here. These little moves elevate this from just great to truly the Perfect Vanilla Cake Recipe.
Tip number one is all about presentation, especially since this is often your go-to Classic Birthday Cake Recipe. Never skip leveling your cakes! When they cool, I use a serrated bread knife, holding it parallel to the counter, and gently saw off that dome top. It might seem like you’re trimming away delicious cake, but I promise you, the stability you gain for stacking is worth every crumb you remove. And hey, those trimmings? Slice them up warm with a cup of coffee later—that’s my reward!
Second, if you are worried about your layers getting too dark on the edges, try the ‘Bake-Even Strip’ trick. You soak those thick fabric strips in water, wrap them around the outside of your cake pans, and clip them shut. They insulate the edges so the cake bakes evenly from the center out. Seriously, no more dark crusts!
For the frosting, the secret to that unbelievably smooth finish is temperature control. If your cake layers are even slightly warm, the buttercream melts instantly when you try to do a crumb coat. Wait until they are completely, utterly cool. Also, when applying the first thin layer—the crumb coat—use an offset spatula and press very gently. You’re just trying to trap those loose crumbs. Pop the whole thing into the fridge for 15 minutes. When you come back for the final, thicker layer of frosting, it will glide on like silk, giving you professional results every time. It’s these fussy little details that make the difference. You can check out my moist zucchini muffins next when you need a quick snack!
Make Ahead Vanilla Cake and Storage Instructions
One of the greatest things about this recipe being so sturdy is that it’s perfect for planning ahead! I absolutely hate the stress of baking everything the morning of a party. You’ll be happy to know you can get the heavy lifting done a whole day before your gathering. That’s what I call smart cooking!
The key here is patience during the cooling stage. You cannot, under any circumstances, wrap these layers up early. They have to be completely cooled down to room temperature first. If you wrap a warm cake, you trap steam, and steam turns into soggy cake—and nobody wants a disappointing zucchini bread with pecans situation either, which is a whole different kind of sad!
Once those layers are totally cool, wrap each one individually. I mean tightly! Use a layer of plastic wrap first, making sure it’s snug against the surface, and then wrap that bundle again in a layer of aluminum foil. This double-wrap acts like armor against freezer burn and drying out. You can keep these wrapped layers safely tucked away at cool room temperature for about 24 hours, or if you need longer, pop them in the fridge for up to three days.
If you are making the absolute best decision and freezing them? They will keep perfectly for up to two months! When you take them out to frost them, just remember to unwrap them first and let them sit on the counter for an hour or two to reach room temp before you start frosting. This ensures your buttercream doesn’t tear up the surface when you try to spread it.
What about the assembled cake? Once your beautiful, fully frosted masterpiece is done, it’s best kept covered at room temperature for about two days if you used a standard buttercream like the one we made. If you used cream cheese frosting, you should definitely keep the whole thing in the fridge. If it’s been chilled, let an individual slice sit out for about 30 minutes before serving—a cold slice of cake rarely shows its true moist self!
Ingredient Notes and Substitutions for Your Vanilla Cake Recipe
I know sometimes you open your fridge and realize you’re missing something crucial, or maybe you just prefer other ingredients. That’s fine, but when it comes to the best vanilla cake recipe, we need to have an honest conversation about a few key players here. I want you to succeed, but sometimes a substitution can dramatically change what makes this cake so special.
Let’s talk about the elephant in the ingredient list: the sour cream. This ingredient is responsible for the amazing tenderness we’re chasing. It’s fat, and it’s acidic, making everything soft and moist inside. If you are completely out, you *can* use full-fat plain Greek yogurt instead. I’ve done it in a pinch when I was making a vanilla cake recipe for a friend who suddenly went dairy-free on me.
Here’s the warning: Greek yogurt is thicker and tangier than sour cream. Your cake might bake up just a tiny bit denser, so don’t expect the exact same weightless fluffiness. Don’t use regular yogurt, though—that’s too thin and watery and will mess up your batter consistency badly!
Another place people try to cut corners is the vanilla, and that’s a major mistake in a recipe that’s supposed to be the epitome of vanilla flavor! If you use imitation vanilla extract, your cake will taste artificial and flat. Seriously, if you are making a cake where vanilla is the main star, use the good stuff—pure vanilla extract. You’ll taste the difference immediately. It’s worth the extra couple of dollars because it really shines through in the finished product, especially when paired with that rich buttercream.
Frequently Asked Questions About the Vanilla Cake Recipe
I figured since you’re going through the trouble of making this amazing vanilla cake recipe from scratch, you might have a few lingering questions. That’s totally normal! I always have questions when I try a new formula, especially when I’m aiming for something truly special like a Bakery Style Vanilla Cake. Here are the few things folks always ask me.
Can I make this a Vanilla Sheet Cake Recipe?
Oh yes, you absolutely can turn this into a Vanilla Sheet Cake Recipe if you need something easier for a big crowd! If you’re using a standard 9×13 inch pan, you’ll need to adjust the time, and since the batter is shallower, it cooks faster. Instead of 30–35 minutes, start checking it around 25 minutes. Keep an eye on it! You want that lovely golden edge, and the toothpick test will still be your best friend.
Why did my cake batter separate?
This is the classic sign that things went wrong with your temperature control—usually, the eggs or the milk were too cold when you added them to the creamed butter mixture. When cold liquid hits warm, creamy fat, it tightens up instantly, causing that curdled, separated look. It’s frustrating!
If it happens, don’t panic, but definitely stop mixing right away! You can try to save it by taking about half a cup of your dry ingredients and whisking that into the separated batter first before mixing the rest of the wet ingredients in slowly. But honestly, for the absolute best structure leading to that Fluffy Vanilla Cake From Scratch, just make sure everything is room temp next time. It’s the easiest way to guarantee a smooth mix!
What is the best vanilla extract to use for this cake?
Because vanilla is the star flavor here, you need to treat it right! If you use imitation vanilla extract, frankly, your cake will taste like something from a plastic bottle. It’s just not worth it, especially when you’re aiming for the Best Vanilla Cake Recipe imaginable.
You want to use pure vanilla extract—the darker the color, generally the richer the flavor. If you are feeling fancy and want an extra layer of flavor in your Simple Vanilla Dessert, try using clear vanilla extract in the actual cake batter, just so the color stays beautifully white, and then use dark, pure vanilla in the buttercream. That way, the frosting gets that deep, familiar vanilla aroma, and the cake layers look pristine!
Estimated Nutritional Data for This Simple Vanilla Dessert
Okay, so while this vanilla cake recipe is definitely special occasion material, I know some of you are planning ahead or just generally curious about the numbers. I always try to give a ballpark estimate for tracking, but you have to remember that these numbers are just my best guess based on the ingredients I buy. Every brand of butter or cup of sugar is slightly different, so treat these figures as a fun guide rather than gospel!
This information is based on slicing the entire recipe into 12 generous servings, which is how I usually cut it for family gatherings. If you slice yours into smaller pieces—maybe for a giant dessert table—the numbers per slice will obviously drop. Think of this as planning for a lovely, satisfying piece of cake!
Please note that these figures are just estimates provided for your convenience, as required by my site disclosure. If you’re tracking very strictly, you’ll want to calculate based on the exact brands you use.
- Serving Size: 1 slice
- Calories: 450
- Sugar: 55g
- Sodium: 250mg
- Total Fat: 22g
- Saturated Fat: 14g
- Carbohydrates: 60g
- Protein: 5g
- Cholesterol: 90mg
Honestly, looking at that sugar content reminds me why we only pull this Simple Vanilla Dessert out for birthdays and big celebrations! It’s rich, it’s decadent, and it’s full of the good stuff—butter and vanilla—which makes it worth every calorie. Enjoy it responsibly, my friends!
PrintClassic Moist Vanilla Layer Cake with Buttercream Frosting
A simple recipe for a soft, fluffy, and moist vanilla layer cake paired with creamy vanilla buttercream frosting, perfect for birthdays or any special occasion.
- Prep Time: 25 min
- Cook Time: 35 min
- Total Time: 60 min
- Yield: 12 servings
- Category: Dessert
- Method: Baking
- Cuisine: American
- Diet: Vegetarian
Ingredients
- 1 3/4 cups all-purpose flour
- 1 3/4 cups granulated sugar
- 1 tablespoon baking powder
- 1/2 teaspoon salt
- 1 cup unsalted butter, softened
- 4 large eggs, room temperature
- 1 cup whole milk, room temperature
- 2 teaspoons pure vanilla extract
- 1/2 cup sour cream (for cake batter)
- For Frosting: 1 cup unsalted butter, softened; 4 cups powdered sugar, sifted; 1 teaspoon vanilla extract; 3-4 tablespoons heavy cream; pinch of salt
Instructions
- Preheat your oven to 350°F (175°C). Grease and flour two 8-inch round cake pans. Line the bottoms with parchment paper.
- In a large bowl, whisk together the flour, sugar, baking powder, and salt.
- Add the softened butter to the dry ingredients. Beat with an electric mixer on low speed until the mixture resembles coarse sand.
- In a separate bowl, whisk together the eggs, milk, vanilla extract, and sour cream until combined.
- Gradually add the wet ingredients to the dry ingredients in three additions, mixing on medium speed until just combined after each addition. Do not overmix. Scrape down the sides of the bowl as needed.
- Divide the batter evenly between the prepared cake pans.
- Bake for 30 to 35 minutes, or until a toothpick inserted into the center comes out clean.
- Let the cakes cool in the pans for 10 minutes before inverting them onto a wire rack to cool completely.
- To make the frosting, beat the softened butter until creamy. Gradually add the sifted powdered sugar, beating until smooth.
- Add the vanilla extract, heavy cream, and salt. Beat on high speed until the frosting is light and fluffy, adding more cream if needed for desired consistency.
- Once the cakes are completely cool, frost and stack the layers.
Notes
- Use room temperature eggs and milk for a smoother batter and better rise.
- Sifting the powdered sugar prevents lumps in your buttercream.
- You can make the cake layers one day ahead and wrap them tightly in plastic wrap once cooled.
Nutrition
- Serving Size: 1 slice
- Calories: 450
- Sugar: 55
- Sodium: 250
- Fat: 22
- Saturated Fat: 14
- Unsaturated Fat: 8
- Trans Fat: 0.5
- Carbohydrates: 60
- Fiber: 1
- Protein: 5
- Cholesterol: 90