

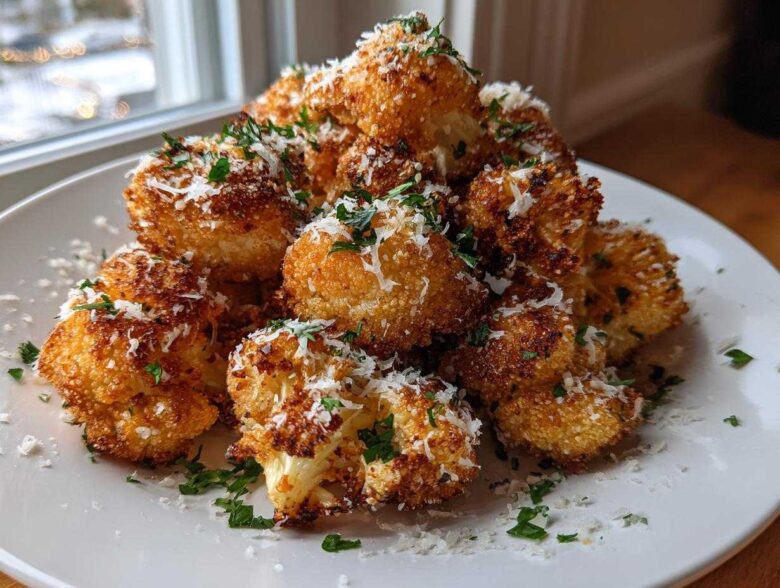
Seriously, if you’re like me, you want that deep-fried crunch, but you absolutely do *not* want the oil splatter waiting for you after dinner. I spent ages trying to nail that perfect outer shell on vegetables without touching my air fryer. It seemed impossible! But trust me, after testing way too many batches that ended up rubbery or sad, I cracked the code. These Parmesan Garlic Baked Cauliflower Bites are the real deal—golden, crunchy, and unbelievably flavorful. I’m telling you, mastering the coating technique is everything, and I’ve got my foolproof, three-step dredging station ready for you. Get ready for your new favorite healthy snack!
Why You Will Love These Parmesan Garlic Baked Cauliflower Bites
I know, I know, we’ve all been promised “crispy baked” things before that end up chewy. This recipe is different, and I promise you’ll be hooked after the first batch. Once you see them come out of the oven, golden and crackling slightly, you’ll understand!
- They are genuinely crispy! We’re talking about that satisfying crunch you usually only get from frying, all thanks to the high heat and Panko combo.
- The flavor is incredible—that savory Parmesan cheese melts slightly and crisps up with the garlic and parsley. It’s utterly addictive.
- Super quick setup! Aside from chopping the cauliflower, the actual coating process takes maybe 15 minutes tops.
- They are perfect for everyone. Whether you need a meatless appetizer or just a fantastic low-carb side dish, these fit the bill easily.
- No fancy equipment needed; this recipe is strictly for the standard oven—no air fryer required, ever!
- They hold up well! Unlike some coatings that slide right off, this three-stage dredging method sticks beautifully.
Essential Ingredients for Perfect Baked Cauliflower Bites
Okay, friends, let’s talk about what makes the coating stick and why this combination of simple pantry staples is non-negotiable for achieving that golden exterior. When you look at the ingredient list for these Baked Cauliflower Bites, you’ll notice we go through a dredging process. It needs three distinct stations, and each ingredient plays a crucial role in the final texture. You really can’t skimp here if you want that restaurant-quality crunch!
First up, you need one large head of cauliflower, of course, cut down into bite-sized florets. Smaller bites actually cook faster and get crispier than huge chunks, so aim for uniform pieces. For the actual coating, we rely on half a cup of all-purpose flour seasoned with salt and pepper for the initial dust. This is critical for moisture absorption!
Next ingredient in your lineup is the milk—just half a cup, and don’t worry about soaking them; this is a fast dip! Then comes the star of the crunch show: a full cup of Panko breadcrumbs. Trust me, Panko over regular Italian breadcrumbs every single time for this, please! We mix those Panko flakes with half a cup of finely grated Parmesan cheese. That cheese is what gives you those incredible browned, savory pockets. Finally, add in two minced garlic cloves and a teaspoon of dried parsley for that classic Parmesan garlic flavor profile. Oh, and don’t forget the two tablespoons of olive oil to drizzle over everything before they hit the oven—it helps them brown up beautifully.
Tips for the Best Coating for Baked Cauliflower
Listen, the secret to achieving that *truly* crispy exterior without deep frying is all about your breading game. Don’t just toss everything in a bowl together! We set up a three-stage dredging station, and it’s the key to the best coating for baked cauliflower. First, the flour mixture soaks up surface moisture from the wet cauliflower, which is huge. Then, that quick dip in the milk does the heavy lifting—it’s the edible glue that makes everything stick.
Finally, we press it hard into the Panko and Parmesan mix. The Panko flakes separate beautifully, creating air pockets that get perfectly crunchy when baked. And the Parmesan? It browns up faster than the breadcrumbs, giving you those gorgeous, slightly salty brown spots. Seriously, if you leave them touching on the pan, they steam instead of crisping, so make sure you give those little bites plenty of space!
Cauliflower Breading Techniques Explained
It’s all about the sequence! Always start dry, then wet, then coat again. The initial flour coat gets rid of surface wetness. The milk is just a quick binder—don’t let them soak! Then, when you press them into that cheesy Panko mix, make sure every single surface is covered. I like to use one hand for the dry steps and the other for the wet steps to keep my fingers from getting totally gummed up. You can see exactly how I put this together in my cauliflower fried rice recipe breakdown, because technique is everything!
Step-by-Step Instructions for Crispy Baked Cauliflower Bites
Alright, here’s where we put that amazing coating to work! Before you do anything else, get your oven fired up to 425 degrees Fahrenheit, which is about 220 Celsius. This is a hot oven—we need that heat right away to set that crust! Line two big baking sheets with parchment paper, and trust me on this: don’t skip the parchment. It saves your cleanup time times ten.
Now, take your first floret. Gently dredge it in the flour mix—just a light coat, shaking off any extra powder. Next, give it a quick dip in the milk, letting the extra moisture drip back into the bowl. The grand finale is pressing that floret firmly into the cheesy Panko heap until it looks fully covered. That firm press is what locks the crust on those Baked Cauliflower Bites.
Place them on your lined sheets, making sure there is space between every single one. If they’re crammed together, they steam, and we want crispy! Once they are all laid out, drizzle that olive oil lightly over the tops. Pop them in the oven for about 20 to 25 minutes, but here is the key: flip them over halfway through! This ensures even cooking. Once they look golden brown and crispy, they are ready to pull out. For more great vegetable ideas, check out my broccoli cheese casserole!
Achieving Maximum Crispiness: How to Make Crunchy Cauliflower in the Oven
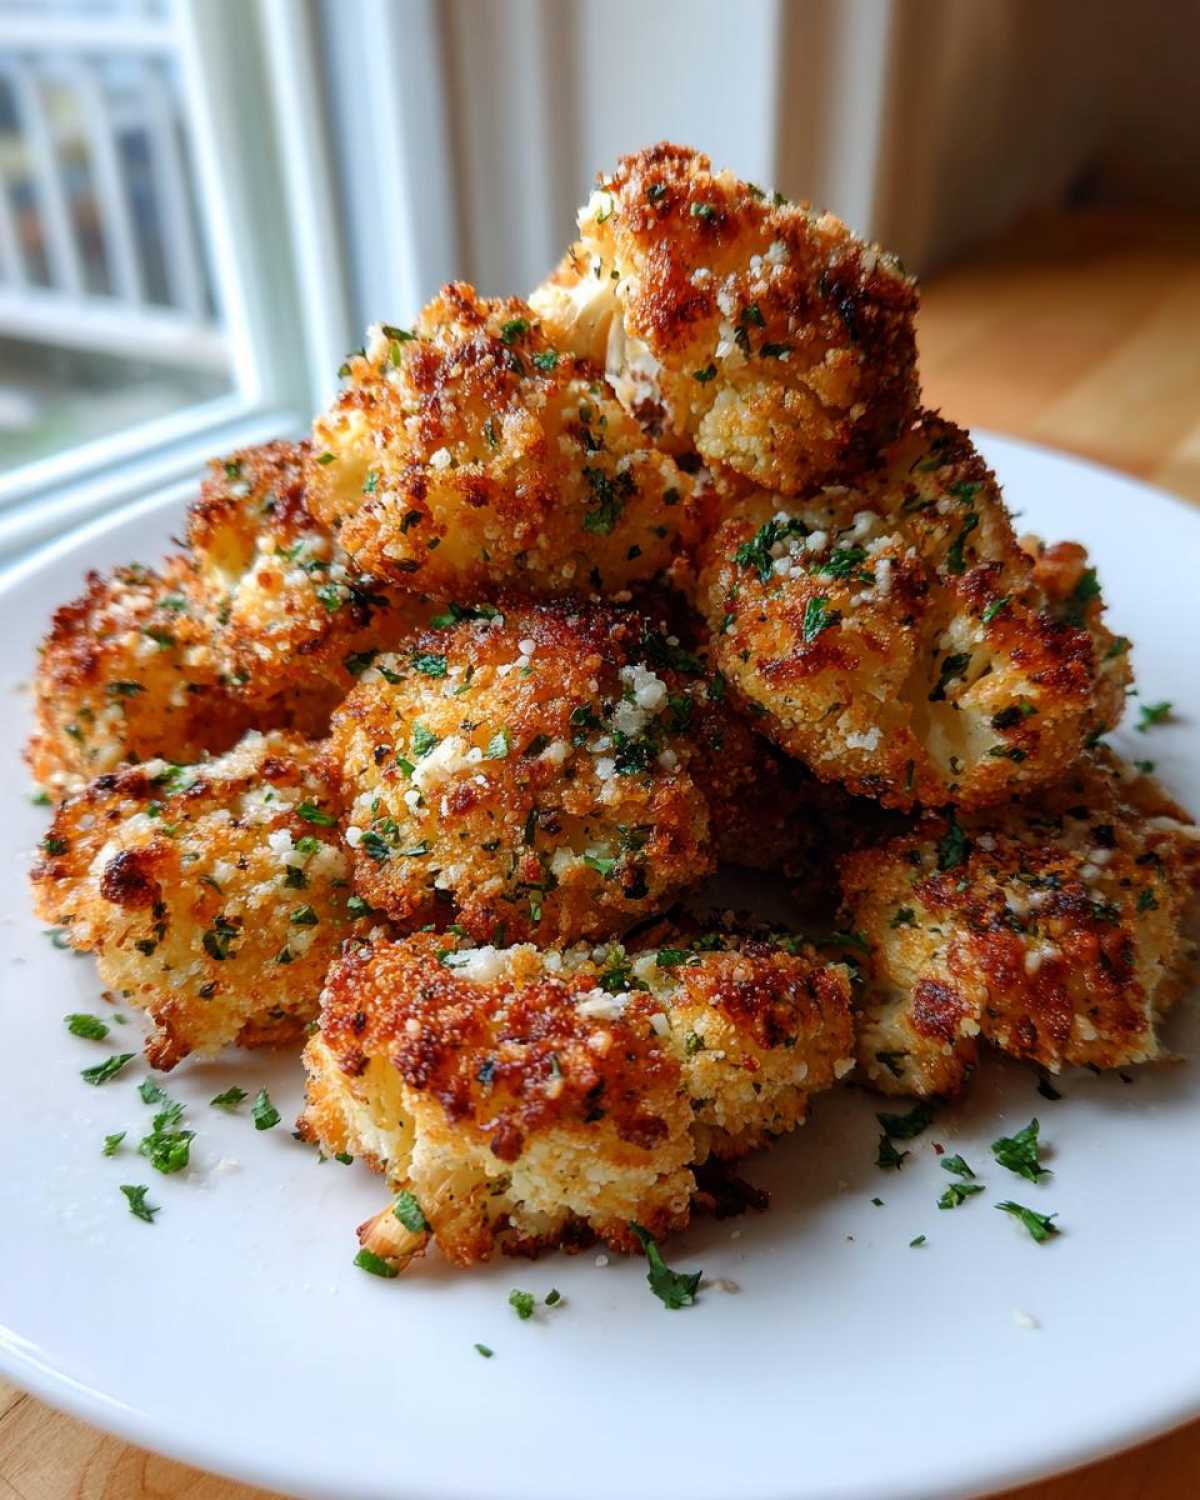
This is the moment of truth, right? We’ve coated them perfectly, but how do we actually get that snap without hauling out the fryer? It all comes down to heat management and a little spatial awareness in your oven. Since we are making these healthy cauliflower bites no air fryer needed, we rely on blasting them with high heat. I use 425°F (220°C) every single time because that high temperature helps the Panko and Parmesan mixture dry out fast before the actual cauliflower turns to mush.
And please, *please* don’t just pour the olive oil over the top! I made that mistake once when I was rushing. I thought pouring it on would grease everything evenly, but instead, I ended up with a soggy bottom layer because the oil pooled! Now, I measure my two tablespoons and drizzle them as lightly and evenly as possible over the tops only. The oil is just there to help accelerate the browning, not to deep-fry them in place. For more tips on getting food crispy without tons of oil, I actually detail my wing secrets over here crispy baked chicken wing no-fry secret! It uses the same principle!
Oven Temperature and Baking Time for Baked Cauliflower Bites
Stick to that 425°F mark! It’s high enough to crisp the outside beautifully while keeping the inside tender. Set your timer for 20 minutes, but don’t even think about pulling them out then unless they look brown already. You need that full 25 minutes, sometimes slightly longer depending on how crowded your pan is. I always stop looking at my clock and start looking for color. You want them deeply golden brown, not pale yellow. When the Parmesan starts smelling nutty and toasty, that’s when you know you’ve mastered how to make crunchy cauliflower in the oven.
Flavor Variations for Your Baked Cauliflower Bites
I know the Parmesan Garlic version is my absolute favorite—and honestly, I think it’s the perfect base for the best coating for baked cauliflower—but once you have the dredging technique down, you can go crazy! These little bites are the perfect canvas for almost any flavor profile you can dream up. It’s all about swapping out what goes into that final Panko mixture.
For instance, if you’re looking for something fiery, you can easily turn these into something resembling spicy baked cauliflower wings! Just omit the Parmesan from the breading bowl. Instead, toast your Panko lightly first, then toss the freshly baked, hot bites in a Buffalo sauce. You’ll want a really great dipping ranch to balance that heat, maybe one of my homemade ones.
Or, if you want an Asian twist, skip the garlic and parsley in the Panko bowl and toss the baked bites immediately in a thick glaze. You can whip up my super quick homemade teriyaki sauce and toss the cauliflower until it shines. It gives you this amazing sweet-and-salty profile that makes these feel super gourmet, but they’re still just easy vegetarian snack recipes oven baked!
Making Parmesan Garlic Cauliflower Bites Recipe
Just to bring it back home, remember that the instructions written out above are specifically for this classic Parmesan Garlic combo. That means you need that specific blend of Panko, salt, garlic, and cheese in your final dredging station. It’s the most reliable starter recipe, ensuring you get those beautiful golden edges on your Baked Cauliflower Bites every single time before you start experimenting with Buffalo or teriyaki!
Serving Suggestions and Dipping Sauces for Baked Cauliflower Appetizers
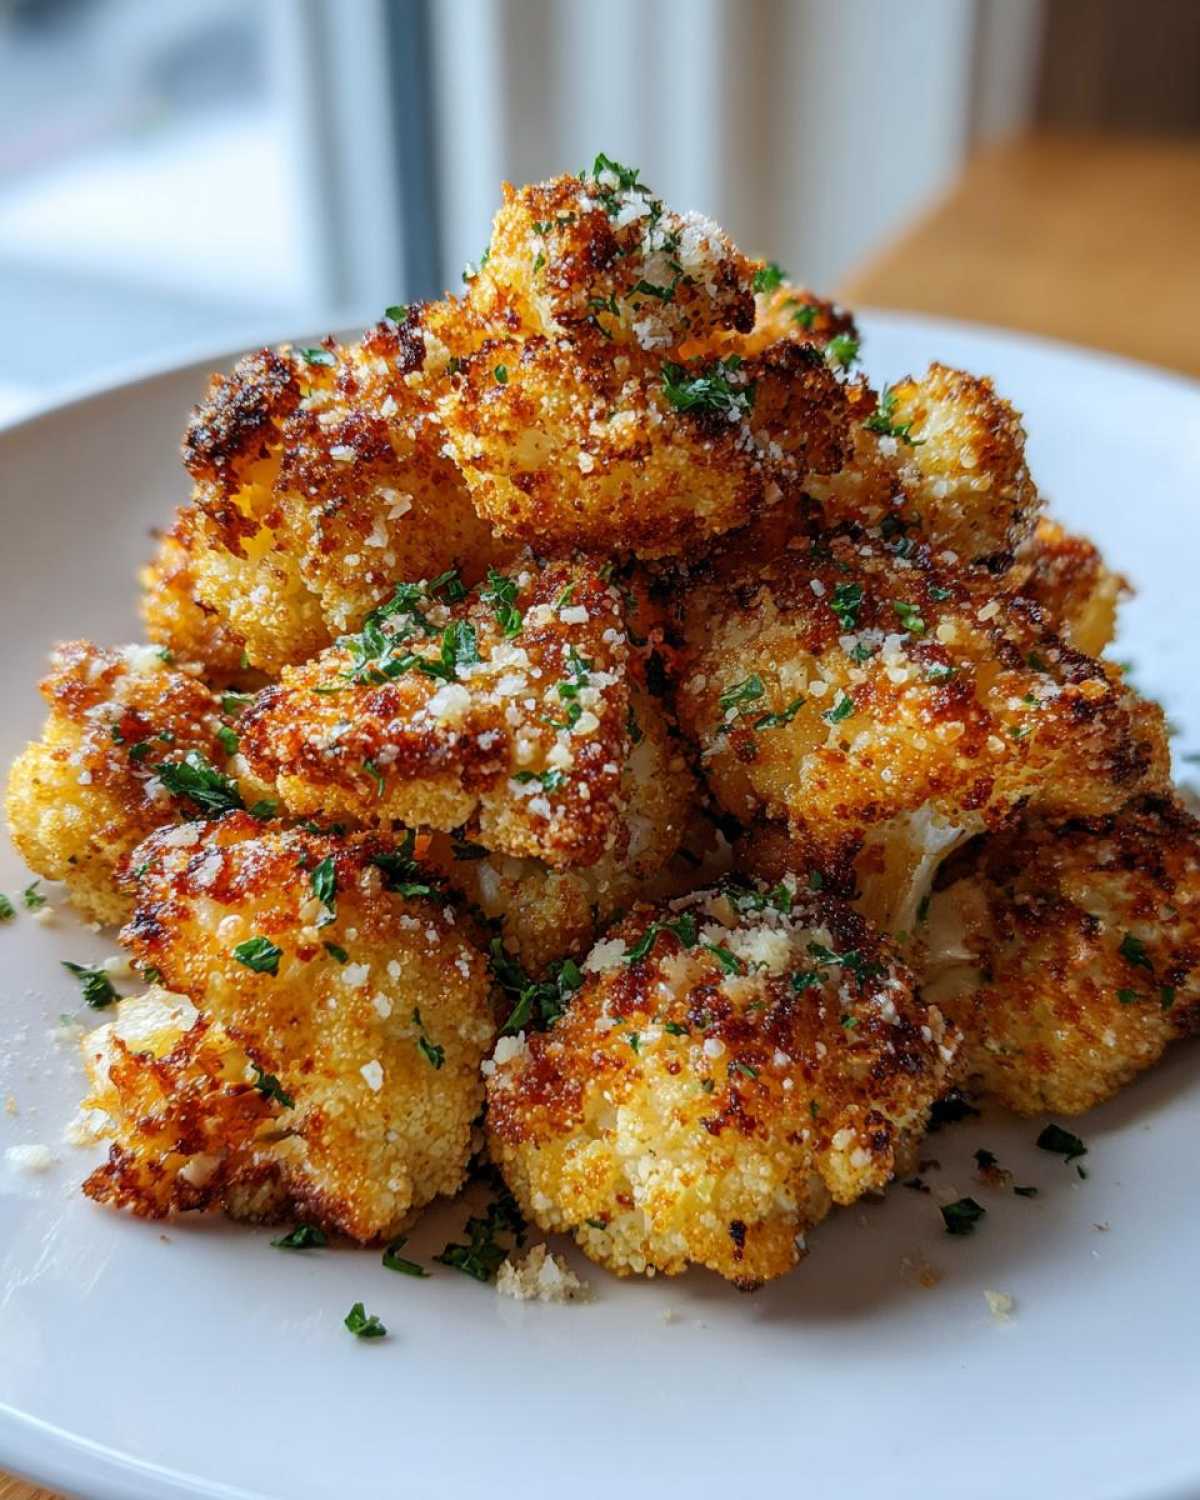
Okay, these Baked Cauliflower Bites are fantastic all on their own, right? They’re crunchy, savory, and totally satisfying. But honestly, if you ask me, any great appetizer deserves a killer dipping sauce! It just takes them from “great side dish” to “the reason everyone showed up.” Since these have that sharp Parmesan and garlic note, you need something cool, creamy, or tangy to balance it out.
When I make a big batch for game day, I always put out at least two different options, because people get opinionated about their dips! My number one go-to is always a creamy ranch, but you can level that up easily. If you want something bold, I highly suggest whipping up a copycat sauce—I put together a recipe for a copycat Outback Bloomin’ Onion sauce that’s fantastic with the crunch of the cauli.
If you prefer something simple, marinara sauce warmed up is always a winner, especially if you’re serving kids. For something with a little kick that complements the Parmesan, try mixing a spoonful of Sriracha into plain Greek yogurt or sour cream—that gives you a super easy spicy aioli base. The right choice of one of these dipping sauces for baked cauliflower can totally change the vibe for your snack spread!
Storage and Make Ahead Baked Snacks Information
It’s the eternal question with anything crispy, isn’t it? How do I keep them great for tomorrow? The biggest enemy of Baked Cauliflower Bites is steam, and that’s exactly what happens when you try to reheat them in the microwave—they turn into sad, soggy little clouds, and we absolutely cannot have that!
If you’re making these as make ahead baked snacks for a party the next day, here is my rule: Cool them completely on a wire rack first. Once they are totally room temperature, put them in a sturdy, airtight container. They will keep fine in the fridge for about three days, but I stress, they will lose a bit of that crispness overnight.
Reheating is key to bringing them back to life! Forget the microwave; it heats the water molecules and makes them soft. You *must* use your oven or even better, a toaster oven if you have one. Spread the cooled bites back out onto a baking sheet—and again, no overcrowding! Pop them into a 350°F or 375°F oven for about 5 to 8 minutes. That short blast of dry heat brings the Panko right back to life! You can prep the cauliflower florets ahead of time too, but I highly recommend doing the full breading process right before you bake them for the absolute best results. I wrote a whole post on my favorite make ahead baked snacks, and the rules for reheating crunchy things are the same in that post!
Frequently Asked Questions About Oven Baked Cauliflower Appetizers
I always get the same questions when people try this recipe for the first time, usually because they’re nervous about getting the crispiness right! Don’t worry, we’ve covered all the bases here to make sure your Oven baked cauliflower appetizers turn out perfectly golden and crunchy!
Can I use regular breadcrumbs instead of Panko for these Baked Cauliflower Bites?
You totally can, if that’s all you have on hand! But here’s the thing: Panko breadcrumbs are flakier and lighter, which means they crisp up much better and absorb less oil in the high heat. If you use standard finer breadcrumbs, your Baked Cauliflower Bites might end up a little denser, but they’ll still taste delicious because of that Parmesan and garlic!
Is this a healthy cauliflower bites no air fryer recipe?
Absolutely, yes! This entire recipe was designed specifically to show off how fantastic the regular oven can be. We don’t need an air fryer here at all. We rely on the high 425°F heat and that smart, multi-stage coating to mimic the frying action. Plus, since this is vegetarian, it’s a wonderfully light and healthy snack or side dish!
How do I keep my Baked Cauliflower Bites from getting soggy?
This is the number one fear, I get it! The key is twofold, just like we talked about. First, you MUST use that initial flour dredge to absorb any surface moisture from the floret itself—it’s the protective layer. Second, and this is vital: Do not overcrowd your baking sheet! If the florets are touching, they trap steam and turn mushy. Give them space to breathe, and they will crisp up beautifully. If you ever need a side dish inspiration, check out my Broccoli Cauliflower Casserole for another awesome veggie bake!
PrintCrispy Parmesan Garlic Baked Cauliflower Bites

Bake cauliflower florets until they are golden brown and crispy using a simple Parmesan and garlic coating. This recipe provides a healthy, oven-baked appetizer or side dish.
- Prep Time: 15 min
- Cook Time: 25 min
- Total Time: 40 min
- Yield: 4 servings
- Category: Appetizer
- Method: Baking
- Cuisine: American
- Diet: Vegetarian
Ingredients
- 1 large head cauliflower, cut into bite-sized florets
- 2 tablespoons olive oil
- 1/2 cup all-purpose flour
- 1/2 teaspoon salt
- 1/4 teaspoon black pepper
- 1/2 cup milk (dairy or non-dairy)
- 1 cup Panko breadcrumbs
- 1/2 cup grated Parmesan cheese
- 2 cloves garlic, minced
- 1 teaspoon dried parsley
Instructions
- Preheat your oven to 425 degrees Fahrenheit (220 degrees Celsius). Line two large baking sheets with parchment paper.
- Set up a three-stage dredging station. In the first shallow bowl, combine the flour, salt, and pepper.
- In the second shallow bowl, whisk the milk.
- In the third shallow bowl, combine the Panko breadcrumbs, grated Parmesan cheese, minced garlic, and dried parsley. Mix well.
- Take one cauliflower floret at a time. First, dredge it lightly in the flour mixture, shaking off excess.
- Next, dip the floured floret into the milk, allowing excess to drip off.
- Finally, press the floret firmly into the Panko-Parmesan mixture until fully coated.
- Place the coated florets on the prepared baking sheets, ensuring they do not touch.
- Drizzle the florets lightly with the olive oil.
- Bake for 20 to 25 minutes, flipping the florets halfway through the baking time, until they are golden brown and crisp.
- Serve immediately with your preferred dipping sauce.
Notes
- For extra crispiness, do not overcrowd the baking sheets; use two sheets if necessary.
- You can substitute almond flour for all-purpose flour for a lower-carb option, though the texture may change slightly.
- Bake time may vary based on floret size; check for doneness at 20 minutes.
Nutrition
- Serving Size: 1 serving (approx. 1 cup)
- Calories: 280
- Sugar: 4
- Sodium: 450
- Fat: 12
- Saturated Fat: 4
- Unsaturated Fat: 8
- Trans Fat: 0
- Carbohydrates: 35
- Fiber: 7
- Protein: 12
- Cholesterol: 10