

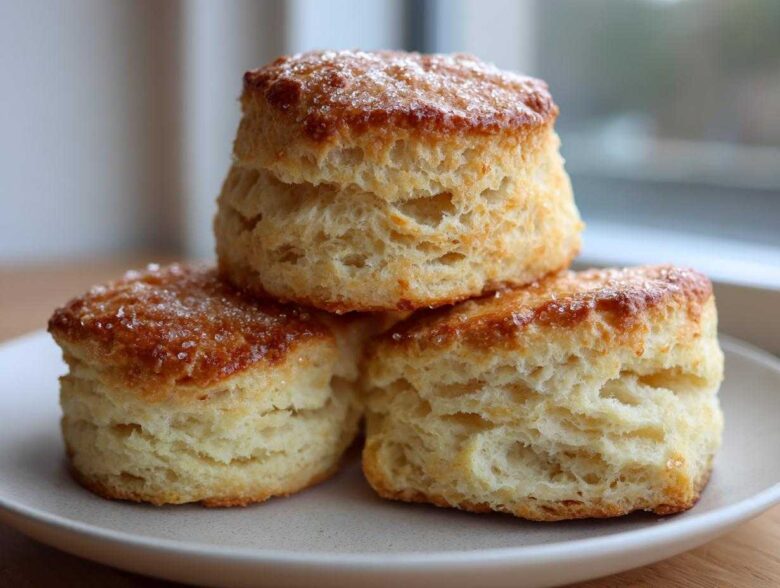
I remember the dark days of baking—the flat, dry hockey pucks that somehow passed for homemade scones. Don’t let that be you! If you’ve ever dreamed of biting into a truly tall, tender buttermilk scone that practically melts, you are in the absolute right place. This recipe is my secret weapon for achieving bakery-quality texture right here in my own kitchen. Trust me, these are the fluffiest buttermilk scones you will ever make, guaranteed. We focus entirely on cold ingredients and gentle handling!
Why These Are the Best Scones Recipe You Will Ever Need (Achieving Fluffy Buttermilk Scones)
If you struggle with dense baked goods, this is the absolute best scones recipe out there because we are getting scientific about texture! The entire point here is height and tenderness. We aren’t aiming for tough biscuits; we want that amazing, crumbly light texture you find at fancy tea rooms. These fluffy buttermilk scones stand tall because we respect the process. That lift separates a good scone from one destined for the trash can!
- We create tiny pockets of steam by keeping the butter ice-cold.
- The buttermilk tenderizes the dough, preventing gluten from getting tough.
- Minimal handling means you don’t crush those precious air pockets we worked so hard to create!
This ensures you get those coveted **tall bakery style scones** every single time. Seriously, always keep your butter straight from the freezer until the moment you cut it into the flour.
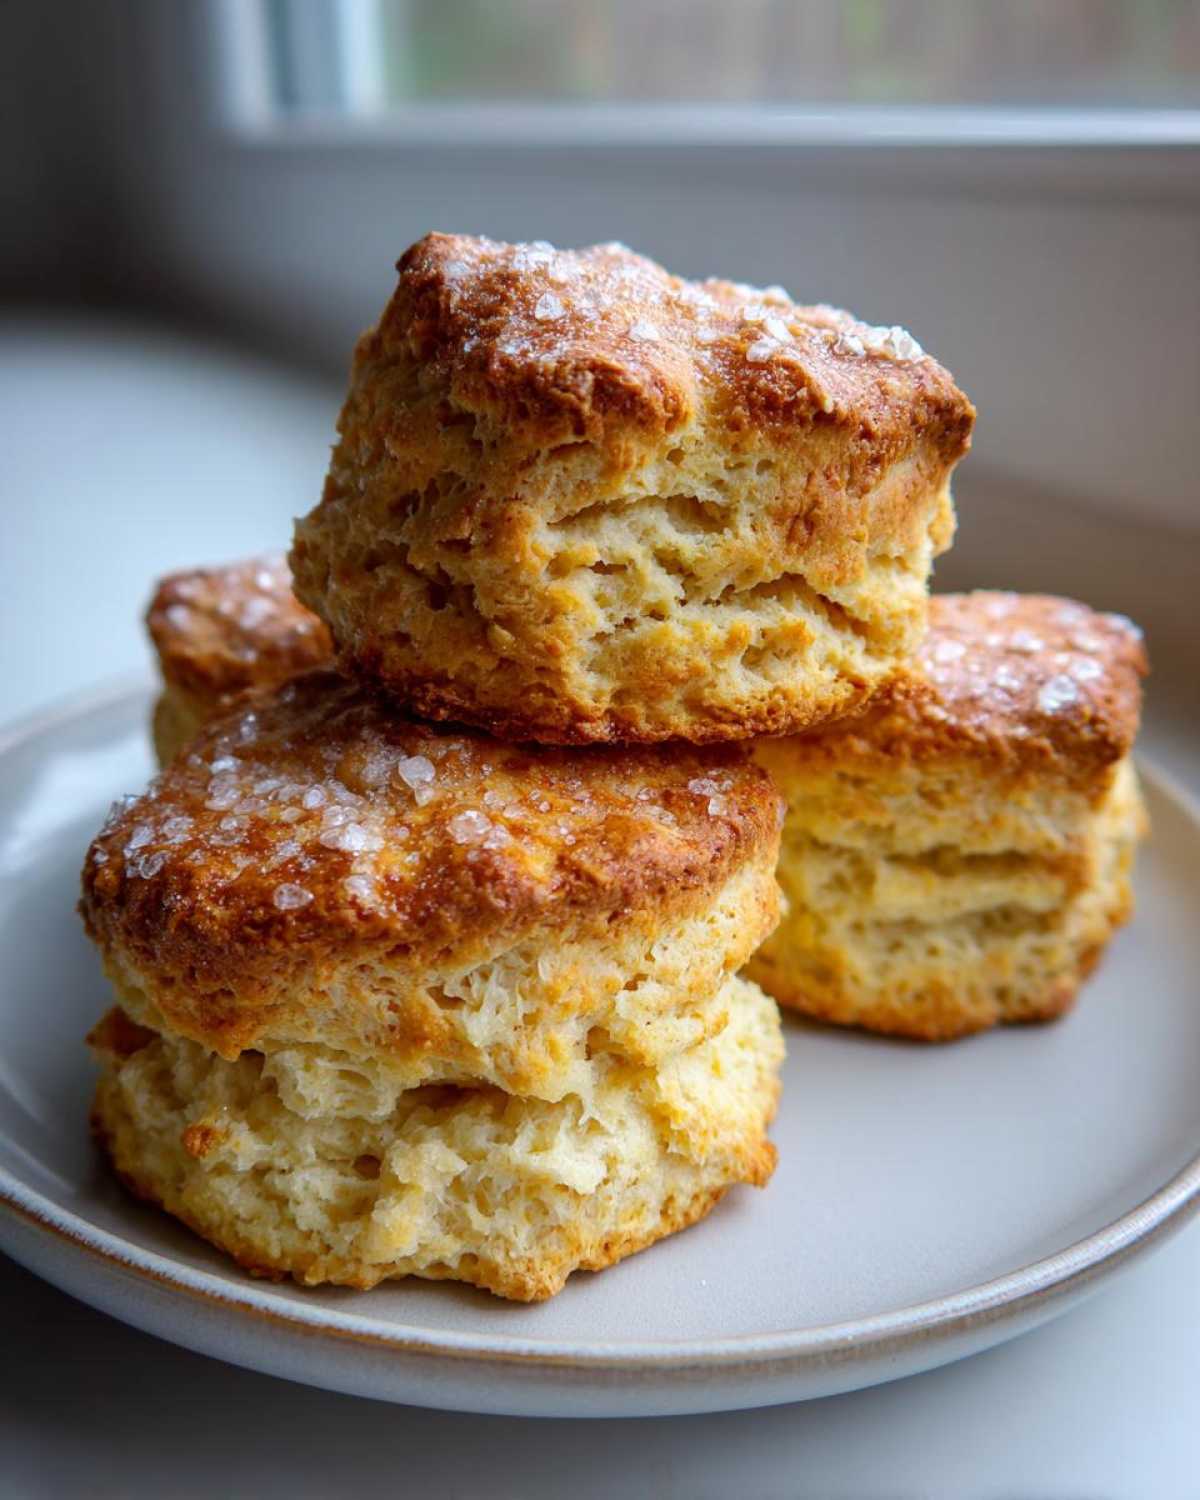
The Secret to Tall Bakery Style Scones: Cold Ingredients
Listen, this cannot be overstated: everything has to be cold. I mean rock-solid cold butter, straight-from-the-fridge buttermilk, and if you can manage it, even cold hands help! When the frozen butter hits that hot oven, it melts fast, creating pockets of steam that physically push the scone upwards. If your butter is soft, it just blends in like oil, and you end up with a sad, flat disk. That’s the secret to their height!
Gathering Ingredients for Classic Plain Scones Recipe
Okay, now that we know the temperature rules, let’s talk about what we actually need for these classic plain scones recipe basics. Since we want that pure, simple flavor, we aren’t adding any crazy mix-ins yet. Keep everything measured out and ready to go before you even think about touching the mixer. We need two cups of flour, about a quarter cup of sugar for just a hint of sweetness, your baking powder, and salt. The star fat is half a cup, or one full stick, of unsalted butter, which is crucial—and remember, it must be cut into small cubes and kept icy cold!
- The Wet Stuff: You’ll need three-quarters of a cup of cold buttermilk.
- The Finish: We prepare one large egg lightly beaten just for the egg wash.
- The Sparkle: A tablespoon of coarse sugar for that beautiful, crunchy top.
Ingredient Notes and Substitutions for Perfect Scones
Buttermilk isn’t just a suggestion; it’s a requirement! Its acidity helps activate the baking powder fast, giving you that beautiful early lift. If you’re in a pinch and don’t have any, don’t panic. Just mix 3/4 cup of regular milk with a teaspoon of white vinegar or lemon juice and let it sit for five minutes until it looks slightly curdled. That’s your homemade buttermilk, and it works just as well for these scones from scratch!
How to Make Perfect Scones: Step-by-Step Instructions
We’ve preheated the oven to a screaming hot 425 degrees F (220 C) and lined our sheet pan, because speed is key now. Grab your dry ingredients and whisk them up! Now for the butter cutting—this is where we create the lift for our scones. You need to cut that cold butter into the flour mixture until it looks like coarse crumbs, with some small, visible pea-sized chunks still hanging around. Don’t stress if you see little bits; those are future steam explosions working for us!
Next, pour in that cold buttermilk. Mix it quickly with a fork. I mean fast! You want it just barely combined so the dough looks shaggy, almost like it doesn’t want to come together. That’s exactly what we’re aiming for. Don’t try to smooth it out; that’s how you get tough, sad scones. We want them tender and fluffy!
Mixing Technique for No Fail Scone Recipe Results
This mixing phase is crucial for a no fail scone recipe. Remember what I said about overmixing? When you stir too much, you activate the gluten in the flour, and gluten means chewiness, which is the enemy of a perfect scone. When you add the buttermilk, just work that fork until the flour bits disappear. The dough shouldn’t look smooth or uniform at all; it should look messy and crumbly. Stop mixing the second it seems *barely* cohesive—it’s better to under-mix and patch it up later!
Cutting and Baking Your Scones
Turn that shaggy mass out onto a lightly floured board. Gently pat it down until it’s about 3/4 of an inch thick. Now, cut straight down—don’t twist the cutter! Twisting seals the edges and prevents them from rising high. I usually cut mine into 8 wedges, but if you use a round cutter, push straight down. Brush those beautiful, tall shapes with the egg wash and sprinkle ’em generously with coarse sugar for that crunch. Pop them into the hot oven for about 12 to 15 minutes until they are golden brown and smelling incredible.
Serving Suggestions for Your Classic Scones
You’ve done the hard part; now it’s time for the best payoff! These classic scones are just begging for rich toppings. I swear, the moment they come off the wire rack, they need to be slathered with something decadent. These are absolutely essential for any proper scones for afternoon tea ceremony, but they are just as good for a quiet Saturday brunch.
The traditional route is always best, in my opinion. You absolutely must have good quality clotted cream—don’t substitute it if you can help it—and your favorite sharp strawberry or raspberry jam. Split the scone horizontally while it’s still wonderfully warm, add a generous dollop of cream, and then top with the jam. They are meant to be eaten warm, as that’s when the tender crumb is at its fluffiest. Enjoy every bite!
Storage and Reheating Instructions for Leftover Scones
Even the best scones don’t always disappear in one sitting, right? Don’t worry about leftovers; our crumbly light scones actually hold up really well! If you have any left over, keep them in an airtight container at room temperature for up to two days. I find they stay fresh this way without getting stale too quickly.
For longer storage—like if you made a huge batch for a party—they freeze beautifully. Wrap them tightly in plastic wrap, and then stick those packages in a freezer bag. When you want one, take it out and reheat it. Pop them in a warm oven (around 350 degrees F) for about 5 to 7 minutes. This flash of heat re-crisps the exterior and softens the inside right back up. Instant fresh scone!
Flavor Variations: Moving Beyond Classic Plain Scones
Once you master the base recipe—which gives you those easy homemade scones—you’ll be itching to try things out! That’s the fun part of baking, right? We can take this same amazing, fail-proof texture and twist it into incredible flavors. Forget those dry bricks; these variations stay just as fluffy!
For a sunny twist, try Cranberry Orange Scones! Simply add the zest of one large orange and about a half cup of dried cranberries to the dry mix before you add the butter. Wow, the smell alone is worth it. If you love a seasonal treat, consider making Pumpkin Spice Scones in the fall by using 1/4 cup of pumpkin puree instead of some of the buttermilk—but remember to slightly reduce the liquid overall!
Quick Scone Recipe Ideas: Add-Ins
Adding mix-ins is the fastest way to level up. Want White Chocolate Raspberry Scones? Just toss in a cup of white chocolate chips and gently fold in a half cup of fresh or frozen raspberries right at the very end of mixing. For a decadent treat, try folding in a mix of semi-sweet and milk chocolate chunks—your triple chocolate moment!
Troubleshooting Common Scone Issues
Even with the best roadmap, sometimes baked goods fight back! If you followed this recipe for scones but still ended up with a disappointing result, don’t throw your apron in the towel. Nine times out of ten, it comes down to that golden rule: temperature and handling.
So, why are my scones flat? Usually, that means your butter wasn’t cold enough, or you mixed the dough way too much when adding the buttermilk. When the butter melts instead of steaming, you lose all that lift we worked for. They just spread out instead of puffing up tall.
If your scones are dry and crumbly in a bad way—not the good, tender crumbly way—you probably overworked the dough. Remember, we mix until it looks shaggy! Working it too long develops that tough gluten. Next time, just mix until everything is barely clinging together. It’s always better to have a slightly messy dough than a tough scone!
Frequently Asked Questions About Making Scones
I know you might have a question or two swirling around, especially if this is your first time trying to bake true, fluffy buttermilk scones! That’s totally normal. Here are the things I hear most often when people are trying to nail the perfect ‘no fail scone recipe’.
Can I use regular milk instead of buttermilk?
Yes, you absolutely can, but you need to fake the buttermilk! If you look above, I mention the trick: take your regular milk, add a teaspoon of vinegar or lemon juice per cup, and let it sit for five minutes. It curdles slightly, and that acidity is what we need to get the right reaction with our baking powder. Don’t skip activating it, or your easy homemade scones won’t get that amazing lift!
How thick should the dough be before cutting the scones?
For those glorious tall bakery style scones you are dreaming of, you want the dough patted out to about 3/4 of an inch thick. Not much more, not much less. If it’s too thin, they won’t have enough structure to rise high when they bake. When you cut them, remember my crucial tip: press straight down without twisting the cutter. That keeps the sides sealed up so they rise vertically!
Can I make these scones ahead of time?
You can prep the dough ahead! After you cut your rounds or wedges but before the egg wash, you can arrange them on the baking sheet, cover them tightly, and chill them in the fridge for up to 12 hours. When you are ready to bake, brush on the wash and top with sugar, then toss them in the hot oven. Sometimes, I find they bake up even a tiny bit taller when they go into the oven nice and cold!
What is the best way to store leftovers?
Honestly, these are best eaten the day they are made, but they hold up pretty well! Store any extras in an airtight container at cool room temperature. If you skip the airtight container, they dry out faster, and nobody wants a sad scone the next day. Reheating is always the answer if they stiffen up overnight!
Nutritional Estimate for These Scones
Now, I know some of you lovely bakers like to keep track of what you’re eating, and I totally get that! Baking is about joy, but having a general idea of what’s in these delicious treats is helpful. Remember, these percentages are just estimates because I don’t weigh every grain of sugar that ends up on my counter—oops! They are based on the standard ingredients listed above and typical pantry brands.
This information reflects the values for one perfect, fluffy scone:
- Serving Size: 1 scone
- Calories: 250
- Sugar: 6g
- Sodium: 250mg
- Total Fat: 13g (with 8g Saturated Fat)
- Carbohydrates: 29g
- Protein: 5g
- Cholesterol: 55mg
Just a little note here: since we are using real butter and buttermilk, they pack a little richness! But hey, everything in moderation, right? For the full rundown and details on how these estimates are calculated, you can always check out the specifics, as we always include a disclaimer about ingredient variance on our standard nutritional guidelines.
PrintClassic Fluffy Buttermilk Scones

A straightforward recipe for tall, tender buttermilk scones, focusing on cold ingredients and proper mixing to achieve a light, crumbly texture perfect for afternoon tea.
- Prep Time: 15 min
- Cook Time: 15 min
- Total Time: 30 min
- Yield: 8 servings
- Category: Breakfast
- Method: Baking
- Cuisine: British
- Diet: Vegetarian
Ingredients
- 2 cups all-purpose flour
- 1/4 cup granulated sugar
- 1 tablespoon baking powder
- 1/2 teaspoon salt
- 1/2 cup (1 stick) cold unsalted butter, cut into small cubes
- 3/4 cup cold buttermilk
- 1 large egg, lightly beaten (for egg wash)
- 1 tablespoon coarse sugar (for topping)
Instructions
- Preheat your oven to 425 degrees F (220 degrees C). Line a baking sheet with parchment paper.
- In a large bowl, whisk together the flour, granulated sugar, baking powder, and salt.
- Add the cold butter cubes to the flour mixture. Use a pastry blender or your fingertips to cut the butter into the flour until the mixture resembles coarse crumbs with some pea-sized pieces of butter remaining.
- Make a well in the center of the dry ingredients and pour in the cold buttermilk. Mix quickly with a fork until just combined. Do not overmix; the dough will look shaggy.
- Turn the dough out onto a lightly floured surface. Gently pat the dough into a 3/4-inch thick circle or rectangle.
- Cut the dough into 8 wedges (if making a circle) or use a biscuit cutter to cut out rounds. Place the scones onto the prepared baking sheet, leaving about 1 inch between them.
- Brush the tops of the scones lightly with the beaten egg wash and sprinkle with coarse sugar.
- Bake for 12 to 15 minutes, or until the tops are golden brown and a toothpick inserted into the center comes out clean.
- Transfer the scones to a wire rack to cool slightly before serving warm.
Notes
- Keep all wet and dry ingredients cold. Cold butter creates steam pockets, which results in taller scones.
- Do not overwork the dough. Overmixing develops gluten, leading to tough, dense scones. Mix only until the ingredients come together.
- For extra height, gently press the cut edges of the scones straight down when cutting, rather than twisting the cutter.
Nutrition
- Serving Size: 1 scone
- Calories: 250
- Sugar: 6
- Sodium: 250
- Fat: 13
- Saturated Fat: 8
- Unsaturated Fat: 5
- Trans Fat: 0
- Carbohydrates: 29
- Fiber: 1
- Protein: 5
- Cholesterol: 55