


Oh my goodness, are you hosting something soon? Whether it’s the Super Bowl, a huge holiday party, or just a random Friday night when you need comfort food, I have the answer for you. Forget those fussy little appetizers that take forever! The absolute MVP of my party spread, the thing that vanishes the second I set them down, is my recipe for cream cheese sausage balls. Seriously, people ask me for this recipe constantly, and it’s embarrassingly simple.
I’ve been making these for neighborhood gatherings since I was in college—and trust me, they survived my questionable college kitchen skills! They are just dreamy: savory, perfectly seasoned, incredibly cheesy, and packed with this unbelievable creamy texture on the inside. Honestly, if you want an appetizer that screams ‘effortlessly good,’ these are it. Let me show you how I whip up a batch that disappears way too fast!
And hey, if you’re looking for another guaranteed crowd-pleaser that’s slightly less meaty, check out my favorite Buffalo Cauliflower Bites—they get rave reviews too!
Why These Are the Best Cream Cheese Sausage Balls Ever
I’ve tried a ton of appetizers over the years, and I keep coming back to this recipe because it just works! Everyone calls them the Best Sausage Balls Ever, and I totally agree. They are rock stars at any gathering, whether it’s a tailgate party or a quiet evening watching movies.
The magic isn’t just that they are easy, although they totally are. The secret sauce—or in this case, the secret cheese—is what gives you that unbelievable texture. Seriously, if you want truly tender Cheesy Appetizer Bites, you need the cream cheese in there. I promise you won’t regret making a double batch because they disappear so fast!
Perfect Texture: Creamy Sausage and Cheese Bites
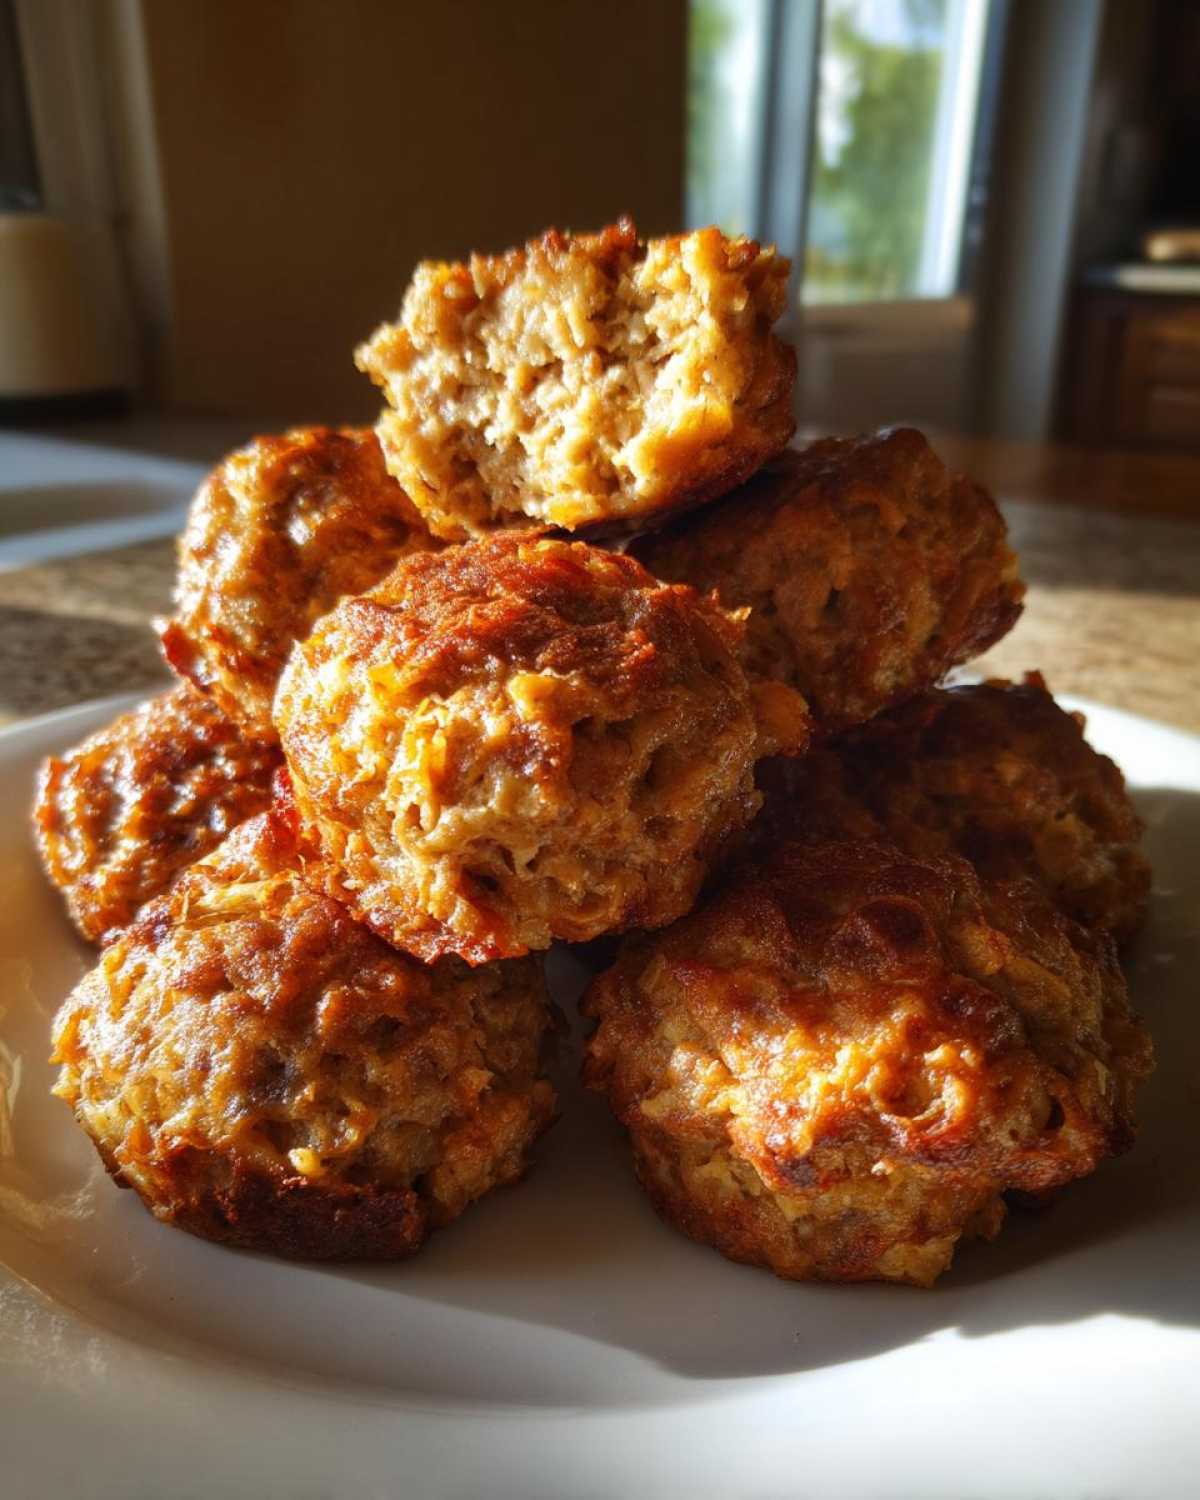
You know how some appetizer balls dry out in the oven? Not these! The softened cream cheese melts right into the sausage and Bisquick, creating this wonderfully soft, almost luxurious center. It sets up just enough so you can handle them, but they stay delightfully creamy on the inside. That contrast with the lightly golden, slightly crisp exterior? That’s what makes folks ask for the recipe every time.
Simple 4 Ingredient Sausage Balls Success
We are talking minimal effort here, folks. This is why I call them my go-to backup plan! You can whip the dough up in maybe fifteen minutes flat. We are basically using four main players here, making this the ultimate Simple 4 Ingredient Sausage Balls recipe. It’s impossible to mess up, and that speed is why they often show up when I’m short on time between shuffling kids and setting the table.
If you need another reliable, cheesy favorite in your rotation, you have to try my recipe for Classic Deviled Eggs. They pair perfectly with these savory bites!
Gather Your Ingredients for Cream Cheese Sausage Balls
Okay, let’s talk about what you need to wrangle for these amazing cream cheese sausage balls. The beauty of this snack is that you likely have most of this stuff—or can grab it super easily! Because this recipe is so short, the quality of those few ingredients really shines through. Pay attention to these prep notes; they are important for getting that famous fluffy texture!
If you want your balls to turn out perfectly every time—moist on the inside and just golden on the outside—we need to be precise with softening and draining. If you happen to be making up a huge batch for a potluck, maybe check out my recipe for Garlic Knots as a side carb!
Ingredient Clarity for Cream Cheese Sausage Balls
Here is the quick rundown of what you need and exactly how I prep it. Don’t skip these little steps—they make all the difference between a good appetizer and the best appetizer!
- Pork Sausage: You need one full pound of bulk pork sausage. The most crucial part? Cook it completely through first, and then you absolutely must drain every last drop of grease off. Soggy sausage means sad sausage balls.
- Cream Cheese: Eight ounces of cream cheese is what provides the magic moisture. Make sure this is fully softened! I usually leave mine out on the counter for at least two hours before I start mixing, or I microwave it gently for about 15 seconds (careful not to melt it!).
- Bisquick: Two cups of Bisquick baking mix. Make sure you spoon it into the measuring cup and level it off—don’t just scoop it straight from the box, or you’ll use too much and end up with dry bites.
- Cheddar Cheese: One cup of shredded sharp cheddar cheese. Sharp brings the flavor punch we really need against the rich pork and cream cheese, so don’t downgrade to mild if you can help it! Also, shred it fresh if you can; the pre-shredded stuff has anti-caking agents that can mess with the texture slightly.
Step-by-Step Instructions for Easy Sausage Balls Recipe
Okay, we’ve got all the goodies ready, now comes the fun part! This is what makes this the quickest, most foolproof Easy Sausage Balls Recipe you’ll ever find. Seriously, from start to finish, you’re looking at maybe 35 minutes total, which is nothing for an appetizer this tasty. Get your environment set up right before you start combining things, because once that cream cheese hits the room-temperature sausage, things move fast!
First thing’s first: Crank that oven up to 350 degrees Fahrenheit! You want it good and hot. While that’s warming up, grab a baking sheet and give it a light grease or maybe line it with some parchment paper if you’re worried about clean-up. That makes moving them easier later, too.
If you’re looking for another great party pairing, my BBQ Chicken Cobb Salad is always a hit when you need something a little lighter!
Mixing and Forming Your Cream Cheese Sausage Balls
Time to combine everything in that big bowl! Gently add your cooked and drained sausage, the softened cream cheese, the Bisquick, and that gorgeous cheddar cheese right on top of each other. Now, this part is truly important for texture, so listen up!
Mix it all together, but stop as soon as it’s combined. You MUST resist the urge to keep beating it! Overmixing develops the gluten in the Bisquick, and that turns your creamy, soft center chewy. We want tender, not tough! Once you see just a few streaks of flour remaining, stop mixing immediately. Next, roll the dough into little snackable balls—I go for about 1 inch in diameter. Since these puff up a little, give them an inch of space between them on that baking sheet.
Baking for a Golden Brown Finish
Into the oven they go! Since everything in the dough is already cooked (sausage and cheese), we are just aiming to bake the Bisquick and get that lovely color. Pop them in at 350°F and set your timer for 15 minutes. Check them around that time; they should be beautifully golden brown on the outside. If they look pale, give them 2 or 3 more minutes.
When they come out, don’t touch them right away! Let them rest on the pan for about five minutes. They firm up a tiny bit when they cool just slightly, which makes them much easier to handle and serve warm!
Tips for Perfect Cream Cheese Sausage Balls Every Time
Even though these are super simple, I always feel like a total genius when people ask how I keep them so moist and flavorful. It comes down to a couple of little known tricks and knowing how to switch things up if you’re missing one ingredient. We want these to be your signature go-to for all your Party Appetizers with Cream Cheese, so let’s make sure they’re perfect!
The secret truly isn’t changing the core recipe; it’s about understanding what those few ingredients do. And if you’re planning your menu ahead of time, you are in luck because these save great for later! If you are making a ton of different appetizers, make sure you check out my Chicken Shawarma Wraps recipe too. It’s totally different but equally delicious!
Spice It Up: Variations for Cream Cheese Sausage Balls
If you’re worried these aren’t punchy enough after reading the basic recipe, I highly recommend adding some extra zip! While I didn’t include Rotel in this base recipe, adding creamy, spicy peppers is a fantastic idea—you can just substitute about half a cup of diced, well-drained Rotel for some of the cheddar cheese if you want that tang.
But the easiest way to add heat is right at the start. If you use hot pork sausage instead of regular mild sausage from the start, you get a nice background warmth in every bite. Also, I sometimes cheat and just stir in a few dashes of my favorite bottled hot sauce right before I mix in the Bisquick. It blends right in, and suddenly you’ve got a much more exciting appetizer!
Handling Bisquick Substitutions
I understand that Bisquick shows up differently in everyone’s pantry. Maybe you ran out, or maybe you just can’t find the box when you need to bake! Don’t panic; you can absolutely keep rolling those sausage balls.
If you need to skip the Bisquick shortcut, you can make your own dry mix easily. You need two cups of all-purpose flour, but that’s not enough binder. You need that lift! So, mix that flour with one full tablespoon of baking powder and about half a teaspoon of salt. Use that mixture exactly where the Bisquick goes in the recipe. It mimics the leavening agents and salts already present in the mix, and trust me, the texture holds up beautifully!
Make Ahead Party Food: Storing Cream Cheese Sausage Balls
This is one of my favorite things about this recipe being the supreme Make Ahead Party Food champion—you don’t have to stress on the day of the event! The dough keeps beautifully, which means you can handle the messy mixing part the day before your big game or holiday gathering.
When I’m planning a huge menu, I always make the dough on Thursday night for Saturday parties. It just takes the pressure off! If you’re looking for another make-ahead snack that requires zero oven time, check out my recipe for No-Bake Trail Mix Granola Bars—great for lunchboxes, too!
Here’s the breakdown for storing both the raw dough and the finished, baked bites:
- Storing Unbaked Dough: After you mix everything but before you roll the dough, cover your mixing bowl tightly with plastic wrap. You can safely store this raw mixture in the refrigerator for up to 24 hours. When you are ready to bake, just pull it out, let it warm up on the counter for about 15 minutes so it’s easier to roll, then form your cream cheese sausage balls and bake as directed.
- Storing Baked Balls: Once they are completely cooled, place the baked sausage and cheese bites in an airtight container. They honestly taste best the day they are made, but they are still fantastic the next day! You can store them on the counter for about 24 hours, or you can put them in the fridge if you need them for a couple of days. They reheat super well!
To reheat the baked ones, I just toss them onto a baking sheet at 325°F for about 5 to 7 minutes until they are warm all the way through. That little bit of heat brings back that perfect crispy edge!
Serving Suggestions for Your Savory Snack Balls
So, you’ve got the perfect batch of Savory Snack Balls sitting on the counter, golden brown and smelling like heaven—what comes next? You need the perfect accompanying dips or situations! These little bites are so hearty and flavorful on their own, but a good pairing just sends them straight over the top. I always think about what game I’m watching or what kind of party I’m having when I choose a dip.
If you’re hosting an actual watch party, these are prime Game Day Snacks Sausage material. Everyone loves grabbing one between touchdowns! They really shine when served right out of the oven while they are still warm, but my secret is mixing up a quick dipping sauce to cut through that richness.
If you’re looking for a healthier spread option for a crowd, you simply can’t go wrong with my recipe for Homemade Guacamole with Baked Tortilla Chips. It’s fresh, tangy, and works wonderfully alongside the heavy sausage flavor!
Here are the ways I usually serve these beloved bites:
- The Dipping Duo: For contrast, you need something tangy! I usually set out small bowls of ranch dressing and creamy honey mustard. The cool ranch is perfect, but the sweetness of the honey mustard really pops against the sausage.
- The Brunch Setting: Believe it or not, these make a great addition to a holiday brunch spread! Serve them alongside fruit and coffee, maybe with a small dish of maple syrup mixed with a tiny splash of Dijon mustard for dipping. It sounds odd, but the maple hits the pork perfectly.
- Keep It Simple: Sometimes, honestly, I just heap them onto a tiered platter with toothpicks stuck directly in the top of each ball. This keeps hands clean and lets guests grab the cream cheese sausage balls easily without worrying about sauce mess—fantastic for mingling crowds!
Frequently Asked Questions About Cream Cheese Sausage Balls
When I put a recipe like this out there, people always have great questions! It means you’re thinking ahead about party planning, which I totally respect. I’ve gathered up some of the most common things folks ask me about assembling and storing these amazing cream cheese sausage balls. If you have a question, chances are one of these FAQ threads will cover it!
If you need a break from savory snacks and want something utterly different for the buffet line, you should definitely bookmark my Stir-Fried Udon Noodles recipe. But for pure appetizer perfection, let’s stick to the balls!
Can I freeze cream cheese sausage balls?
Oh yes, freezer friendly is the name of the game for me! This is how I handle making massive batches for holidays—we make the dough and freeze it raw. You can roll out your dough balls, place them on a sheet tray spaced out, and freeze them solid for about an hour. Once frozen, transfer them to a freezer-safe bag. They keep perfectly for up to three months!
When you are ready to bake, just pop the frozen balls onto your baking sheet and add about 5 to 8 minutes to the total baking time. If you already baked them, they freeze well too! Cool them completely first, then put them in a sealed container. To reheat, just use the 325°F oven trick I mentioned earlier until they are warmed through.
Can I make these without Bisquick?
Absolutely, yes! Don’t skip making the sausage balls just because you’re out of the yellow box. We talked about this in the tips section, but it’s worth repeating because if you’re in a pinch, you need this solution! Instead of the two cups of Bisquick, you are going to mix up your own binder using 2 cups of all-purpose flour, 1 tablespoon of baking powder, and about 1/2 teaspoon of salt. Mix that dry combination really well, and then add it into your sausage and cheese like normal. It works just as beautifully, so you still get those amazing Bisquick Sausage Balls texture without the actual mix!
What type of sausage works best for cream cheese sausage balls?
The standard, go-to option that everyone loves is standard bulk pork sausage. It provides that perfect savory, slightly fatty flavor that pairs so wonderfully creamy with the cream cheese and cheddar. If you use the classic pork sausage, make sure it’s mild, or it might overpower the cheese flavor.
However, if you want to bump up the excitement level—especially for a game day spread—use hot pork sausage instead! Or, if you’re sticking with mild, just add a dash or two of your favorite cayenne pepper or hot sauce right into the mix, just like I mentioned before. That little injection of heat makes these cream cheese sausage balls even more addictive!
Nutritional Estimate for Creamy Sausage Appetizer
Okay, let’s quickly touch on the boring stuff—the numbers! We all know when we’re making cream cheese sausage balls, we aren’t really worried about counting calories, right? These are appetizer-land royalty, meant for celebrating and enjoying!
But hey, for those of you keeping a general tally, I pulled the estimates from my recipe breakdown. These figures are based on serving just one of these little Creamy Sausage Appetizer bites. Because we are using fatty sausage and full-fat cheese, they definitely pack flavor, which usually means a little more fat and sodium, but they also give you a great little protein boost!
Remember, these are just estimates based on the standard ingredients I used. If you swap out mild sausage for hot, or use a different brand of Bisquick, those numbers might shift a tiny bit, so take this as a guideline!
If you’re looking to see how other savory, hearty meals stack up, you should check out my Tuna Quinoa Bowl Recipe for a completely different kind of powerhouse meal!
Here is the breakdown per ball:
- Serving Size: 1 ball
- Calories: 110
- Fat: 9g (with 4g saturated fat)
- Cholesterol: 25mg
- Sodium: 280mg (This is why you don’t eat twelve!)
- Carbohydrates: 4g
- Protein: 5g
- Sugar: 1g (That’s just from the natural stuff, no added sugar!)
See? Not terrible for a cheesy, meaty bite! They are perfectly portioned for popping one or two when you walk by the snack table!
Share Your Experience Making Cream Cheese Sausage Balls
Okay, now that you’ve got the secret to the best, creamiest, most reliable cream cheese sausage balls, I desperately want to hear about it! Honestly, seeing your results is my favorite part of sharing these recipes. I imagine your kitchen is already smelling incredible!
When you make a batch of these phenomenal Bite Sized Savory Appetizers, please let me know how they went! Did you use hot sausage, or did you stick to mild? Which dip did you set out for them? Tell me everything in the comments below. If you have a minute, leaving a quick rating really helps other home cooks find a recipe they can trust!
And if you snap a photo of your beautiful golden bites, please share it on social media and tag me! I love seeing them pop up in my feed. If you are looking for more snack inspiration, don’t forget to poke around the main site for plenty more ideas!
PrintEasy Cream Cheese Sausage Balls

Make these simple, cheesy sausage balls using cream cheese for a moist, savory appetizer perfect for any gathering.
- Prep Time: 15 min
- Cook Time: 18 min
- Total Time: 33 min
- Yield: About 30 balls
- Category: Appetizer
- Method: Baking
- Cuisine: American
- Diet: Vegetarian
Ingredients
- 1 pound bulk pork sausage, cooked and drained
- 8 ounces cream cheese, softened
- 2 cups Bisquick baking mix
- 1 cup shredded sharp cheddar cheese
Instructions
- Preheat your oven to 350 degrees Fahrenheit. Lightly grease a baking sheet.
- In a large bowl, combine the cooked and drained sausage, softened cream cheese, Bisquick mix, and shredded cheddar cheese.
- Mix all ingredients thoroughly until just combined. Do not overmix.
- Roll the mixture into small balls, about 1 inch in diameter.
- Place the balls on the prepared baking sheet, leaving about 1 inch between them.
- Bake for 15 to 18 minutes, or until golden brown.
- Remove from the oven and let cool slightly before serving warm.
Notes
- You can prepare the dough ahead of time, cover it, and refrigerate for up to 24 hours before rolling and baking.
- For a spicy variation, use hot pork sausage or add a dash of hot sauce to the mixture.
- If you do not have Bisquick, you can substitute with 2 cups of all-purpose flour mixed with 1 tablespoon baking powder and 1/2 teaspoon salt.
Nutrition
- Serving Size: 1 ball
- Calories: 110
- Sugar: 1
- Sodium: 280
- Fat: 9
- Saturated Fat: 4
- Unsaturated Fat: 5
- Trans Fat: 0
- Carbohydrates: 4
- Fiber: 0
- Protein: 5
- Cholesterol: 25