

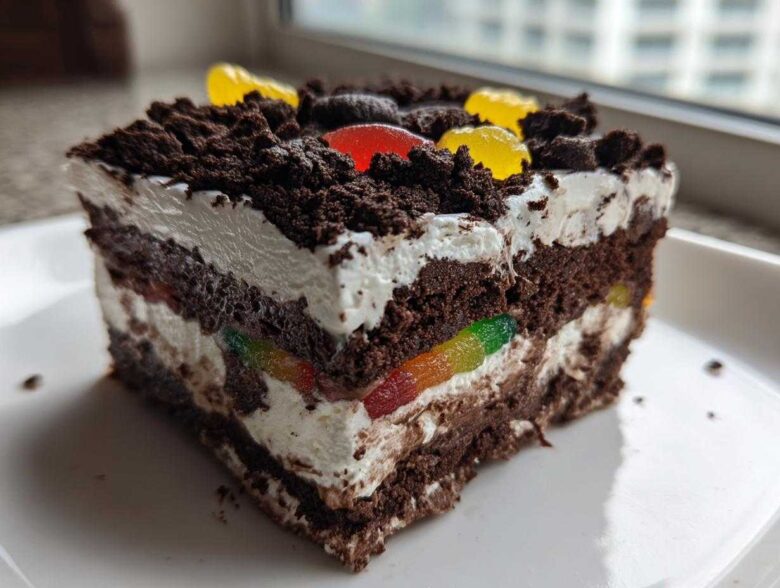
Oh, sometimes you just need a dessert that doesn’t require turning on the oven, right? Something that screams pure, unadulterated childhood fun and brings everyone running to the kitchen? That’s exactly what this dirt cake does! Amaya and I have made this easy, no-bake Oreo Dirt Cake for years, and it remains a guaranteed hit at any gathering, whether it was a quiet afternoon in Kyoto or a busy family night here in our new New York apartment. Discovering all the wonderful cooking styles here in NYC has been so inspiring, but nothing beats the simple joy we get from recreating these classic, nostalgic treats. Trust me, once you try this classic, creamy, layered treat, it will become your go-to for parties, potlucks, and especially nights when the grandkids visit. If you’d like to read a little more about our journey here, you can check out our story. It’s really the simplest way to bring big smiles!
Why This Classic Dirt Cake Recipe Works So Well
I truly believe simplicity often beats complexity, and this recipe is proof! It checks every box a busy cook could ask for. People always ask me how I get such a good turnout every time, and it’s because this Oreo Dirt Cake Recipe is built for ease. It’s the perfect example of a Quick Dessert Recipe that tastes like you spent hours!
- It’s entirely no-bake! No turning on the hot oven, which is a blessing in the summer months. When you need a speedy dessert, think of my pancake recipe—sometimes simple is just better!
- The flavor is deeply satisfying—rich chocolate and sweet cream—it’s a wonderful Nostalgic Dessert.
- The texture is just right: the crust is a little buttery, the middle is silky smooth, and the top is crunchy.
- Honestly, this is one of the best Kid Friendly Desserts because they love helping crush the cookies and stick in the worms.
Gathering Your Ingredients for the Best Dirt Cake
My goal here is to make sure you have everything ready before you even look at the mixer. Because this is a no-bake dessert, the timing of mixing the filling is crucial. When Amaya and I look at an ingredient list, we look for simple things we usually have on hand! We are using the classic, wonderful Oreo cookie—don’t even think of touching those other sandwich cookies for this version! For every ingredient, the preparation noted is important, like making sure that cream cheese is truly softened. You can find a great reference for simple ingredient assembly on this ingredient guide I reviewed recently. Let’s list exactly what you need:
- One package of Oreo cookies—we need them divided, remember? About one cup will be saved for the top decoration layer.
- Half a cup of unsalted butter, and please make sure it’s melted nicely before you start mixing the base.
- An 8-ounce package of cream cheese—and this is important—it needs to be completely softened. No cheating here!
- One cup of powdered sugar for sweetness in our creamy layer.
- The 8-ounce container of frozen whipped topping, and it needs to be completely thawed before you gently fold it in.
- Two packages of instant chocolate pudding mix, the 3.9 ounce size.
- Three cups of cold milk to get that pudding nice and thick.
- And of course, for fun, a package of gummy worms if you want to welcome those little creatures into your dessert!
Step-by-Step Instructions for No Bake Dirt Cake
Okay, now that we have our ingredients shining nice and bright, let’s get to the fun part—layering! Getting these **Simple Dirt Cake Layers** right is what separates the good dirt cake from the truly magnificent one. Don’t rush the chilling; that’s my main piece of advice. When everything is well-set, you get that beautiful clean slice! We always refer back to trusted sources like the one I saw from Cut, Cook, Taste when we are finalizing steps for crowd-pleasing desserts like this one.
Preparing the Crushed Oreo Base Layer
First things first, we need our “soil.” Take your Oreos and put about one cup aside; these are for the very top later so you get some nice texture. The rest go into the food processor. You want the crumbs to look fine, just like loose garden dirt—no huge chunks if you can help it! If your food processor is being stubborn or you don’t have one (which happens!), put the Oreos in a sturdy zip-top bag and use a rolling pin. I remember Amaya trying to use a mortar and pestle once when we were short on space; it took forever! Once the crumbs are ready, gently mix them with your melted butter until everything is damp and holds together just a little.
Press that buttery crumb mixture very firmly into the bottom of your 9×13 dish. You want a solid foundation for our amazing dessert!

Creating the Creamy Filling for Your Dirt Cake
This step is where the magic happens, creating that silky texture. In a large bowl, you absolutely must beat the softened cream cheese with the powdered sugar until there are no lumps showing at all. If your cream cheese is cold, the sugar won’t incorporate correctly, and the filling will feel grainy—that’s an amateur mistake we are avoiding! When dealing with cream cheese, you must always ensure it is fully softened for the best results; that’s a classic bit of baking Expertise we stick to.
Once smooth, you gently fold in the thawed whipped topping. Use a wide spatula and just bring the mixture together slowly, we don’t want to knock out all that lovely air. Next, whisk your chocolate pudding mix with the three cups of cold milk in a separate bowl. You must whisk vigorously for about two full minutes until the mixture starts visibly thickening up. Honestly, try timing it; those two minutes are essential to activating the pudding correctly.
Assembling and Chilling the Layered Oreo Dessert
Now we stack! Spread that rich, creamy mixture—that’s your second layer—evenly over the pressed Oreo crust. Make sure it’s level; it helps with the final presentation. After the cream layer, gently sprinkle the remaining reserved crushed Oreos over the top. Think of this top layer as the freshest layer of dirt where the worms like to hide!

This is the hardest part: waiting! Cover the dish tightly with plastic wrap and put it into the refrigerator. You absolutely need to chill this for a minimum of four hours, but believe me, making this a make ahead dessert and letting it chill overnight is even better. It allows those **Simple Dirt Cake Layers** to truly set up perfectly, which is crucial for structure.
Final Touches for Your Dirt Dessert with Gummy Worms
Once the cake is thoroughly chilled and firm, you are ready for the grand unveiling! Take your package of gummy worms and gently press them into the top layer of crumbs. Stick some up high, let some peek out the side—be creative here! This presentation is what makes this **Dirt Dessert with Gummy Worms** fantastic for parties. I love seeing the children’s faces when they realize what they are about to eat!

Expert Tips for the Best Dirt Cake Recipe
Even though this dirt cake is simple, a few little secrets can take it from good to absolutely legendary! When Amaya and I make this, especially when we know we are serving it to friends who appreciate detail, we focus on temperature and consistency. This helps ensure we get that signature, unbelievably smooth texture in our **Creamy Chocolate Pudding Dessert**.
First, really let your cream cheese sit out. I mean it—bring it to room temperature for at least an hour before you touch it. If it’s even slightly firm, your mixing bowl will end up with stubborn cream cheese lumps, and that ruins the silky feel we want! You can read a great piece on small adjustments that make a big difference over at The First Year Blog.
Also, for the pudding layer, I sometimes try using French Vanilla instant pudding instead of just plain vanilla, or even using a sugar-free chocolate mix if I have family watching sugar intake. You just need to make sure you use the same amount of very cold milk specified on your pudding box, no matter the flavor, so it sets up firmly. The cold milk is what makes the instant setting work so quickly!
Finally, when you fold in the whipped topping—please, please do it gently, using a motion like you are folding silk into flour. Don’t stir aggressively! We are keeping those air bubbles for fluffiness, not beating them flat.
Ingredient Notes and Substitutions for Dirt Cake
Oh, people ask me about substitutions all the time! I know sometimes you open the pantry and realize you are just short one item. That’s okay! This recipe is very forgiving, but there are a couple of spots where you must be careful if you want that perfect **Classic Dirt Cake** texture.
First, if you don’t have that frozen whipped topping (like Cool Whip), you can absolutely whip heavy double cream until stiff peaks form, but the texture will be a bit richer and less stable. Also, if you want to use homemade pudding instead of the instant mix, you must cook it completely according to the package directions and then chill it thoroughly before folding it into the cream cheese mix. Instant pudding sets up much firmer when combined with the cream cheese, which is why I love it for this **Chocolate Dirt Dessert**.
Regarding the cookies, yes, you can use wafer cookies or chocolate graham crackers if you are completely out of Oreos, just make sure to add that melted butter, and you might need just a touch more, as wafers tend to be drier. You can see some great discussions about varying cookie choices over at Good For Recipes!
Making Your Dirt Cake a Make Ahead Dessert
One of the best secrets to truly enjoying a big family meal or party is having desserts ready to go, isn’t it? That is why I adore this **dirt cake**, because it shines as a fantastic **Make Ahead Dessert**!
You can completely assemble the entire layered dessert—crust, creamy filling, and the top layer of crumbs—the day before you plan to serve it. Cover it tightly with plastic wrap and keep it tucked away in the refrigerator. When we were hosting big gatherings back home, this step saved my sanity!
It actually tastes *better* the next day because the crust has a chance to absorb a tiny bit of moisture, making it softer without getting mushy. Just remember to add your gummy worms right before you bring it to the table so they stay looking fresh and wiggly. For the best storage tips on keeping things fresh, I always reference guides like the one from Cut, Cook, Taste!
Fun Variations for Your Chocolate Dirt Dessert
While I adore the original recipe—it’s a pure slice of Nostalgic Desserts for me—sometimes it is fun to shake things up just a little! I always encourage my grandchildren to try decorating, and we sometimes experiment with the flavors, too. Remember, the heart of this easy chocolate dirt dessert is the cream and the crunch; the flavor profile can certainly be tweaked!
For instance, if you want a slightly more grown-up flavor, try whipping instant coffee granules right into your cold milk before you mix the chocolate pudding. It gives the cream layer a wonderful mocha depth that plays beautifully off the dark Oreo crumbs. You can get inspired by looking at some creative twists people have shared, like on this lovely page from Joy Filled Sunshine.
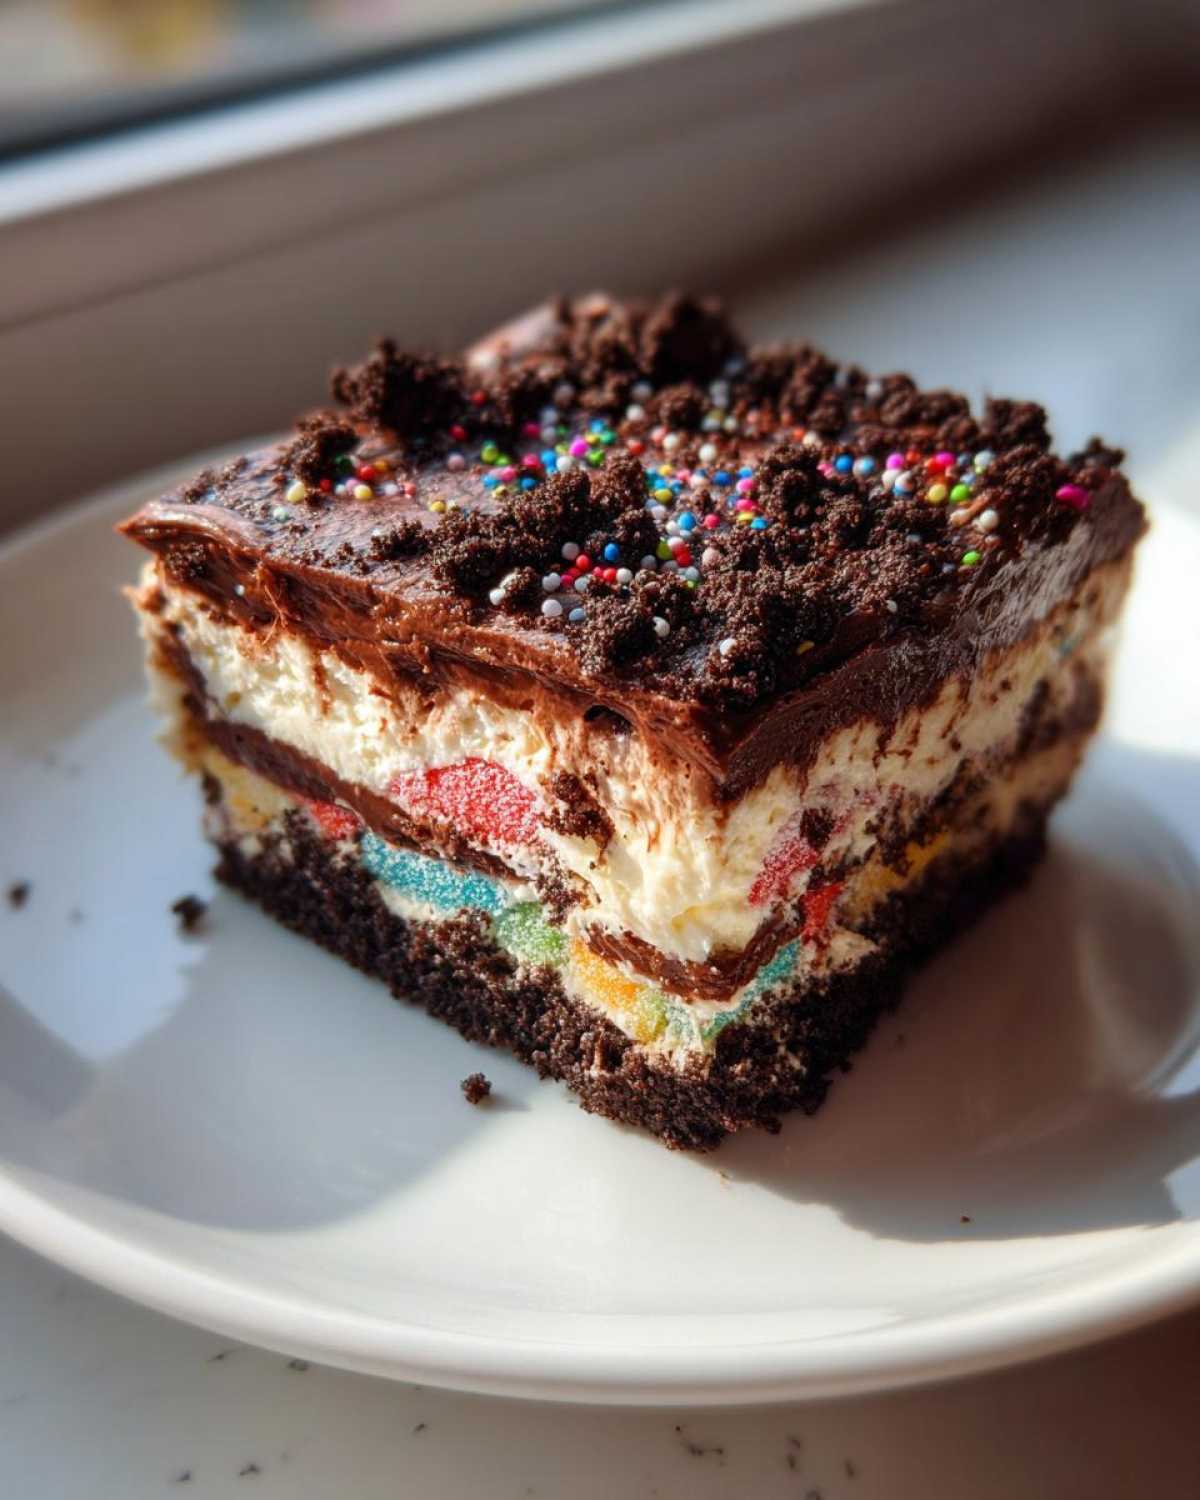
Another tip: switch out the cookies! Instead of the classic Oreos, try using Golden Oreos for a lighter, vanilla-flavored crust, or even chocolate graham crackers if you have them. And instead of gummy worms, sometimes we use crushed peanut butter cups mixed into the top layer for a delightful salty-sweet surprise. It’s still dirt cake, just with a little more personality!
Serving Suggestions for Dirt Cup Recipe Presentation
While the big 9×13 dish is wonderful when you need a massive batch for a big celebration—when I bring this to potlucks, it vanishes first!—sometimes I want something a little more special looking. Serving individual portions makes the whole thing feel a bit fancier, even though it’s the same easy recipe inside. This is perfect for when you need easy **Potluck Dessert Ideas** that look polished!
My favorite way to serve the Dirt Cup Recipe is in small, clear glasses or even small mason jars. You can really show off those beautiful layers that way! You just follow the exact same steps we covered, but you layer the crust, then the cream, then the crumbs, in each individual cup. You can stick one little gummy worm right out of the top of each one.
If you’re making it for a larger group but still want individual servings, use a clear trifle bowl instead of a baking dish. You simply build the layers up high, and it looks magnificent! Just make sure to grab an extra long serving spoon, as seen on this great site about dirt cup ideas. Serving individually or layered high, this dessert always disappears fast!
Frequently Asked Questions About Dirt Cake
We get so many wonderful questions after people try this recipe for the first time! It’s natural to wonder about little tweaks, especially when dealing with a no-bake dessert where structure is so important. I am happy to share what Amaya and I have learned over the years to ensure your dirt cake comes out perfectly creamy and wonderful every single time. You can always find more helpful advice on these details on sites like the one from Mighty Mrs.
Can I use homemade chocolate pudding instead of instant in this dirt cake?
Oh yes, you certainly can use homemade pudding! Just know that the texture will change a little. Homemade pudding is often softer and silkier than the instant kind when set. Because of this, I highly recommend that if you use cooked pudding, you let your dessert chill for a good six to eight hours, maybe even overnight, to make sure those layers set up firmly enough for slicing. The instant mix is our favorite because it locks things in quickly!
How long does this Oreo Dirt Cake Recipe last in the fridge?
This is a terrific Make Ahead Dessert, but like any dessert relying on whipped toppings and pudding, it tastes freshest in the first couple of days. I find that this Oreo Dirt Cake Recipe holds up beautifully for about three days in the refrigerator if it is sealed tight. After that, the crust layer will start to get a bit sad and soggy from the moisture in the pudding. If you know you won’t finish it, it’s better to freeze the layers without the worms!
What is the best way to crush Oreos for the Easy Dirt Pudding?
For the absolute finest, most realistic “dirt” consistency, nothing beats putting the cookies in a food processor and pulsing until they are fine crumbs. That’s the pro way to go! However, if you are making a small batch or my trusty food processor is dirty (it happens!), put those cookies in a very sturdy freezer bag. Seal out most of the air and then use a rolling pin or the bottom of a heavy mug to smash them down. Keep smashing until you don’t feel any large, hard bits poking through the plastic! Consistency is key for that perfect base and top layer for your Easy Dirt Pudding.
PrintEasy No-Bake Oreo Dirt Cake with Gummy Worms

You will love making this classic, creamy Oreo Dirt Cake. This no-bake dessert layers rich chocolate pudding with crushed Oreos and is perfect for parties or family night treats.
- Prep Time: 20 min
- Cook Time: 0 min
- Total Time: 4 hr 20 min
- Yield: 12 servings
- Category: Dessert
- Method: No Bake
- Cuisine: American
- Diet: Vegetarian
Ingredients
- 1 (14.3 ounce) package Oreo cookies, divided
- 1/2 cup (1 stick) unsalted butter, melted
- 1 (8 ounce) package cream cheese, softened
- 1 cup powdered sugar
- 1 (8 ounce) container frozen whipped topping, thawed
- 2 (3.9 ounce) packages instant chocolate pudding mix
- 3 cups cold milk
- 1 package gummy worms (optional, for decoration)
Instructions
- Set aside about 1 cup of the Oreo cookies for the topping layer. Place the remaining Oreos into a food processor and pulse until you have fine crumbs that resemble dirt.
- In a medium bowl, mix the fine Oreo crumbs with the melted butter until combined. Press this mixture firmly into the bottom of a 9×13 inch baking dish. This forms your first layer.
- In a large bowl, beat the softened cream cheese and powdered sugar together until smooth. Gently fold in the thawed whipped topping until just combined.
- In a separate bowl, whisk together the instant chocolate pudding mix and cold milk for about two minutes, or until the mixture begins to thicken.
- Spread the pudding mixture evenly over the Oreo crust layer.
- Top the pudding layer with the remaining crushed Oreo crumbs, creating the ‘dirt’ top layer.
- Cover the dish and chill in the refrigerator for at least four hours, or preferably overnight, to allow the layers to set properly.
- Before serving, press the gummy worms lightly into the top layer of crumbs for a fun presentation.
Notes
- For the best texture, make sure your cream cheese is fully softened before mixing.
- You can make this a make ahead dessert by preparing it completely the day before you plan to serve it.
- If you do not have a food processor, place the Oreos in a large zip-top bag and crush them using a rolling pin.
Nutrition
- Serving Size: 1 slice
- Calories: 380
- Sugar: 35
- Sodium: 350
- Fat: 20
- Saturated Fat: 10
- Unsaturated Fat: 10
- Trans Fat: 0
- Carbohydrates: 48
- Fiber: 1
- Protein: 4
- Cholesterol: 30