


Oh, my goodness, when Kenji and I first moved to New York City, I thought I would have to give up my favorite evening ritual: a sweet, cool dessert after dinner! The busy life here means I need treats that are fast and good for us. That’s why I am so utterly thrilled to share this recipe for **protein ice cream** with you. It’s truly the easiest, creamiest treat you’ll ever make—seriously, just four ingredients! We are using a little **cottage cheese hack** that gives us a fantastic texture and boosts the protein way up. If you’ve been searching for a guilt-free frozen delight, stop right now, because here it is. It’s the best quick fix after a long day of exploring this amazing city! Kenji and I both agree it’s satisfying without being heavy.
Why This 4-Ingredient Cottage Cheese Ice Cream is the Ultimate Healthy Ice Cream Hack
When I first tried making something frozen that fit our new health goals in New York, I was skeptical! So many recipes fail midway through freezing. But this **high protein dessert** is different. It’s fantastic because it keeps the sugar low while packing in the good stuff you need for energy. It is truly a fantastic **low sugar ice cream** that doesn’t taste like it! You must check out our protein muffins if you love this kind of fuel.
Achieving 20g Protein Per Serving
The magic, of course, is the cottage cheese! It’s not just creamy; it’s a protein powerhouse. We get about 20 grams per cup, which is incredible for something that feels like a real indulgence and makes it a superior **viral protein treat** compared to those overly sweetened tubs in the freezer aisle.
The Secret to Creamy Blender Ice Cream Texture
Don’t let “cottage cheese” scare you! A good high-speed blender breaks down those curds beautifully. The key is blending everything until it’s completely uniform, followed by adequate freezing time. This combination is what turns a simple liquid into perfect **blender ice cream** instead of a sugary ice block.

Gathering Ingredients for Your Creamy Protein Ice Cream
Kenji always says that the best cooking starts with simple, beautiful ingredients, and this blender ice cream is proof! We only need four things to get started. It’s amazing how little you need to create something so delicious and high in protein. Before you start blending, make sure everything is ready to go so the process is fast!
Ingredient Clarity and Preparation
Here is the short list. Trust me, you won’t get lost in complicated steps here. Since we use low-fat, we don’t really need to drain the cottage cheese, but if yours looks very watery, maybe pat it slightly with a paper towel just to be safe—it ensures the best texture, dear reader.
- 1 cup low-fat cottage cheese: Use your favorite brand; this is the base.
- 1/4 cup milk: Dairy or non-dairy works beautifully here, so use what you have on hand!
- About 1 tablespoon sweetener: This can be monk fruit, stevia, or even a few drops of liquid sweetener. Adjust to your taste!
- 1 teaspoon vanilla extract: Don’t skip this; it really rounds out the flavor.
If you are looking for other fast, healthy recipes, check out our no-bake protein bars. They use a similar principle of minimal effort for maximum results!
Step-by-Step Guide to Making Perfect Protein Ice Cream
Now for the fun part! This process moves so fast, it feels like magic. Since we adapted this recipe for our busy life in the city, speed and ease are essential. Just dump everything in, blend, and wait patiently. If you’re looking for more quick meals and ideas, you can always browse our full recipe index!
Always start by placing your cottage cheese, milk, sweetener, and vanilla right into your high-speed blender. Don’t mix them in a separate bowl first; we want all that blending power to do the work for us.
Blending for Smoothness: Tips for the Best Blender Ice Cream
This is the most important moment! We are relying on our machine here to get the absolute creamiest result possible. You need to blend until it is totally smooth—no grainy bits allowed! When blending, use a tamper if your blender has one, or stop every 30 seconds to scrape down the sides thoroughly. I learned that this frequent scraping prevents air pockets that cause iciness later on. Keep running it until the mixture flows smoothly, looking almost like a thick milkshake.

Freezing and Serving Your High Protein Dessert
Once it’s perfectly smooth, pour that beautiful mixture into a freezer-safe container. A shallow dish is actually best because it helps it freeze faster and more evenly. You must let it freeze for a minimum of 4 hours. I know, waiting is hard when you have a **high protein dessert** waiting for you! Once it’s firm enough to scoop, you’re nearly done.
If you wait too long and it turns rock solid—and this happens to me sometimes!—just pull it out and let it sit on the counter for about 10 minutes. This little rest is crucial for getting that perfect scoopable texture every single time.
Flavor Variations for Your Cottage Cheese Ice Cream Base
Oh, mixing flavors is where the real fun begins! Because this base recipe for **cottage cheese ice cream** is so simple and neutral, you can twist it into almost anything you want. This flexibility is why I think this recipe is so popular—it adapts to whatever you’re craving that day. If you love cottage cheese, you’ll love how these additions transform the flavor profile completely! And if you’re looking for other ways to use cottage cheese, you have to see Kenji’s amazing microwave brownie!
Creating Chocolate Protein Ice Cream
If you are craving chocolate, don’t even think about reaching for sugary syrups! Simply add about one tablespoon of unsweetened cocoa powder right into the blender with your other ingredients in Step One. Blend it right away. It mixes beautifully and gives you a deep, rich chocolate flavor without changing the amazing texture we worked so hard to achieve.
Boosting Protein with Powder
For those days when you really need that extra fuel, Kenji likes to sneak in a scoop of his vanilla protein powder. If you do this, remember you’re adding dry powder, so you might need a tiny splash more milk—maybe just a teaspoon extra—to keep that perfect smooth consistency. It’s still an amazing **healthy ice cream hack** even with the addition!

Troubleshooting Common Issues with Protein Ice Cream
Making any homemade frozen treat can sometimes lead to little hiccups, right? Don’t panic if your first batch isn’t absolutely perfect! That’s why Kenji and I stick around to help troubleshoot. Most issues that pop up with this **protein ice cream** center around texture—maybe it froze too hard, or maybe it’s stubbornly refusing to turn smooth.
The beauty of this simple base is that even if it freezes a bit firm, there’s always something you can do to bring it back to life before serving it up. It’s all about listening to what the mixture is telling you!
Fixing Grainy Texture in Protein Ice Cream
If, after blending, you find a slight graininess, that means your cottage cheese wasn’t fully incorporated into that beautiful, smooth base. This happens sometimes, especially if your blender isn’t a super high-powered model. The fix before freezing is easy: just blend it longer! If you’ve already frozen it and it’s grainy, you’ll need to microwave it for about 10-15 seconds, then give it a very brief blitz in the blender again, adding just a tiny splash of milk if necessary. Blending it smooth initially is the best way to avoid this!
Storage & Reheating Instructions for This Healthy Ice Cream Hack
Once you manage to get this wonderful **protein ice cream** into the freezer, it keeps beautifully! You absolutely must use an airtight container; plastic wrap pressed directly onto the surface helps stop any ice crystals from forming. I always store mine on the back shelf of the deep freezer so it doesn’t freeze *too* solid.
When you are ready for your treat, resist the urge to use the microwave, no matter how tempting! Just pull your container out and let it rest on the counter for about 5 to 10 minutes, just like Kenji taught me. This short rest is the secret to perfect scooping for this **healthy ice cream hack**. If you need other make-ahead tips, you might enjoy our recipe for sour cream coffee cake!

Nutritional Estimates for This Low Sugar Ice Cream
When you’re enjoying this delicious **low sugar ice cream**, it’s nice to know what you are eating, right? Because we are focusing on minimal ingredients, the nutritional panel is quite good! Remember, these numbers are just estimates based on the base recipe—the exact sweetening agent or milk you choose can change things slightly. We were so happy that we could keep the fat low while still getting that amazing protein boost!
For half a cup serving (which is quite generous for how satisfying this treat is), approximately:
- Calories: 130
- Protein: 20g
- Sugar: 5g
- Fat: 2g
It’s a wonderful way to satisfy a sweet craving while keeping your nutritional goals on track. Enjoy every bite!
Frequently Asked Questions About Making This Viral Protein Treat
When something becomes this popular, people always have questions, and I love hearing from you! Don’t hesitate to reach out when you have a tricky spot; check out Kenji’s favorite contact page if you need anything. Here are a few things folks have been asking about this fantastic **viral protein treat**.
Can I use Greek Yogurt instead of Cottage Cheese for this protein ice cream?
Yes, you absolutely can! If you prefer Greek yogurt, go right ahead. You might notice the final texture is slightly different—Greek yogurt sometimes makes an even silkier result, but the protein content might shift a little depending on which brand you choose. It’s a great way to customize your **protein ice cream** instantly!
How do I make this a low-carb ice cream?
That’s an easy adjustment to make this a truly **low sugar ice cream**! The base ingredients are naturally low in carbs, so the secret is your sweetener. If you are watching carbs closely, make absolutely sure you are using a zero-carb sweetener like pure erythritol or a liquid zero-calorie stevia. The milk choice matters too; stick to unsweetened almond milk if you are unsure!
How long does this cottage cheese ice cream last in the freezer?
Because this recipe has minimal stabilizers, it’s best eaten within the first week or so, though it will last longer if kept sealed tightly. Because it’s a **healthy ice cream hack**, it tends to freeze harder than store-bought tubs, so remember that 10-minute counter rest before you try to scoop!
We Would Love to Hear About Your Blender Ice Cream Experience
Well, dear friends, that is absolutely everything you need to know to make the creamiest, dreamiest, guilt-free **protein ice cream** right in your kitchen! Kenji and I truly hope you enjoy making this **high protein dessert** as much as we do now that we live in the hustle and bustle of New York City. It’s just so encouraging to have a healthy treat ready in the freezer!
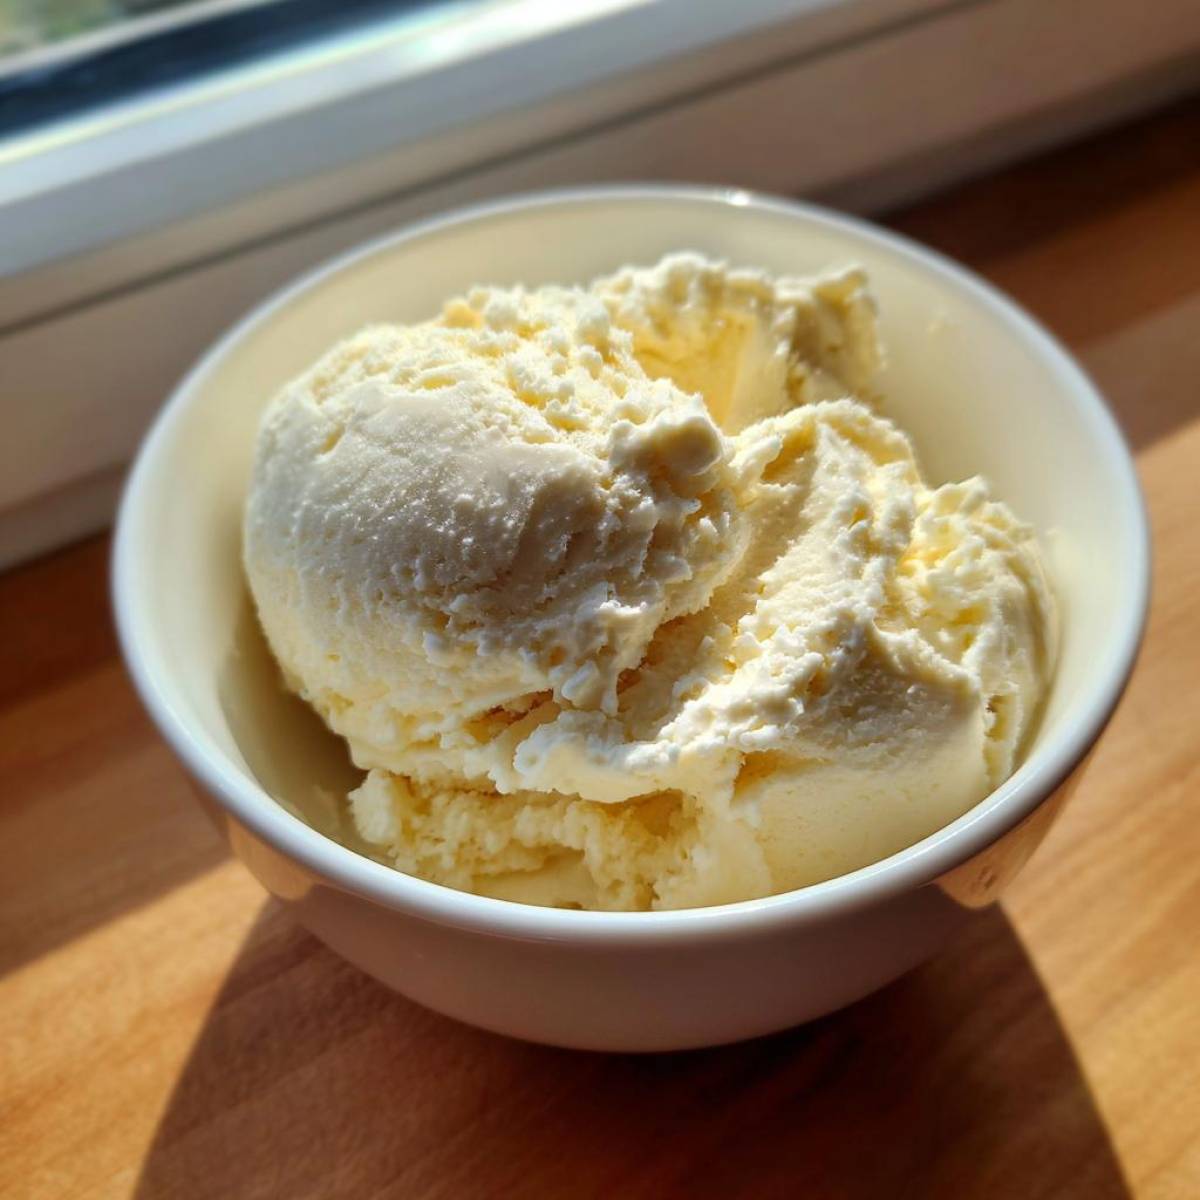
Now, please, don’t stop here! We love hearing from our readers. Did you try mixing in some peanut butter powder? Maybe you added a pinch of cardamom for a spicy surprise? I’d be so grateful if you could leave a rating for the recipe below and tell us in the comments what flavor combination you loved best. Your joy in the kitchen is what keeps our blog going!
Thank you for letting us share our little corner of food love with you today.
Print4-Ingredient High Protein Ice Cream (Cottage Cheese Hack)

Make creamy, high protein ice cream with just four simple ingredients in your blender. This healthy ice cream hack delivers about 20g of protein per cup.
- Prep Time: 5 min
- Cook Time: 0 min
- Total Time: 4 hr 5 min
- Yield: 2 servings
- Category: Dessert
- Method: Blender/Freezing
- Cuisine: American
- Diet: Low Fat
Ingredients
- 1 cup low-fat cottage cheese
- 1/4 cup milk (dairy or non-dairy)
- 1 tablespoon sweetener (like monk fruit or stevia)
- 1 teaspoon vanilla extract
Instructions
- Place the cottage cheese, milk, sweetener, and vanilla extract into a high-speed blender.
- Blend the mixture until it is completely smooth and creamy. Stop and scrape down the sides as needed.
- Pour the mixture into a freezer-safe container.
- Freeze for at least 4 hours, or until firm enough to scoop like traditional ice cream.
- If the mixture is too hard after freezing, let it sit on the counter for 5 to 10 minutes before scooping your high protein dessert.
Notes
- For a thicker texture, use only 3 tablespoons of milk initially.
- Add 1 scoop of your favorite protein powder for an extra protein boost (adjust liquid if needed).
- For chocolate protein ice cream, add 1 tablespoon of unsweetened cocoa powder before blending.
- If you want a richer flavor, use Greek yogurt instead of cottage cheese, though the protein content may vary slightly.
Nutrition
- Serving Size: 1/2 cup
- Calories: 130
- Sugar: 5
- Sodium: 350
- Fat: 2
- Saturated Fat: 1
- Unsaturated Fat: 1
- Trans Fat: 0
- Carbohydrates: 8
- Fiber: 0
- Protein: 20
- Cholesterol: 10