

Why This Homemade Naan Bread Recipe Works So Well
I love making bread. Truly, I do! This recipe for homemade naan bread really cracked the code.
It delivers that soft, pillowy texture. You know the one from your favorite Indian restaurant?
We achieve this magic right on your stovetop. No fancy clay oven needed here.
The secret weapon is simple. It’s the plain yogurt we add to the dough.
Yogurt keeps the bread incredibly tender. It helps create that beautiful, airy fluff.
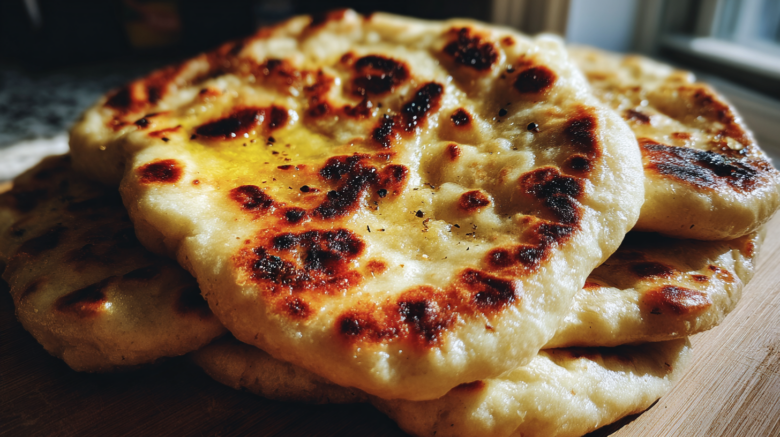
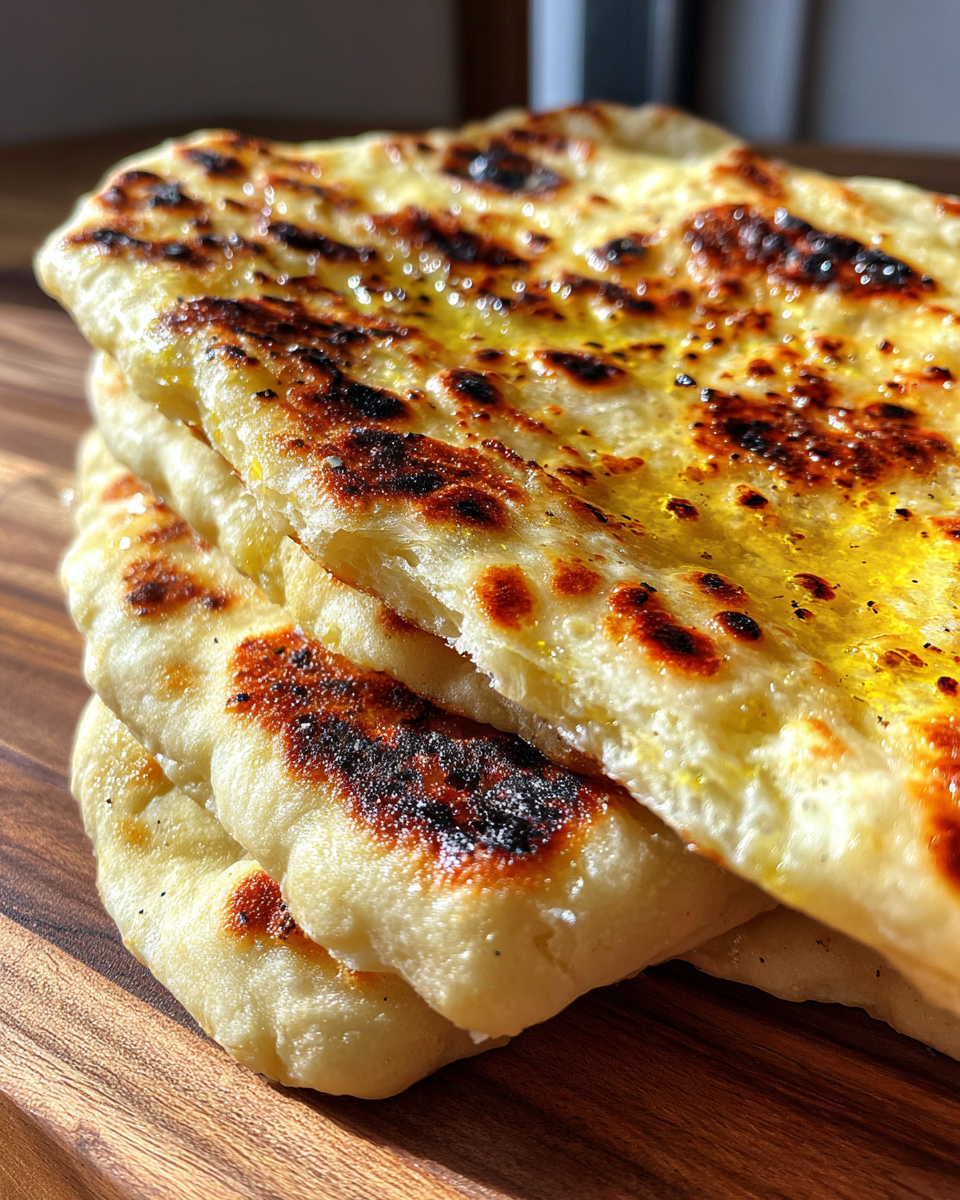
Using a screaming hot, dry skillet gives the perfect leopard spots. That’s what makes it authentic!
Essential Ingredients for Perfect Homemade Naan Bread
Getting the texture right for homemade naan bread starts here. It’s all about quality ingredients.
Don’t worry, you likely have most things already. This recipe keeps things wonderfully simple.
We aren’t calling for exotic flours. Just pantry staples make this happen.
I always gather everything before I start mixing. It makes the process so much smoother.
These components build the base for truly soft and chewy bread.
Gathering Your Dough Components
For the dough, precision matters just a little bit.
- We need 1 ½ cups of warm water. Check the temp; aim for about 110°F.
- Active dry yeast needs 1 tablespoon. Sugar gets 1 teaspoon to feed it.
- Three cups of all-purpose flour are necessary. Plus extra for dusting later.
- Salt comes in at 1 teaspoon for flavor balance.
- Two tablespoons of plain yogurt are key for softness.
- Milk needs 2 tablespoons for richness.
- Melted butter or ghee is used for brushing later on.
Optional Flavor Boost: Garlic Butter for Homemade Naan Bread
If you want that restaurant aroma filling your house, try the garlic butter.
It turns simple bread into a showstopper. This variation is my family’s favorite.
It’s the perfect way to customize your homemade naan bread.
You only need a couple of extra items here.
- Take your melted butter or ghee from the main recipe.
- Mince up about 2 cloves of fresh garlic very finely.
- Mix that garlic right into the warm melted fat.
- Brush this mixture onto the warm naan right after cooking.
Equipment Needed for Skillet Naan Bread
You don’t need a huge, specialized oven for great bread.
My kitchen is small, so I prefer simple tools. This recipe proves that.
We rely on basic items for success here.
Having the right pan makes a big difference in the texture.

Here is what you need to gather up:
- A large mixing bowl for building your dough.
- Measuring cups and spoons are always essential for baking.
- A clean kitchen towel for covering the rising dough.
- A rolling pin to shape your oval pieces thinly.
- A heavy-bottomed skillet or cast-iron pan. Make sure it’s large enough.
- A pastry brush for applying that lovely melted butter.
That cast-iron skillet gets wonderfully hot. That intense heat mimics the tandoor. Tandoor ovens reach extremely high temperatures, which is what we are trying to replicate.
It creates those beautiful charred, bubbly spots fast.
Keep your spatula handy for flipping the bread quickly.
Step-by-Step Instructions for Fluffy Homemade Naan Bread
Now comes the fun part. We turn simple flour into amazing homemade naan bread.
Follow these steps closely for the best results. Pay attention to the timing.
This method keeps the bread wonderfully soft and light.
I remember my first attempt—it was a little flat. Patience is key here!
Activating the Yeast and Mixing the Dough
First, wake up your yeast; it needs warmth to wake up.
Mix warm water, yeast, and sugar in a small bowl.
Let this sit for five to ten minutes. You must see foam forming on top.
This foam is proof your yeast is alive and ready to work.

Whisk the flour and salt in a larger bowl next.
Then, add the yogurt and the bubbly yeast mixture.
Kneading and the Crucial Rise for Homemade Naan Bread
Mix everything until you see a shaggy dough form up.
Turn the mixture out onto a lightly floured surface now.
Knead the dough for a full five to seven minutes.
You want the dough to feel smooth and quite elastic.
Place the dough in an oiled bowl. Cover it well.
Let it rise in a warm spot for 1 to 1.5 hours.
It should double completely in size. This rise builds the fluff.
Shaping and Cooking Your Homemade Naan Bread on the Stovetop
Gently punch down the risen dough. Divide it into eight equal balls.
Cover these small balls and let them rest for ten minutes.
Heat your skillet over medium-high heat until it is very hot.
Do not add any oil to the pan at all.
Roll each ball thin, about 1/8 inch thick, into an oval shape.
Place one piece of dough onto the hot, dry skillet now.
Cook for about one minute until big bubbles appear.
Flip it over. Cook the second side for just one minute more.
Look for those nice browned spots on both sides.
Finishing Touches: Achieving That Soft Naan Finish
Remove the cooked bread immediately from the hot skillet.
Brush the top generously with melted butter or ghee right away.
This step locks in moisture, making it so soft.
Stack the cooked breads together. Cover them with a clean towel.
Stacking keeps the steam trapped inside each piece.
Repeat this process until all your homemade naan bread is done.
Tips for Success with Your Homemade Naan Bread
Making truly great homemade naan bread is simple. But a few tricks help a lot.
I learned these lessons over many batches.
Don’t sweat the small stuff if things look imperfect.
These tips ensure you get that restaurant feel every time you bake.
We want soft, chewy results, not flat crackers.
Follow these pointers for perfect homemade naan bread.
Achieving Restaurant-Quality Puff and Softness
The puff is the hardest part for many home cooks.
First, that skillet needs to be screaming hot.
Put it on medium-high heat for several minutes beforehand.
A cold pan steams the dough instead of puffing it.
Remember the yogurt? It is a must for softness.
Yogurt’s acidity tenderizes the gluten structure beautifully. The nutritional benefits of yogurt often include probiotics that aid digestion.
If your dough feels sticky while rolling, don’t panic.
Add flour just one tablespoon at a time while kneading.
Keep your dough balls covered during the resting period.
This stops the surface from drying out too much.
Drying prevents the dough from expanding properly on the heat.
Brush that butter on immediately after it comes off the pan.
That immediate brushing traps the heat and keeps it supple.
Frequently Asked Questions About Homemade Naan Bread
I always get questions after sharing this recipe.
People want to know about making homemade naan bread ahead of time.
It’s a common concern when baking bread.
Let’s clear up a few things before you start.
These answers should help your baking go smoothly.
Can I Make Homemade Naan Bread Ahead of Time?
Yes, you absolutely can make this bread ahead.
You can bake a batch and store them later.
Wrap the cooled naan tightly in plastic wrap.
They keep well at room temperature for a day.
For longer storage, freeze them in an airtight bag.
They taste best when reheated briefly in a hot oven.
You can also freeze the dough balls before rolling them out.
Thaw the dough overnight in the fridge first.
Then let them warm up slightly before rolling and cooking.
What If I Don’t Have Yogurt for My Homemade Naan Bread?
Oh, the yogurt question! It really helps the texture.
But if you are truly out, don’t stop baking!
You can substitute the 2 tablespoons of yogurt.
Use an equal amount of sour cream instead.
If you have neither, use 2 tablespoons of extra milk.
The bread will still be good, just slightly less soft.
Remember, the yogurt is what gives that amazing chewiness.
It aids in keeping the final homemade naan bread tender.
Serving Suggestions for Your Fresh Homemade Naan Bread
Now that you have this gorgeous bread, what should you eat it with?
Warm, fluffy naan is perfect for soaking up flavor.
It’s more than just a side dish, really.
It becomes part of the meal itself, you know?

Here are a few simple ways we enjoy ours at home.
- Dipping it straight into rich lentil dal is divine.
- It pairs beautifully with creamy butter chicken or tikka masala.
- Try using it to scoop up hummus or baba ghanoush.
- Serve it alongside a simple yogurt raita for cooling contrast.
- We love tearing off pieces for dipping into leftover curry sauce.
Even plain, brushed with garlic butter, it’s a treat.
It tastes wonderful just warm from the pan.
Don’t let any go to waste!
Understanding the Nutrition in Your Homemade Naan Bread
We all love the taste of fresh bread. But knowing what’s in your homemade naan bread helps too.
I wanted to share some estimated nutritional information for you.
This recipe yields 8 lovely pieces of bread.
Keep in mind these numbers are based on averages.
They can change depending on your exact ingredients.
Here is a breakdown per one piece of naan:
- Calories: Around 230 per serving.
- Fat content is quite low, about 5 grams total.
- Carbohydrates make up the bulk at 41 grams.
- Protein provides about 7 grams to the side dish.
- Sugar content is minimal, just 2 grams.
It’s a satisfying bread that pairs well with everything.
Enjoying it with a vegetable curry adds fiber and nutrients.
This provides a good foundation for a balanced meal.
Disclaimer Regarding Estimated Nutrition Data
Please remember these figures are just estimates for your homemade naan bread.
The exact amounts of flour or butter change things.
Your specific brand of yogurt matters too.
We highly recommend you calculate your own final data.
This is especially true if you have dietary needs.
Use these numbers for general guidance only.
Share Your Delicious Homemade Naan Bread Experience
Well, that’s our journey to making perfect homemade naan bread.
I truly hope you found this guide helpful in your kitchen.
Amaya and I love hearing from you all so much.
Cooking is about sharing, after all, that’s why we started this blog.
Did these tips help you get that amazing soft texture?
Did you try the garlic butter variation?
We would be thrilled if you left a rating for the recipe.
Five stars means we did something right!
Tell us how your bread turned out in the comments below.
Share a picture if you have one!
We cherish being part of your cooking stories.
Happy baking, and come back to Whisk Daily soon.
PrintAmazing 8-Step Homemade Naan Bread Secret
Learn how to make soft, fluffy, and authentic homemade naan bread using your skillet. This simple recipe yields restaurant-quality results without needing a tandoor.
- Prep Time: 20 minutes
- Cook Time: 15 minutes
- Total Time: 1 hour 45 minutes
- Yield: 8 Naan breads
- Category: Bread
- Method: Skillet/Stovetop
- Cuisine: Indian
- Diet: Vegetarian
Ingredients
- 1 ½ cups warm water (about 110°F)
- 1 tablespoon active dry yeast
- 1 teaspoon sugar
- 3 cups all-purpose flour, plus more for dusting
- 1 teaspoon salt
- 2 tablespoons plain yogurt
- 2 tablespoons milk
- 2 tablespoons melted butter or ghee, for brushing
Instructions
- Combine warm water, yeast, and sugar in a small bowl. Let it sit for 5-10 minutes until foamy. This shows your yeast is active.
- In a large bowl, whisk together the flour and salt.
- Add the yogurt and the yeast mixture to the dry ingredients. Mix until a shaggy dough forms.
- Turn the dough onto a lightly floured surface. Knead for 5-7 minutes until the dough is smooth and elastic.
- Place the dough in a lightly oiled bowl, turning to coat. Cover the bowl with plastic wrap or a clean towel. Let the dough rise in a warm place for 1 to 1.5 hours, or until doubled in size.
- Gently punch down the risen dough. Divide it into 8 equal pieces. Roll each piece into a ball.
- Cover the dough balls and let them rest for 10 minutes.
- Heat a heavy-bottomed skillet or cast-iron pan over medium-high heat until it is very hot. Do not add oil to the pan.
- Take one dough ball and roll it out into an oval or teardrop shape, about 1/8 inch thick.
- Place one rolled naan onto the hot, dry skillet. Cook for about 1-2 minutes until bubbles form on the surface and the underside is lightly browned.
- Flip the naan. Cook the second side for another minute until browned spots appear. If you see large bubbles, gently press them down with a spatula to encourage even cooking.
- Remove the cooked naan from the skillet and immediately brush the top with melted butter or ghee.
- Repeat with the remaining dough, stacking the cooked naan and covering them with a clean towel to keep them warm and soft.
Notes
- For Garlic Naan: Mix 2 cloves of minced garlic into the melted butter or ghee before brushing the cooked naan.
- Using yogurt makes your naan softer. Do not skip it.
- Make sure your skillet is very hot before placing the dough down for the best puff.
- If the dough is too sticky to handle, add flour one tablespoon at a time while kneading.
Nutrition
- Serving Size: 1 Naan bread
- Calories: 230
- Sugar: 2g
- Sodium: 350mg
- Fat: 5g
- Saturated Fat: 3g
- Unsaturated Fat: 2g
- Trans Fat: 0g
- Carbohydrates: 41g
- Fiber: 2g
- Protein: 7g
- Cholesterol: 10mg