

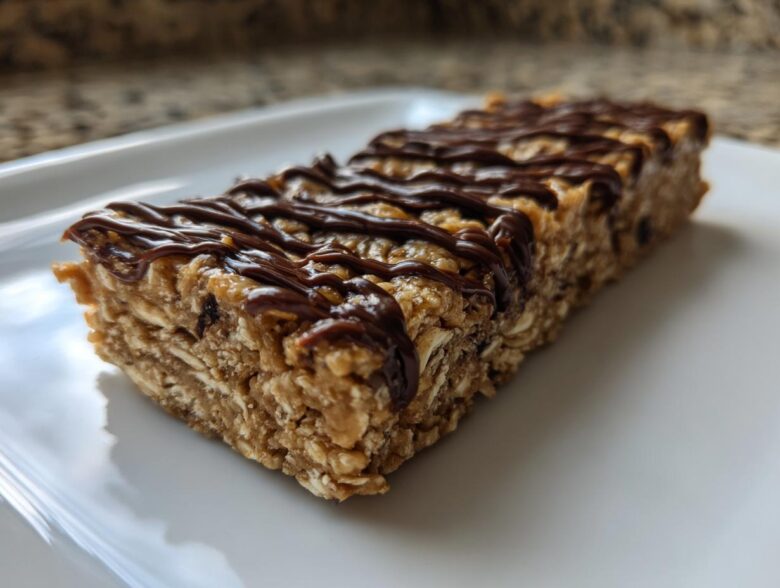
Seriously, does anyone else struggle to find a store-bought snack that actually tastes good *and* doesn’t have a list of ingredients longer than my arm? I feel like I’m constantly trying to hit my protein goals, but those fancy packaged bars just leave me disappointed, or worse, empty my wallet! That’s why I spent ages perfecting simple, homemade protein bars that actually taste like a treat, not cardboard. I’m telling you, these Easy No-Bake 5-Ingredient Peanut Butter Protein Bars are the answer to all our snack prayers. If you like other quick, minimal-ingredient recipes, you absolutely must check out my advice for no-bake trail mix granola bars too!
They take about ten minutes, max, and they are dense, chewy, and taste exactly like a peanut butter cup hiding as healthy food. I’ve been tweaking these for years—trying to keep the ingredient count low for quick meal prep moments. Trust me, once you try these, you’ll never look at the checkout aisle bars the same way again. We are talking minimal effort for maximum payoff here!
Why These Easy No-Bake 5-Ingredient Protein Bars Are Your New Go-To
I know you want snacks that don’t complicate your life, and that’s exactly what we get here! These aren’t just another batch of fancy store-bought replacements; these are genuinely fantastic protein bars made right in your kitchen with tools you already own. They crush cravings and fit perfectly into tight schedules. If you’re looking for more great snack ideas, check out my main blog page for endless inspiration!
What makes these unbeatable? Well, let me break down why they jumped straight to the top of my rotation:
Quick Prep Time for Busy Schedules
Seriously, the prep time is just ten minutes. Ten minutes! You mix everything, press it down, and walk away. There’s no preheating the oven, no worrying about burning things—they are the ultimate quick protein treats when you realize at 3 PM you forgot to pack anything substantial.
Minimal Ingredients for Simple Homemade Snacks
We cut the fluff right out of this recipe. The core uses just five things you probably have sitting in your pantry already. That means less time at the specialty store and more time enjoying your food. They are so simple, I honestly recommend these as the first protein bars for beginners!
Gathering Ingredients for Your Peanut Butter Protein Bars
Okay, I’m super excited about this part because it proves just how easy these peanut butter protein bars are to make. Remember, we are sticking to five main ingredients, which means grocery trips are quick and clean-up is minimal. If you’re looking for other amazing recipes that highlight chocolate and peanut butter, you have to try my smoothie recipe I linked here—it’s a game-changer! Check out my advice on my chocolate peanut butter smoothie protein recipe for a liquid boost!
Getting the right texture depends entirely on having the correct measurements for our binders and dry ingredients. Accuracy matters, even with only five things!
Core Components of These Protein Bars
For the main body of the bar, you’ll need these basics. Don’t substitute the protein powder unless you know what you’re doing; the ratios are tricky!
- 1 cup rolled oats—use the regular old rolled ones, not instant!
- 1/2 cup peanut butter—I use creamy, but crunchy works for texture if you don’t mind the chunks.
- 1/2 cup vanilla or unflavored protein powder—this is our main source of staying power.
- 1/4 cup maple syrup or honey—this is our binder and sweetener.
- 2 tablespoons water or milk (as needed)—just enough to bring it all together.
Optional Chocolate Drizzle Details
If you want to make these taste like a true indulgent treat, you need the optional drizzle. It takes five extra seconds, I promise it’s worth it!
- 1/4 cup dark chocolate chips (for optional drizzle)—melted, of course, to pour over the top before that final chill.
Step-by-Step Guide to Making No Bake Protein Bars
Now we get to the fun part! Don’t let the step-by-step sound intimidating—this is honestly just mixing and waiting. But precision in these first few steps guarantees you end up with perfect, chewy protein bars that don’t crumble when you grab them for your post-workout snack. If you love this easy style, you absolutely must try my recipe for peanut butter protein muffins!
Preparing the Pan and Mixing the Protein Bars Base
First things first: get your 8×8 inch pan ready! Line it with parchment paper, making sure you leave some overhang on the sides. This overhang is our handle later, so don’t skip it! In a good-sized bowl, toss in your dry stuff—oats and protein powder—then add the peanut butter and maple syrup. Now, get your spoon and mix it up. You need to mix until it looks like a cohesive, thick dough. This is important:
If it seems way too dry and crumbly, don’t panic! Add water or milk only one teaspoon at a time. We want it just wet enough to hold its shape when squeezed. If you add too much liquid, these wonderful no bake protein bars won’t stay together.
Pressing, Chilling, and Cutting Your Chewy Protein Bars
Once you have that perfect, slightly sticky dough, transfer it to your lined pan. Use the back of a spoon or your fingers, but you have to press it down HARD. Seriously, pack it in there tight so they are dense and satisfying. This firmly packed layer is key to getting those beautiful, chewy bars!
Next, this is crucial for success: into the fridge they go! They need at least one full hour to chill and firm up. If you try to cut them when they are soft, you end up with a mess. Once they are firm, use the parchment overhang to lift the whole slab out gently. Then, slice them into 10 or 12 servings. Clean cuts happen when they are rock solid!
Finishing with the Chocolate Drizzle
If you opted for the drizzle, now is the time to shine! Melt those dark chocolate chips. I just microwave mine in 30-second bursts, stirring in between so I don’t burn them. As soon as it’s smooth and glossy, grab a fork and drizzle that chocolate lovingly over the top of your bars. They look so professional once that chocolate hits!
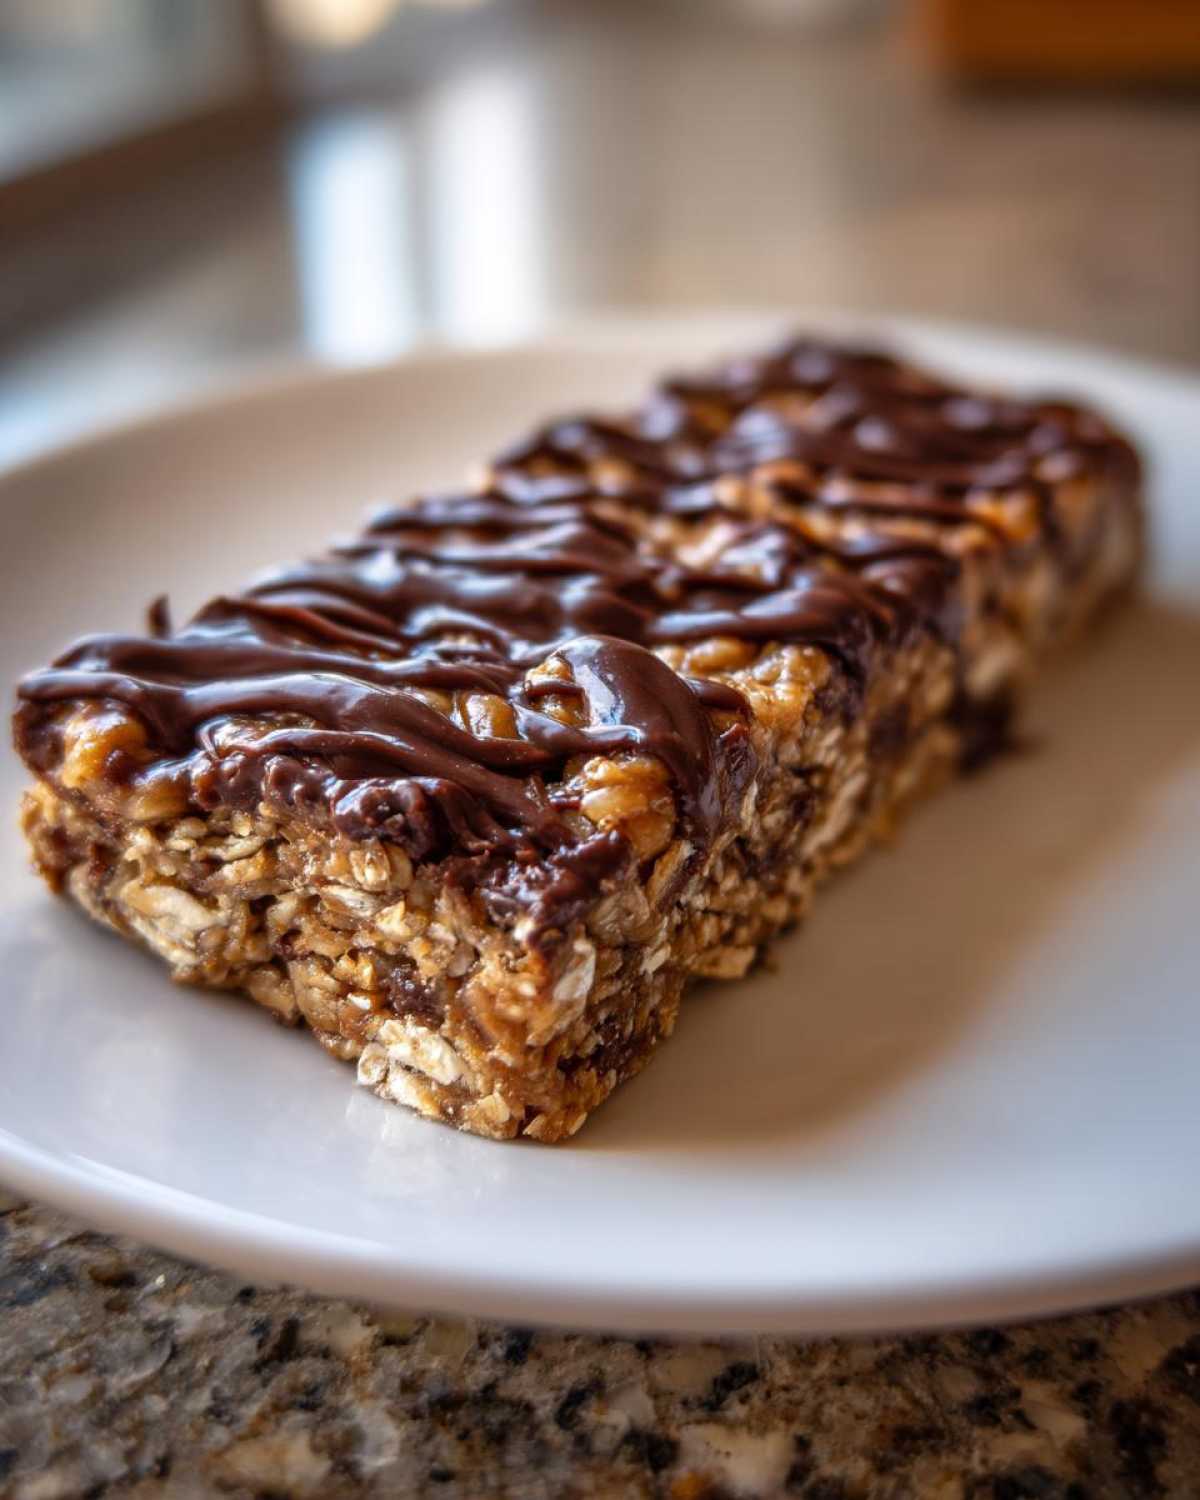
Pop them back into the fridge one last time. You need that chocolate to set up hard before you serve them. That’s it! You’ve made incredible homemade protein bars in under an hour of total time.
Expert Tips for Perfect Homemade Protein Bars
Okay, so we have the basic steps down for this easy protein bar recipe, but if you want them to be absolutely *flawless* every single time—you need a few inside secrets for texture control. When I first started making these, sometimes they were too crumbly, and other times they were a little too soft. It all comes down to how you handle the dry and wet elements!
Achieving the Right Dough Consistency
Listen, protein powders are sneaky little devils. Some brands soak up liquid like a sponge, and others just slide right past it. If your dough seems too dry right away, resist the urge to dump in a whole tablespoon of water. Add liquid—whether it’s filtered water or milk—one teaspoon at a time while mixing. You should stop adding liquid the instant you can successfully squeeze a handful and have it hold its shape without immediately crumbling apart. That slightly stiff, almost cookie-dough-like texture is what we are striving for.
Packing for Meal Prep Bars Success
Since these are designed to be amazing meal prep bars, you need to wrap them properly if you aren’t eating them all in one day. I learned the hard way that if you just stack them in a container, they tend to stick together, and you end up ripping off half the chocolate drizzle trying to separate them! My trick is to cut your bars first, then immediately wrap each individual bar tightly in small squares of plastic wrap or wax paper. They stack perfectly in an airtight container in the fridge this way, ready to grab for a snack all week long.
If you want more ideas about making crunchy clusters for snacks, check out my recipe for homemade granola clusters—it uses a similar binding concept!
Ingredient Notes and Substitutions for Your Protein Bars
One of the best parts about making your own protein bars is being able to tweak them for your pantry or dietary needs! I get so many questions about substitutions, and honestly, as long as you keep the dry-to-wet ratio close to what we established, you should be golden. If you’re interested in other recipes that allow for great swaps, you should absolutely look at my recipe archive for vegan protein muffins!
Swapping Nut Butters for Variety
The peanut butter is fantastic, but what if someone has an allergy or just wants something different? You can certainly swap it! Almond butter works beautifully—it has a really nice, rich flavor profile that complements the vanilla powder well. If you need to keep things completely tree-nut-free but still want that gooey texture, sunflower seed butter (SunButter) is a great savory substitute. Just make sure whatever you use is relatively runny, not super hardened straight from the fridge.
Adjusting Sweeteners for Low Sugar Protein Bars
Maple syrup gives a lovely, caramel depth, but if you’re watching your pure sugar intake closely, you absolutely have room to adjust. You can substitute the maple syrup or honey with a zero-calorie syrup like monk fruit or erythritol blends. Remember, these liquid sweeteners measure differently than syrup, so you might need slightly less of the syrup substitute, or you’ll need that extra splash of water/milk we talked about earlier to get the correct consistency for your low sugar protein bars.
Storing and Reheating These Make Ahead Protein Snacks
Because these are no-bake, keeping them fresh and firm is all about that cold environment. I totally rely on these being amazing meal prep bars for my busy weeks, so storage is non-negotiable! You need to keep them somewhere cool. Store them in an airtight container—and I highly recommend wrapping them individually in wax paper first, just like I mentioned before, so they don’t fuse together.
When kept chilled in the refrigerator, these wonderfully dense protein bars are still perfect for up to a full week. Honestly, they never last that long in my house, but they hold up beautifully! There’s no reheating required either; just grab one straight from the fridge and enjoy the cool, chewy texture. If you ever need a cold dessert idea, you should try my recipe for avocado chocolate chip ice cream!
Frequently Asked Questions About Making Protein Bars
I always end up with a million questions after trying a new easy protein bar recipe, so I figured I’d jot down the ones I get asked the most about these peanut butter beauties. Trying to nail down the perfect texture or making minor dietary swaps can sometimes feel tricky, but these bars are wonderfully forgiving! If you’re looking for other great, slightly different ideas, check out my recipe for gluten free protein muffins—they use a similar high-protein philosophy!
Can I make these vegan protein bars recipe?
Oh, absolutely! These are already so close to being plant-based, it’s just one tiny swap. To turn this into a proper vegan protein bars recipe, you just need to swap out the honey for maple syrup (if you didn’t already use it), and make sure your protein powder is plant-based, of course! Pea protein, soy protein, or even a blended vegan mix will work perfectly fine here. The texture should be nearly identical since the binders are the same.
How do I make these gluten free protein bars?
This is super easy, too! Your main ingredient throwing a wrench in the works might be the oats, right? If you buy certified gluten free protein bars at the store, they cost a fortune! Instead, just make sure the rolled oats you buy are specifically labeled as certified gluten-free. Everything else—the peanut butter, the maple syrup, the chocolate chips—is naturally gluten-free. It’s a simple solution for making fantastic healthy snack bars that everyone can enjoy.
Are these the best tasting protein bars I can make at home?
In my humble opinion? Yes! That’s why I love them so much. Store-bought bars often taste synthetic, but because we are using real peanut butter and maple syrup to bind everything, you get that authentic, rich flavor. If you want them to level up even further towards being the best tasting protein bars? Don’t skip that optional chocolate drizzle! That combination of salty peanut butter and melted dark chocolate makes them taste like a candy bar, but you’ve got 12g of protein in every bite. Give ‘em a try; I bet you’ll agree!
Can I bake these instead of making no bake protein bars?
You know, you totally could try, but honestly, I designed these specifically because they are no-bake! If you bake them, you risk drying out the oat/powder mix too much, and the peanut butter can get really oily. If you are set on baking something, you might be better off looking for a dedicated baked recipe, but I highly recommend the chilling method for the ultimate chewy protein bars.
Estimated Nutritional Values for Homemade Protein Bars
I always look at the numbers too, because it helps me plan my snacks for the week! Just remember that these are estimates for one bar, assuming you slice the batch into 10 servings, and the exact figures depend on what brand of protein powder you sneak into your favorite protein bars. I’ve listed the main highlights for you below, based on the recipe ingredients.
- Calories: Around 180 per bar
- Protein: About 12 grams of power!
- Carbohydrates: Roughly 18g
- Fat: About 9g
Keep in mind that using almond butter or different sweeteners will shift these numbers just a bit, but this gives you a fantastic baseline for these amazing high protein recipes!
Share Your Homemade Protein Bars Creations
Alright, friends, putting the spatula down for a second! I truly hope you give these protein bars a try this week. I put a lot of heart into making this recipe as simple and delicious as possible so that everyone can stop wasting money on those expensive, chemical-laden bars from the store. Now that you know the secrets, I want to see what you whip up!
Did you keep it simple, or did you jazz them up with a totally different nut butter? Maybe you went wild with a mix-in I hadn’t even thought of! Drop a comment below and let me know how they turned out for you. Were they the best quick protein treats you’ve ever made? Did they disappear before your planned meal prep was even finished?
If you snap a picture of your perfectly chilled, chocolate-drizzled masterpieces, tag me on social media! Use the hashtag so I can easily find your creations and share them on my stories. I love seeing my recipes come to life in your kitchens. If you have any burning questions or need troubleshooting advice that wasn’t covered, don’t hesitate to shoot me a message through my Contact page—I’m always here to help a fellow snack maker!
Happy mixing, and I can’t wait to hear all about your success with these healthy snack bars!
PrintEasy No-Bake 5-Ingredient Peanut Butter Protein Bars
Make simple, chewy peanut butter protein bars at home with only five ingredients. These no-bake bars are perfect for quick meal prep and satisfy cravings.
- Prep Time: 10 min
- Cook Time: 0 min
- Total Time: 70 min
- Yield: 10 servings
- Category: Snack
- Method: No-Bake
- Cuisine: American
- Diet: Vegetarian
Ingredients
- 1 cup rolled oats
- 1/2 cup peanut butter
- 1/2 cup vanilla or unflavored protein powder
- 1/4 cup maple syrup or honey
- 2 tablespoons water or milk (as needed)
- 1/4 cup dark chocolate chips (for optional drizzle)
Instructions
- Line an 8×8 inch baking pan with parchment paper, leaving an overhang on the sides for easy removal.
- In a medium bowl, combine the rolled oats, protein powder, peanut butter, and maple syrup.
- Mix the ingredients thoroughly until a thick, uniform dough forms. If the mixture is too dry, add water or milk one teaspoon at a time until it holds together when pressed.
- Press the dough evenly into the prepared pan. Use the back of a spoon or your fingers to pack it down firmly.
- Place the pan in the refrigerator to chill for at least 1 hour, or until firm.
- Once firm, lift the bars out using the parchment paper overhang and cut them into 10 to 12 equal bars.
- For the optional drizzle, melt the chocolate chips in a microwave-safe bowl in 30-second intervals, stirring until smooth. Drizzle the melted chocolate over the bars.
- Return the bars to the refrigerator until the chocolate sets before serving.
Notes
- Store the finished bars in an airtight container in the refrigerator for up to one week.
- You can substitute peanut butter with almond butter or sunflower seed butter for a different flavor.
- For a lower sugar option, use a sugar-free syrup substitute instead of maple syrup.
Nutrition
- Serving Size: 1 bar
- Calories: 180
- Sugar: 7g
- Sodium: 80mg
- Fat: 9g
- Saturated Fat: 2g
- Unsaturated Fat: 7g
- Trans Fat: 0g
- Carbohydrates: 18g
- Fiber: 2g
- Protein: 12g
- Cholesterol: 0mg