

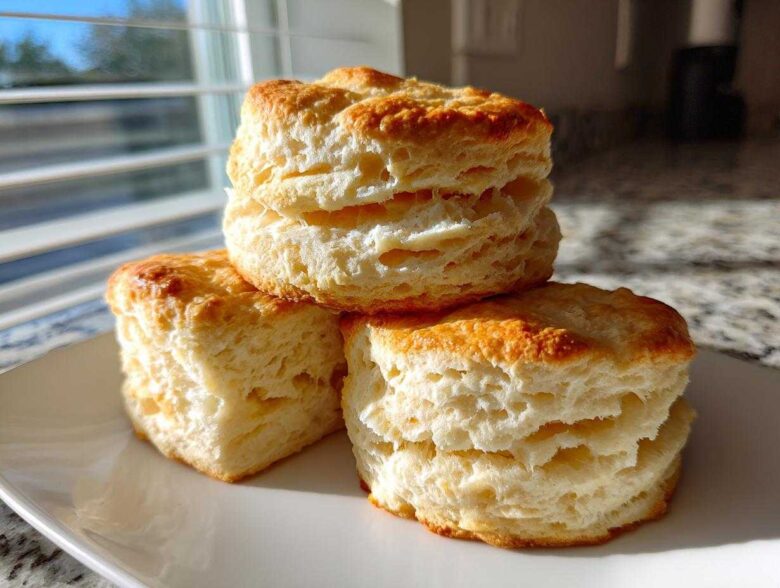
Oh, you just can’t beat that perfect biscuit, can you? I mean the kind that shatters slightly when you touch it but is tender and pillowy soft inside. That aroma of warm butter filling the whole house when they first come out of the oven? It takes me right back to Saturday mornings at my Granny’s house, watching those incredible breakfast bread recipes puff up impossibly high. Forget those flat, tough hockey pucks you sometimes get! This recipe is my absolute go-to for making the best Southern buttermilk biscuits from scratch. Trust me, after one batch, you’re never looking back.
Why You Will Bake the Best Buttermilk Biscuits With This Recipe
This isn’t just another recipe thrown together in five minutes—this is how we guarantee success every single time we make buttermilk biscuits. When you follow these simple rules, you lock in that perfect texture that everyone dreams about, just like the great breakfast bread recipes from the South:
- You get that amazing, airy height because we focus on creating real layers.
- The crumb is incredibly tender; no more tough dough, thanks to minimal mixing!
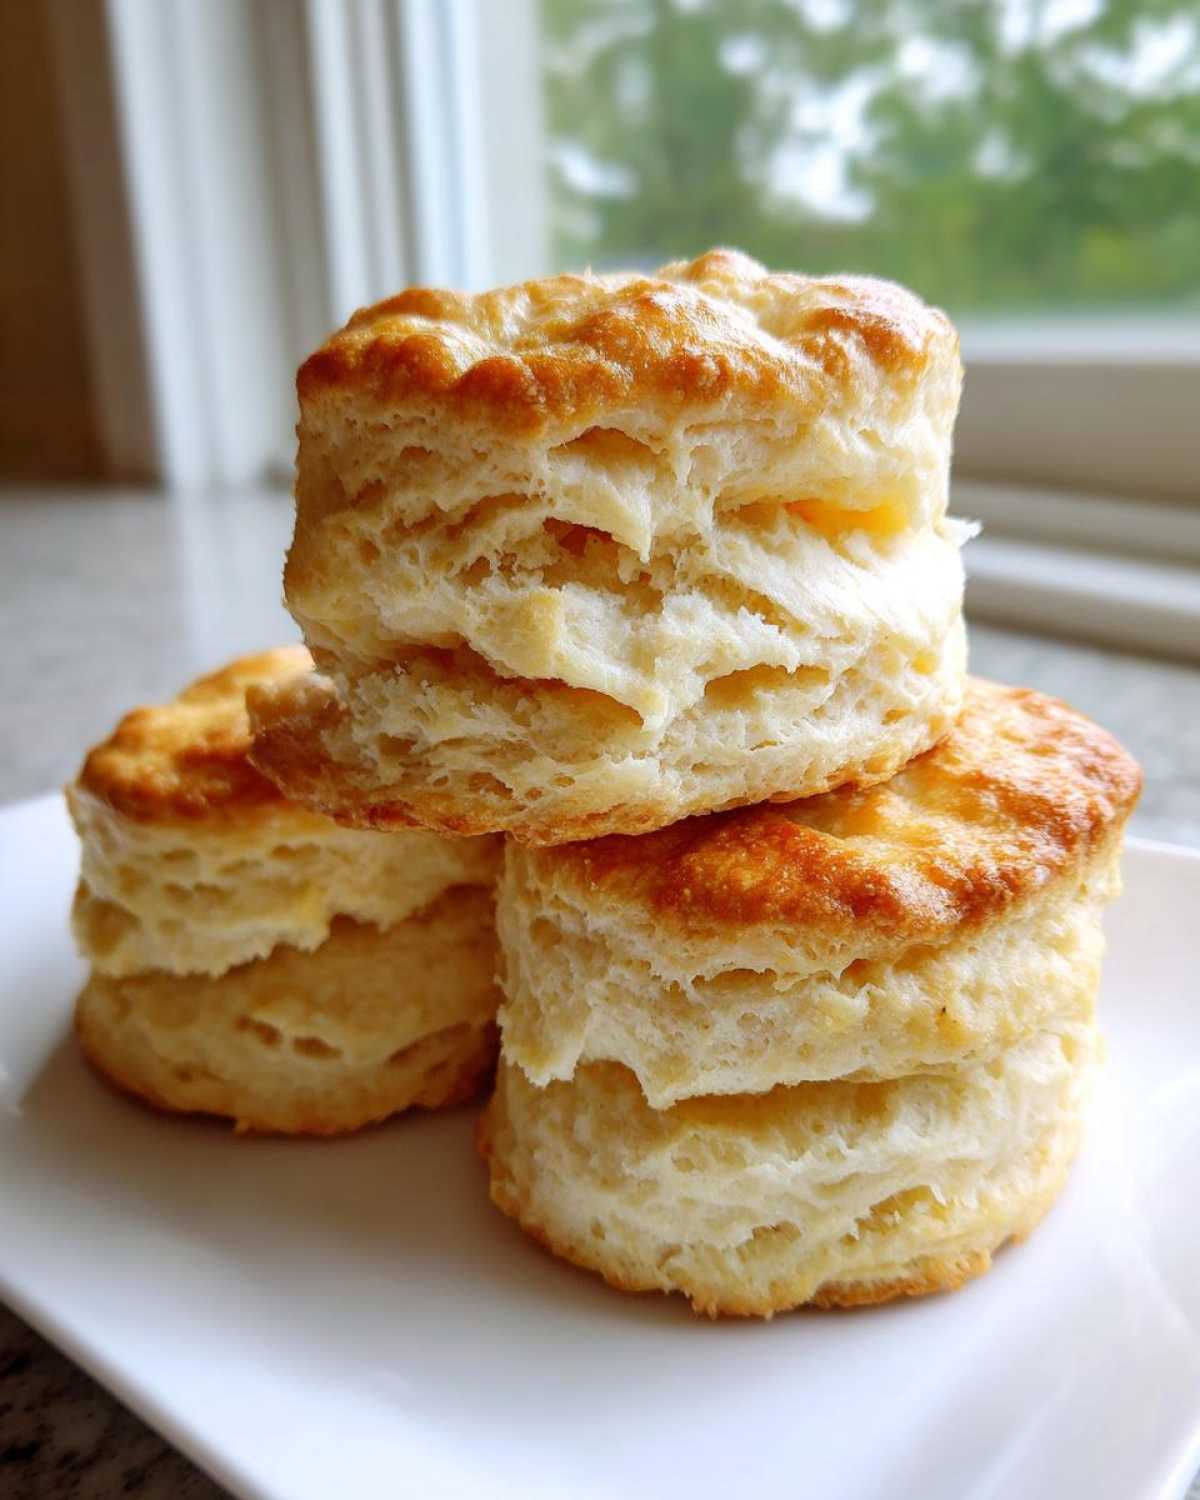
- They bake up perfectly golden brown with that unbeatable buttery flavor.
- It’s a true from scratch baking experience that actually wraps up in under 30 minutes—wow!
Essential Ingredients for Perfect Buttermilk Biscuits
Honestly, the magic here isn’t in any fancy trick; it’s 100% about using the right ingredients at the absolute right temperature. If you skip focusing on the coldness here, your lovely buttermilk biscuits won’t get that flaky lift we are aiming for!
Make sure everything is icy cold. I mean it! I often cube my butter and toss it in the freezer for ten minutes right before I start. That’s how we get those perfect pockets of steam in the oven.
- All-Purpose Flour: Two cups, of course. It’s the backbone of our baking techniques for biscuits.
- Leavening Agents: We need 1 tablespoon of baking powder and 1 teaspoon of baking soda to get them puffy.
- Salt: Just one teaspoon—enough to wake up the flavor.
- Unsalted Butter: This is non-negotiable! Half a cup, cut into small cubes. It must be ice cold, or even frozen if you’re feeling extra cautious!
- Buttermilk: Three-quarters of a cup, and this definitely needs to be cold too. It reacts with the baking soda, giving us that classic tang and rise.
Mastering the Technique: How to Make Flaky Buttermilk Biscuits
Okay, this is where the magic happens, folks! If you want those sky-high, melt-in-your-mouth results, you have to treat the dough gently. We want to keep that cold butter intact because those butter pockets are what explode in the oven and create those gorgeous separation layers. We’re aiming for laminated layers, even in our humble little baking techniques for biscuits.
Combining Dry Ingredients and Cutting in the Butter
First, grab your big bowl and whisk those dry guys—flour, baking powder, soda, and salt—together really well. We need them evenly distributed! Then, toss in your icy cold butter cubes. You can use a pastry blender if you have one, but my hands work just fine, honestly. Just work quickly so the butter doesn’t warm up on you.
You’re looking for a texture like coarse sand mixed with small peas. See those bigger chunks? Don’t mash those out! Those pea-sized pieces are literally building blocks for your flaky layers. If everything looks uniformly sandy, you’ve overworked it already!
Mixing the Dough for Tender Buttermilk Biscuits
Now, make a little well right in the middle of that buttery flour mix and pour in your cold buttermilk all at once. Grab a fork and stir it gently—just enough to get the flour hydrated. Seriously, stop stirring the second you see the dough start to patch together. If you mix too much, you’re developing gluten, and gluten means tough, chewy buttermilk biscuits. We want tender here, not chewy!
Creating Layers Through Folding (The Secret to Tall Buttermilk Biscuits)
Dump that shaggy dough onto your lightly floured counter. Now, gently pat it out into a slightly messy rectangle, maybe 3/4 of an inch thick. This part is key to getting tall biscuits: fold that rectangle over itself in thirds, just like you’re folding a business letter. Give it a gentle press after folding.
Now, turn that folded dough a quarter turn (90 degrees) and pat it out again to that same thickness. Fold it one more time. That’s two full sets of folding and patting! This process—which bakers call lamination—is why your buttermilk biscuits will shoot straight up rather than spreading out flat. It’s simple, but it creates dozens of layers, which is the secret to achieving that light, flaky texture.
Cutting and Arranging the Biscuits
Time to cut! Grab your biscuit cutter—about 2.5 inches is perfect for height. Now, listen to me: press straight down and pull straight up. Do NOT twist the cutter! Twisting seals those beautiful layered edges shut, and they won’t lift high in the oven. If you don’t twist, the steam escapes upward, making tall buttermilk biscuits.
Decide how you want them: place them close together on the baking sheet for softer, pull-apart sides, or spread them slightly apart if you prefer crispy edges all around.
Baking Tips for Golden Brown Buttermilk Biscuits
We are so close to glory! The prep is done, the layers are stacked, and now we just need the oven to do its glorious work. Getting the temperature right on these buttermilk biscuits is crucial because we need a blast of heat to make those butter pockets turn instantly into steam and lift the dough high.
Make sure your oven is fully preheated to 425 degrees F (that’s 220 degrees C). Don’t even think about opening that oven door for the first ten minutes—let them rise in peace! They only need about 12 to 15 minutes total to bake up perfectly.
Right before they go in, give the tops a light, gentle brush with a little pool of that extra cold buttermilk you had leftover. This helps them get that beautiful, smooth, golden sheen you see in pictures. I’ve got a great recipe for roasted asparagus that pairs beautifully with these, too, if you’re looking for a side dish: Simple Roasted Asparagus.
Now, here is an extra little moment of magic I learned after years of tinkering: the second those lovely buttermilk biscuits slide out of the oven, grab a pat of melted, salty butter—the real stuff, mind you—and brush it right over the hot tops. Seriously, do this immediately! It melts right in, creates an unbeatable shine, and deepens that already wonderful buttery flavor. That little move takes them from ‘great’ to ‘I need three more right now!’.
Ingredient Notes and Substitutions for Your Buttermilk Biscuits
I get so many questions about ingredients, especially since people rarely keep buttermilk hanging around the house all the time! Don’t panic if your fridge is empty of the real stuff, though. We can fix that easily, and you can still achieve wonderfully tender buttermilk biscuits.
The main rule, which I stressed before, is TEMPERATURE. If you switch up the flour or the baking powder quantity, it’s usually fine, but if your butter melts before it hits the flour, you’re going to get flat cakes, not tall biscuits! Just plan ahead and keep your butter and liquid straight out of the fridge until the last second.
If you are totally out of buttermilk, here is my old trick for making a quick substitute. It mimics what store-bought buttermilk does to the baking soda, giving you that necessary acidic reaction for lift. You just need regular whole milk (or even 2% in a pinch) and an acid.
Take one cup of milk and stir in one tablespoon of white vinegar or fresh lemon juice. Let that sit on the counter for about ten minutes. You’ll see it curdle slightly and thicken up—that means it’s ready! Use that mixture exactly where the recipe calls for cold buttermilk, and you’ll be just fine. These buttermilk biscuits will still bake up beautifully high.
Also, some folks ask about butter substitutes. Margarine and oils just don’t give you that rich, creamy flavor. If you use them, you lose some of the savory depth, in my opinion. Real, good quality unsalted butter is what makes these buttermilk biscuits worth making!
Serving Suggestions for Homemade Buttermilk Biscuits
What good is a perfect, tender biscuit if you don’t know what to slather on it or serve alongside it? These biscuits are wonderful all on their own—rich, savory, and so buttery—but they truly shine when paired with classic Southern comfort food. They are the vehicle for so much deliciousness!
Since these are truly homemade buttermilk biscuits, they deserve the best toppings. My top pick, especially for a lazy Sunday morning, has to be a really thick, peppery, sausage gravy poured generously over the top. That combination of hot, savory gravy soaking into the flaky layers of the biscuit is pure heaven.
If you’re not feeling gravy, sweetness is absolutely the way to go. I adore these with fresh blackberry jam that I canned last summer, or just a simple smear of salted butter and local honey. The salt in the butter just elevates the whole experience of this buttery biscuit recipe.
For something a little more inventive, especially if you’re having them for dinner instead of breakfast, you can serve them alongside something hearty. Think about serving a stack of these next to a big bowl of my favorite Cajun Shrimp and Grits—that spicy, creamy base is perfect mopped up with a soft biscuit!
Honestly, they are a fantastic short-cut dinner roll too. Keep a batch of these ready to go; they are surprisingly quick once you nail the folding technique!
Storage and Reheating Instructions for Buttermilk Biscuits
These buttermilk biscuits are unquestionably best right out of the oven. I mean, nothing beats that initial warmth and perfect puff! But let’s be real, sometimes we have leftovers, or maybe you just don’t want to make them all at once. Luckily, these freeze and reheat like champions if you treat them right.
If you want to save them for later, you have two options: saving them for the short term (a day or two) or freezing them for the long haul. For short-term storage, just let them cool completely first. Then, place them in an airtight container or a sturdy zip-top bag. I try not to stack them too high, or they might flatten a little under their own weight. They stay great at room temperature for about two days, but if your kitchen is warm, maybe opt for the fridge after day one.
Freezing for Later
If you realize you made a double batch—which happens to the best of us!—freezing is your best friend. You must bake them completely first. Make sure they are totally cool to avoid any weird moisture buildup inside the bag. Store them in a single layer in a freezer-safe, airtight bag. Try to press out as much air as possible before sealing it up tight. They will keep beautifully like this for up to three months.
The Best Way to Reheat Buttermilk Biscuits
Do NOT use the microwave if you can avoid it for reheating plain biscuits! Microwaves are amazing for quick thawing, sure, but they make biscuits rubbery and stiff almost instantly. We want to bring back that flaky texture, not turn them into chewy dough again.
The absolute best method to restore that fresh-baked magic is using the oven. Preheat your oven to 350 degrees F (about 175 degrees C). Place the biscuits directly on the rack—no need to grease anything! Let them warm through for about 5 to 8 minutes. That low, slow heat warms them all the way through and actually dries out any residual dampness on the surface, giving you a crisp exterior again. If you’re reheating frozen ones, they might need 15 minutes.
If you are truly starving and you only have one biscuit, the microwave is okay for a quick fix, but you have to go easy on it. Wrap that single biscuit loosely in a paper towel and zap it for just 10 to 15 seconds. It’ll be hot, soft, and ready for butter, even if it lost a little bit of that crispy outer layer.
Following these simple storage steps means you can enjoy incredible buttermilk biscuits all week long!
Frequently Asked Questions About Fluffy Biscuit Recipe Success
I know baking can sometimes feel fussy, especially when you are aiming for the absolute fluffiest results! Even experienced bakers run into issues, so don’t feel bad if the first batch doesn’t look like a magazine cover. Here are the things people ask me about most often when trying to perfect their fluffy biscuit recipe.
Why are my buttermilk biscuits flat instead of tall?
If your biscuits look more like sad, short pancakes instead of proud, stacked layers, it almost always boils down to one of three things we talked about. First, were your ingredients warm? If your butter melted into the flour before it ever hit the heat of the oven, those layers never got the chance to steam apart, leading to a dense bake. Second, did you overmix the dough? We want it shaggy, not smooth! Overmixing builds gluten which resists rising.
And finally, the biggest culprit for flatness: Did you twist the biscuit cutter? Twisting seals the sides of the dough together. When you seal the sides, the steam has nowhere to go but sideways, causing them to spread out instead of puffing straight up. Press straight down; that’s the trick to high biscuits!
Can I use regular milk instead of buttermilk?
Yes, you absolutely can, especially if you are determined to make a quick batch of homemade buttermilk biscuits and you don’t have any on hand! Buttermilk is acidic, which reacts beautifully with the baking soda we added, giving us a big lift.
To mimic that reaction using regular milk—whole milk works best here, by the way—you just need to add a little acid yourself. It’s super simple: for every cup of regular milk required, stir in one tablespoon of white vinegar or fresh lemon juice. Let that mixture sit on the counter for about five to ten minutes. You’ll see it curdle slightly and look a bit thick; that means you’ve made your own buttermilk substitute!
Use that mixture just as you would the real thing in the recipe. It works! If you want to check out other great recipes for the morning, I have a wonderful classic French toast recipe that works wonders, too.
Don’t forget, these techniques lead to truly tender buttermilk biscuits! If you have any other questions about achieving that perfect Southern texture, drop them below in the comments!
Share Your Experience Making These Buttermilk Biscuits
Well, we’ve done it! We’ve unlocked the secrets to making the tallest, flakiest, and most wonderfully flavorful buttermilk biscuits straight from your own oven. I really hope you feel empowered now to ditch the can opener for good. Baking these should be a joy, not a chore, and I’m always here to help troubleshoot if things go sideways!
I’m dying to know how yours turned out! Did you nail that perfect height on your first try? Did you brush them with that extra melted butter right after they came out? Let me know in the comments below how you found the process. I love hearing about your baking successes.
Did you manage to achieve those wonderfully tender buttermilk biscuits we talked about, or do you have a secret tip you think I should try next time? Feel free to rate this recipe, share pictures if you can, or just leave a note to say hello. If you need to reach out directly for personal advice, you can always use my contact page here: Get in Touch.
Happy baking, and I hope your next breakfast is stacked high with these amazing Southern beauties!
PrintUltra Flaky and Tender Southern Buttermilk Biscuits
Follow these steps to make tall, flaky, and tender buttermilk biscuits from scratch with a rich, buttery flavor.
- Prep Time: 15 min
- Cook Time: 15 min
- Total Time: 30 min
- Yield: 8 servings
- Category: Breakfast
- Method: Baking
- Cuisine: American
- Diet: Vegetarian
Ingredients
- 2 cups all-purpose flour
- 1 tablespoon baking powder
- 1 teaspoon baking soda
- 1 teaspoon salt
- 1/2 cup (1 stick) cold unsalted butter, cut into small cubes
- 3/4 cup cold buttermilk, plus more for brushing
Instructions
- In a large bowl, whisk together the flour, baking powder, baking soda, and salt.
- Add the cold butter cubes to the flour mixture. Use a pastry blender or your fingers to cut the butter into the flour until the mixture resembles coarse crumbs with some pea-sized pieces of butter remaining.
- Make a well in the center and pour in the cold buttermilk. Stir gently with a fork just until the dough comes together. Do not overmix.
- Turn the dough out onto a lightly floured surface. Gently pat the dough into a rectangle about 3/4 inch thick.
- Fold the dough into thirds, like a letter. Turn the dough 90 degrees and gently pat it back into a rectangle about 3/4 inch thick. This folding creates layers. Repeat the fold and pat process one more time.
- Use a biscuit cutter (about 2.5 inches) to cut straight down through the dough. Do not twist the cutter. Reroll scraps once if needed.
- Place the cut biscuits close together on an ungreased baking sheet for softer sides, or slightly apart for crispier sides.
- Brush the tops lightly with a little extra buttermilk.
- Bake in a preheated oven at 425 degrees F (220 degrees C) for 12 to 15 minutes, or until the biscuits are tall and golden brown on top.
Notes
- Keep all ingredients, especially the butter and buttermilk, very cold for the flakiest results.
- Do not twist the biscuit cutter; press straight down to keep the layers sealed, which helps the biscuits rise tall.
- For extra buttery flavor, brush the tops with melted butter immediately after they come out of the oven.
Nutrition
- Serving Size: 1 biscuit
- Calories: 250
- Sugar: 2
- Sodium: 450
- Fat: 13
- Saturated Fat: 8
- Unsaturated Fat: 5
- Trans Fat: 0
- Carbohydrates: 29
- Fiber: 1
- Protein: 5
- Cholesterol: 30