


If you’ve ever bought a loaf of the most cloud-like, impossibly soft bread from a specialty bakery and wondered how on earth they do it, I have the secret, and it’s not witchcraft—it’s science! We are ditching dense, standard sandwich bread forever. I want to walk you through my foolproof recipe for achieving that signature pillowy soft texture in authentic japanese milk bread. I spent years trying to get that delicate crumb right. The breakthrough came when I finally nailed the Tangzhong method. It’s the technique where you cook a small portion of the flour and liquid first. Trust me, this little step makes all the difference because it essentially pre-hydrates the starch, allowing the dough to hold mountains more moisture. Once you see how this bread feels, you’ll be hooked!
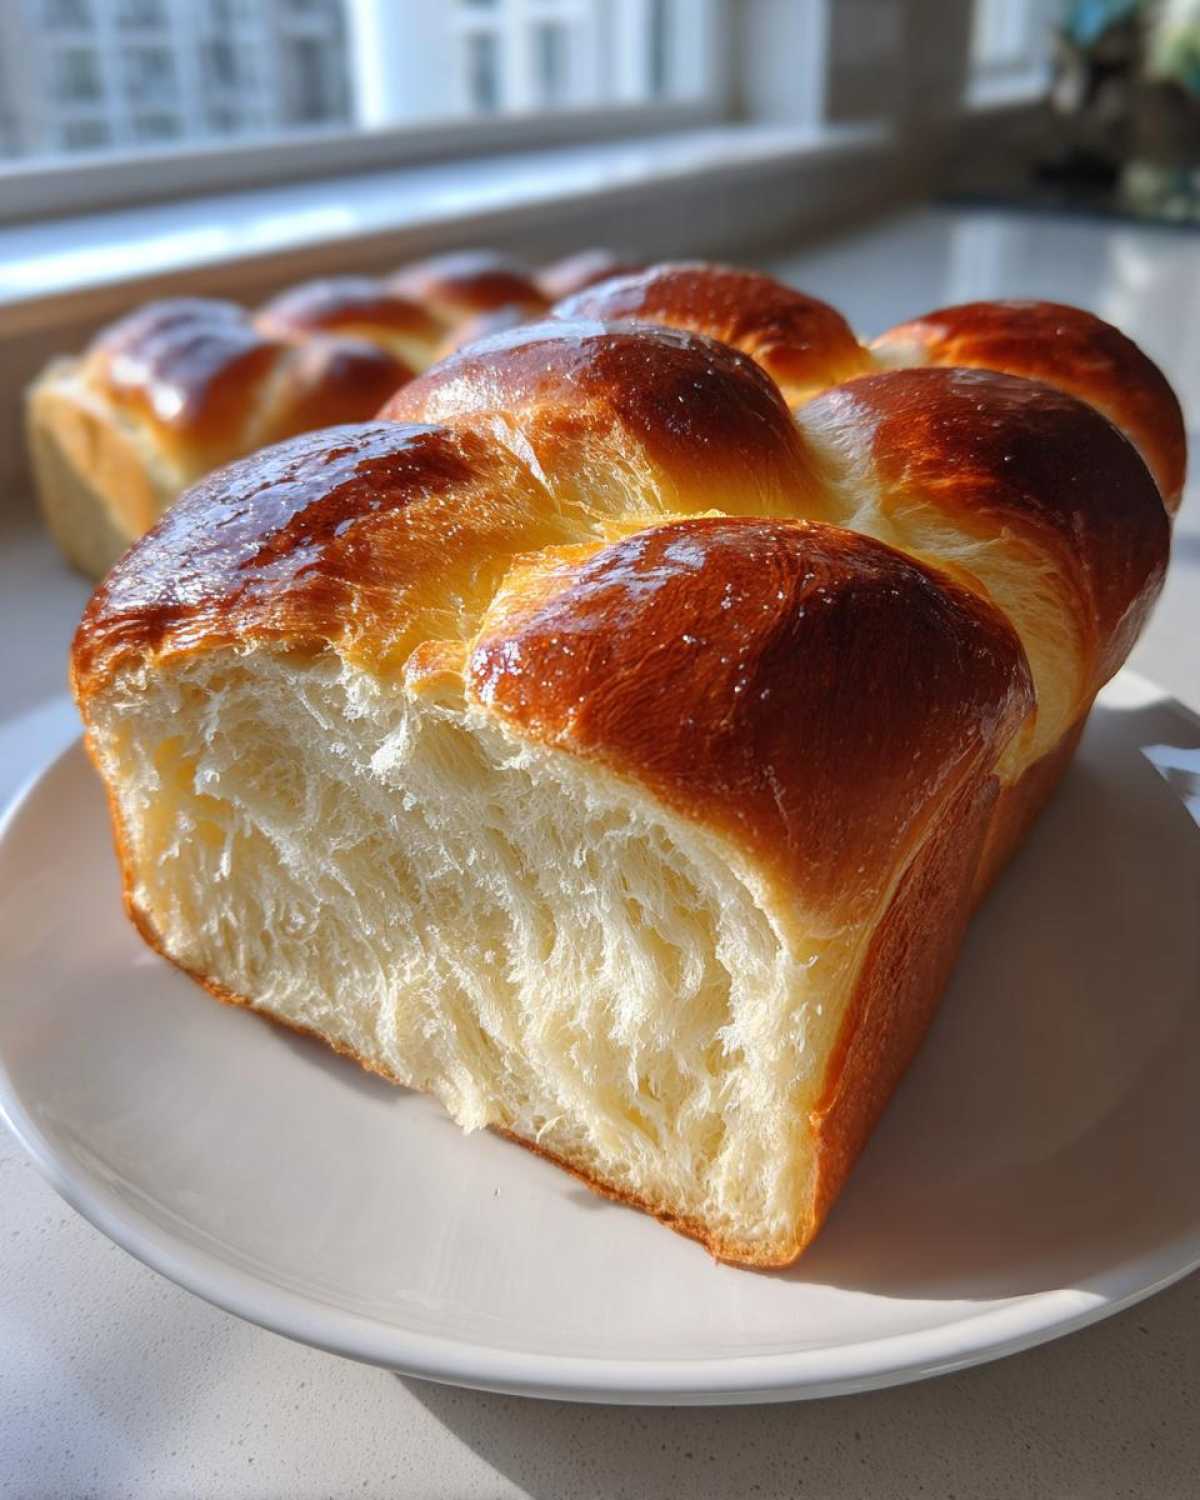
Why This Tangzhong Method Delivers the Best Japanese Milk Bread
Okay, let’s talk about the absolute core magic here—the Tangzhong method. If you want that famous, shreddable, almost cotton-candy texture in your japanese milk bread, this is non-negotiable. What we’re doing is essentially making a little roux first. We cook a small amount of the flour and water until it turns into this thick, glossy paste.
Why bother, you ask? Well, this process is called starch gelatinization. It lets the flour absorb way more water than it normally could. When you add this paste back into your main dough, it traps all that moisture in during the bake. That means you get bread that stays incredibly soft and fluffy for days, way longer than your average loaf!
Tangzhong vs. Yudane: A Quick Comparison for Your Japanese Milk Bread
You might hear people talk about Yudane, especially when they talk about Hokkaido style. They’re cousins! Tangzhong is what I use because it feels a little more gentle; we heat the flour and water slowly using low heat until it thickens around 170°F. Yudane is simpler—you just pour boiling water directly onto the flour. Both achieve incredible results for your japanese milk bread loaf by locking in moisture, but I find Tangzhong more controlled.
Ingredients for Foolproof Japanese Milk Bread (Shokupan)
Gathering your ingredients is half the battle won! Because this japanese milk bread relies so heavily on precision—especially when dealing with the Tangzhong—you need to measure everything carefully. Don’t go substituting bread flour with all-purpose flour here; we need that high protein content for the amazing stretch we’re aiming for.
I like to have everything measured out and ready to go before I even turn on the stove for the paste. It just makes the whole process feel smoother, less chaotic, and way more professional!
For the Tangzhong Paste
This is the wet star of the show. Don’t worry, it’s only two things, but the precision matters for getting that perfect paste consistency:
- 30g Bread Flour
- 150ml Water
For the Main Japanese Milk Bread Dough
Once the Tangzhong is cooled completely—and I mean completely, maybe even chill it a bit—you’ll mix the rest in. Make sure your butter is soft, not melted, and those eggs have been sitting out a bit!
- 250g Bread Flour
- 40g Granulated Sugar
- 4g Salt
- 5g Instant Dry Yeast
- 120ml Whole Milk, cold
- 40g Unsalted Butter, softened
- 2 Large Eggs, room temperature
Step-by-Step Instructions for Perfect Japanese Milk Bread
This recipe might look long, but trust me, the steps are actually really straightforward. The biggest challenge in making japanese milk bread is patience—you have to wait for the Tangzhong to cool and then wait for the rising! But once you see that windowpane test work, you’ll realize the effort is totally worth that cloud-like texture.
Preparing the Tangzhong Method Base
First things first: the magic paste! Whisk together that small amount of flour and water in a little saucepan until it looks totally smooth—no lumps allowed. Now, you need to put this over medium-low heat. Stir it constantly, okay? If you walk away, it burns! You’re looking for it to thicken up until it hits about 170°F (or 77°C); it should really look like a thick, almost pudding-like paste. This is the key step for moisture retention!
Once it hits that texture, pull it right off the heat! Slap a piece of plastic wrap directly onto the surface of the paste. This stops a skin from forming. And here’s the big rule: It has to cool completely. If it’s even a little warm when you add it to the rest of the dough, it’ll mess up the yeast activation later. I often make this the night before.
Mixing and Kneading the Japanese Milk Bread Dough
Time to bring the main ingredients together! In your big bowl or mixer, gently mix the rest of your dry ingredients: the flour, sugar, salt, and the bulk of your yeast. Don’t mix too hard yet, just combine them roughly.
Next, add your cooled Tangzhong, the cold milk, and those room-temperature eggs. Mix this on low speed until it just comes together into a shaggy mess. Now, the butter! Add that softened butter in, and increase the speed slightly. You are going to knead this for a solid 10 to 15 minutes. Seriously, let the machine work! The goal here is gluten development for that incredible fluffiness. You know you’re done when your dough passes the windowpane test. You should be able to stretch a small piece super thin—like thin enough to see light through it without it tearing apart. That elastic stretch means your japanese milk bread structure is perfect.
This dedication to kneading will give you that gorgeous texture, much like when you bake a great crusty Italian loaf, but the inside stays soft. It’s the best of both worlds!
Proofing and Shaping Your Soft Japanese Bread Loaf
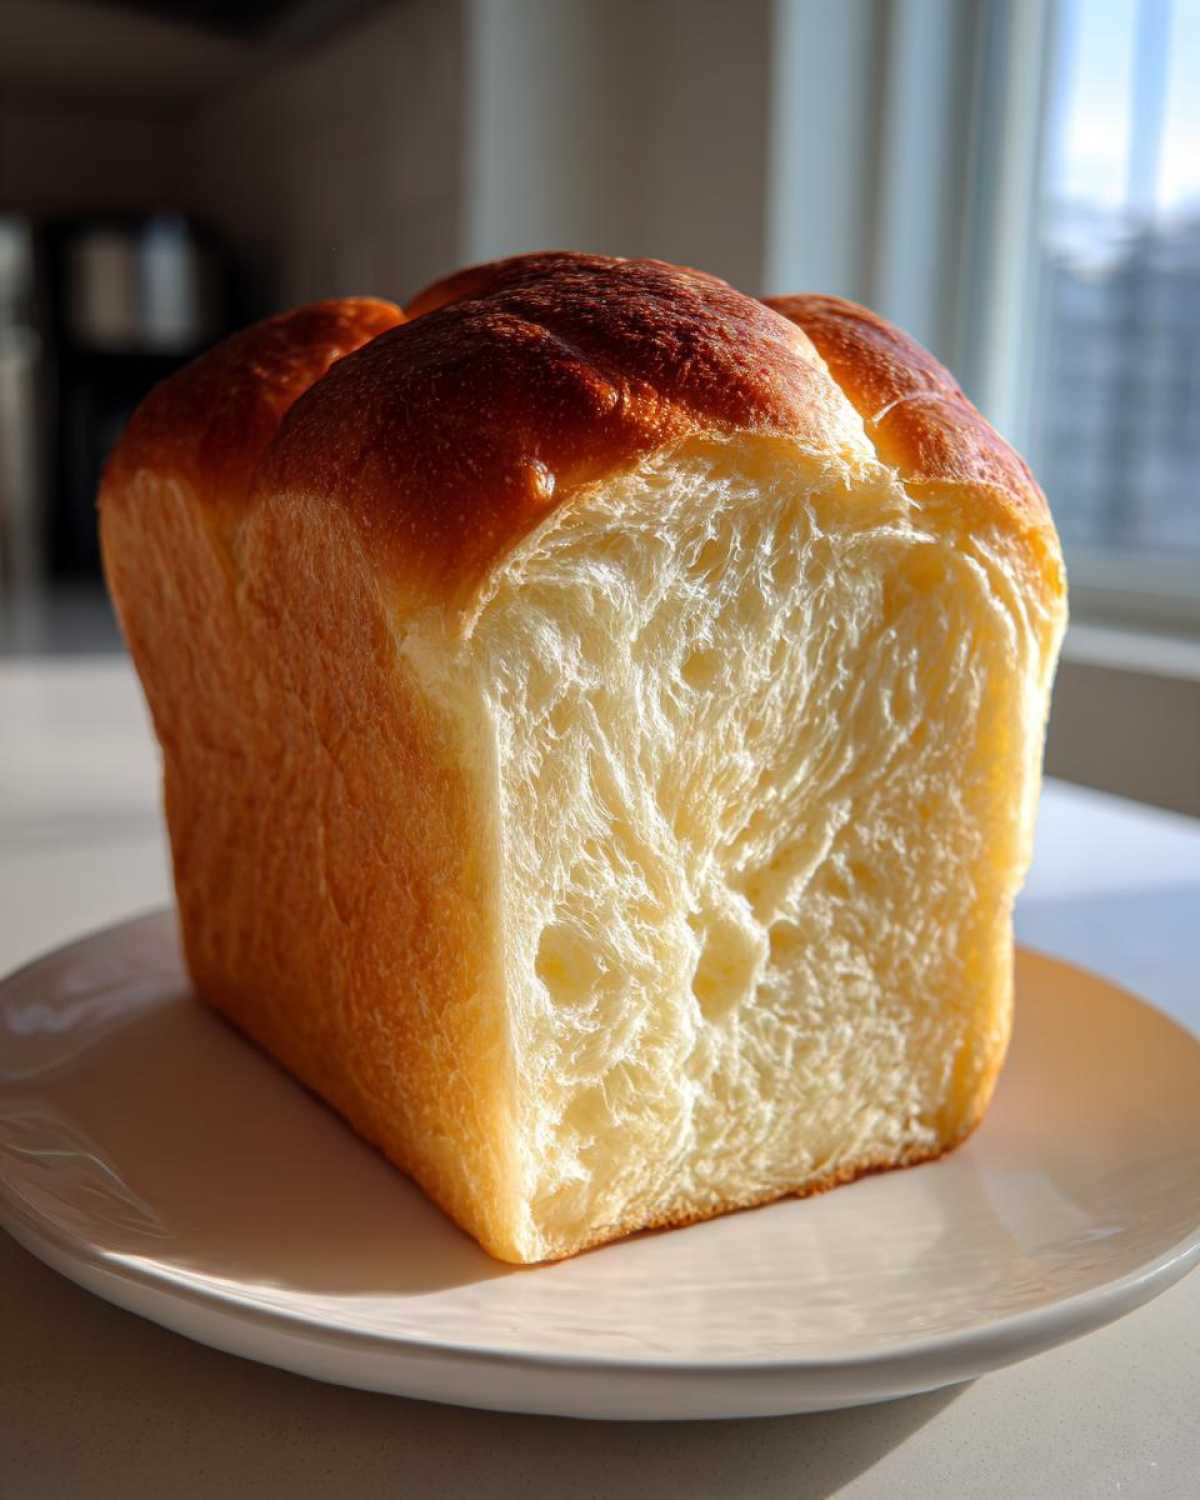
Transfer that beautifully elastic dough into a lightly oiled bowl and cover it up. Let it rise in a warm spot until it doubles, usually about an hour to 90 minutes, depending on your kitchen. Don’t rush this first proof!
Once doubled, gently deflate the dough—just kind of punch the air out softly. Divide the mass into three equal pieces. Now, this shaping step is important for that classic look. Roll each piece into a tight little cylinder or log. Then, place those three logs side-by-side, seam-down, into your greased 9×5 inch loaf pan.
Cover the pan loosely again. For the second rise, you want the dough to nearly double and rise about an inch above the rim of the pan. This usually takes 45 to 60 minutes. Start warming up your oven to 350°F (175°C) during the last 15 minutes of this second proof, so it’s perfectly heated when the time comes.
Baking and Cooling the Pillowy Soft Loaf
Get that loaf into the preheated oven and bake it for about 30 to 35 minutes. You’re looking for a lovely golden brown top, and if you have a thermometer, the center should hit 200°F (93°C). If the top is getting too dark too fast—which happens sometimes—just loosely drape a piece of aluminum foil over it so it doesn’t burn while the inside finishes baking.
The cooling process is almost as important as the baking! As soon as it’s done, get it out of the pan immediately and set it on a wire rack. But here’s the secret to keeping that moisture locked in: while the loaf is still warm—not piping hot, but definitely still warm—wrap it tightly in plastic wrap. This traps all the steam inside, guaranteeing you get the softest pillowy soft loaf possible the next morning. Wait until it’s completely cool before slicing so you don’t squash that beautiful crumb!

Tips for the Ultimate Fluffy Japanese Milk Bread Success
You’ve gone through all the steps—the Tangzhong is perfect, the dough passed the windowpane test—but these last few little tricks are what push your japanese milk bread from just “very good” to “bakery-worthy.” Baking is all about those tiny details, isn’t it? My favorite successes here have always come from paying attention right at the very end.
First, that shiny crust! My grandmother always told me shiny meant professional, and it’s so easy to achieve here. Before you put the loaf into the oven for its final bake, whip up a small mixture of one egg yolk with just a splash of milk. Brush this lightly over the top of the dough. It washes the surface, guaranteeing that gorgeous, deep golden, reflective sheen when it comes out. It just looks so celebratory!
Here’s a tip I learned the hard way: Don’t slice it warm. I know, I know, the smell is intoxicating, and you want to tear off a piece right away, but resist! If you slice while it’s hot, all that trapped moisture—the moisture we worked so hard to keep with the Tangzhong—escapes way too fast. You’ll end up with a slightly gummy interior, and it won’t have that dreamy, pull-apart texture. Seriously, wrap it up tight while warm like I said, and let it cool completely. You want the structure to set.
If you’re looking to refresh a day-old loaf, don’t put it in the microwave! That makes it tough. I put slices of my milk bread into a hot oven (around 300°F) for about five minutes. It crisps the exterior just a little bit and brings back that fresh-from-the-oven softness. It’s like magic on toast!
Ingredient Notes and Substitutions for Homemade Milk Bread
I always get questions about adapting this recipe because people think flour is just flour, right? Wrong! Especially when we are aiming for that amazing, cloud-like structure in our homemade milk bread. The biggest substitution question I get surrounds the flour type. Please, please, stick to bread flour if you can. It has a higher protein content, which means more gluten develops when you knead it. That strong gluten network is what holds all the moisture from the Tangzhong in place, giving you those long, shreddable strands of fluffiness.
Using all-purpose flour will certainly make bread, but it tends to be a bit cakier or denser because the gluten just can’t stretch as much. Think of it like trying to make a trampoline out of tissue paper—it just doesn’t hold up to the weight of all that moisture for that gorgeous rise!
Another thing people often mess up is the butter temperature. I usually say it needs to be “softened,” but what does that really mean? It means you should be able to press a finger into it easily and leave a dent, but the butter shouldn’t look shiny or greasy. If it’s too cold, it won’t cream properly with the sugar, and you’ll end up with air pockets that form too late, making the final crumb inconsistent. If it’s too warm and greasy, it just mixes right into the dough before it has a chance to hold those tiny air bubbles we need for lift.
As for milk and eggs, room temperature is slightly preferred for the eggs because it helps them incorporate smoothly without chilling down the dough batch too much. Cold milk is specified in the main dough mix because we rely on the heat from the oven later to do the heavy lifting, and we want the yeast to activate slowly and steadily alongside the Tangzhong.
Storage and Reheating Instructions for Japanese Milk Bread
You spent time getting that Tangzhong perfect, so let’s make sure this bread stays tasting amazing for days! The beauty of japanese milk bread is that it’s designed to stay wonderfully soft longer than a standard loaf because of all that trapped moisture. The absolute key here is that moment right after it comes out of the oven: wrap it tight in plastic wrap while it’s still warm!
Seriously, that plastic wrap traps the steam, and that steam is what keeps the crumb pillowy. Once it’s fully cooled, you can store it at room temperature. I usually keep mine in a bread box or wrapped tightly in a clean kitchen towel. If your kitchen is really dry, you can double-wrap it in plastic bags, but honestly, with the Tangzhong, it stays amazing at room temperature for a good three or four days.
Now, should you ever put it in the fridge? My advice is no, if you can avoid it. Refrigerators are the enemy of soft bread! They dry bread out shockingly fast, even when it’s covered. If you absolutely must store it for a week or more, freeze it. Slice the loaf first, wrap the slices tightly in plastic wrap, and then place them in a freezer bag. That way, you can just pull out one or two slices when you need them.
When you pull a slice out of the freezer, don’t thaw it on the counter—it gets a weird texture. Instead, treat it almost like toast! Pop that slice straight into a preheated 300°F oven for about five to seven minutes. It sounds counterintuitive, but that gentle heat thaws the bread while crisping the edges in the best way, bringing back nearly all that beautiful fluffiness you loved on day one. It works wonders on revitalizing old moist breads!
Serving Suggestions for Your Shokupan Recipe
Congratulations! You’ve made one of the softest loaves of bread known to humanity. Now, what do you do with it? Honestly, the absolute best way to experience the magic of this japanese milk bread is completely plain. Just slice it thick, maybe lightly toast it, and just marvel at how it practically dissolves in your mouth. That unparalleled lightness is why we went through all that Tangzhong trouble!
But I know you’ll want to use it for more than just sniffing it admiringly! The high-fat, slightly sweet nature of Shokupan makes it completely transformative in classic applications. It’s famous for a reason.
- Ultimate Sandwiches: Forget flimsy white bread! This makes incredible milk bread for sandwiches. A thick slice dipped in egg batter turns into the fluffiest French toast you’ve ever had, which is why I love this recipe for special weekend breakfasts. Try it with high-quality jam, or make the thickest, most decadent grilled cheese you can imagine.
- Thick Toast (Shokupan Toast): This is huge in Japan. Take a very thick slice—almost two inches—and toast it just until the exterior turns golden brown, leaving the interior incredibly soft and custardy. Top it simply with butter and quality honey. It’s simple perfection, and the bread is sturdy enough to hold up to any topping.
- Basic Bread & Butter: Seriously, try it lightly toasted with real, good quality butter melting into those airy pockets. That slight sweetness from the dough really shines through. It’s also fantastic for making the best, most decadent French toast, as the bread soaks up the custard without turning soggy underneath!

Frequently Asked Questions About Japanese Milk Bread
I know you might still have a few little questions bouncing around, especially if this is your first time using the Tangzhong method. It’s easy to feel a little nervous when baking something that promises such a high level of fluffiness! People often ask me about the necessity of the paste or what went wrong when their loaf didn’t turn out quite right. Don’t worry, these are all common hurdles on the way to baking the best milk bread recipe.
Can I skip the Tangzhong or Yudane method and still get soft Japanese Milk Bread?
I really, really wouldn’t recommend it if you’re looking for that true, signature texture. If you skip the Tangzhong, you’re making a very nice, slightly sweet yeast bread, but it won’t be the ultra-soft, shreddable Shokupan recipe everyone falls in love with. You can try substituting some of the liquid with extra milk or using an enrichment method, but honestly, the starch gelatinization from the paste is the non-negotiable science behind achieving that incredible structure. It’s the secret weapon!
Why did my loaf turn out dense instead of pillowy soft?
Oh, that’s the most common frustration! Nine times out of ten, a dense loaf means one of two things: either the gluten didn’t develop enough, or the yeast wasn’t strong enough to lift all that enriched dough. Did you get a good windowpane test? If the dough tore easily, you needed to knead longer—that stretch is vital! Secondly, check your proofing times. This dough needs time to rise properly because of all the fat (milk, butter, eggs). If your kitchen was too cold, the yeast might have just moved slowly instead of vigorously producing gas. A dense loaf of soft Japanese bread can usually be fixed next time by just kneading a few minutes longer.
Is this Homemade Milk Bread the exact same as Hokkaido Milk Bread?
They are certainly siblings in the world of soft Asian baking! Both rely on using lots of dairy for richness. The primary difference is often the enrichment base. True Hokkaido milk bread is often made using a *shredded* cooked dough component, similar to Tangzhong but sometimes even richer in dairy solids. My recipe uses the liquid Tangzhong as described above, which gives you that classic, light, and airy Japanese sweet bread structure that is perfect for toast. Both are wonderfully soft, but the preparation technique varies slightly.
What’s the best way to use this bread if I don’t want to eat it plain?
The best way to utilize this bread is when you want something perfectly tender to soak up flavor! If you’re looking for sandwich ideas, use it for egg salad or cucumber sandwiches; its softness contrasts beautifully with fillings. As I mentioned earlier, it makes the world’s best French toast. You can also use slices to make a simple, rich honey sandwich loaf. It toasts beautifully without becoming brittle, unlike standard bread.
Rate Your Experience Making Japanese Milk Bread
Whew! We made it through the Tangzhong, the kneading, and the waiting games. Now that you’ve mastered the technique for making this incredible, cloud-like japanese milk bread, I really want to know how it turned out for you! Honestly, pulling that first perfect, springy loaf out of the oven is such a blast. Don’t be shy—let me know how you found the process.
Did the windowpane test work perfectly for you? Did your loaf stay fresh for days like magic? Drop a quick star rating right below and tell me what you served your gorgeous Shokupan with! We bakers have to stick together, and sharing results really helps everyone feel confident tackling this process next time. Happy baking!
⭐️⭐️⭐️⭐️⭐️
Tell me about your loaf in the comments below!
PrintFoolproof Japanese Milk Bread (Shokupan) with Tangzhong Method

Make incredibly soft, fluffy, and pillowy Japanese Milk Bread using the Tangzhong method. This recipe yields a loaf that stays fresh for days.
- Prep Time: 45 min
- Cook Time: 35 min
- Total Time: 180 min
- Yield: 1 loaf
- Category: Baking
- Method: Baking
- Cuisine: Japanese
- Diet: Vegetarian
Ingredients
- 60g Milk
- 12g Bread Flour
- 2g Granulated Sugar
- 1g Instant Dry Yeast
- 250g Bread Flour
- 40g Granulated Sugar
- 4g Salt
- 5g Instant Dry Yeast
- 120ml Whole Milk, cold
- 40g Unsalted Butter, softened
- 2 Large Eggs, room temperature
- Tangzhong: 30g Bread Flour, 150ml Water
Instructions
- Prepare the Tangzhong: Whisk 30g flour and 150ml water in a small saucepan until smooth. Heat over medium-low, stirring constantly until the mixture thickens to a paste (about 170°F or 77°C). Remove from heat, cover the surface with plastic wrap, and let it cool completely.
- Activate Yeast: In a small bowl, combine 60g milk, 12g sugar, 12g bread flour, and 1g yeast. Mix well and let stand for 10 minutes until slightly foamy.
- Mix Dry Ingredients: In a large bowl or stand mixer, combine the remaining 250g bread flour, 40g sugar, 4g salt, and 5g yeast. Mix briefly.
- Combine Wet Ingredients: Add the cooled Tangzhong, cold milk, and eggs to the dry ingredients. Mix on low speed until a shaggy dough forms.
- Knead: Add the softened butter. Knead the dough on medium speed for 10 to 15 minutes until it passes the windowpane test (you can stretch a small piece thin enough to see light through it without tearing).
- First Proof: Place the dough in a lightly oiled bowl, cover, and let it rise in a warm place until doubled in size, about 60 to 90 minutes.
- Shape the Loaf: Gently deflate the dough. Divide it into three equal pieces. Roll each piece into a tight log. Place the three logs side-by-side into a greased 9×5 inch loaf pan.
- Second Proof: Cover the pan loosely and let it rise again until the dough has nearly doubled and crests about 1 inch over the top of the pan, about 45 to 60 minutes. Preheat your oven to 350°F (175°C) during the last 15 minutes of proofing.
- Bake: Bake for 30 to 35 minutes, or until the top is golden brown and the internal temperature reaches 200°F (93°C). If the top browns too quickly, loosely tent it with foil.
- Cool: Immediately remove the bread from the pan and cool on a wire rack. Wrap tightly in plastic wrap while still warm to retain moisture.
Notes
- For an extra shiny crust, brush the top of the loaf with a mixture of egg yolk and a splash of milk before baking.
- If you prefer the Yudane method, use hot water instead of cold water for the Tangzhong base.
- Slice the bread only after it has cooled completely for the best texture.
Nutrition
- Serving Size: 1 slice
- Calories: 180
- Sugar: 8g
- Sodium: 150mg
- Fat: 5g
- Saturated Fat: 3g
- Unsaturated Fat: 2g
- Trans Fat: 0g
- Carbohydrates: 28g
- Fiber: 1g
- Protein: 6g
- Cholesterol: 30mg