

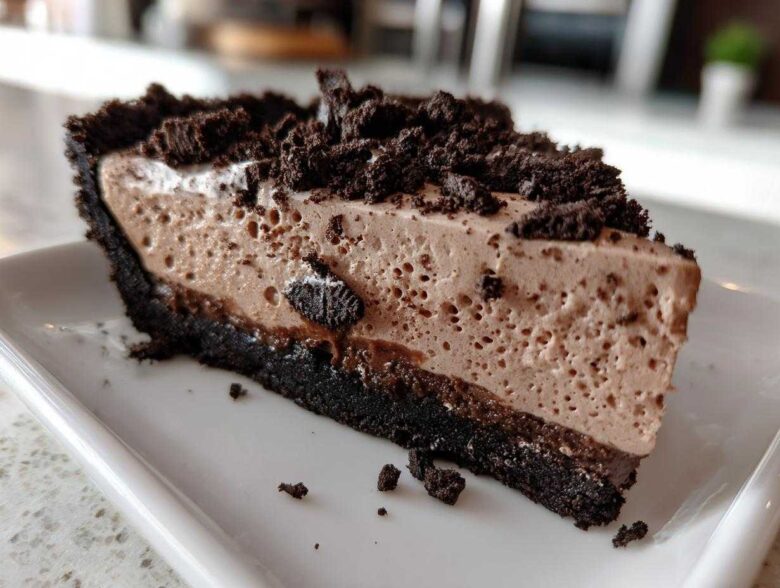
When the chocolate craving hits hard, but the thought of turning on the oven makes you sweat—I have the answer, trust me! This No-Bake Creamy Oreo Pie is the absolute best, most decadent thing you can whip up in minutes when you need a stellar dessert fast. Seriously, this recipe saved me last summer when the AC decided to quit on me right before a big gathering. I needed something spectacular, fast, and totally hands-off, and this simple *oreo pie* delivered! It’s rich, it’s packed with those signature cookies and cream vibes, and nobody ever guesses it hasn’t seen an oven.
It uses basic pantry stuff, comes together in less than twenty minutes of active work, and then it just chills itself into perfection. If you love quick treats, you absolutely have to check out my tips for no-bake trail mix granola bars, but for serious indulgence, this is the pie you need. This is my guaranteed crowd-pleaser for every last-minute gathering!
Why This No-Bake Oreo Pie Recipe Works So Well
Honestly, what’s not to love? This particular *oreo pie* is designed for speed and maximum payoff without any scary oven guesswork. It’s the ultimate answer when you need a showstopper that requires zero fuss. Plus, you can sneak in another fun recipe, like these incredible no bake oreo cheesecake cups, while this pie chills!
-
Quick Preparation Time for Your Oreo Pie
You are only actively mixing for about 20 minutes! That’s why I call it a *Quick Oreo Dessert*. In the time it takes to boil water for pasta, you’ve got the crust pressed and the filling mixed up. So easy!
-
The Velvety Filling Texture of This Oreo Pie Recipe
This isn’t some stiff, rubbery filling. Nope! The combination of the softened cream cheese, instant pudding, and whipped topping creates this impossibly smooth, light, and rich texture. It achieves that perfect *Velvety Oreo Filling*—it just melts in your mouth.
Gathering Ingredients for Your Creamy Oreo Pie Recipe
Okay, this is where the magic starts, and the best part about this *Creamy Oreo Pie Recipe* is that you probably have half of this stuff already! Remember, since this is a no-bake situation, precision really matters so everything sets up beautifully in the fridge. Don’t try to eyeball the butter or the pudding mix—it’s crucial for getting that incredible texture we talked about. If you need another quick, chocolatey idea while your pies are chilling, you might enjoy my recipe for a chocolate peanut butter smoothie!
We are splitting the ingredients into two easy groups: the crust and the filling. Pay close attention to the state of your ingredients, like making sure the cream cheese is truly soft!
Ingredients for the Homemade Oreo Crust
This crust is sturdy, delicious, and completely buttery. Don’t even think about using graham crackers here; we want 100% pure Oreo goodness for our *Homemade Oreo Crust*!
- 1 1/2 cups Oreo cookie crumbs (Trust me, that’s usually about 30 of those sandwich cookies, crushed super fine!)
- 6 tablespoons unsalted butter, melted—it needs to be melted so it binds everything together nicely.
Ingredients for the No Bake Oreo Pie Filling
This is where the richness comes from. Since we aren’t baking, the pudding and cream cheese are doing all the heavy lifting to create this dreamy structure for our *No Bake Oreo Pie*.
- 8 ounces cream cheese, softened—it absolutely has to be softened, or you’ll get lumps!
- 1 cup powdered sugar (sift it if you have time, but don’t stress too much!)
- 1 teaspoon vanilla extract
- 1 (8 ounce) container frozen whipped topping, thawed—and here’s a tip: thaw it in the fridge overnight so it’s cold but fluffy.
- 1 (3.4 ounce) package instant chocolate pudding mix (Yes, instant! We have no time for cooking pudding here.)
- 1 1/2 cups cold milk (Make sure it’s cold milk for the pudding to whip up right.)
- 1 cup crushed Oreo cookies, for topping. (Save these until the very last second!)
Step-by-Step Instructions for the Perfect Oreo Pie
Alright, now that we have our star ingredients gathered, let’s put this show on the road! The process is super simple, but every step needs a little attention so your final *oreo pie* sets up beautifully. You should have about 20 minutes of active stirring before it heads off to chill. If you need a good no-bake side project while you wait, check out how I make my avocado chocolate chip ice cream—it’s surprisingly good!
The most important piece of advice I can give you here is to find room in your fridge for this pie to sit undisturbed for at least four whole hours. That chilling time is absolutely crucial; otherwise, you’re going to end up with a soupy mess instead of those perfect, clean slices!
Creating and Chilling the Oreo Cookie Pie Crust
First things first: that crust needs to be rock solid before the filling goes in. Mix your Oreo crumbs and that melted butter until it looks like wet sand—totally combined, no dry bits left. Press it really, really firmly into your 9-inch pie plate. I use the bottom of a dry measuring cup to really pack it down against the bottom and sides. Once it’s packed solid, stick that crust straight into the freezer while we tackle the creamy part. This freezing step is essential for a sturdy base for your *Oreo Cookie Pie*.
Mixing the Cream Cheese and Pudding Components for the Oreo Pie
We’re making two separate components and then merging them. In one bowl, beat that softened cream cheese with the powdered sugar and vanilla until it’s fluffy and there are absolutely no sugar grains. Set that aside. In a *separate* bowl, whisk the instant chocolate pudding mix right into the cold milk. Whisk it fast for a full two minutes—it’ll start getting thick right away. After a quick five-minute rest, gently fold the pudding mixture into the cream cheese base. Be gentle here! You want to keep all the air we just whipped in. Then, *very* gently fold in half of the thawed whipped topping, followed by the rest. This careful folding ensures you get that fantastic *Oreo Pudding Pie* consistency.
Assembling and Setting the Chilled Oreo Dessert
Once your filling is looking uniform and dreamy, carefully scrape all that glorious mixture into your waiting, cold crust. Try to keep the edges neat! Cover the pie loosely with some plastic wrap—you don’t want it sticking to the top, so drape it gently or use toothpicks to prop it up. Now, into the fridge it goes for a minimum of four hours. Seriously, four hours! This solidifies everything, ensuring this *Chilled Oreo Dessert* slices like a dream.
Tips for the Best Homemade Oreo Crust
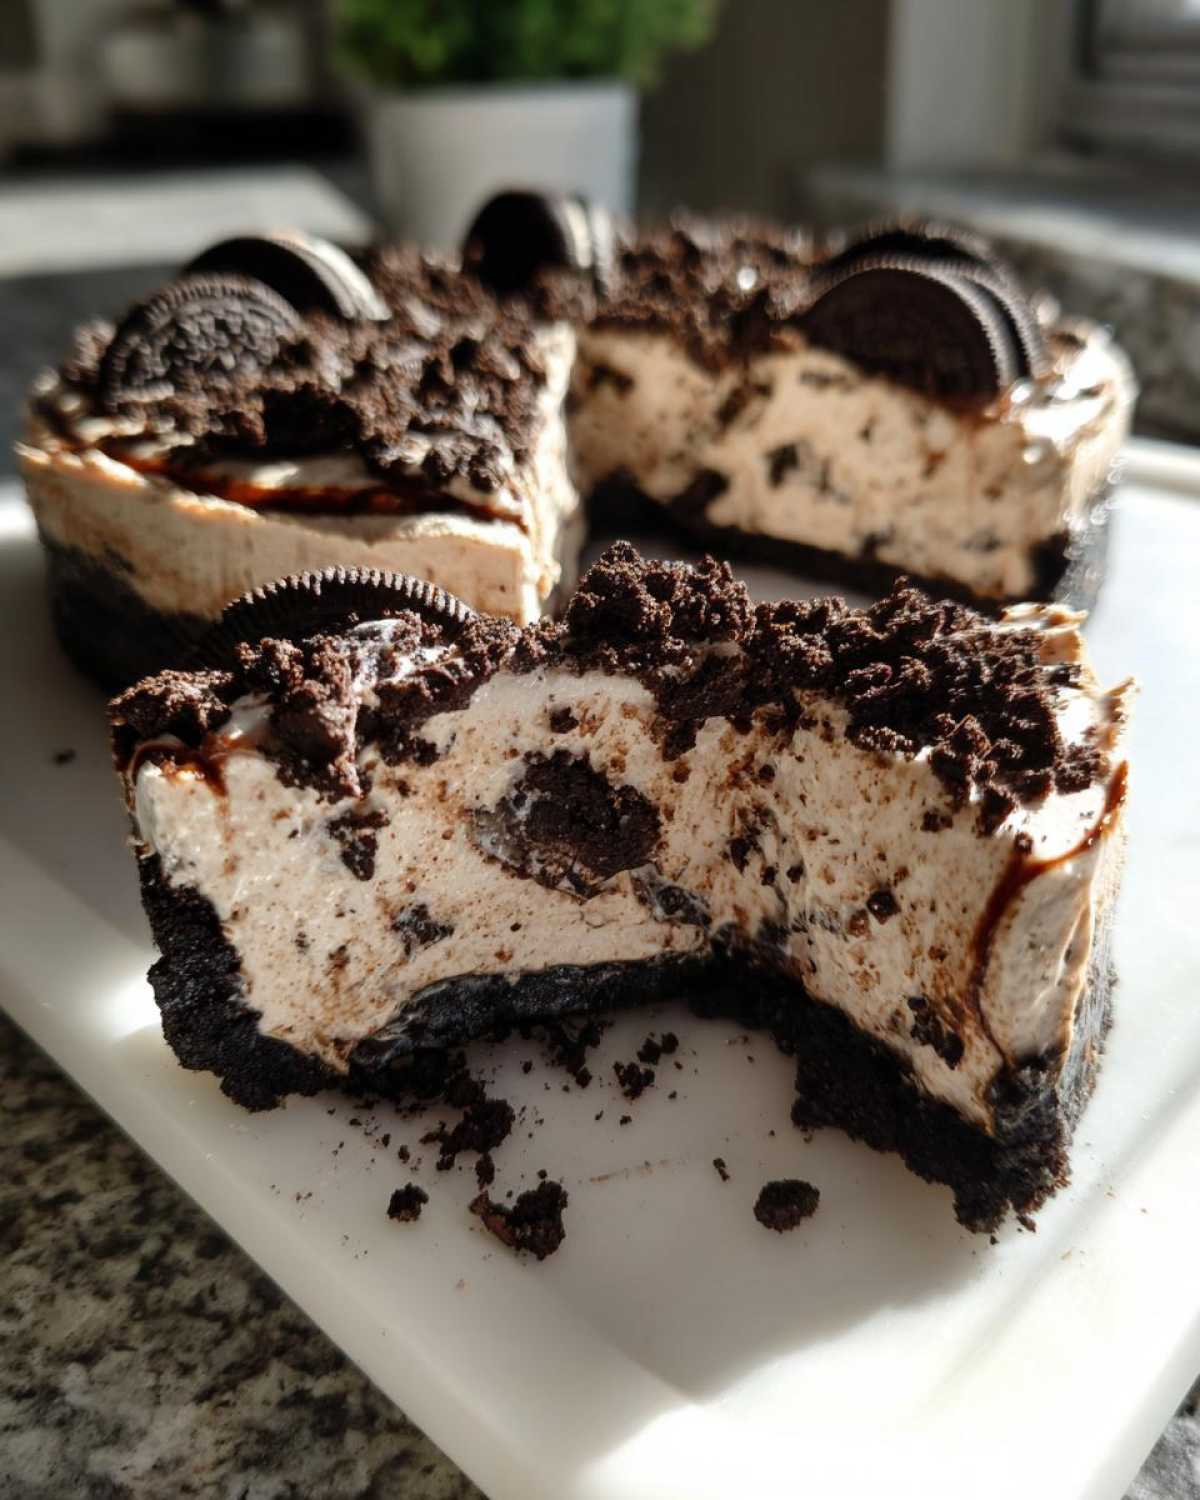
Creating the perfect base is honestly half the battle for any great *Homemade Oreo Crust*. If your crust crumbles when you go to slice it, the whole dessert experience suffers, you know? And if it’s rock hard, you break your teeth! I’ve learned a few tricks over the years to make sure this crust binds perfectly without being indestructible.
First, those cookies need to be truly pulverized. I used to throw them straight into the food processor, but if you’re feeling old-school or just don’t want to drag out the appliance, sticking them in a sturdy zip-top bag and then beating them senseless with a rolling pin works wonders. Just make sure they look like fine, dark sand—no big chunks allowed!
The ratio of butter to crumbs is the second secret. You want just enough melted butter so that when you squeeze a handful of the crumbs, they hold their shape when you open your hand. If it feels too dry, drizzle in an extra teaspoon of butter until it reaches that perfect, damp consistency. You don’t want pools of butter at the bottom of your pie plate!
Now, for the packing—this is where muscle comes in. Scoop the crumb mix into your chilled pie plate. Then, grab the flat bottom of a dry measuring cup (I usually use the 1-cup size) and press down hard, working from the center outwards and moving up the sides. Using the flat bottom lets you apply even, firm pressure across the entire surface. Press it down until it feels absolutely solid—you are creating a little cookie shell for our filling. I always pop this packed crust back into the freezer for at least 10 minutes after pressing, even if the recipe mentions it, just to make sure it sets tight before we pour in that heavy, creamy filling. You can see how I use similar binding techniques when I make my homemade granola clusters!
Ingredient Notes and Substitutions for Your Oreo Pie
Because this is a no-bake marvel, the ingredients really matter since we don’t have the oven setting everything, right? I get so many questions about swapping things out, and I totally get it—sometimes you’re missing one tiny thing! But before you make huge changes, know that this exact combination is what creates the magic in this *oreo pie*. When I tested this recipe without the instant pudding, the filling felt way too heavy and tasted more like thick frosting than a fluffy, light pie!
If you’re looking for alternatives, I’ve got a few suggestions that I’ve tried successfully. If you need ideas for other make-ahead treats, you should look at my tips for making zucchini bread with pecans—it freezes great!
What If I Don’t Have Instant Chocolate Pudding Mix?
Look, instant pudding is designed to set up fast with just cold milk, and that structure is what stops our pie from collapsing later. If you *only* have the cook-and-serve kind, you have to cook it following the package directions, but then you absolutely must let it cool completely in the fridge until it’s thick and gelatinous before folding it into the cream cheese mixture. Otherwise, it’s going to melt that cream cheese right into soup!
Can I Use My Own Homemade Whipped Cream Instead of Cool Whip?
Yes, you absolutely can! This is where you can really upgrade the flavor, but remember: homemade whipped cream is lighter than the stabilizers in whipped topping. If you swap it out, you need to make sure you use heavy cream and whip it to stiff peaks. After you fold in the pudding and cream cheese base, you might need to gently fold in *more* whipped cream than the recipe calls for, just to get that same volume and lightness. Since this recipe uses an 8-ounce container, try whipping up about 2 cups of heavy cream and seeing how it incorporates.
The Essential Role of Softened Cream Cheese
I can’t stress this enough: the cream cheese MUST be softened! If it’s cold, you will end up with little, unmixed clumps of cheese throughout your filling, and no amount of stirring will fix that once the pudding is added. I usually take mine out an hour before I start mixing. If you forget, you can try cutting it into small cubes and microwaving it for about 10 seconds total, checking every 5 seconds. You want it pliable, not melty!
Serving Suggestions for This Easy Oreo Dessert
Once that magnificent *oreo pie* has set in the fridge and you’ve sprinkled on those reserved crushed cookies, the real fun begins: making it look as good as it tastes! Honestly, sometimes I just pull it out of the fridge and call it a day because that chocolate and white filling contrast is already stunning. But if you are taking this to a potluck or gathering, a little extra presentation goes a long way!
This dessert is simple enough for a Tuesday night, but it absolutely shines as a *Party Oreo Dessert*. It’s rich enough that a small slice feels completely indulgent, which means you can serve a crowd without using up tons of effort. If you’re looking for another appetizer that always disappears instantly at parties, check out my foolproof recipe for classic deviled eggs!
Garnishes That Elevate Your No-Bake Pie
While the recipe calls for crushed Oreos on top—and you should definitely do that—here are a few ways I like to dress it up! Keep these garnishes light so you don’t disturb the filling right before serving.
- Chocolate Shavings: Take a vegetable peeler and run it down the side of a good quality bar of chocolate. Those delicate curls look so professional scattered over the top layer of crushed cookies.
- A Dusting of Cocoa: After the pie is sliced, sometimes I lightly dust the exposed filling parts with unsweetened cocoa powder using a fine-mesh sieve. It deepens the chocolate flavor right before you take a bite.
- Fresh Fruit Contrast: I know, I know, it’s a chocolate bomb, but a few vibrant red raspberries or perfectly sliced strawberries placed artfully on top of the sprinkled cookies look incredible. The tartness cuts through the richness beautifully!
Serving Temperature Matters
Because this is a no-bake treat reliant on the stability of the cream cheese and whipped topping, you want to serve it cold! Pull it out of the fridge about 5 to 10 minutes before you plan to slice it. Any longer than that, and the edges might start to weep a little, especially if your kitchen is warm. If you are serving outdoors in the summer heat, try serving individual slices on chilled plates instead of leaving the whole pie sitting out on the buffet table!
Storage and Make-Ahead Tips for Your Oreo Pie
One of the absolute best things about this amazing *No Bake Oreo Pie* is that it just keeps getting better in the fridge—sort of! Because it needs that long chill time anyway, it’s the perfect make-ahead dessert for holidays or when you know you’ll be busy the day of a party. When I make a batch, I like to let it sit for at least 6 hours, just to let the pudding and cream cheese fully bond with that buttery crust.
You can safely store this pie in the refrigerator for up to three, maybe four days maximum. Any longer and the texture of the crust starts changing, which is a tragedy! If you need a great make-ahead snack for later in the week, I’ve got you covered with my recipe for peanut butter oatmeal energy bites, which are freezer-friendly!
Making Components Ahead of Time
You can definitely sneak a head start on this recipe to save time on the day you plan to serve it. The crust is the easiest part to prep in advance! You can mix your Oreo crumbs and butter and press it into the pie plate up to 24 hours ahead of time. Just wrap that whole pie shell tightly in plastic wrap and stick it in the fridge. It hardens up nicely. When you’re ready to go, you can skip the freezer step completely, although I personally still like to pop it in for 5 minutes just to be safe!
I wouldn’t recommend making the entire filling more than about 12 hours ahead of time, though. While the pudding helps stabilize it, the whipped topping can sometimes start to deflate a tiny bit overnight, making the filling less light than when it’s fresh. So, crust today, filling tomorrow—that’s my rhythm!
Covering Your Oreo Pie Properly
If you cover your pie too tightly with plastic wrap right after you make it, you risk the wrap sticking right into the beautiful cookie crumb topping you just sprinkled on. That’s a crying shame! The main reason we cover it is to stop it from grabbing smells from the fridge—nobody wants their dessert smelling faintly of last night’s tuna casserole, right?
Here’s my trick: once the pie is set and the top layer of crumbs is on, I use three or four wooden skewers or toothpicks stuck vertically into the filling around the edges. Then, I loosely drape the plastic wrap over the top of those skewers, creating a sort of tent over the pie. This keeps the plastic from crushing your delicious topping while still protecting the whole *oreo pie* from fridge odors. It works like a charm every time!
Freezing Unfilled Crusts
While I don’t recommend freezing the fully assembled pie—the texture of the cream cheese filling and whipped topping just doesn’t thaw well; it gets gritty—you absolutely can freeze an empty, pressed crust! If you make two batches and only need one pie now, wrap that empty, pressed crust tightly in two layers of plastic wrap and then a layer of foil. It freezes beautifully for up to two months. When you’re ready to use it, just pull it out, let it sit on the counter for about an hour, and proceed with mixing the filling for your next *No Bake Oreo Pie*.
Frequently Asked Questions About Oreo Pie
I know you might still have some burning questions rattling around after looking at all those steps! We all do when we try a new *oreo pie* recipe for the first time. It’s that rich filling that makes everyone wonder about the details. If you’re hungry for more delicious no-bake inspiration after this, you should definitely take a peek at how I put together my no bake tiramisu—another guaranteed winner!
Can I use a baked crust instead of no-bake for this Oreo Pie?
You totally can! If you prefer the texture of a baked crust, mixing the crumbs and butter and then baking it for about 10 minutes at 350°F (175°C) works fine. However, keep in mind that this luscious filling is specifically weighted and balanced to set perfectly against a frozen or chilled crust. If you use a baked crust, the contrast in temperature and texture will be different, but it’s certainly a quick adjustment if that’s what you prefer!
What happens if I skip chilling the Oreo Cheesecake Pie?
Oh, please don’t skip the chill time! That is the most non-negotiable step for achieving that gorgeous, clean slice of *Oreo Cheesecake Pie*. If you try to cut into it when it’s still room temperature, the rich filling won’t be firm enough, and you’ll end up with a beautiful puddle on your plate instead of a nice wedge. Four hours is the minimum, but honestly, overnight is even better for maximum stability!
Is this really a 3 Ingredient Oreo Pie?
That’s a great question that pops up often! While you could technically make a super basic version with just crust crumbs, melted cream cheese, and whipped topping, this recipe includes chocolate pudding and powdered sugar to make it truly magnificent. That extra step gives you that incredible *Oreo Pudding Pie* flavor and structure that makes people ask for the recipe again and again. So, no, this specific recipe isn’t 3-ingredient, but it’s only a few steps more and worth every extra minute!
Can this Chocolate Oreo Dessert get greasy if left too long?
Because we use butter in the crust and the main components are cream cheese and whipped topping—which are very stable once chilled—this *Chocolate Oreo Dessert* does not tend to get greasy like a traditional custard pie might. The fat content is high, but the cold temperature keeps it all firm and velvety. If you notice any slight oiliness after 4 days in the fridge, just scrape it off the top before serving; usually, that only happens if the pie gets slightly warmer than fridge temperature for too long.
Nutritional Estimates for One Slice
So, yes, this is an indulgent, decadent treat, and that’s totally okay! We all deserve a slice of something amazing without worrying about the details too much, but I know some of you like to keep track. As promised, here are the general estimates for one serving of our rich, creamy *oreo pie*. This is based on the recipe yielding 8 good-sized slices.
Just a gentle reminder here—these numbers are based on standard brands and measurements, so they are good guidelines but not exact science! If you swap out the sugar for something else, these will change, of course. If you want to see another recipe that takes diet into account, check out my low-carb take on keto cauliflower mac and cheese!
- Serving Size: 1 slice
- Calories: 450
- Sugar: 35g (Yes, it’s sweet! It’s dessert!)
- Fat: 28g
- Saturated Fat: 15g
- Carbohydrates: 45g
- Protein: 5g
See? Totally worth it for that creamy, chocolatey bite! Enjoy every single bit!
PrintNo-Bake Creamy Oreo Cheesecake Pie

Make this simple, creamy Oreo pie without baking. It features a homemade Oreo crust and a rich, velvety filling.
- Prep Time: 20 min
- Cook Time: 0 min
- Total Time: 4 hr 20 min
- Yield: 8 servings
- Category: Dessert
- Method: No Bake
- Cuisine: American
- Diet: Vegetarian
Ingredients
- 1 1/2 cups Oreo cookie crumbs (about 30 cookies)
- 6 tablespoons unsalted butter, melted
- 8 ounces cream cheese, softened
- 1 cup powdered sugar
- 1 teaspoon vanilla extract
- 1 (8 ounce) container frozen whipped topping, thawed
- 1 (3.4 ounce) package instant chocolate pudding mix
- 1 1/2 cups cold milk
- 1 cup crushed Oreo cookies, for topping
Instructions
- Prepare the crust: Mix the Oreo cookie crumbs and melted butter in a medium bowl until combined. Press the mixture firmly into the bottom and up the sides of a 9-inch pie plate. Place the crust in the freezer while you prepare the filling.
- Make the cream cheese base: In a large bowl, beat the softened cream cheese, powdered sugar, and vanilla extract until smooth. Fold in half of the thawed whipped topping until just combined. Set aside.
- Prepare the pudding: In a separate bowl, whisk together the instant chocolate pudding mix and cold milk for two minutes until the mixture begins to thicken. Let it stand for five minutes.
- Combine the filling: Gently fold the thickened chocolate pudding into the cream cheese mixture until uniform in color. Then, gently fold in the remaining half of the thawed whipped topping.
- Assemble the pie: Pour the filling evenly into the chilled Oreo crust.
- Chill: Cover the pie loosely with plastic wrap and refrigerate for at least 4 hours, or until the filling is firm.
- Serve: Before serving, sprinkle the top evenly with the crushed Oreo cookies. Slice and serve cold.
Notes
- You can substitute store-bought Oreo crumbs to save time.
- For a firmer crust, chill the crust mixture for 10 minutes before adding the filling.
- If you prefer a richer chocolate flavor, use chocolate milk instead of regular milk when making the pudding.
Nutrition
- Serving Size: 1 slice
- Calories: 450
- Sugar: 35g
- Sodium: 320mg
- Fat: 28g
- Saturated Fat: 15g
- Unsaturated Fat: 13g
- Trans Fat: 0.5g
- Carbohydrates: 45g
- Fiber: 1g
- Protein: 5g
- Cholesterol: 55mg