

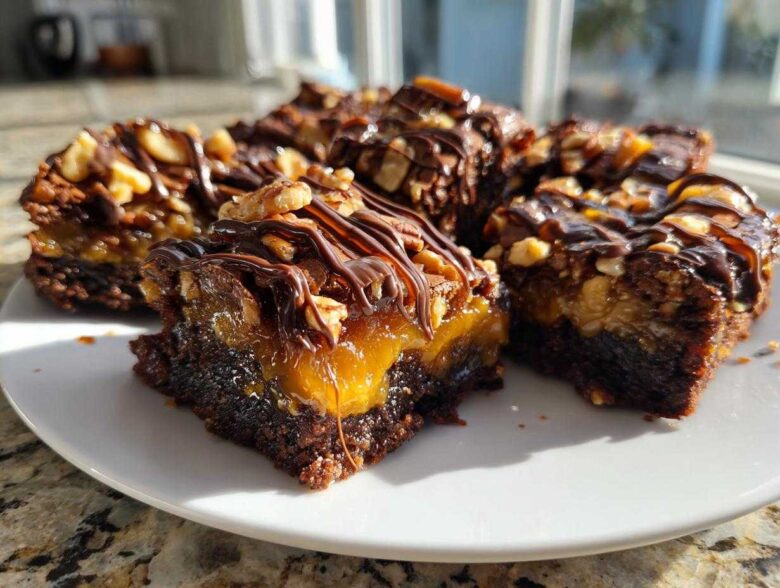
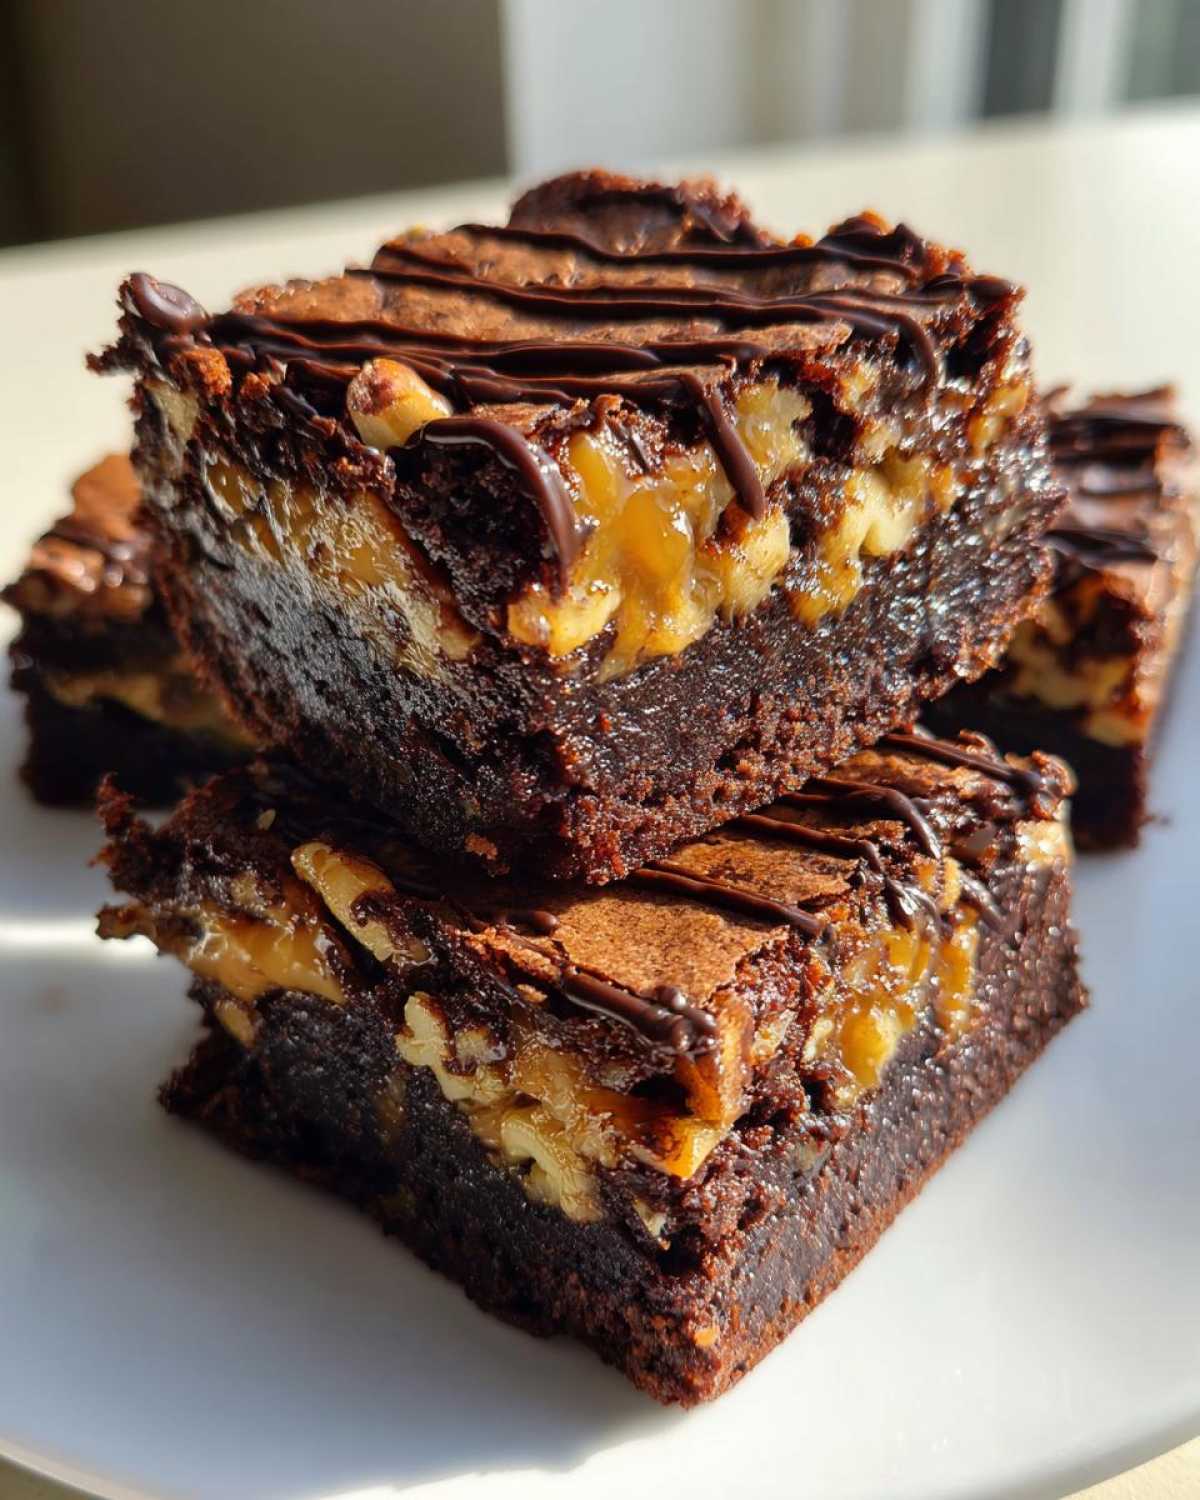
Oh, you know those desserts that just feel like a hug wrapped in chocolate? I live for those! When I’m trying to impress someone, or honestly, just really treat myself after a tough week, I skip the plain chocolate chip cookies and go straight for something truly decadent. My obsession right now? The ultimate chocolate, caramel, and pecan combination—we’re talking about the legendary **turtle brownies**.
Now, making layered brownies sounds intimidating, right? You think the caramel is going to sink to the bottom and burn, or the pecans will just float away? Trust me, I’ve been there. I spent years tweaking recipes to make sure the fudgy base stays perfectly fudgy, the caramel stays gooey where you put it, and every single bite captures that perfect turtle candy magic. This isn’t just throwing things together; this is architectural baking! By the end of this, you’re going to be whipping up the absolute best **turtle brownies** your friends have ever tasted, and you won’t even need a specialized degree to do it.
Why You Will Make the Best Turtle Brownies
These aren’t your average boxed brownies, not even close! I promise you these are going to be your new favorite decadent bar cookie. They hit every single note you want in a gourmet treat:
- You get that unbelievably rich, fudgy brownie base that melts right on your tongue.
- We layer in pockets of warm, buttery caramel that stay gooey, not hard or burnt—that was a massive focus!
- Don’t forget the crunch! Toasted pecans provide the perfect texture contrast.
- This layered method ensures everything stays exactly where it should, so you get flavor in every single square.
Essential Ingredients for Decadent Turtle Brownies
I always say, with recipes as rich as these chocolate caramel nut bars, the quality of your ingredients really shouts at you in the final product. You can’t hide cheap chocolate here! For this recipe, we keep the core brownie ingredients simple—that lets those decadent turtle toppings really shine.
Here is exactly what you’ll need, make sure that unsweetened chocolate is the good stuff; it makes a huge difference when melting!
- 1 cup (2 sticks) unsalted butter – gotta have real butter for richness!
- 4 ounces unsweetened chocolate, chopped – this is the deep, dark chocolate foundation.
- 2 cups granulated sugar
- 4 large eggs
- 1 teaspoon vanilla extract
- 1 cup all-purpose flour
- 1/2 teaspoon salt
- 1 cup caramel sauce, divided – make sure it’s thick so it doesn’t run everywhere!
- 1 cup chopped pecans, divided – I like to gently toast mine first for extra flavor, even though it’s not in the main instructions.
- 4 ounces semi-sweet chocolate, chopped for drizzling – this is what we use for that beautiful finish.
If you want more tips on picking out fantastic chocolate, check out my post on how to choose the best chocolate for baking. Okay, now that we’ve got our shopping list sorted, let’s talk about the tools we need to keep this gooey goodness from sticking!
Equipment Needed to Prepare Perfect Turtle Brownies
Look, you don’t need a giant stand mixer or professional pastry tools for these amazing chocolate caramel nut bars. In fact, I love that these brownies don’t require much fuss! Having the right gear just makes the process smoother, especially when dealing with sticky caramel.
Here’s the simple list of tools that will make whipping up these decadent bars a breeze:
- A good sturdy 9×13 inch baking pan. This gives us the perfect thickness for fudgy edges but soft centers.
- Parchment paper! This is my golden ticket. You need enough to line the pan with an overhang on the sides—that overhang is how you lift the whole slab out later without breaking the caramel layer.
- A medium saucepan. We use this for gently melting the butter and the unsweetened chocolate together. Low and slow is the name of the game here.
- A whisk and a simple rubber spatula or wooden spoon. We only mix lightly, so a hand whisk is perfect for incorporating air into the eggs and sugar without overdeveloping the gluten.
- A wire cooling rack. You absolutely cannot skip cooling! If you try to drizzle the chocolate topping while the brownies are warm, you’re going to have a shiny, melted mess. Patience, friend!
That’s it! No fancy gadgets required for achieving gourmet brownie status. Having these items ready means zero scrambling mid-bake.
Step-by-Step Instructions for Layered Turtle Brownies
Okay, this is where the magic happens! Making these layered treats, these truly decadent chocolate caramel nut bars, is all about timing and gentle hands. We’re building flavor and texture layers, so don’t rush the mixing or the cooling, or you’ll lose that amazing texture that makes them so special. I actually wrote a whole separate guide on a similar technique if you’re looking for something extra fudgy, like my hot chocolate brownies; the non-mixing rule applies fiercely here too!
Preparing the Pan and Batter Base for Your Turtle Brownies
First things first, go ahead and crank that oven up to 350 degrees F. While that’s warming up, prep your 9×13 pan. I cannot stress this enough: grease it *and* line it with parchment paper, making sure you leave those nice little overhang “handles” on the sides. This step is your insurance policy against cracking when you try to lift them out later!
Next, we melt. In a saucepan over low heat—seriously, keep that heat low—melt your butter right along with that unsweetened chocolate. Stir it until it’s just completely smooth and shiny. Take it OFF the heat then! Whisk in your sugar until it’s just combined. Now, beat in your eggs, one at a time, followed by that splash of vanilla. In a separate bowl, give your flour and salt a quick whisk—this just evens things out. Gently fold your dry stuff into the wet stuff. Stop mixing the second you don’t see any more white streaks of flour. If you mix too much here, those luxurious brownies turn cakey, and we want fudgy!
Layering Caramel and Pecans in Your Turtle Brownies
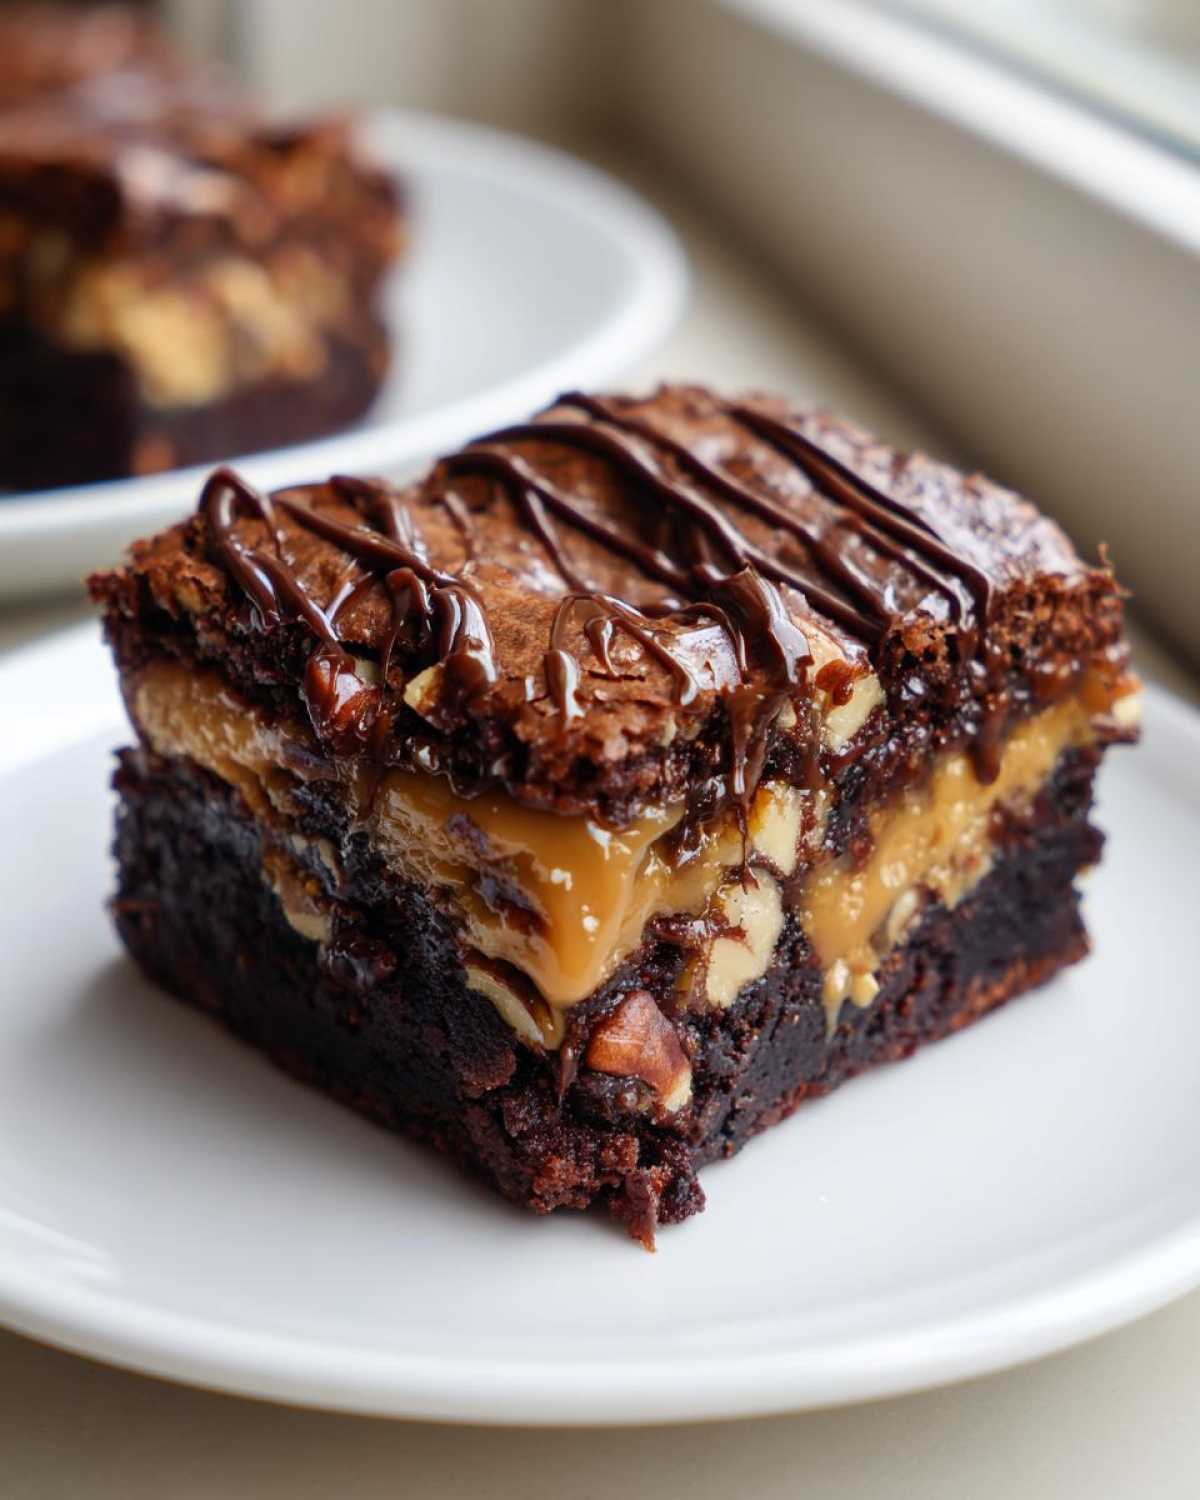
This layering process is what separates a good brownie from a truly gourmet brownie idea. Pour half of your chocolate batter into your prepared pan and smooth it out gently. Now, drizzle half of that beautiful caramel sauce right over the top—don’t try to spread it too much because we want it contained in pockets.
Sprinkle half of your chopped pecans right over that caramel layer. Then, carefully spoon the rest of your batter over everything. For the showstopper top layer, drizzle the remaining 1/2 cup of caramel over the top, followed by the last of those pecans. Want a pro secret? Take a butter knife and gently swirl those top two layers together just a couple of times. This helps distribute the caramel richness throughout the top half instead of having it all pool on the bottom or slide off entirely.
Baking, Cooling, and Finishing the Decadent Turtle Brownies
Pop the pan into that preheated oven for about 30 to 35 minutes. You’re testing for doneness right near the edge—when you stick a toothpick in there, you want to see moist crumbs clinging to it. If it comes out totally clean, you’ve already gone too far and they are going to be dry. If it’s gooey wet batter, give it five more minutes.
This next part requires real patience, my friend. You have to let them cool COMPLETELY in that pan on a wire rack. I mean rock solid cool. If you try to drizzle chocolate on warm brownies, it melts right into the surface and you lose that beautiful, crisp top line. Once they are room temperature, melt your remaining semi-sweet chocolate. Drizzle it artfully across the top—I like messy zigzag lines! Let that chocolate set up (a little chill in the fridge helps speed this up) before grabbing those parchment paper handles and lifting out the whole slab so you can cut perfect squares.
Tips for Achieving Perfect Turtle Brownies Every Time
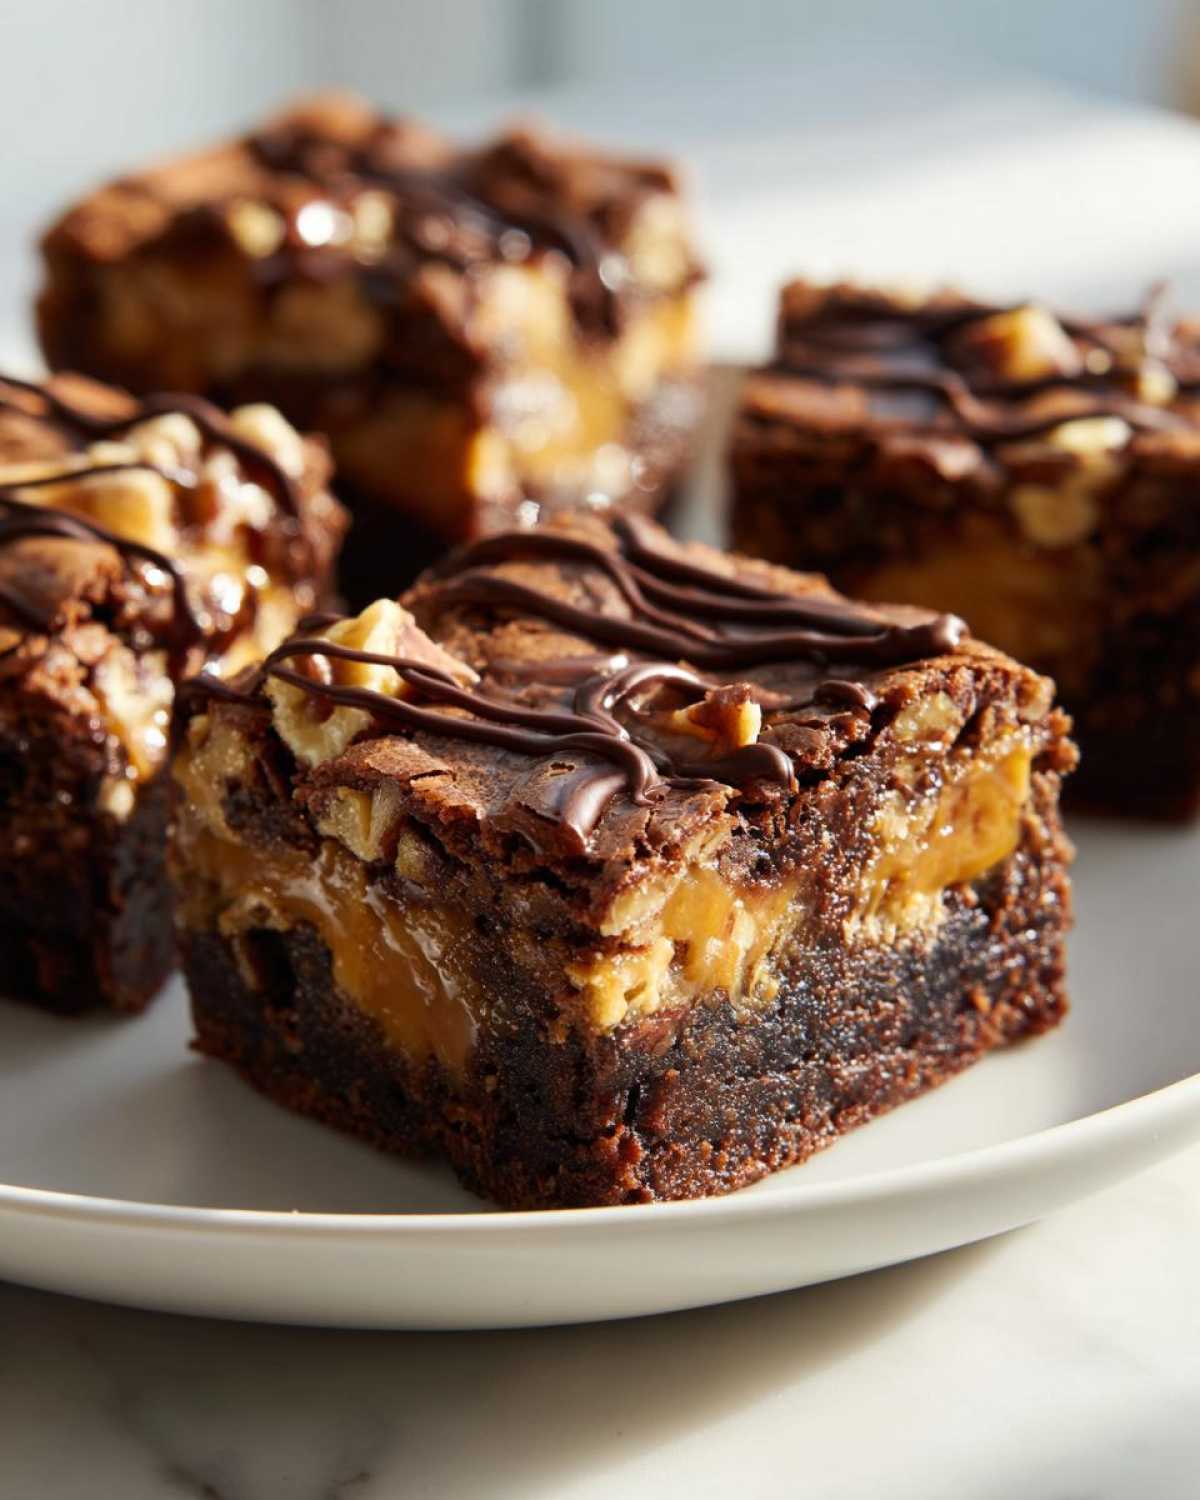
Even with my perfect recipe, sometimes things go a little sideways during the bake, right? That’s normal! Making these incredible turtle brownies is about texture balance—gooey caramel fighting a fudgy background with crunchy nuts, all under a firm chocolate shell. I’ve picked up a few tricks over the years to make sure these **caramel pecan brownies** turn out exactly how they’re supposed to.
My biggest piece of advice? Don’t rush the cooling process. It’s agony, I know, especially when the house smells like melted chocolate and sugar, but trust me, cutting warm brownies is like trying to slice through lava; they’ll just smear everywhere and lose that amazing layered structure we worked so hard to build. If you want to check out some solid science on achieving max fudge factor, take a look at how I maximize fudge in my triple chocolate brownies—the principles apply here too!
Here are my go-to tactics for making sure these turtle brownies are consistently amazing:
- Don’t Use Runny Caramel. If you’re using store-bought sauce, check its thickness first. If it seems thin, try gently heating it on the stove for a few minutes until it thickens slightly just before you layer it in. You want it thick enough to sit on top of the batter layer without immediately sinking.
- The Swirl is Subtle. When you gently swirl the top layer with a knife, don’t go crazy cutting through to the bottom pan. Just a few gentle figure-eights on the surface is enough to break up the caramel slightly so it distributes nicely when baking, but not so much that you destroy the definition between the layers.
- Baking Time is Key for Moisture. I always pull mine out just when those edges look set and the center toothpick has moist crumbs (not wet batter!). These brownies continue to cook using residual heat after they leave the oven. Underbaking by just one minute is better than overbaking by one minute when striving for that perfect moist center.
- Chill Before Drizzling. This seems minor, but it’s huge for presentation. If the brownie top is even slightly warm when you melt that final drizzle of semi-sweet chocolate on top, the drizzle will melt right into the crust, disappearing completely. Let them cool completely, and the drizzle will look sharp, glossy, and completely professional!
Variations on Classic Turtle Brownies
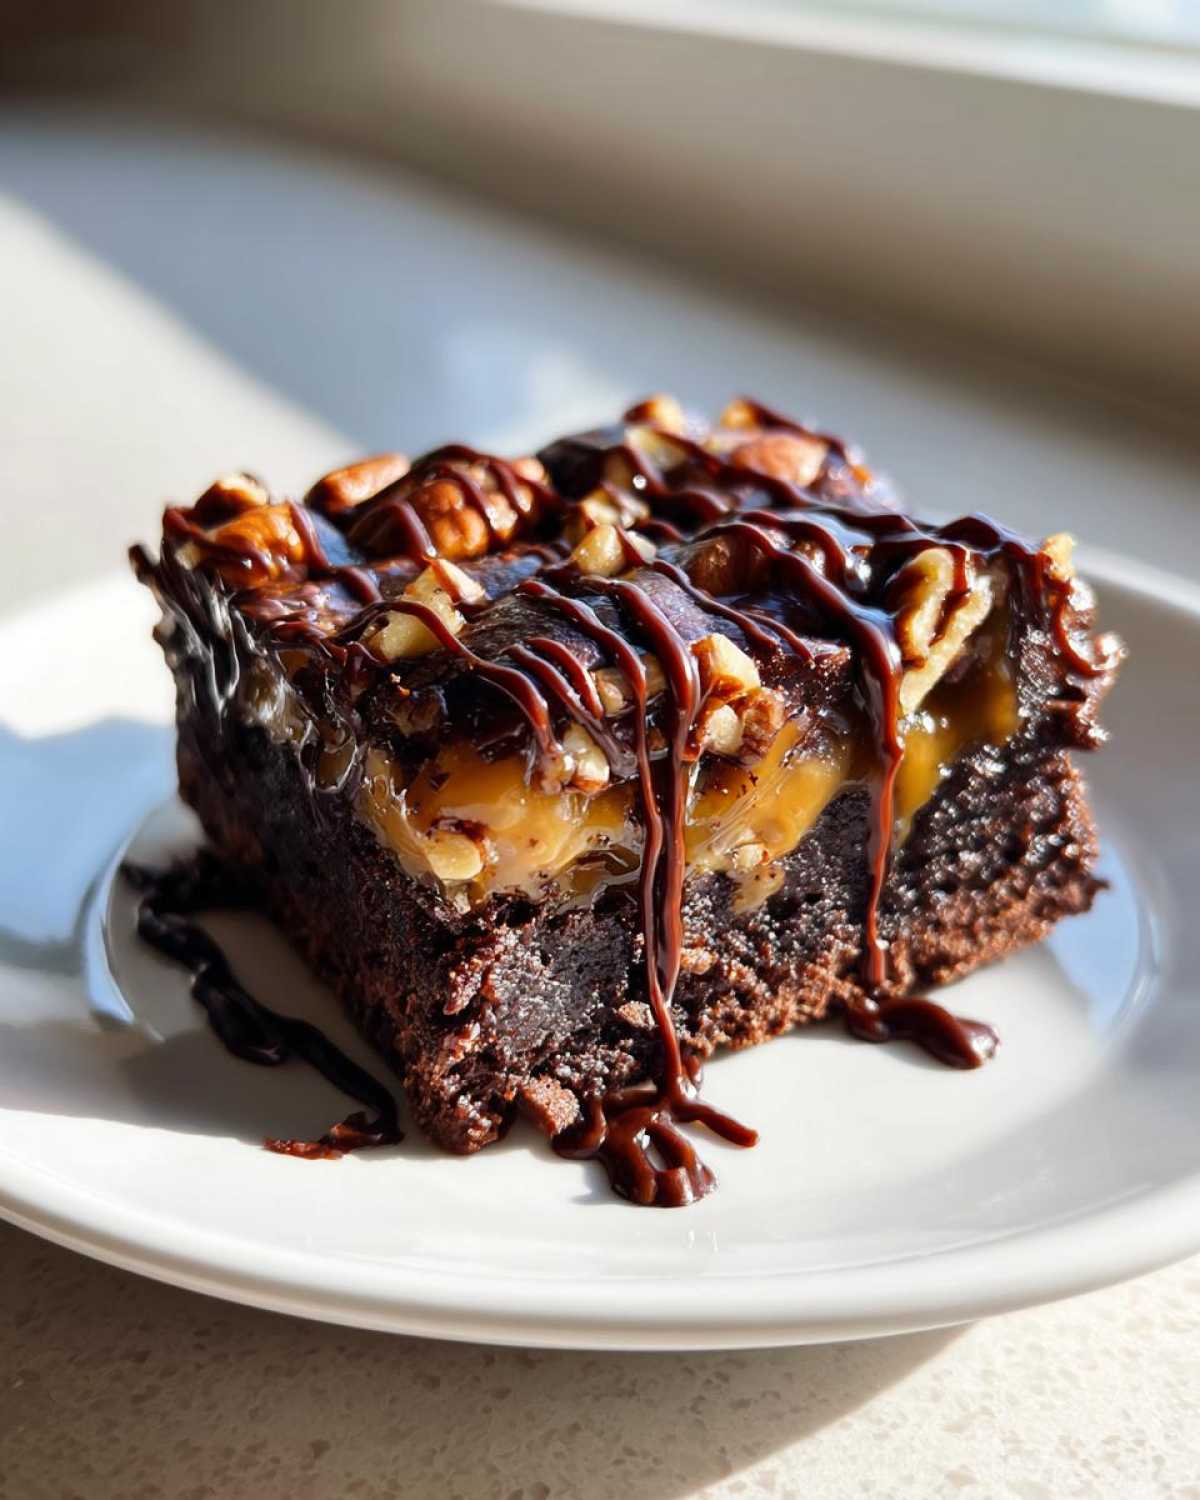
One thing I love about baking is that once you nail the base formula, you can start playing around! These turtle brownies are so rich and satisfying on their own, but sometimes you want to customize them for a party or just use what you have in the pantry. Don’t feel like you have to stick rigidly to the pecan and semi-sweet standard!
I’ve tried a few easy swaps over the years that give you that same gorgeous texture but change up the flavor profile just enough to keep things fun. These are all still amazing **chocolate caramel nut bars**!
Here are my favorite ways to mix things up:
- Nut Swaps: Pecans are traditional for ‘turtle’ flavoring, but they certainly aren’t mandatory! If you aren’t a huge pecan fan, try using roughly chopped walnuts—they provide a slightly earthier taste. For something richer, I’ve used macadamia nuts, and wow, the buttery flavor of macadamias mixed with the caramel is just divine. You can even do a 50/50 mix if you can’t decide!
- Chocolate Layer Adventures: The recipe calls for a semi-sweet drizzle on top, which cuts the richness nicely. But if you are baking for true chocoholics, swap that semi-sweet out for milk chocolate chips or even chunks of dark chocolate (70% cacao or higher) for the drizzle. You’ll get a different intensity of flavor across the top coating.
- Spice It Up: This is subtle, but try adding just a tiny pinch—like 1/8th of a teaspoon—of cayenne pepper right into your dry ingredient mix. It won’t make them spicy, but it really enhances the deep, earthy flavors of the chocolate and caramel. It’s a secret weapon for any gourmet brownie idea!
The beauty of these turtle brownies is how forgiving they are! As long as you keep that fudgy batter base intact and don’t overbake, your variations will be a guaranteed hit.
Storing and Reheating Your Homemade Turtle Brownies
Now that you’ve gone through all the trouble of making these spectacular turtle brownies—which, let’s be honest, takes some serious willpower to accomplish without eating half the pan warm—you need to know how to keep them perfect until you decide to share them. Or not share them! I totally understand.
The biggest challenge with these beauties is keeping that caramel layer happy. We want it soft and gooey, not rock hard like toffee, which can happen if they get too cold, or too soft and messy if they get too warm! For true fudgy perfection, you have to manage their environment.
How to Keep Your Turtle Brownies Fresh at Room Temperature
If you plan on eating these amazing caramel pecan brownies within a day or two, room temperature is actually your best friend. The butter and fats in the brownie base and the caramel stay softer when they aren’t chilled. Just make sure they are sealed up tight!
Here’s my method: Place the cooled, fully set brownies into an airtight container. I try to use a container that’s just big enough so they aren’t rolling around, as that can mess up that beautiful chocolate drizzle. If you need to stack them, place a sheet of wax paper or parchment between the layers to prevent sticking. Keep the container somewhere cool and dry, away from direct sunlight or the oven heat. They should stay gorgeously moist for about two to three days like this.
When to Store Turtle Brownies in the Refrigerator
If you’ve made a massive batch and know they won’t be devoured by day three, or if your kitchen is just really hot, definitely move them to the fridge. Refrigeration will keep them fresh longer, probably up to a week, but there’s a trade-off. The cold temperature will firm up both the brownie and the caramel layers significantly.
When refrigerating your chocolate caramel nut bars, it’s doubly important to use that airtight container. Moisture loss is much faster in the fridge! If they are cut into squares already, you can wrap individual squares tightly in plastic wrap before putting them in the main container. This offers extra protection against fridge smells and drying out.
Warming Up Chilled Turtle Brownies for the Best Bite
If you chilled your brownies and now you want that gooey, fresh-from-the-oven experience? You absolutely can reheat them, but you have to be gentle! We are trying to soften the caramel, not re-melt the chocolate drizzle into a puddle!
For a single square, I think the microwave is fastest, but use short bursts. Place the brownie square on a microwave-safe plate and heat it for just 8 to 10 seconds on 50% power. This usually warms the center just enough to soften the caramel without turning the chocolate topping into soup. If you’re warming a whole pan, the oven is better, but keep it low.
Set your oven to a very low 300 degrees F. Place the entire pan (or just the squares on a baking sheet) in the oven for about 5 to 7 minutes. You’re just trying to take the chill off. Pull them out and let them sit on the counter for just a minute before serving. That wait time allows the residual heat to work its magic on the caramel, making them taste just as decadent as when you first finished that final drizzle!
Frequently Asked Questions About Caramel Pecan Brownies
I get so many questions about these rich treats! It makes sense; everyone wants to nail that perfect balance when making **caramel pecan brownies**. People often ask me how to keep things neat, especially since we’re dealing with gooey textures. Don’t worry, I’ve got the answers to help you avoid messy catastrophes and make perfect **chocolate caramel nut bars** every single time.
Can I use different nuts instead of pecans in turtle brownies?
Absolutely! While pecans give you that classic turtle vibe, feel free to experiment! Walnuts are a fantastic, slightly earthier substitute. If you want something really buttery and luxurious, try toasted slivered almonds or even macadamia nuts. As long as they are roughly chopped, they’ll work great in your turtle brownies.
How do I prevent the caramel from sinking to the bottom?
Ah, the dreaded sinking caramel! This is the main worry when making these, but we built a few defenses into the recipe, like layering half the batter first. To really guarantee that caramel stays high, here’s what I recommend: make sure your caramel sauce is thick, almost like a soft pudding consistency. If it’s too runny, it will seep right through the batter. Also, before you drizzle that first layer of caramel on top of the bottom batter layer, give it a gentle 5-second warm-up in the microwave. Warming it slightly relaxes it just enough so it spreads easily without immediately thinning out and diving to the bottom of the pan. Keeping that initial layer thicker is hugely important!
If you are curious about other recipes where texture control is everything, like how I keep my date nut bread super moist but structured, these principles of ingredient consistency are often the key!
Nutritional Estimates for These Gourmet Brownie Ideas
Okay, let’s get real for a second. When we talk about layering rich chocolate, thick caramel sauce, and toasted pecans, these aren’t exactly “diet food,” and that’s perfectly fine! Sometimes you just need that ultimate, over-the-top indulgence, and these gourmet brownie ideas deliver exactly that. We aren’t shy about the butter and sugar here, because that’s what makes them so unbelievably good!
I always like to give a rough idea of what you’re looking at if you actually manage to stick to just one square (which, spoiler alert, I rarely do). Please remember these numbers are just estimates. They change wildly based on the exact brand of caramel sauce you use or how thick your chocolate drizzle ends up being. For the most accurate count, you’d need to plug in every specific ingredient you use on one of those online calorie counters, but this gives you a good baseline for these amazing chocolate caramel nut bars.
For one square, based on our standard recipe of 24 servings, here’s what the numbers generally look like:
- Serving Size: 1 square
- Calories: 280
- Sugar: 30 grams (I know, I know, but worth it!)
- Sodium: 110 milligrams
- Fat: 16 grams
- Saturated Fat: 8 grams
- Unsaturated Fat: 8 grams
- Trans Fat: 0 grams (Thank goodness for that real butter!)
- Carbohydrates: 33 grams
- Fiber: 1 gram
- Protein: 4 grams
- Cholesterol: 65 milligrams
If you want to read up on the science behind balancing rich recipes like this with healthier options, I occasionally post some simple baking thoughts over at my main blog index. But honestly, for these turtle brownies, just enjoy every single, fudgy, caramel-coated bite!
PrintDecadent Turtle Brownies
Make rich, fudgy brownies layered with gooey caramel and crunchy pecans for a turtle candy inspired dessert.
- Prep Time: 20 min
- Cook Time: 35 min
- Total Time: 55 min
- Yield: 24 servings
- Category: Dessert
- Method: Baking
- Cuisine: American
- Diet: Vegetarian
Ingredients
- 1 cup (2 sticks) unsalted butter
- 4 ounces unsweetened chocolate, chopped
- 2 cups granulated sugar
- 4 large eggs
- 1 teaspoon vanilla extract
- 1 cup all-purpose flour
- 1/2 teaspoon salt
- 1 cup caramel sauce, divided
- 1 cup chopped pecans, divided
- 4 ounces semi-sweet chocolate, chopped for drizzling
Instructions
- Preheat your oven to 350 degrees F. Grease and line a 9×13 inch baking pan with parchment paper, leaving an overhang on the sides.
- Melt the butter and the 4 ounces of unsweetened chocolate together in a saucepan over low heat, stirring until smooth. Remove from heat.
- Whisk the sugar into the chocolate mixture until combined. Beat in the eggs one at a time, then stir in the vanilla extract.
- In a separate bowl, whisk together the flour and salt. Gradually add the dry ingredients to the wet ingredients, mixing until just combined. Do not overmix.
- Pour half of the batter into the prepared pan. Drizzle half of the caramel sauce (1/2 cup) over the batter. Sprinkle half of the chopped pecans (1/2 cup) over the caramel.
- Spoon the remaining batter over the pecan and caramel layer. Top with the remaining 1/2 cup of caramel sauce and the remaining 1/2 cup of pecans.
- Bake for 30 to 35 minutes, or until a toothpick inserted near the edge comes out with moist crumbs attached.
- Let the brownies cool completely in the pan on a wire rack.
- Once cool, melt the 4 ounces of semi-sweet chocolate. Drizzle the melted chocolate over the top of the cooled brownies.
- Let the chocolate set before lifting the brownies out using the parchment paper overhang and cutting into squares.
Notes
- For the best swirl effect, use a knife to gently swirl the caramel layers before baking.
- Use store-bought caramel sauce for ease, or make your own thick caramel sauce.
- Chill the brownies for 30 minutes after drizzling the chocolate to help it set faster.
Nutrition
- Serving Size: 1 square
- Calories: 280
- Sugar: 30
- Sodium: 110
- Fat: 16
- Saturated Fat: 8
- Unsaturated Fat: 8
- Trans Fat: 0
- Carbohydrates: 33
- Fiber: 1
- Protein: 4
- Cholesterol: 65