


Oh, that smell! Isn’t it the best feeling in the whole world when the aroma of sweet, buttery cinnamon starts drifting from your oven? It truly signals that something special is happening—the perfect slow weekend breakfast or brunch moment.
Kenji and I, we have tried many recipes over the years, but I promise you, this one for homemade cinnamon rolls is truly my absolute favorite. It’s the recipe that makes our house smell like a wonderful bakery. I’ve refined this yeast dough recipe until it yields the softest, fluffiest rolls you could imagine, all swirled around that rich, gooey cinnamon filling. This isn’t just a sweet breakfast recipe; honestly, sharing these with our grandchildren when they visit is one of my greatest comforts now that we live in New York. If you love this type of big, comforting bake, you might also want to check out our recipe for cinnamon roll casserole sometime! Follow my steps closely, and you’ll have the best cinnamon roll you’ve ever made at home.
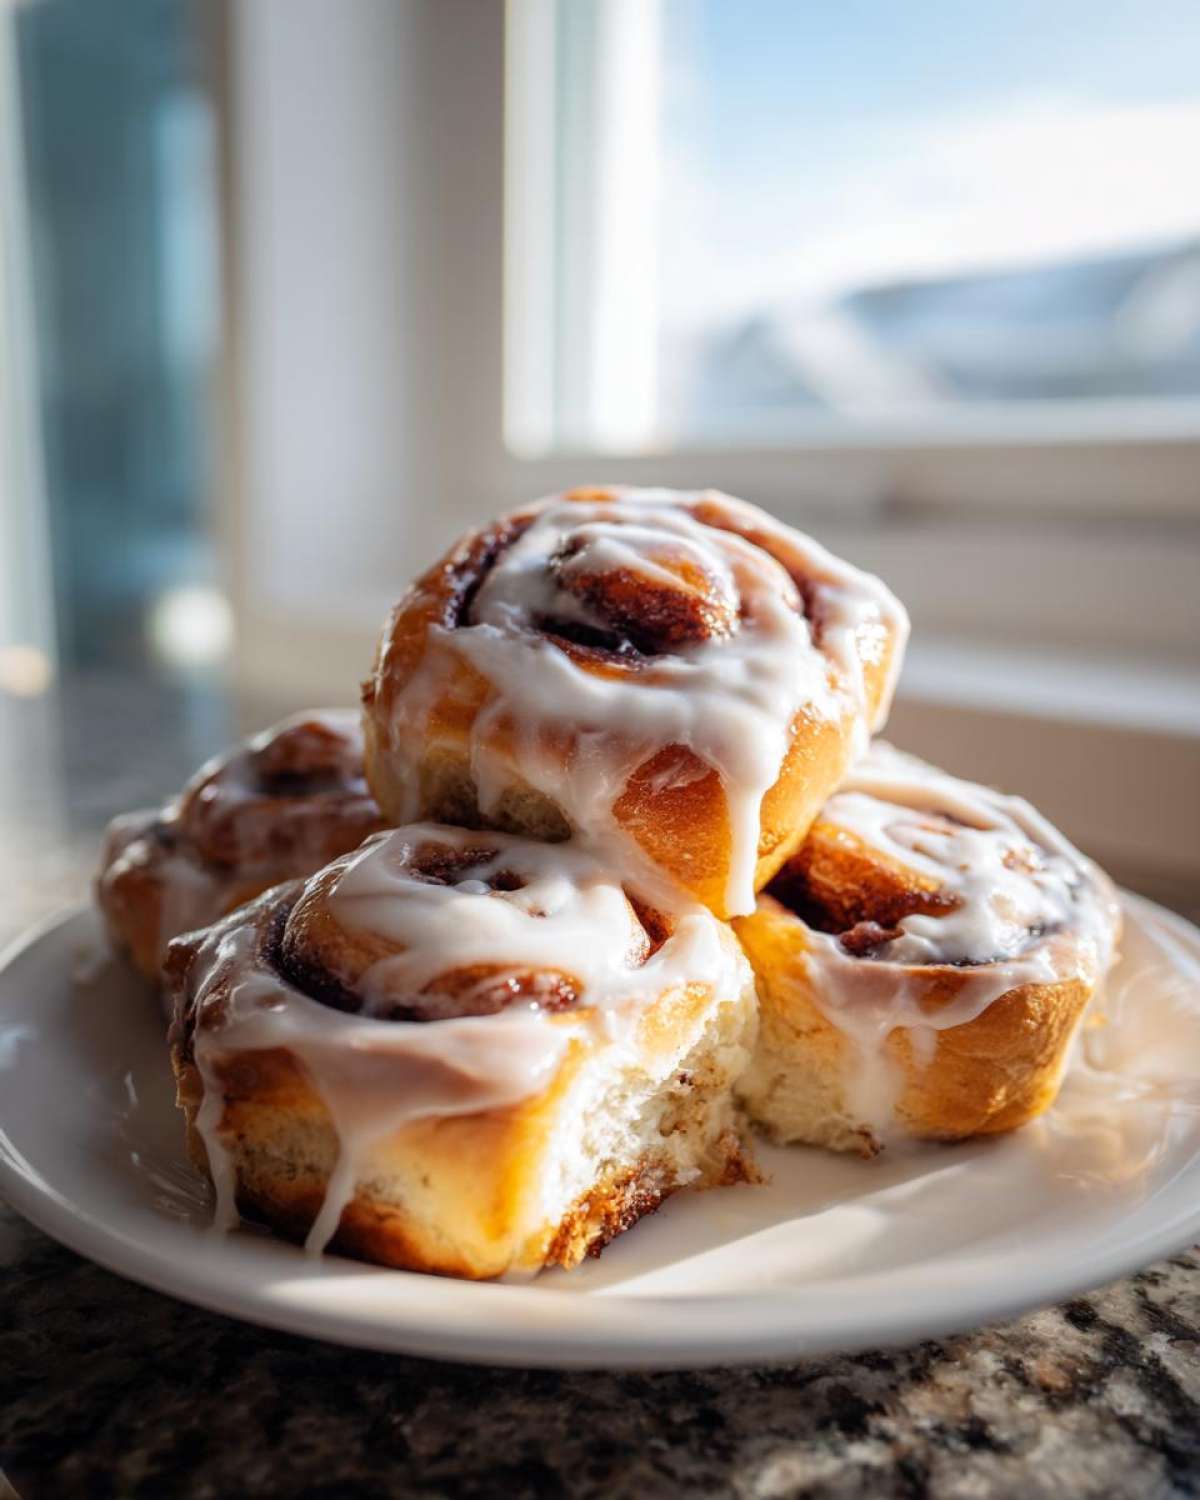
Why This is the Best Cinnamon Roll Recipe You Will Ever Make
I know, everyone claims theirs is the best cinnamon roll recipe, but trust me when I say this one delivers that melt-in-your-mouth texture every single time. If you’ve ever been intimidated by yeast—don’t be! This dough is surprisingly easy, which makes it one of my favorite easy cinnamon rolls to prepare. The secret is definitely in the richness, which keeps them wonderfully soft even the next day.
Achieving Bakery-Quality Softness in Your Homemade Pastry
The softness comes from two main things we do differently. First, we use both butter *and* eggs in the dough, which enriches the structure so much more than just milk alone. Second, proper kneading makes all the difference in this homemade pastry. When you knead until the dough looks smooth and elastic, you are building the strength needed to hold all that buttery filling without collapsing. It results in a gorgeous, pillowy final product!
Gathering Ingredients for the Perfect Cinnamon Roll
To set ourselves up for success—and to ensure we get those deeply satisfying, gooey centers—we need to be very precise with our ingredients. I know it sounds fussy, but trust me, paying attention to things like temperature ensures the yeast behaves! Everything needs to be ready before we even start mixing, which is part of that wonderful Japanese preparation spirit Kenji always admires.
When you look at the full ingredient list, it might seem long, but building the flavor foundation is everything. You really want fresh, full-fat ingredients here because this is a splurge, isn’t it? If you prefer to see how we make a fantastic matching topping later on, you can always peek at my guide for the best classic cream cheese frosting recipe.
Dough Ingredients: Building a Rich Yeast Roll Recipe Base
The first thing to check is your milk! It can’t be cold, and it definitely can’t be boiling hot. We need it warmed just right—think bath water temperature, around 105°F to 115°F. This happy medium is what wakes up our active dry yeast, which is the heart of this yeast roll recipe. Also, please make sure your eggs and butter are at room temperature. Cold ingredients shock the yeast and make the dough hard to work with, which is the opposite of what we want for our soft rolls!
The Essential Gooey Cinnamon Filling
This filling is where the real magic happens for your **cinnamon roll**. We use light brown sugar here, not white sugar, because that molasses flavor deepens beautifully when it caramelizes in the oven. You need a generous amount of ground cinnamon, too—don’t be shy! We want a 1:2 ratio of cinnamon to sugar or even closer to 1:1.5 if you are feeling adventurous. When you spread the softened butter edge-to-edge, it acts like glue, holding that sugary spice mix right where it belongs, ensuring you don’t end up with rolls where all the filling drips out during baking!
Step-by-Step Instructions for Soft Cinnamon Rolls
Now we put everything together! It’s time to turn those beautiful ingredients into actual cinnamon rolls. Don’t rush through the rising times; that is where the softness is born. We follow a very set path here, mixing our wet and dry parts carefully before we even think about shaping. Making good bread, even sweet bread like this, takes a little waiting, much like learning to make Kenji’s favorite soft, fluffy naan bread!
Activating Yeast and Kneading the Cinnamon Roll Dough
First, we wake up that yeast in the warm milk, waiting patiently for those happy bubbles to appear—usually about 10 minutes. Once foamy, you mix it in with the flour, sugar, salt, softened butter, and eggs. I usually start mine in the stand mixer until it just pulls together into a shaggy mess. Then, increase the speed slightly and let it work its magic for 5 to 7 minutes. You are looking for dough that feels smooth when you touch it, and it should be a little tacky, like it wants to stick to you just a touch, but it shouldn’t be leaving massive gobs of stickiness on your hands or the bowl. That’s how you know you’ve developed the structure!
After kneading, tuck it into an oiled bowl, cover it up, and let it rest in a warm spot until it has doubled in size—I usually find this takes about an hour and a half on a cool day.
Rolling, Filling, and Cutting Your Cinnamon Roll Log
Once it has risen nicely, gently punch the air out! On a floured surface, roll that soft dough into a big rectangle, about 12 inches by 18 inches. This is important: take your extra softened butter and spread it evenly across the surface. You must go almost to the edges, but please leave about a 1-inch strip clean along one long side. This clean edge helps us seal the log later! Next, sprinkle that glorious brown sugar and cinnamon mixture evenly over the butter. Now, starting on the side *opposite* the clean border, you must roll it up tightly, like you are rolling a jelly roll. Give that final seam a good pinch closed! Then grab a sharp knife or unflavored dental floss and cut the log into 12 equal pieces. See how tight those swirls are? Quality **cinnamon roll**!

The Final Proof and Baking for Golden Perfection
Place your cut rolls snugly into your prepared pan. Cover them loosely so they can breathe but stay warm, and let them have their second nap for about 30 to 45 minutes until they look puffy. Don’t skip this! When they look ready, pop them into a preheated oven at 375°F (190°C). I often tell people to cover the pan with foil for the first 15 minutes of baking; this traps steam, which guarantees those bases stay super soft. After 15 minutes, take the foil off so the tops turn that perfect golden brown, usually taking another 10 minutes.
Crafting the Ultimate Cream Cheese Icing for Your Cinnamon Roll
After all that waiting and baking, we’ve earned the best part: the glaze! A great **cinnamon roll** isn’t finished until it’s drowning in luscious cream cheese icing. This step is so easy it feels like cheating, but the rich tang balances that overwhelming sweetness perfectly. It’s a beautiful contrast that elevates this from a simple bake to a true, standout sweet breakfast recipe.
The absolute biggest rule here, and I cannot stress this enough, is that your cream cheese and your butter must be perfectly softened. I mean soft enough that you can press a finger into them easily, but they absolutely cannot be melted or greasy-looking. If they are too warm, your icing will become soupy and run right off the rolls before it sets up nicely. We want spreadable, not drippy!

When you start beating them together in your mixer, they should look smooth and creamy before you even think about adding the powdered sugar. Start adding the sifted powdered sugar slowly, too—dusting it in helps prevent a big sugar cloud explosion in your kitchen! I always add vanilla extract early, but I hold back on that last bit of milk. I use the milk just to reach that perfect consistency where the icing holds its shape slightly on a spoon but still flows gently when you drizzle or spread it across the warm rolls. If you used cold rolls, you can use a thicker icing, but for warm rolls, that slight looseness is just heaven!
Tips for Success When Making Cinnamon Rolls
Baking truly is a mix of science and love, isn’t it? Even with the very best recipe, sometimes little troubles pop up in the kitchen. I want to share a few things I’ve learned over the years—especially those little tricks that make my rolls turn out perfectly every time, so you don’t have to worry about a tricky rise or gooey leaks.
If you find yourself struggling with dough that refuses to rise, it’s almost always the temperature of your milk. Too cool, and the yeast sleeps; too hot, and you’ve killed it! Always check that 105°F to 115°F window. Another thing that bothers people is a runny filling. That’s why we spread the softened butter all the way to the edges—it acts as a seal holding the sugar in place until the dough is baked. If you’d like another comforting breakfast bake that doesn’t rely on yeast, you might enjoy our easy moist sour cream coffee cake recipe; it’s much faster!
And here is my favorite secret for busy mornings: make the dough ahead of time! This lets you plan your baking for when you have time to sit and enjoy the process. After you finish the first knead (Step 3), instead of letting it rise at room temperature, lightly oil the dough, put it in a tightly sealed bowl, and place it in the refrigerator overnight. The slow, cold rise develops fantastic flavor. In the morning, just let the dough warm up on the counter for about an hour before you punch it down and move on to rolling and filling. It’s wonderful because you get that amazing bakery scent without starting at 5 AM!
Storage and Reheating Your Delicious Cinnamon Roll Leftovers
Oh, the eternal question once the first batch is devoured—what do we do with the delicious leftovers? We are making these **cinnamon rolls** to be enjoyed over a few days, but we certainly don’t want them to turn dry! The key to keeping that amazing softness is sealing them in tight.
Once the rolls have cooled completely after glazing, you need an airtight container. If you have a large container, place a piece of plastic wrap right against the icing layer first, then secure the lid. This stops the icing from sticking to the plastic wrap and helps keep that wonderful moisture locked inside the soft dough. Stored this way on the counter, they are perfectly soft for two days, sometimes three.
If you need them to last longer than that, the refrigerator is your friend, but be careful! Cold temperatures can stiffen the bread. When you plan to eat refrigerated rolls later, take them out about an hour before you want to enjoy them so they can warm up a bit. If you can’t wait that long, I have two methods for bringing them back to life.
Warming Them Up in the Microwave
For a single, quick roll that you want piping hot immediately—the microwave works beautifully. Wrap the individual **cinnamon roll** loosely in a slightly damp paper towel. This little bit of steam protects the outside while the inside warms up. Nuke it for about 15 to 20 seconds on medium power. It softens up almost instantly, and you get that just-baked gooey texture again!
The Best Way to Reheat a Whole Pan
If you want the whole pan feeling cozy and fresh again, the oven is much better than the microwave because it keeps the tops from getting rubbery. Preheat your oven very low, about 300°F (150°C). Place the pan (covered tightly with foil) inside for about 10 to 15 minutes. This gentle heat warms everything through evenly, making the butter in the filling melt just slightly again. When you pull them out, they feel almost as fresh as when they first came out of the oven!
Variations on the Classic Cinnamon Roll
While this classic recipe is what I turn to when I need ultimate comfort, I absolutely love changing things up a bit! Baking should always be fun, and once you master the dough technique, you can play endlessly with the fillings and frostings. This is where you get to make the recipe truly yours, taking that wonderfully soft base and giving it a little new spin. If we are feeling festive, I sometimes whip up something different entirely, like my cinnamon roll casserole, but for shaping the original? Here are a few small tweaks that bring big flavor!
The easiest way to change things up is in that middle, buttery layer. Maybe you love nuts, or perhaps you prefer a brighter flavor profile? Don’t hesitate to experiment!
Spice Swaps for the Filling
If you find yourself craving something a little different than just straightforward cinnamon, try blending spices together! My favorite swap involves removing about half of the cinnamon and adding an equal amount of cardamom. Cardamom brings this beautiful, slightly citrusy, floral warmth that pairs wonderfully with the sweet richness of the brown sugar. It feels very elegant!
Another option, especially nice in the deep fall or winter months, is to use a mix of cinnamon, a touch of nutmeg, and just a tiny pinch of ground cloves. You want this blend to just whisper spice, not shout it, so start small! Remember, the goal isn’t to cover up the sugar, but to give it depth, so a little goes a very long way in these little **cinnamon rolls**.
Adding Texture to the Filling
If you want to add something crunchy or chewy to the center besides the doughy texture, you can absolutely fold it into the cinnamon sugar mixture before sprinkling. Finely chopped pecans or walnuts work perfectly because they toast lightly during the 20-minute bake time. Just make sure your nuts are chopped small, otherwise, they can make rolling the log tricky.
For a chewy burst, instead of using my recipe’s note about soaking raisins, try adding finely chopped dried apricots instead—their tartness cuts through the richness of the butter and icing beautifully! You just scatter them over the buttered surface along with the sugar mixture. It’s a delicious surprise when you pull apart a warm, gooey piece.
Next-Level Frosting Ideas
The cream cheese icing is already spectacular, but sometimes you need a little extra punch. If you love citrus, skip adding milk entirely and use fresh orange juice instead! The zest from one entire orange, beaten right into the cream cheese, brightens the entire **cinnamon roll** up wonderfully, making it feel lighter. It pairs perfectly with the cardamom spice swap if you made that one!

If you prefer something purely decadent, skip the cream cheese entirely and make a simple vanilla bean glaze instead. Beat just the butter, powdered sugar, vanilla, and milk until very smooth and thin. Right before you pour it over the warm rolls, stir in a small spoonful of good quality dulce de leche. That thick, cooked caramel flavor merging with the freshly baked dough is just heavenly, making any morning feel like a celebration!
Frequently Asked Questions About Making Cinnamon Rolls
Oh, I just love hearing from you all about your baking adventures! It’s so important to me that you feel confident in the kitchen, especially when tackling a beautiful, time-consuming recipe like these **homemade cinnamon rolls**. Kenji always tells me that answering questions directly is the best way to show we care about your success. Here are a few things folks ask me most often when they try this sweet breakfast recipe.
Can I use instant yeast instead of active dry yeast for this cinnamon roll recipe?
Yes, you certainly can! Instant yeast doesn’t need that “waking up” phase we do with active dry yeast, which is handy if you’re in a hurry. If you use instant yeast, you can skip Step 1 entirely—no proofing in the warm milk needed! Just mix the instant yeast directly into your dry ingredients (flour, salt, sugar) along with the rest of the flour mixture. Then, proceed straight to adding the wet ingredients. It eliminates a small step, but the rest of the process, including the rising times, stays exactly the same for your yeast roll recipe.
How do I get my cinnamon rolls extra gooey?
Gooeyness is key! There are two ways I guarantee that wonderful melt-in-your-mouth center. First, for the filling, make sure you are using **packed** light brown sugar. When measuring any sugar, you must press it down firmly into the cup. This ensures you get enough rich sugar to melt beautifully during baking. Second, and this is crucial for the gooey top: you must ice the rolls while they are still warm—not piping hot, but definitely warm to the touch. This allows the cream cheese icing to melt slightly and seep down into the swirls, creating that perfect, sticky texture.
What is the best way to reheat leftover cinnamon rolls?
If you have any leftovers, treat them right! The microwave is fast, but the oven gives you that fantastic, fresh-baked texture back. If you have a few rolls left, I suggest wrapping them loosely in aluminum foil to protect the icing. Pop them into a 300°F (150°C) oven for about 10 minutes. The foil keeps them moist while the gentle heat warms the butter inside the filling, making them wonderfully soft again. If you only have one, wrap it in a damp paper towel and microwave it for about 20 seconds—that steam works wonders for reviving the dough!
Estimated Nutritional Snapshot for One Cinnamon Roll
Kenji insists that even though these sweet breakfast recipes are meant for enjoyment, not counting calories, people still like to know what they are getting into! Please remember that these numbers are only an estimate based on the ingredients listed in my recipe and divided across 12 generous servings. Because this is a decadent treat made with butter and rich icing, these homemade pastries are definitely more of an occasional indulgence than an everyday choice!
Here is a general breakdown for one serving of these delightful **cinnamon rolls**:
- Calories: 480
- Total Fat: 25g (This includes about 15g of saturated fat, mostly from the butter and cream cheese!)
- Carbohydrates: 60g
- Sugar: 45g (Yes, that’s a lot of sweet goodness, but it’s what makes them delicious!)
- Protein: 7g
- Fiber: 2g
Enjoy them with a cup of strong coffee or tea, and don’t worry about the numbers too much. Food tastes better when you are happy, and these rolls look, smell, and taste like pure happiness!
PrintSoft and Fluffy Homemade Cinnamon Rolls with Cream Cheese Icing

Follow this recipe for the best cinnamon rolls that are soft, sweet, and covered in a rich cream cheese glaze. This yeast dough recipe yields bakery-quality results perfect for a special breakfast.
- Prep Time: 45 min
- Cook Time: 25 min
- Total Time: 2 hr 55 min
- Yield: 12 servings
- Category: Breakfast
- Method: Baking
- Cuisine: American
- Diet: Vegetarian
Ingredients
- 1 cup whole milk, warmed to 105-115°F
- 2 1/4 teaspoons active dry yeast
- 1/2 cup granulated sugar, plus 2 tablespoons for sprinkling
- 1/2 cup unsalted butter, softened, plus 1/2 cup for filling
- 2 large eggs, room temperature
- 4 cups all-purpose flour, plus more for dusting
- 1 teaspoon salt
- For the Filling:
- 1 cup packed light brown sugar
- 2 tablespoons ground cinnamon
- For the Cream Cheese Icing:
- 8 ounces cream cheese, softened
- 1/2 cup unsalted butter, softened
- 3 cups powdered sugar, sifted
- 1 teaspoon vanilla extract
- 2 tablespoons milk, or as needed
Instructions
- Activate the yeast: In a small bowl, combine the warm milk and 1 teaspoon of the yeast. Let it sit for 5 to 10 minutes until foamy.
- Mix the dough: In a large bowl or the bowl of a stand mixer, combine the flour, 1/2 cup sugar, and salt. Add the softened 1/2 cup butter, eggs, and the activated yeast mixture. Mix on low speed until a shaggy dough forms.
- Knead: Increase the speed to medium-low and knead for 5 to 7 minutes until the dough is smooth and elastic. It should be slightly tacky but not sticky.
- First Rise: Place the dough in a lightly oiled bowl, turning to coat. Cover the bowl with plastic wrap and let it rise in a warm spot for 1 to 1.5 hours, or until doubled in size.
- Prepare the filling: While the dough rises, mix the brown sugar, 2 tablespoons of granulated sugar, and cinnamon together in a medium bowl. Set aside.
- Roll the dough: Gently punch down the risen dough. On a lightly floured surface, roll the dough into a large rectangle, about 12 by 18 inches.
- Spread the butter: Spread the remaining 1/2 cup of softened butter evenly over the surface of the dough, leaving a 1-inch border along one long edge.
- Add filling: Sprinkle the cinnamon-sugar mixture evenly over the buttered surface.
- Roll and cut: Starting from the long edge opposite the clean border, tightly roll the dough into a log. Pinch the seam closed. Cut the log into 12 equal rolls.
- Second Rise: Arrange the rolls in a greased 9×13 inch baking pan. Cover loosely and let them rise again for 30 to 45 minutes until puffy.
- Bake: Preheat your oven to 375°F (190°C). Bake for 20 to 25 minutes, or until the tops are golden brown.
- Make the icing: While the rolls cool slightly, beat the softened cream cheese and butter together until smooth. Gradually beat in the sifted powdered sugar and vanilla extract. Add milk one tablespoon at a time until you reach a smooth, spreadable consistency.
- Glaze and serve: Spread the cream cheese icing generously over the warm rolls. Serve immediately for the best experience.
Notes
- For extra soft rolls, cover the pan with foil for the first 15 minutes of baking, then remove the foil to brown the tops.
- If you want a richer dough, substitute whole milk for the water in your liquid measurement.
- You can make the dough ahead of time and let it rise slowly in the refrigerator overnight for easier morning preparation.
Nutrition
- Serving Size: 1 roll
- Calories: 480
- Sugar: 45g
- Sodium: 280mg
- Fat: 25g
- Saturated Fat: 15g
- Unsaturated Fat: 10g
- Trans Fat: 0.5g
- Carbohydrates: 60g
- Fiber: 2g
- Protein: 7g
- Cholesterol: 65mg