

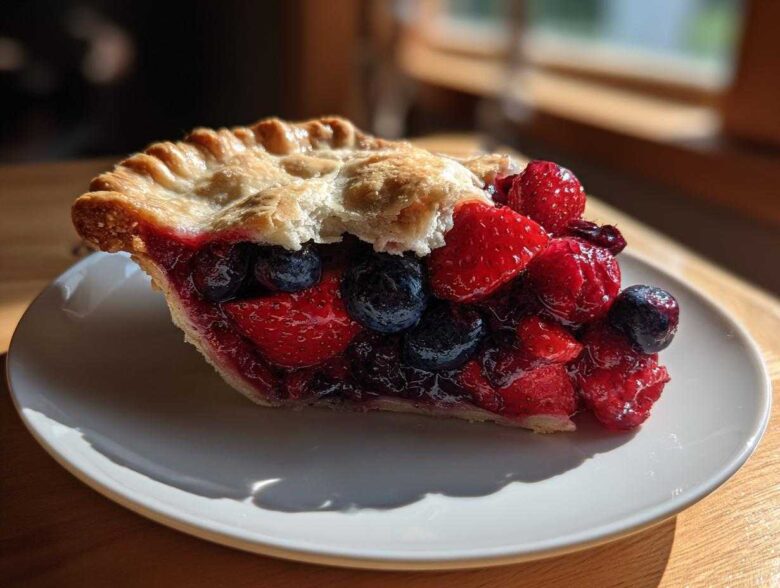
Okay, let’s talk about summer baking, because honestly, nothing screams “perfect afternoon” like a sizzling slice of homemade fruit pie. You see those gorgeous, towering pies in bakeries, right? They look stunning, but inevitably, when you cut into them, you get that sad, watery mess running all over the plate. Ugh! I spent years battling that gummy, unset filling, especially with mixed berries.
But trust me, after way too many ruined picnics and far too many soggy bottoms, I cracked the code. This isn’t just any triple berry pie recipe; this is *the* recipe. We’re talking about an all-butter crust that shatters beautifully, plump strawberries, tangy raspberries, and deep blue jewels all held together in a filling that sets up like a dream. If you want the definitive guide to making a slice that holds its shape on the fork every single time, stick with me. This triple berry pie is going to change how you think about fruit desserts!
I actually developed this filling method after failing spectacularly at a holiday order two years ago that called for twelve mixed berry pies. I almost cried! Now, thanks to a little trick with cornstarch and temperature control, I can confidently whip up a perfect batch, frozen berries or fresh—doesn’t matter! You’re in good hands. Speaking of getting things right in the kitchen, when I’m not baking pies, I’m usually making something comforting like easy homemade fluffy rice pilaf. Consistency really matters!
Why This is the Best Triple Berry Pie Recipe You Will Make
I know there are a million Berry Pie Recipes out there, but this one tackles the messy parts head-on. My goal here was simple: provide you with a showstopper Homemade Fruit Pie that doesn’t require a degree in pastry arts, and definitely won’t leave you with a puddle on the counter.
Here’s precisely why you need to try this specific Mixed Berry Dessert:
- Foolproof Set Filling: We use a specific combination of thickener and careful cooling that guarantees your slice holds its perfect wedge shape. We beat the running mess!
- Truly Flaky Crust: It’s all-butter, baby. I give you the exact technique needed for that shatteringly crisp, light texture you dream about.
- Balanced Flavor: We hit that perfect sweet and tart balance by combining strawberries, blueberries, and raspberries just right. It’s the quintessential Summer Berry Dessert.
- Easy Assembly: Even if you’re nervous about pies, this step-by-step guide makes the whole process feel like cheating. You won’t believe how simple it is to get results this good.
If you love baking comfort food, you might also want to check out my tips for making the best homemade chocolate chip cookies while you wait for your pie to cool!
Ingredients for Your Perfect Triple Berry Pie
Alright, let’s get our station set up! Baking is like chemistry, and you need the right tools and ingredients, or things go sideways fast. For this Berry Pie Recipe, don’t even *think* about making substitutions on the butter—it has to be cold! We are building flavor and structure here, foundation first!
Here is what you need for this show-stopping Dessert from Scratch. I like to measure everything out into little bowls beforehand; it saves me from a mid-bake panic attack!
- 2 1/2 cups all-purpose flour
- 1 teaspoon salt
- 1 cup (2 sticks) unsalted butter, very cold and cubed (I mean *ice* cold!)
- 1/2 cup ice water, plus more if needed
Now for the glorious filling that’s going to set up perfectly. Remember, if you are using frozen berries, don’t thaw them! You just toss them in!
- 6 cups mixed berries (strawberries, blueberries, raspberries), hulled and halved if large—don’t skip halving the biggest strawberries!
- 1 cup granulated sugar
- 1/4 cup cornstarch (this is our set-it-up secret weapon!)
- 1 tablespoon lemon juice
- 1 teaspoon vanilla extract
And finally, for that perfect golden shine:
- 1 large egg, beaten (for the egg wash)
- 1 tablespoon coarse sugar (for topping—it gives such a great crunch!)
Having all this ready makes rolling out the dough later so much smoother. If you want some practice with pastry before tackling the pie, you could try mixing up a loaf of moist date nut bread!
Mastering the Flaky Pie Crust for Your Triple Berry Pie
Honestly, the crust is where 90% of people mess up. I’m giving you the secret to that perfect, buttery snap that makes a Homemade Fruit Pie worth the effort. The entire trick boils down to temperature control and discipline—you need to keep everything, I mean *everything*, cold.
First, when you mix your flour and salt, you need to cut in that butter. My grandmother used to call it ‘sand and pea size.’ You want some chunks of butter left! Those are the little pockets that turn to steam in the oven and make the crust flaky. If you blend it until it’s smooth, you’re making shortbread, not pie crust. Don’t fear the lumps!
Next is the water. You need ice water, not tap water. Drip it in slowly—we mix just until the dough *comes together*. If you knead this dough like bread dough, you’re developing gluten, and that makes the crust tough. Tough crusts are the enemy of a perfect Berry Pie Recipe!
Once it’s barely holding hands, stop! Divide it into two disks, wrap them tight, and they need to chill for at least an hour. I cannot stress this enough: this chilling time is non-negotiable. It lets the gluten relax and keeps that butter solid for baking. For extra crust practice before you commit to the full pie, you can check out my guide on the easy Italian bread recipe; the dough handling principles are similar!
Tips for the Flakiest Pie Crust Tutorial
If you want to level up to expert status on flaky crusts, pay attention to these three things. They make a huge difference in the texture of your final slice!
- Use a Pastry Blender (or Cold Hands): If you use your hands, work fast! Warm hands melt the butter instantly, and we don’t want that. A pastry blender cuts the butter in evenly without transferring much heat.
- Ice Water is Your Best Friend: If you see flour streaks, add water one teaspoon at a time until things just barely hold a shape. Remember, ‘just barely’ means you should still be able to see tiny slivers of butter in the dough.
- Don’t Overwork the Dough Once Wrapped: When you pull those disks out of the fridge, handle them as little as possible when rolling. Every time you touch it, you risk warming up that precious butter that creates the layers.
Creating the Best Berry Pie Filling: The Secret to No Runny Pie Filling
Okay, this is the moment of truth. We’ve got our crust ready to go, and now we have to conquer the single scariest part of making a Homemade Fruit Pie: the filling that won’t turn into soup! If you want a piece of pie that stands tall and proud, you have to treat the thickener right.
My secret here is using cornstarch, but it needs to be introduced properly. You can’t just dump it in! Toss the berries *first* with the sugar, lemon juice, and vanilla. Then, sprinkle that cornstarch right over the top. Gently fold everything together until those beautiful mixed berries are evenly coated. This ensures the cornstarch dissolves and mixes completely, so you don’t get weird gummy pockets.
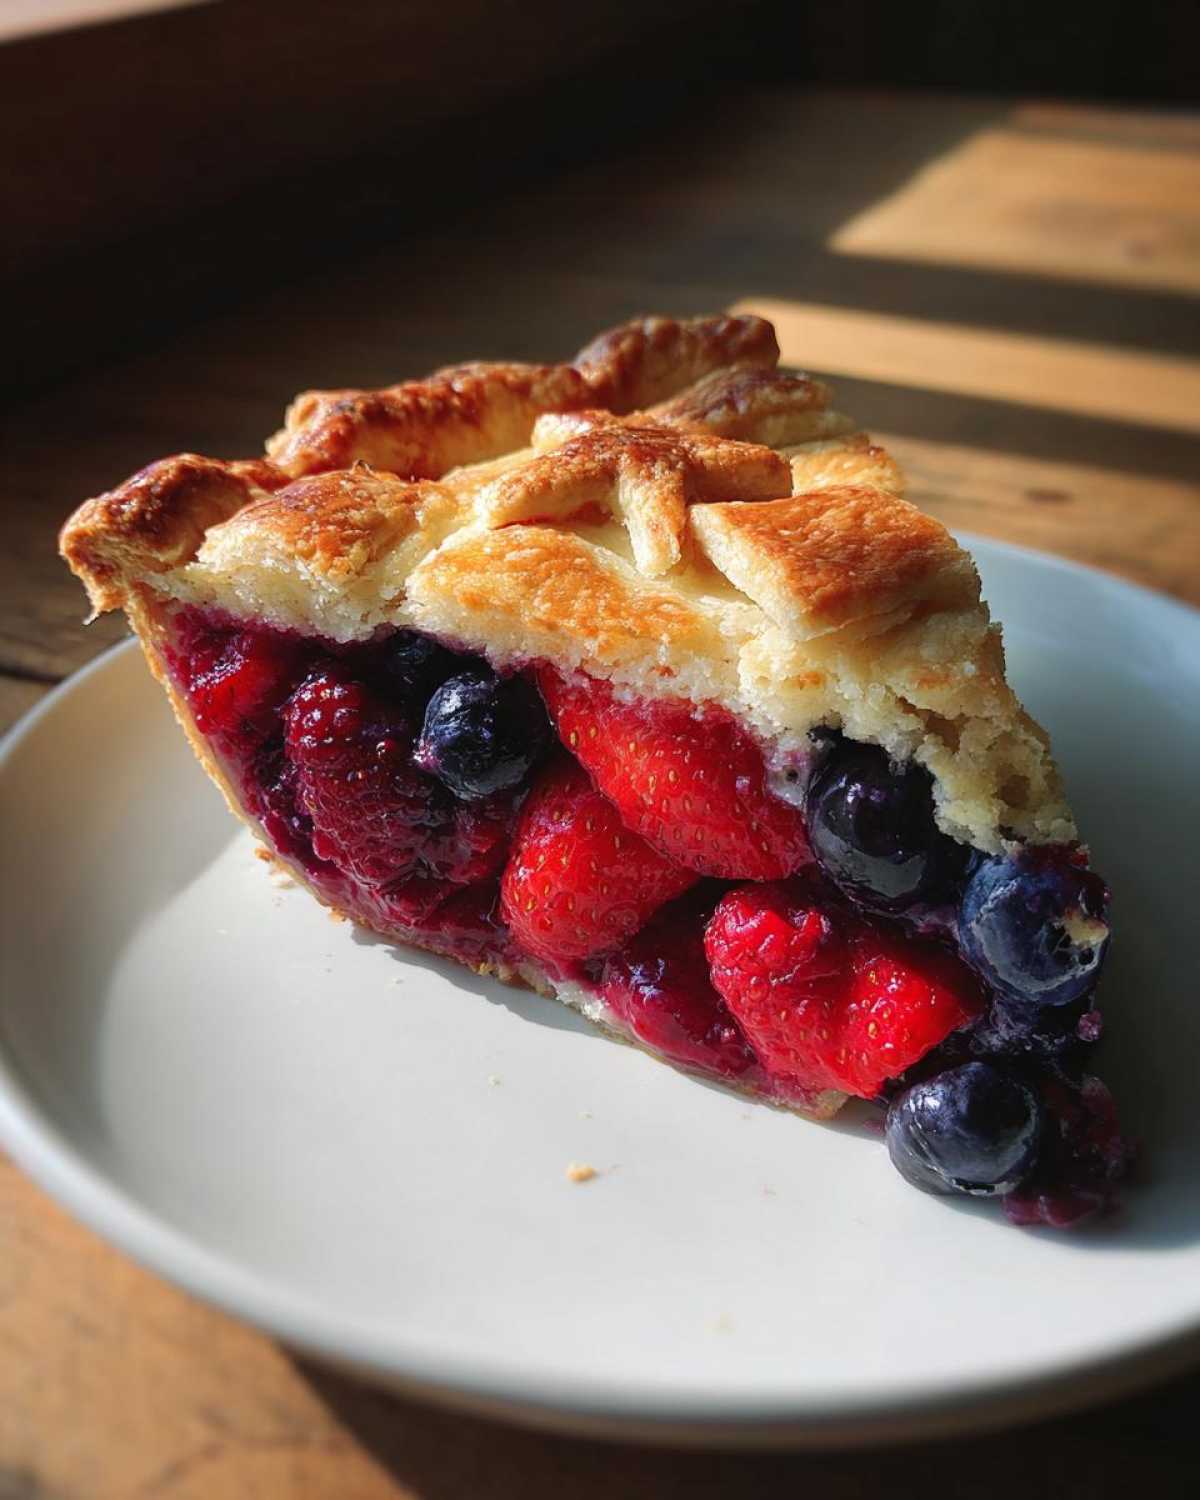
Regarding fresh versus frozen berries—I love using fresh in the summer, but if you grab a bag of frozen berries, don’t thaw them first! Just toss them in straight from the freezer. Because frozen fruit releases more water, you might need to bump that cornstarch up by just one extra teaspoon, but generally, this recipe handles both like a champ. If you’re interested in another fruit preservation method, check out my guide on easy raspberry jam recipe without pectin. It’s all about getting that set texture right!
Assembling and Baking Your Beautiful Triple Berry Pie
Now that we have our perfect, cold dough and our beautifully coated, ready-to-set filling, it’s time to put this gorgeous Triple Berry Pie together! This is my favorite part—seeing all the pieces come together. Remember what I said about keeping things cold? That applies right until it hits the oven!
First, roll out that bottom crust—try to get it about 12 inches across so it drapes nicely into your 9-inch pie plate. Gently place it in, trim the overhang to about an inch, and then spoon in all that berry goodness. Try to keep the berries mounded slightly in the center. Next up is the top crust. You can do a full circle or get fancy with a lattice top—either way, make sure you cut vents if you use a full top layer! Steam trapped inside is the enemy of a crisp crust.
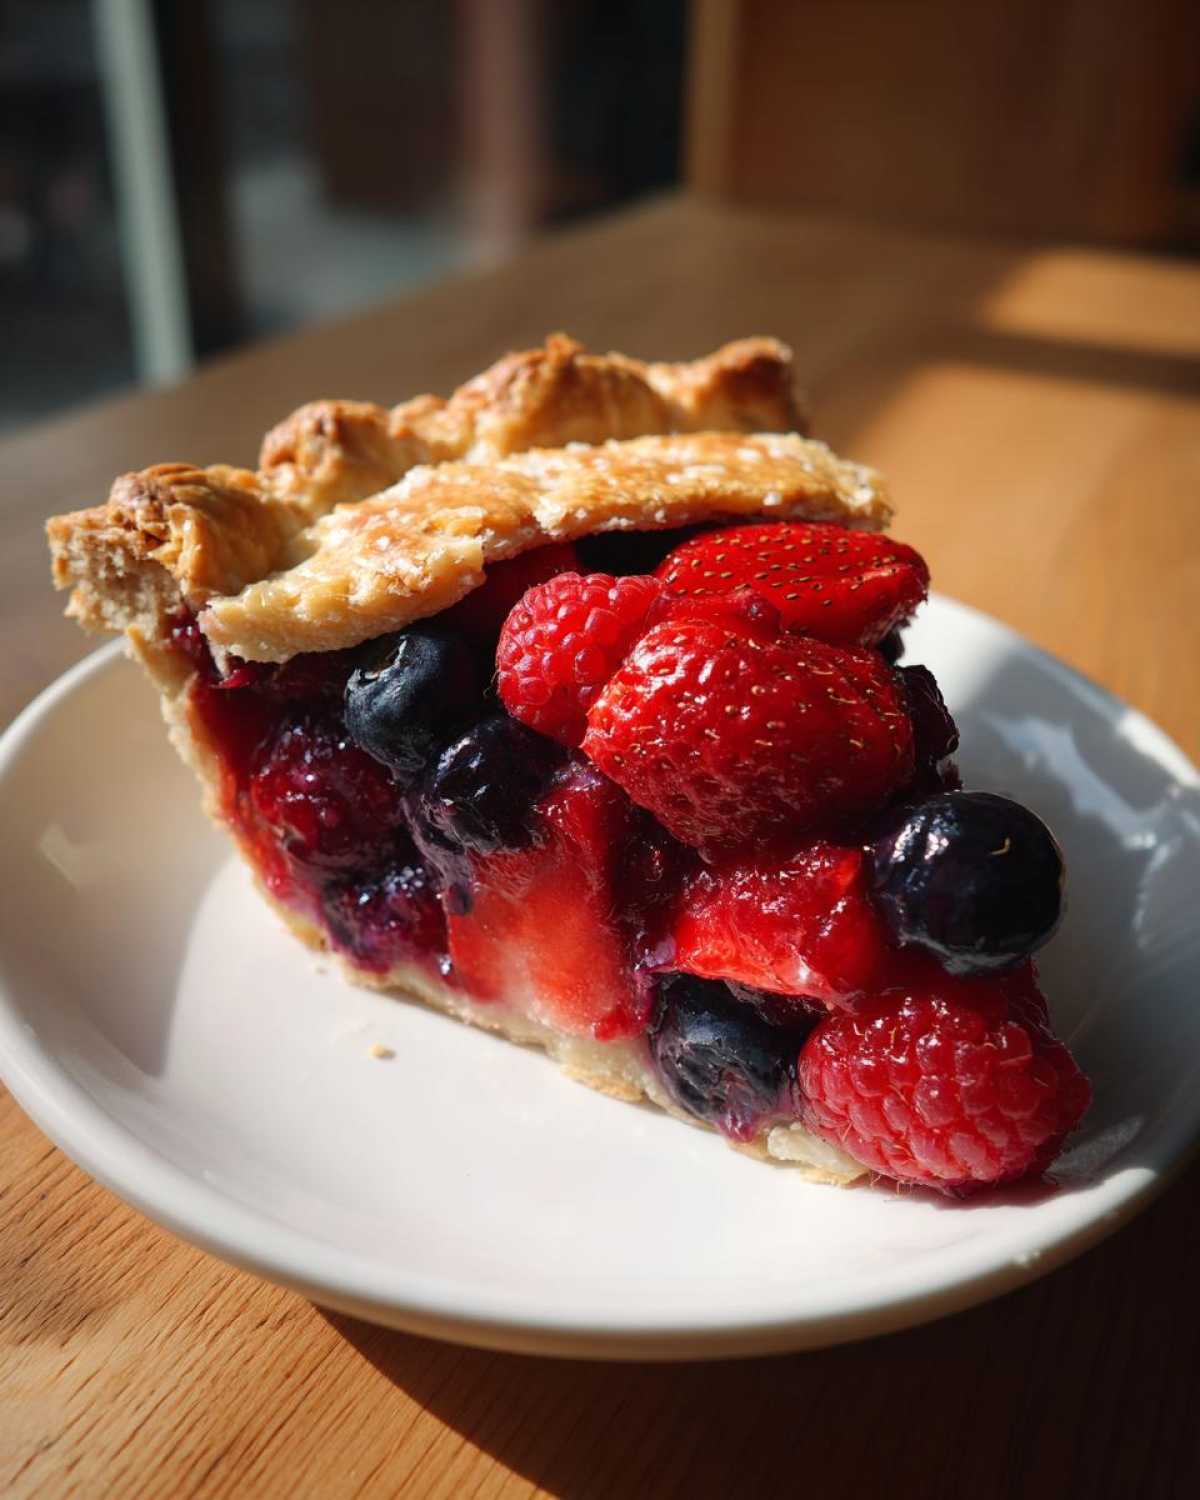
Seal those edges tight and seriously, pop the whole assembled pie into the fridge for about 15 minutes before baking. That little chill locks everything down before the heat hits. Once your oven is humming at 400°F, place the pie on a baking sheet—trust me, those drips happen! Bake at 400°F for 20 minutes, then drop your temperature down to 375°F and bake another 35 to 45 minutes. If you see the edges looking dark too early, just grab some foil and loosely tent them. That protects the flake while the center finishes cooking.
Achieving a Golden Finish with Egg Wash
Don’t skip the egg wash! It’s what gives this Berry Pie Recipe that professional, deep golden shine. Just whisk that one egg and brush it lightly over the entire top crust—even over the lattice strips. Then, the last tiny touch before it goes in: sprinkle it with coarse sugar.
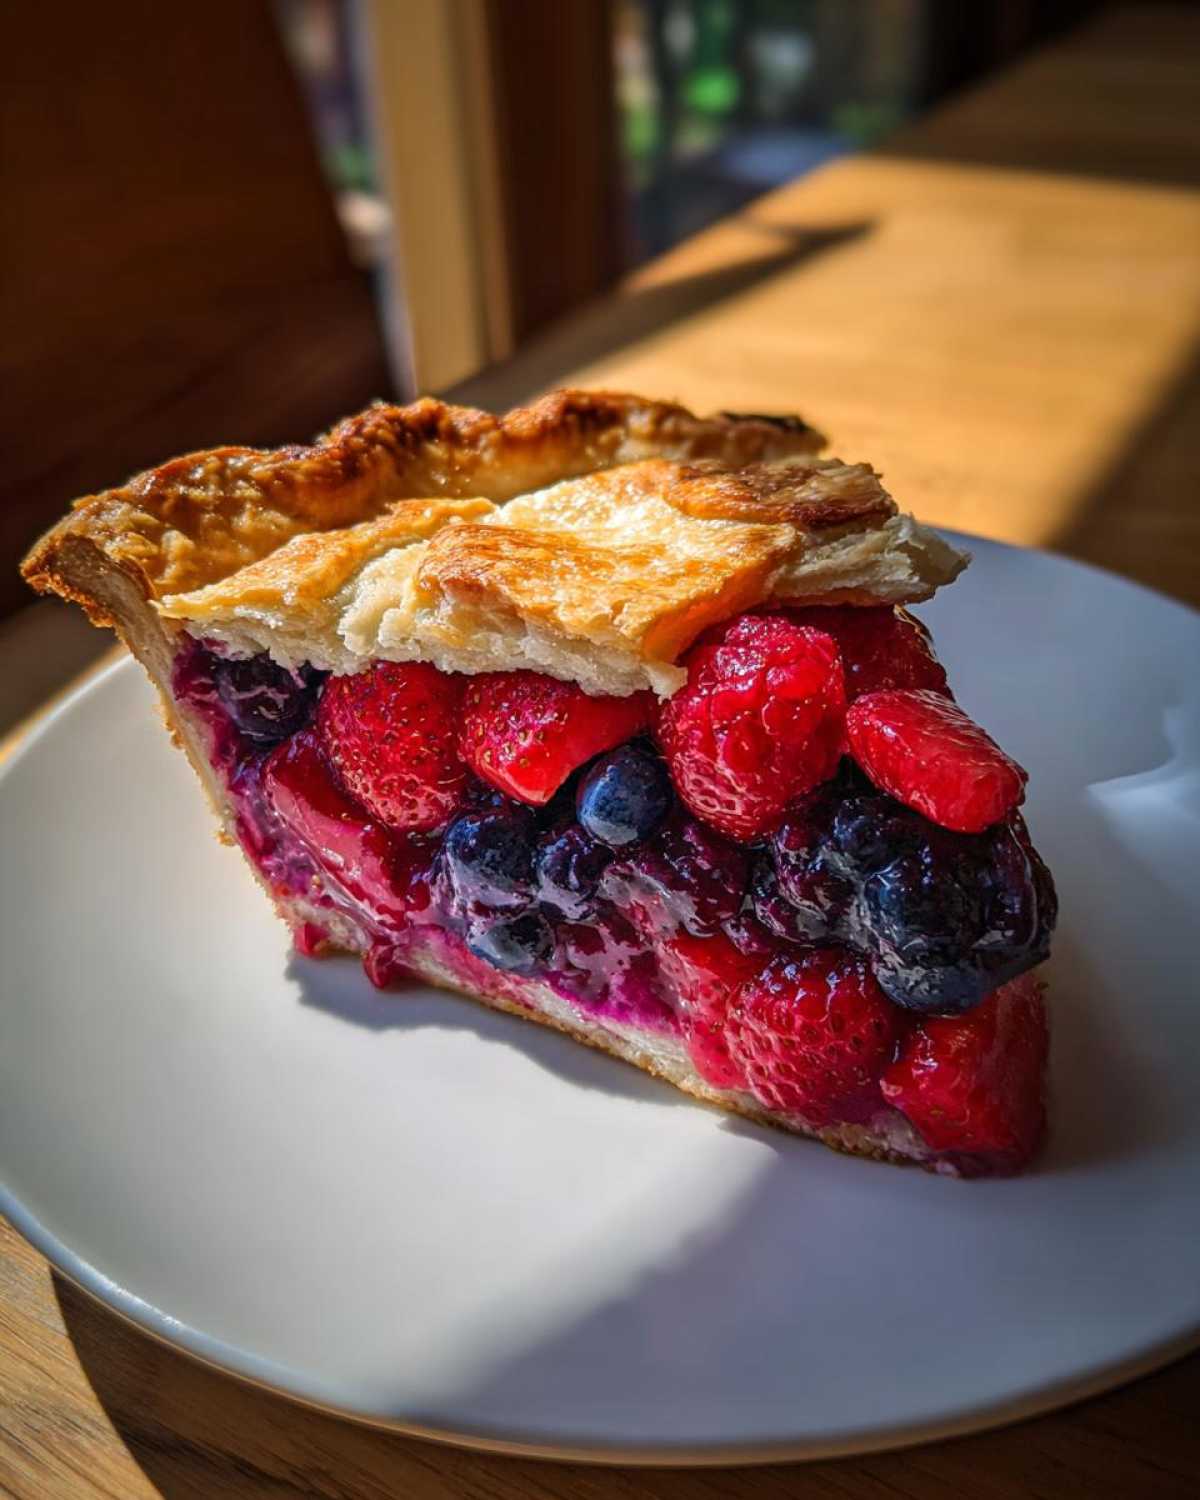
That sugar melts slightly, crystallizes during the bake, and gives you the most satisfying *crunch* when you bite into that first slice. Once it comes out, bubbling thickly, you are done assembling and baking! Now comes the *really* hard part, which I cover next: waiting! If you need something simple to keep your mind busy while you bake, maybe try easy homemade fluffy rice pilaf. It’s quick and completely different!
The Hardest Part: Cooling Your Triple Berry Pie Completely
Okay, I’m going to be brutally honest here. You just pulled a bubbling, glorious, golden creation out of the oven. You want to cut it right then and there, I know! But if you slice into this Triple Berry Pie before it’s cooled, you are going to get that runny mess we worked so hard to avoid.
You absolutely must let this pie cool for a minimum of four hours. I mean it! Lay it on a wire rack and just walk away. I learned this the hard way once when I was rushing to bring a pie to a party. I cut into it after only two hours, and the whole thing looked like a berry landslide. I nearly cried in the car on the way over!
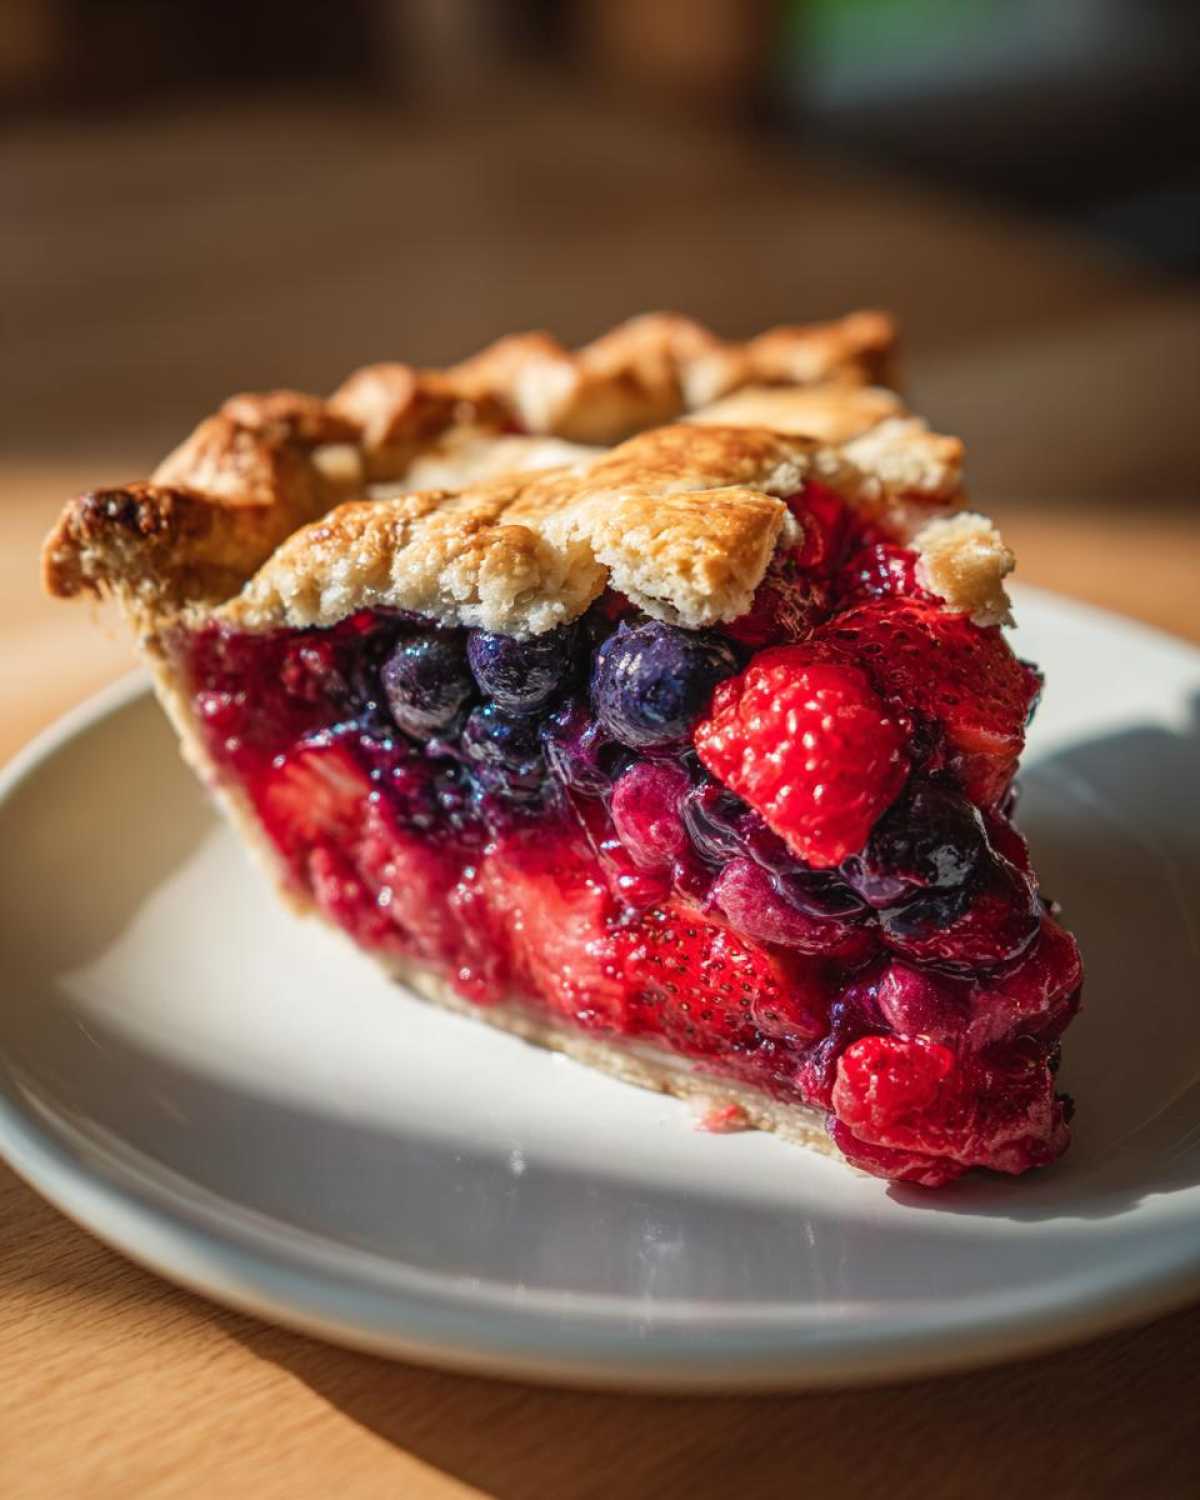
Those four hours are essential because the cornstarch isn’t done thickening; it needs time to set up properly as it cools down. If you can manage it, five hours is even better. If you need something to tide you over while you wait, you could whip up a little batch of old-fashioned creamy rice pudding. It’s soothing, sweet, and definitely doesn’t require any cooling time!
Serving Suggestions for Your Berry Pie Recipe
Now that you’ve mastered the bake and, more importantly, you’ve managed to wait for it to cool completely—congratulations! It’s time to serve the star of the show. This Berry Pie Recipe is sweet, but those raspberries and that lemon juice give it a lovely tart edge, which means it pairs perfectly with something creamy and cold.
My absolute favorite way to serve this is just slightly warm (after that long cooling period, of course!) with a massive scoop of high-quality vanilla bean ice cream. The contrast between the warm berry filling and the cold, melting cream is honestly heaven. If you’re looking for something a little lighter, grab heavy cream and whip up some fresh whipped cream!
For a slightly more elegant touch, especially if you’ve done a fancy lattice top, a dollop of homemade whipped cream infused with a little vanilla, maybe even a splash of almond extract, is fantastic. Thinking about vanilla after a pie makes me hungry for something sweeter… I recently perfected my recipe for moist fluffy vanilla cupcakes if you need another vanilla-based treat!
Frequently Asked Questions About Homemade Fruit Pie
I get so many messages about pie baking, and I totally get it—it can feel intimidating! But once you nail this triple berry pie, you’ll wonder why you ever bought one from a store. Here are some of the top questions I get asked about making a fabulous Homemade Fruit Pie. Don’t worry about making mistakes; that’s how we learn!
If you end up loving this crisp crust work, you might want to try my recipe for a slightly different style of dessert, the classic old-fashioned southern buttermilk pie!
Can I substitute other fruits in this Berry Pie Recipe?
You absolutely can! This recipe is wonderfully forgiving. If you only have blueberries or just peaches, go for it! The main thing you need to watch out for is the liquid content. If you switch to a very watery fruit like kiwi (though I wouldn’t recommend it for a traditional bake!) or cut back drastically on the berries, you might need to add an extra sprinkle of cornstarch. For instance, if you make a Peach Blackberry Pie, you might want an extra half-teaspoon of cornstarch just to be safe, keeping that filling perfectly set!
What is the best way to store leftover Triple Berry Pie?
This is a really important question since we want to preserve that flaky crust! If you made this pie with lots of fresh berries and didn’t bake it 100% dry (which you shouldn’t!), I recommend storing any leftovers in the fridge. Cover it loosely with foil or plastic wrap—don’t seal it airtight, or the bottom might get soggy. It keeps beautifully for about three days.
Now, for reheating: If you just stick a cold slice in the microwave, you’ll ruin the crust texture totally. Instead, take the slice out about 30 minutes before serving to let it warm slightly, or if you want it warm-warm, pop it in a toaster oven or regular oven set to about 300°F for maybe 8 to 10 minutes. That short blast of dry heat revives the crust beautifully without melting all the set juices.
If you’re looking for a low-fuss storage option down the line, I’ve got a great recipe for easy no-bake protein bars that require zero oven time!
Storage and Reheating Instructions
So, you made it through the waiting period and devoured that incredible triple berry pie! If, by some miracle, you have leftovers—and you should definitely try to save some—storage is easy, but reheating takes a little care to protect that gorgeous, flaky crust we worked so hard on.
I always keep my leftovers right on the counter, loosely covered with foil, for the first 24 hours because the temperature shock from the fridge can sometimes make the crust soften faster. It stays perfectly good for at least three days this way! If you need to keep it longer, pop it in the fridge, but remember to let it come to room temperature for about half an hour before you plan to eat it.
When you’re ready to eat that second slice, skip the microwave! That’s a crust killer. Take that slice and pop it into a toaster oven or a regular oven set to about 300°F for just 8 to 10 minutes. That brief warmth brings back the crispness without melting all that beautiful, set-up filling. It tastes almost brand new! If you’re looking for something that requires zero reheating time down the road, check out my recipe for easy no-bake protein bars!
PrintTriple Berry Pie with Foolproof Set Filling

Make a classic triple berry pie using strawberries, blueberries, and raspberries. This recipe focuses on a flaky, all-butter crust and a filling that sets perfectly without being runny.
- Prep Time: 45 min
- Cook Time: 65 min
- Total Time: 110 min
- Yield: 8 servings
- Category: Dessert
- Method: Baking
- Cuisine: American
- Diet: Vegetarian
Ingredients
- 2 1/2 cups all-purpose flour
- 1 teaspoon salt
- 1 cup (2 sticks) unsalted butter, very cold and cubed
- 1/2 cup ice water, plus more if needed
- 6 cups mixed berries (strawberries, blueberries, raspberries), hulled and halved if large
- 1 cup granulated sugar
- 1/4 cup cornstarch
- 1 tablespoon lemon juice
- 1 teaspoon vanilla extract
- 1 large egg, beaten (for egg wash)
- 1 tablespoon coarse sugar (for topping)
Instructions
- Prepare the Crust: In a large bowl, whisk together the flour and salt. Cut in the cold butter using a pastry blender or your fingers until the mixture resembles coarse crumbs with some pea-sized pieces of butter remaining. Gradually add the ice water, one tablespoon at a time, mixing until the dough just comes together. Do not overmix. Divide the dough in half, flatten each half into a disk, wrap in plastic, and chill for at least 1 hour.
- Prepare the Filling: In a separate bowl, gently combine the mixed berries, granulated sugar, cornstarch, lemon juice, and vanilla extract. Toss lightly until the berries are evenly coated. Set aside while you roll out the bottom crust.
- Assemble the Bottom Crust: On a lightly floured surface, roll out one dough disk into a 12-inch circle. Carefully transfer the dough to a 9-inch pie plate. Trim the edges, leaving a 1-inch overhang. Place the berry mixture into the crust.
- Create the Top Crust: Roll out the second dough disk. You can cut strips for a lattice top or place the whole circle over the filling. If using a full top crust, cut several slits in the top to allow steam to escape. Crimp the edges of the top and bottom crusts together to seal.
- Chill and Bake: Brush the top crust lightly with the beaten egg and sprinkle with coarse sugar. Chill the assembled pie for 15 minutes before baking. Preheat your oven to 400°F (200°C).
- Bake the Pie: Place the pie on a baking sheet (to catch drips). Bake for 20 minutes at 400°F. Reduce the oven temperature to 375°F (190°C) and continue baking for another 35 to 45 minutes, or until the crust is golden brown and the filling is bubbling thickly. If the edges brown too quickly, cover them with foil.
- Cool Completely: Remove the pie from the oven and place it on a wire rack. You must let the pie cool completely, at least 4 hours, before slicing. This allows the cornstarch to fully set the filling.
Notes
- If using frozen berries, do not thaw them first. Toss them directly with the sugar and cornstarch mixture, but you may need to add an extra teaspoon of cornstarch to account for extra moisture.
- For the flakiest crust, keep all ingredients cold and avoid working the dough more than necessary.
- If you prefer a sweeter or tarter pie, adjust the sugar slightly, keeping the cornstarch measurement the same to maintain the set.
Nutrition
- Serving Size: 1 slice
- Calories: 410
- Sugar: 35g
- Sodium: 210mg
- Fat: 23g
- Saturated Fat: 14g
- Unsaturated Fat: 9g
- Trans Fat: 0g
- Carbohydrates: 52g
- Fiber: 3g
- Protein: 4g
- Cholesterol: 55mg