

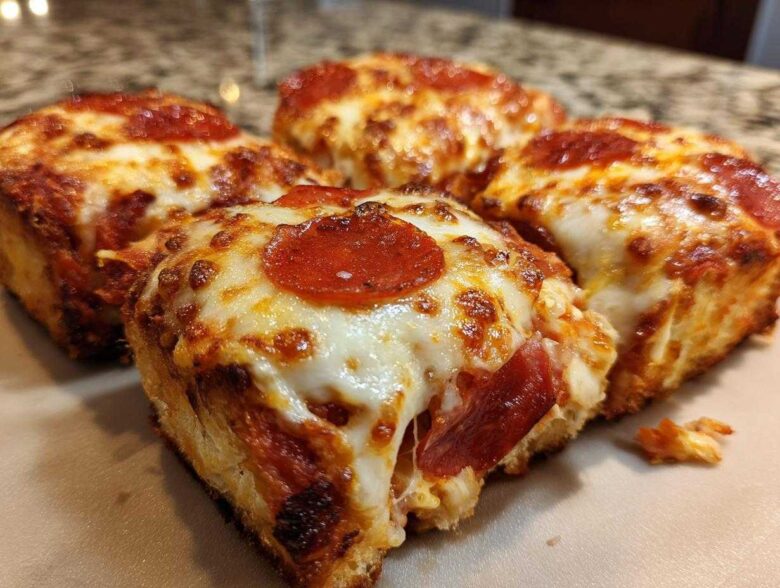
Okay, let’s talk honesty for a second. If you’re hosting anything—I mean *anything*—you need food that disappears instantly but takes zero brainpower to assemble, right? Forget complicated appetizers that require standing over a stove. My obsession right now, and the very best thing to hit my game day spread last Sunday, has to be these ultimate easy pull-apart pizza sliders!
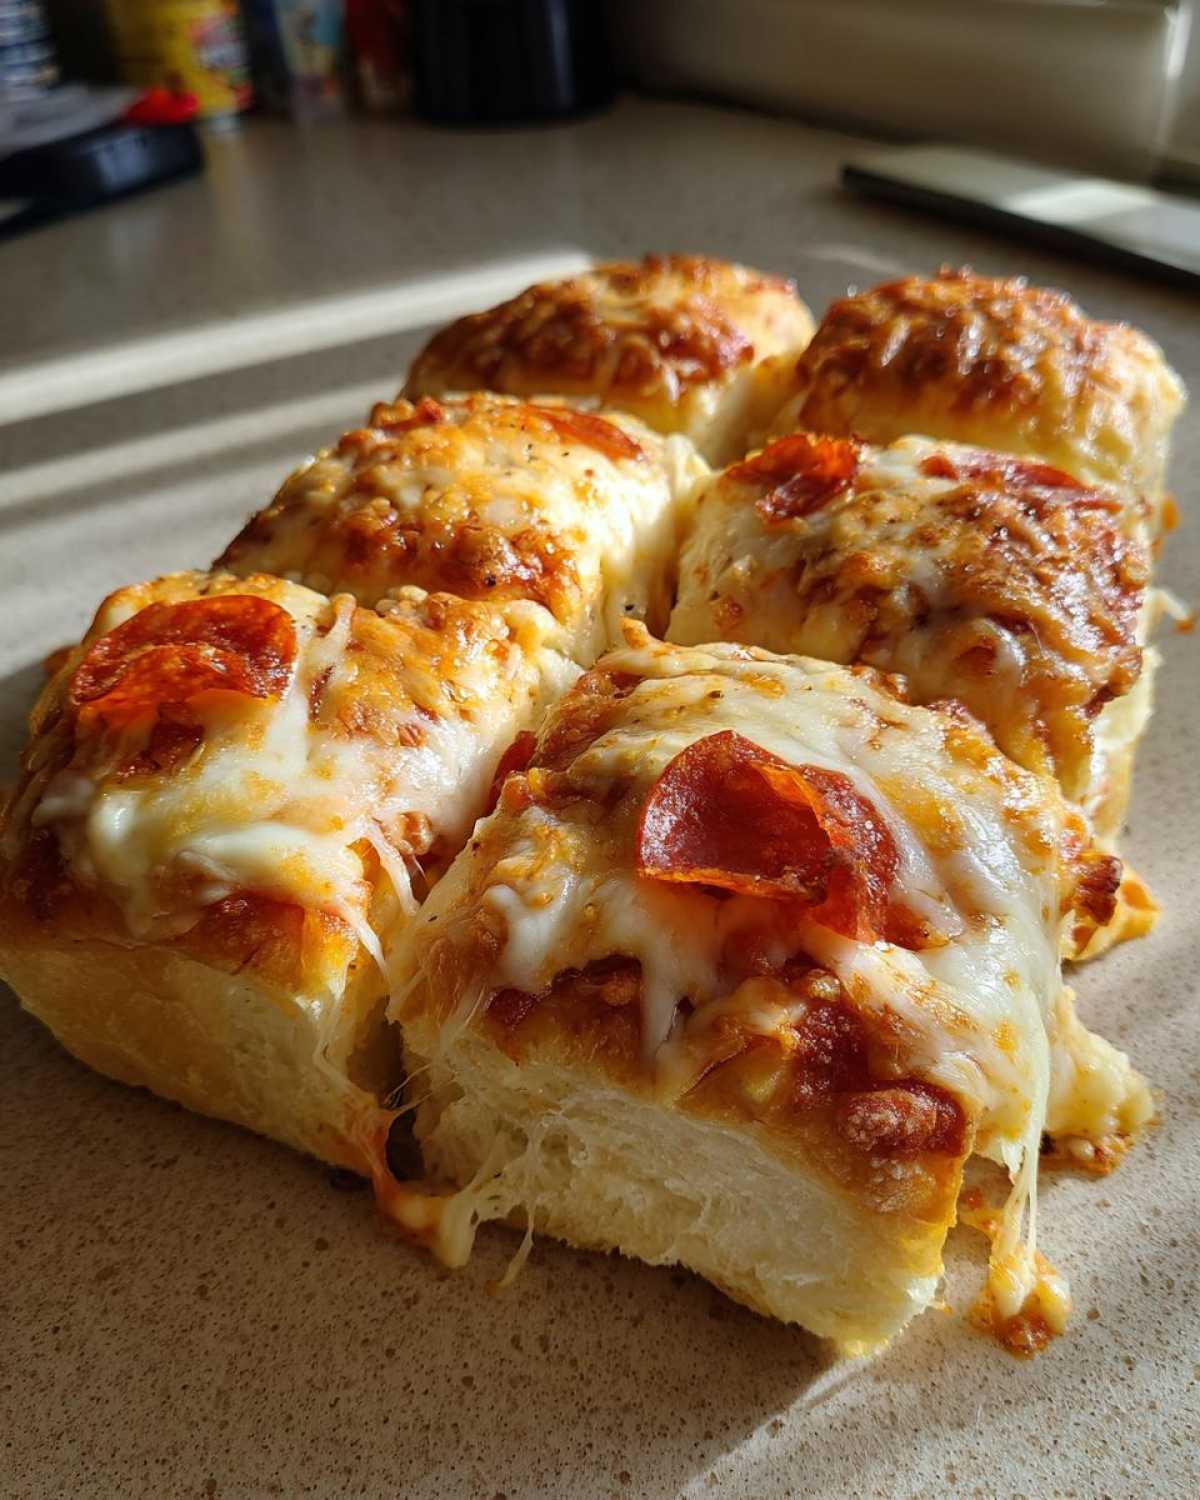
Seriously, these use the sweet little Hawaiian rolls, which are practically a cheat code for deliciousness. You toss them with sauce, mountains of cheese, pepperoni, and then drown them in the most incredible garlic butter sauce before baking. If you’re worried about dinner being done before halftime, don’t sweat it—these are ready in under 40 minutes total. They are pure, gooey, crowd-pleasing magic!
I remember making a huge batch of seven-layer dip for the big college championship last year, and while that was good, guess what everyone actually crowded around? These sliders. They are just so satisfying to pull apart. Trust me on this one; this is the recipe you’ll use for every party, rushed weeknight, or movie night from now on.
Why You Will Make These Easy Pizza Sliders Again and Again
Listen, I measure success in a party appetizer by how fast the platter empties. These pizza sliders follow my three golden rules for party food. I know you’ll love them for the exact same reasons I can’t stop making them:
- They are ridiculously fast! I mean, we are talking 10 minutes of actual assembly time. If you can stack ingredients, you can make these. It’s such a quick party appetizer breakthrough!
- We use those wonderful sweet Hawaiian rolls. No kneading, no fussing with yeast—just slice and fill. They bring that perfect soft texture that regular dinner rolls just can’t match.
- They are built for big crowds. You assemble one giant pan, bake it, and everyone just pulls their own little perfect sandwich off. It’s effortless serving!
- Cleanup is a dream. Honestly, it’s just one baking dish and maybe a tiny bowl for the garlic butter. That’s it! More time for you to relax and enjoy the party.
Ingredients for the Best Hawaiian Roll Pizza Sliders
Okay, grabbing your ingredients for these pizza sliders is the easiest part. There’s not much here, so focus on quality where you can—especially that pepperoni! I always opt for the thicker cut if I can find it, because it curls up nicely when it bakes and gets those crispy little edges. Yum!
You absolutely need the sweet kind of rolls. Don’t try to swap these for plain white buns; the slight sweetness is what elevates this recipe from ‘good’ to ‘best party food ever.’
Here’s what you need to pull this magic together:
- One 12-count package of those sweet Hawaiian rolls. They’re the foundation!
- About one cup of your favorite pizza sauce. Not too watery, please!
- Two full cups of shredded mozzarella cheese. Yes, two cups—we aren’t skimping on the gooey factor here.
- Your favorite sliced pepperoni. Get a good brand because that flavor really shines through!
- Four tablespoons of unsalted butter, melted down until it’s liquid gold.
- One teaspoon of robust garlic powder.
- One teaspoon of dried Italian seasoning. This is perfect for brushing on top.
- And finally, about a quarter cup of grated Parmesan cheese to finish it off. It really toasts up nicely.
If you want to check out my absolute favorite way to make homemade dipping sauce that goes perfectly with these, check out my recipe for easy homemade garlic butter; sometimes I put a little extra on the tops just because I can’t help myself!
Step-by-Step Instructions for Perfect Pizza Sliders
Wow, we’ve got all our beautiful ingredients ready, and I promise, getting these pizza sliders into the oven takes hardly any time at all! Don’t be intimidated by the layering; it’s actually much easier than making a full-sized pizza because everything stays perfectly aligned on those rolls. You’ll be amazed at how foolproof this assembly is.
The most important thing here is slicing the whole package horizontally in one clean cut. Think of it like opening a book, keeping the top and bottom halves connected by the outside crust bits. This is what makes them the legendary pull-apart buns we all crave!
Prepping the Oven and Dish for Your Pizza Sliders
First things first, crank that oven up to 350 degrees Fahrenheit. While it heats up, grab your 9×13 inch baking dish. You need to give it a little grease—just a quick spray or buttering—so nothing sticks later when the cheese tries to escape!
Assembling the Layers of Your Cheesy Pizza Sliders Recipe
Now for the fun part! Place the bottom half of those sliced Hawaiian rolls neatly into your greased dish. Spoon your pizza sauce evenly across that layer. Don’t go overboard with the sauce; we don’t want soggy bottoms later! Next, sprinkle both cups of mozzarella cheese evenly across the sauce. I always try to get the cheese right up to the edges! Then, arrange all your pepperoni slices across the top of that cheese. Finally, place the top half of the rolls right back over the pepperoni. They form a perfect little sandwich layer.
The Crucial Garlic Butter Pizza Rolls Topping
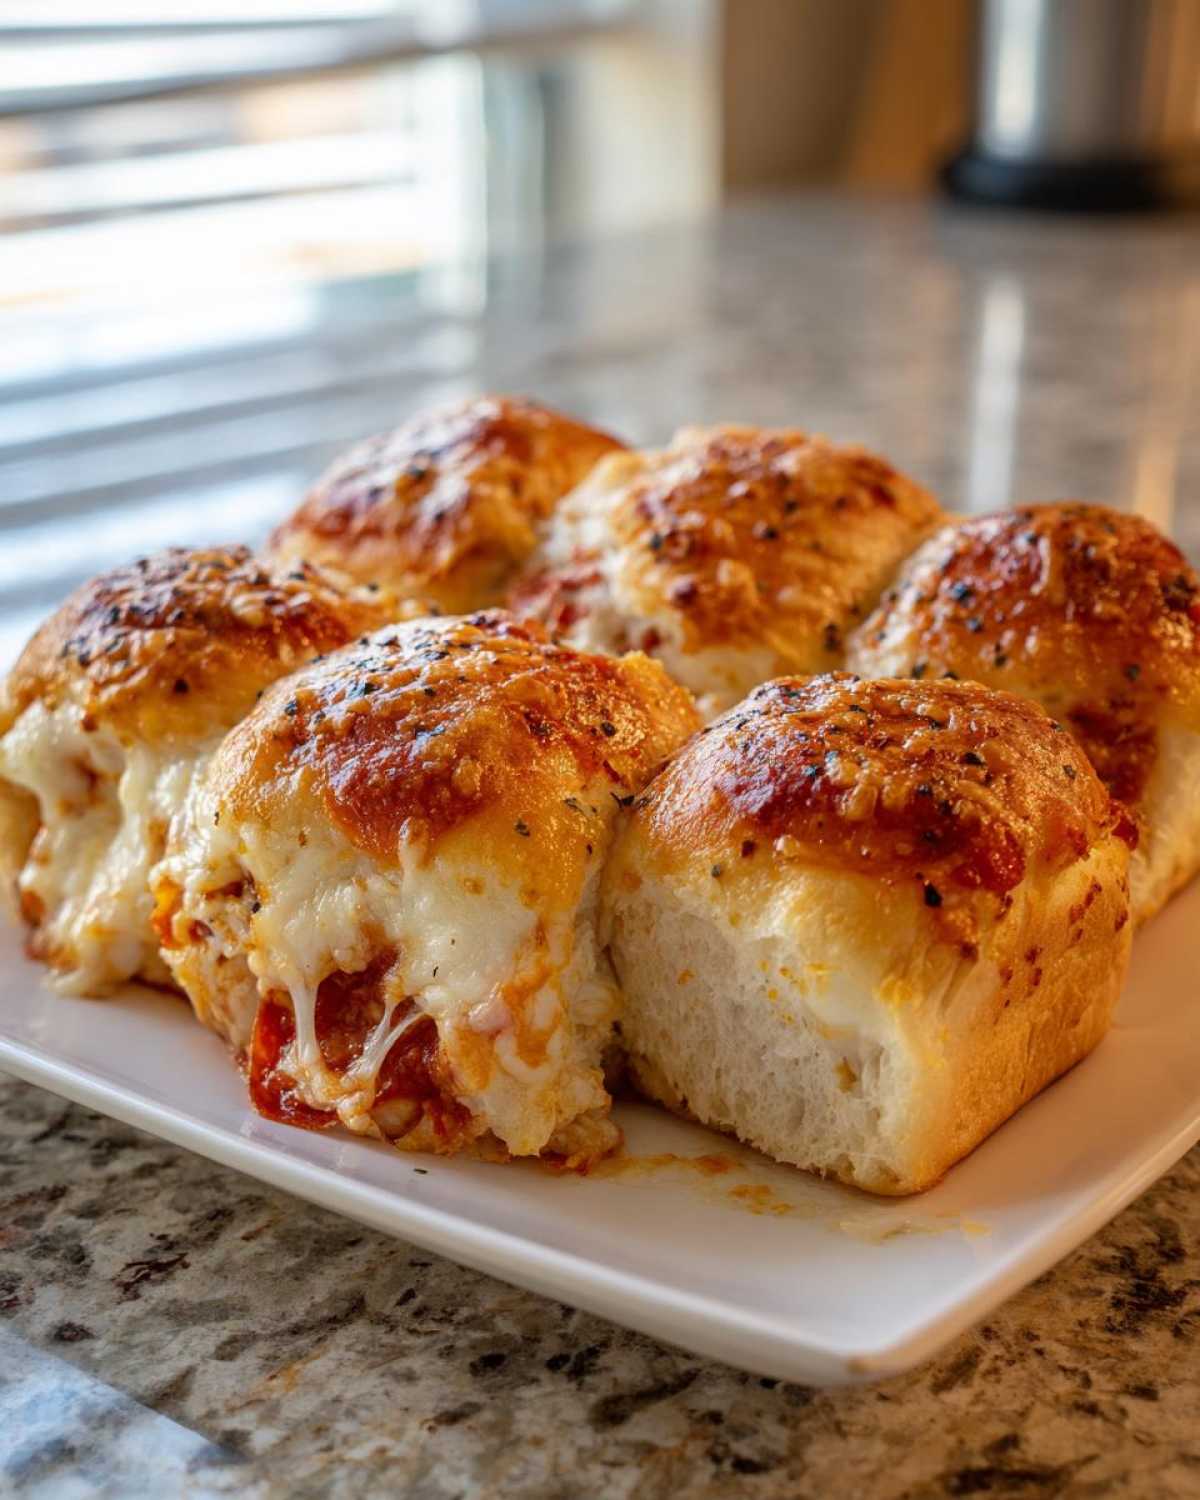
This is the secret sauce that separates these from plain pizza sandwiches! In a small bowl, whisk together your four tablespoons of melted butter with the garlic powder and Italian seasoning. Make sure that seasoning gets totally mixed in. Grab a pastry brush—or even use the back of a spoon if you’re in a rush—and brush that savory butter mixture thoroughly over every single top roll. Don’t miss any spots! Then, hit it with that grated Parmesan cheese for a gorgeous, crispy finish. You can see the whole recipe card layout right here if you need a visual reminder.
Baking and Finishing Your Pizza Sliders
Time for the oven! Cover that dish loosely with aluminum foil—this step steams the inside slightly and melts the cheese perfectly. Bake it like that for 15 minutes. After that, pull the foil off completely and bake uncovered for another 5 to 10 minutes. You’re looking for the tops to be beautifully golden brown and the cheese underneath to be bubbling everywhere. Once they look perfect, pull them out, but please, let them rest for about 5 minutes before you try to slice them. It lets the cheese set just enough so it doesn’t run all over your hands when you pull them apart!
Tips for Success Making Pizza Sliders
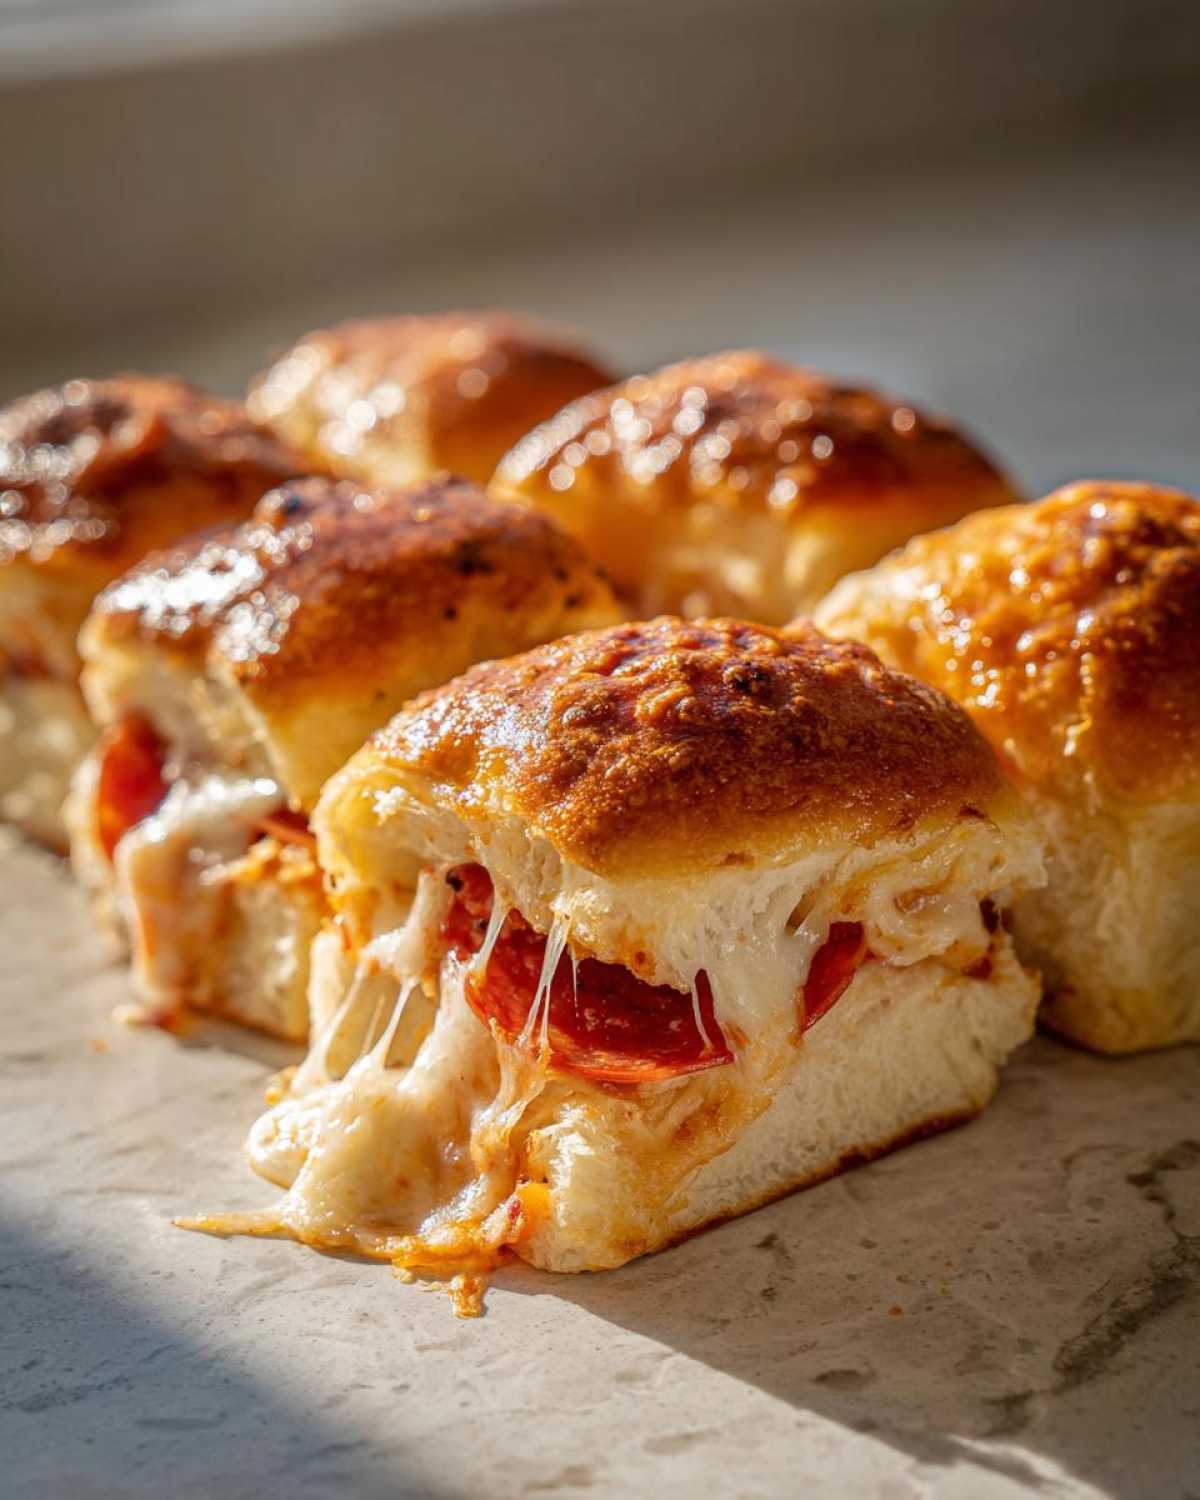
Listen, these are pretty straightforward, but I’ve learned a couple of tricks over the years to make sure our pizza sliders are flawless every single time. My biggest piece of advice is humidity control! Since we aren’t completely covering these for the entire bake, you need to make sure your sauce isn’t soaking into the bottom roll before it even hits the oven.
Try to keep your sauce measurement tight—too much sauce equals a soggy bottom slice, and nobody wants that. For the cheese melt, I always try to use mozzarella that isn’t straight-out-of-the-fridge cold. Room temperature cheese melts much better and more evenly, which means you get that glorious cheese pull effect we’re aiming for!
Also, if you want slightly crispier pepperoni edges, follow the note: skip the foil for the last five minutes. If you’re trying to replicate a crust like my easy Italian bread, the direct heat helps texture big time. Just watch them closely after you take the foil off so they don’t burn!
Variations for Your Pull Apart Pizza Buns
As much as I love the classic pepperoni version—and trust me, I make it constantly—sometimes you just need to switch things up! These pizza sliders are so forgiving that they handle creative customizations like a champ. Think of the Hawaiian roll base as your little canvas for flavorful experimentation!
We stick to the same process—slice, fill, top with garlic butter—but we just change up the fillings underneath that buttery top. It’s a great way to use up random ingredients in the fridge too. If you’re looking for something punchier than the usual pizza flavor, check out my recipe for buffalo chicken sliders, which uses a similar pull-apart method but packs a totally different heat!
Here are a few swaps that always turn out incredible in these pull apart pizza buns:
- Cheese Swap: Ditch some or all of that mozzarella for provolone! Provolone has a sharper, saltier taste that is heavenly with pepperoni. You could also try thinly sliced Monterey Jack if you want something extra melty.
- Meat Adventures: Instead of pepperoni, try using crumbled pre-cooked Italian sausage—make sure it’s drained well! Alternatively, shredded ham and pineapple make these feel like a totally different (but still awesome) sandwich.
- Sneak in Veggies: This is key for getting the kids interested! Thinly sliced mushrooms or bell peppers work great, but you absolutely have to sauté them briefly first. Letting them release their moisture in the oven will just make everything soggy, and we aren’t aiming for that!
- Sauce Remix: If you’re feeling brave, swap out the pizza sauce base for a very thin layer of pesto or even some Alfredo sauce. It completely changes the profile, turning it into a white pizza slider!
No matter what you fill them with, the garlic butter topping magically ties it all together. It’s the binder that makes these the best party food!
Serving Suggestions for These Quick Party Appetizers
You’ve made the perfect batch of pizza sliders. They are hot, they are cheesy, and they are smelling up your whole house—fantastic! But what are you serving alongside them? Since these are already heavy on the carbs, fat, and cheese, we want fresh, bright sides to balance out the indulgence, or maybe another amazing dip because who doesn’t love dips?
The beauty of these quick party appetizers is that they go with almost anything, but I always try to offer something that cleanses the palate a little bit before diving back in for a second slider. They handle bold flavors really well, so don’t be afraid to pair them with something zesty.
When I make these for a big gathering, I usually set up a little station that looks amazing without me messing up my kitchen flow:
- The Crisp Contrast: A big bowl of fresh, crisp crudités with a light vinaigrette dressing works great. You get crunch and freshness that cuts right through that rich butter topping.
- Go Darker on the Dip: Since these are savory, you want a dip that’s either super zesty or maybe a little smoky. If you feel like making one more thing, you absolutely must try my recipe for Cowboy Caviar. It’s fresh, full of vegetables, and the lime dressing gives the whole table a lift.
- Simple Salad Strategy: If you’re serving them as a meal instead of just an appetizer, you need a simple green salad. Keep the dressing light—lemon and olive oil is perfect. Avoid heavy ranch or creamy dressings, as that just doubles down on the decadent factor!
- Crunch Factor: Serve them alongside a big bowl of salty kettle chips or some crispy veggie straws. Sometimes, you just need that unapologetic crunch with your gooey cheese, you know?
Honestly, sometimes I just put them out with a side of marinara sauce warmed up, and people are happy. But having a fresh side dish makes serving so much more colorful and exciting!
Storage and Reheating Instructions for Leftover Pizza Sliders
Oh, friends, leftovers! The next-day miracle! If you happen to have any of these glorious pizza sliders left over—which, let’s be real, is rare if I’m hosting—you don’t want to just toss them!
The good news is they store surprisingly well, but the reheating process is where you win or lose the texture battle. Nobody wants a greasy, steamy sandwich the next day. We are aiming for that perfect, melty, slightly crusty bite again, just like they came out of the oven!
I’ve learned the hard way that the microwave is your enemy here. It’s fast, sure, but it turns those beautiful Hawaiian rolls into sad, squishy sponges. If you want to savor those leftovers properly, you need something with dry heat to crisp things back up. I’ve got a little cheat sheet for reviving leftover pizza sliders right here, which is part of my guide on make ahead party snacks!
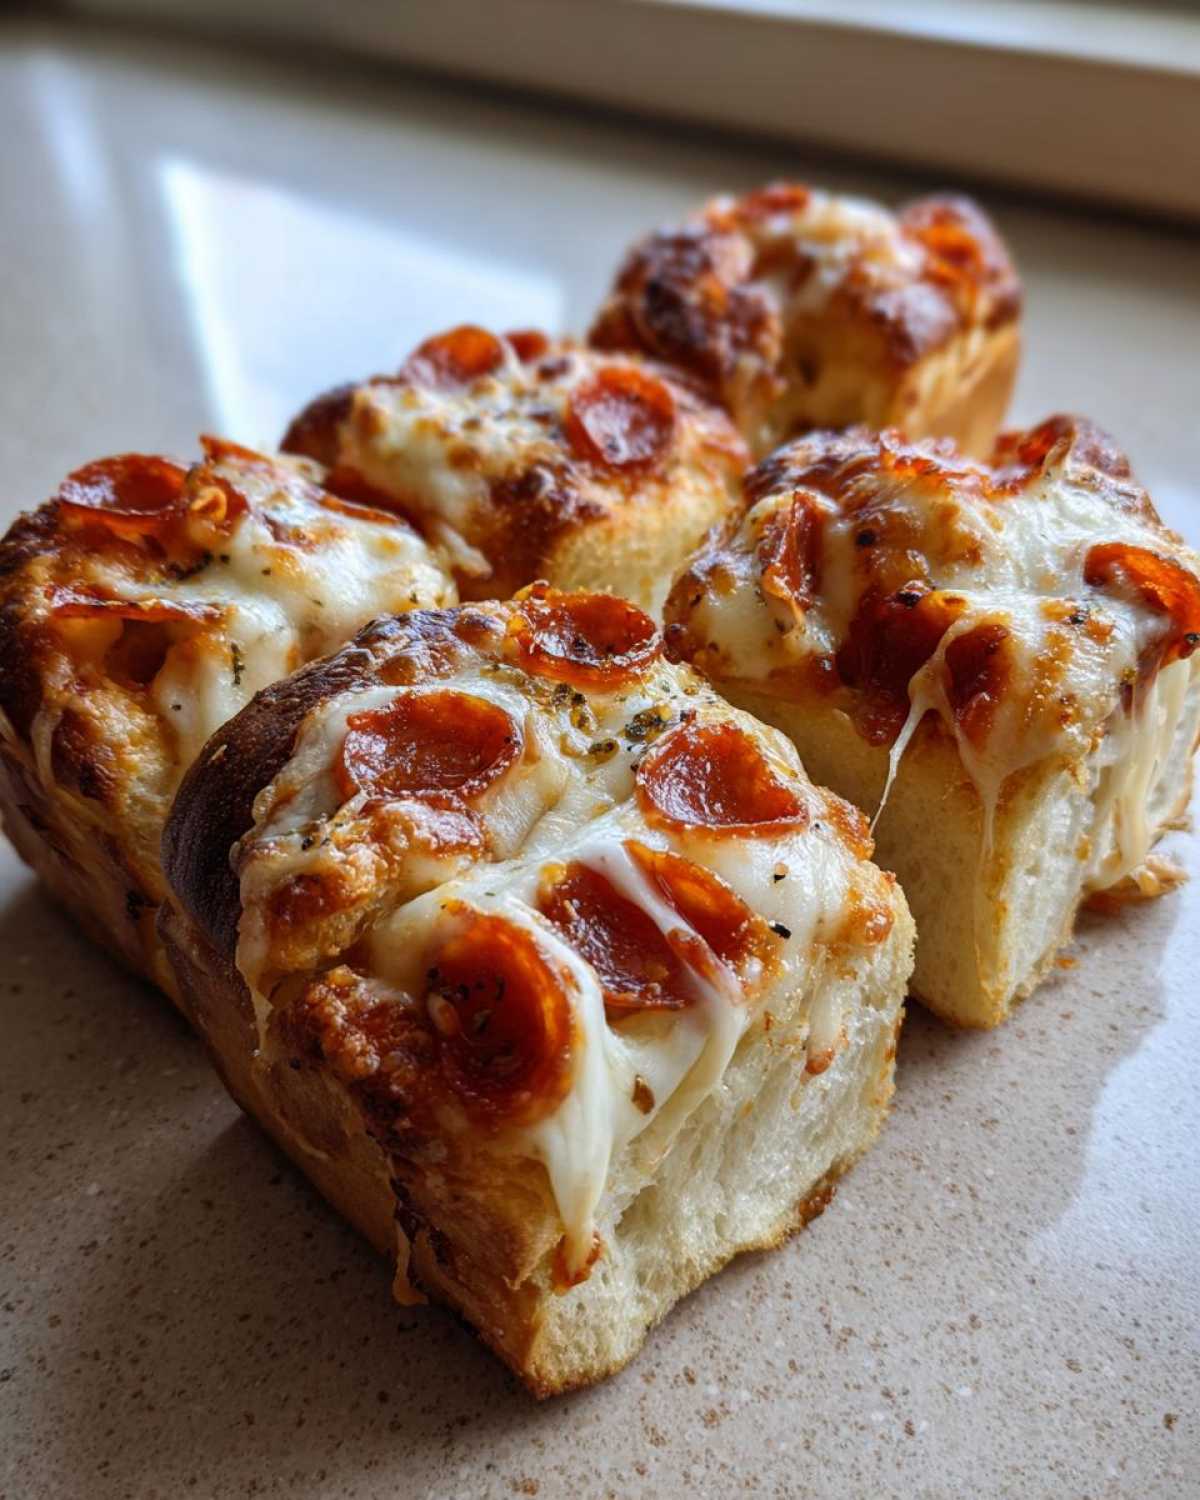
Here’s how you keep the magic alive:
- Storage First: Let the sliders cool down completely after the party ends. Then, stash them in an airtight container. If you have a lot, layering them between sheets of wax paper can stop them from sticking together into one giant, cheese-fused block. They should keep nicely in the fridge for about three days!
- Oven Revival: This is my preferred method for getting that bakery-fresh texture back. Set your oven or toaster oven to about 325 degrees Fahrenheit. Place the leftover sliders on a baking sheet (maybe lay down a piece of parchment paper first). Heat them for about 8 to 10 minutes. You’ll notice the cheese starts looking gooey again and the top gets that lovely toasted color back. They taste almost brand new!
- Air Fryer Fanatic: If you have an air fryer, you are in luck! This tool is amazing for resurrecting anything cheesy and comforting. Pop the desired amount in the basket and cook them at 325°F for just 3 to 5 minutes. Keep a close eye on them—the garlic butter glaze can crisp up fast in there!
You won’t even believe they were leftovers. Enjoy every last one of those amazing pull apart pizza buns!
Frequently Asked Questions About Baked Pizza Rolls
I get so many emails and comments when I post these pizza sliders, and honestly, I love hearing from you all! It’s funny how one simple recipe can spark so many great cooking questions. Since these are so popular for anything from family dinners to big sporting events, I put together answers for the ones I hear most often. If you’re planning your spread for the next big event, these tips should help you nail your next batch of Game Day Slider Recipes!
Can I use regular yeast rolls instead of Hawaiian rolls?
You totally can, but you might want to mentally prepare for a flavor shift! The sweetness from the Hawaiian rolls is a huge part of what makes these specific cheesy pizza sliders so addictive. If you use plain yeast rolls or slider buns, they will still taste like pizza—obviously!—but they’ll be much more savory and less balanced. If you go that route, I seriously recommend adding just a tiny drizzle of honey or maple syrup to the garlic butter topping to mimic some of that sweetness the Hawaiian rolls usually provide.
How do I keep my pizza sliders from getting soggy on the bottom?
Soggy bottoms are the enemy of any good baked sandwich, right? This usually happens because of too much sauce or trapped steam. My number one tip for preventing this is to go light on the pizza sauce. You need just enough to coat the bread, not pool on it. Also, make sure your mozzarella cheese isn’t dripping straight onto the bottom roll; it acts like a moisture barrier if it melts properly! Finally, the two-step baking process is key: covering them steams the top nicely, but uncovering them lets that extra steam escape before it soaks the bottom rolls.
Can these be prepped ahead of time? I need kid friendly meals ready to go!
This is a great question if you’re planning for busy school nights or want to get a jumpstart on party prep! Yes, you can completely assemble these ahead of time. After you’ve layered the sauce, cheese, and pepperoni, but *before* you put the top on, cover the whole thing tightly with plastic wrap and put it in the fridge for up to 12 hours. Then, right before you want to bake them (around 30 minutes before serving), add the top layer of rolls, brush with the garlic butter mixture, and bake according to the directions. They turn out fantastic!
What’s the best way to ensure all 12 rolls cook evenly?
The size of your dish matters here! The recipe is written for a standard 9×13 inch pan because it gives the rolls enough breathing room. If you try to cram them into a smaller dish, they’ll press together too tightly, and the middle ones won’t get browned nicely. If you use a square 8×8 pan, you’ll have to bake them in two batches, which is totally fine, but you just won’t get that perfect pull-apart uniform look. If you are making a huge batch, spread them out onto two separate baking sheets!
Estimated Nutritional Data for Cheesy Pizza Sliders Recipe
I try to keep track of what we eat, but measuring out every single shred of cheese is tough work! Keep in mind that side dishes and dips will drastically change these numbers, but for a baseline serving of one of these amazing baked pizza rolls, here are the rough estimates based on the ingredients list above:
- Serving Size: 1 slider
- Calories: 280
- Sugar: 7g
- Sodium: 650mg (Yep, pepperoni adds up!)
- Fat: 14g
- Saturated Fat: 7g
- Unsaturated Fat: 7g
- Trans Fat: 0g
- Carbohydrates: 28g
- Fiber: 1g
- Protein: 11g
- Cholesterol: 35mg
These numbers are just an estimate, of course! If you use low-fat cheese or turkey pepperoni, you’ll obviously see those numbers shift around quite a bit. But for a fun, indulgent appetizer, they aren’t too bad!
Share Your Ultimate Easy Pull-Apart Pepperoni Pizza Sliders Experience
I truly hope these pizza sliders become your new go-to comfort food or party staple! There’s nothing that makes me happier than knowing one of my simple recipes made your gathering easier or your Tuesday night dinner more exciting.
Once you’ve tried this, please come back and leave a rating and a comment below! I want to hear what you thought—did you use provolone? Did your family devour them in five minutes flat? Tell me everything! Sometimes readers share clever little tricks they’ve discovered, and I love learning new things about how you adapt my recipes in your own kitchens. Tag your photos on social media so I can see the gooey, cheesy goodness you’ve created!
Don’t forget to poke around the blog for more ridiculously easy recipes that save your sanity!
Estimated Nutritional Data for Cheesy Pizza Sliders Recipe
I try to keep track of what we eat, but measuring out every single shred of cheese is tough work! Keep in mind that side dishes and dips will drastically change these numbers, but for a baseline serving of one of these amazing baked pizza rolls, here are the rough estimates based on the ingredients list above:
- Serving Size: 1 slider
- Calories: 280
- Sugar: 7g
- Sodium: 650mg (Yep, pepperoni adds up!)
- Fat: 14g
- Saturated Fat: 7g
- Unsaturated Fat: 7g
- Trans Fat: 0g
- Carbohydrates: 28g
- Fiber: 1g
- Protein: 11g
- Cholesterol: 35mg
These numbers are just an estimate, of course! If you use low-fat cheese or turkey pepperoni, you’ll obviously see those numbers shift around quite a bit. But for a fun, indulgent appetizer, they aren’t too bad!
Share Your Ultimate Easy Pull-Apart Pepperoni Pizza Sliders Experience
I truly hope these pizza sliders become your new go-to comfort food or party staple! There’s nothing that makes me happier than knowing one of my simple recipes made your gathering easier or your Tuesday night dinner more exciting.
Once you’ve tried this, please come back and leave a rating and a comment below! I want to hear what you thought—did you use provolone? Did your family devour them in five minutes flat? Tell me everything! Sometimes readers share clever little tricks they’ve discovered, and I love learning new things about how you adapt my recipes in your own kitchens. Tag your photos on social media so I can see the gooey, cheesy goodness you’ve created!
Don’t forget to poke around the blog for more ridiculously easy recipes that save your sanity!
PrintUltimate Easy Pull-Apart Pepperoni Pizza Sliders (Ready in 30 Minutes with Hawaiian Rolls)
Make these simple, crowd-pleasing pizza sliders using Hawaiian rolls, pepperoni, mozzarella, and a savory garlic butter topping. They are perfect for parties or quick weeknight meals.
- Prep Time: 10 min
- Cook Time: 25 min
- Total Time: 35 min
- Yield: 12 sliders
- Category: Appetizer
- Method: Baking
- Cuisine: American
- Diet: Vegetarian
Ingredients
- 1 (12 count) package sweet Hawaiian rolls
- 1 cup pizza sauce
- 2 cups shredded mozzarella cheese
- 1 cup sliced pepperoni
- 4 tablespoons unsalted butter, melted
- 1 teaspoon garlic powder
- 1 teaspoon dried Italian seasoning
- 1/4 cup grated Parmesan cheese
Instructions
- Preheat your oven to 350 degrees Fahrenheit. Lightly grease a 9×13 inch baking dish.
- Slice the entire package of Hawaiian rolls horizontally in half, keeping the rolls connected. Place the bottom half of the rolls in the prepared baking dish.
- Spread the pizza sauce evenly over the bottom layer of rolls.
- Sprinkle the mozzarella cheese over the sauce.
- Arrange the pepperoni slices over the cheese layer.
- Place the top half of the rolls over the pepperoni.
- In a small bowl, mix the melted butter, garlic powder, and Italian seasoning. Brush this mixture evenly over the top of the rolls.
- Sprinkle the Parmesan cheese over the buttered tops.
- Cover the dish loosely with aluminum foil and bake for 15 minutes.
- Remove the foil and bake for another 5 to 10 minutes, or until the cheese is fully melted and the tops are golden brown.
- Let the sliders rest for 5 minutes before slicing between the rolls and serving warm.
Notes
- You can substitute mozzarella with provolone or a pizza blend cheese for different flavor profiles.
- For extra flavor, add a sprinkle of dried oregano to the garlic butter mixture.
- If you want crispier edges, bake uncovered for the entire time, watching carefully to prevent burning.
Nutrition
- Serving Size: 1 slider
- Calories: 280
- Sugar: 7
- Sodium: 650
- Fat: 14
- Saturated Fat: 7
- Unsaturated Fat: 7
- Trans Fat: 0
- Carbohydrates: 28
- Fiber: 1
- Protein: 11
- Cholesterol: 35