

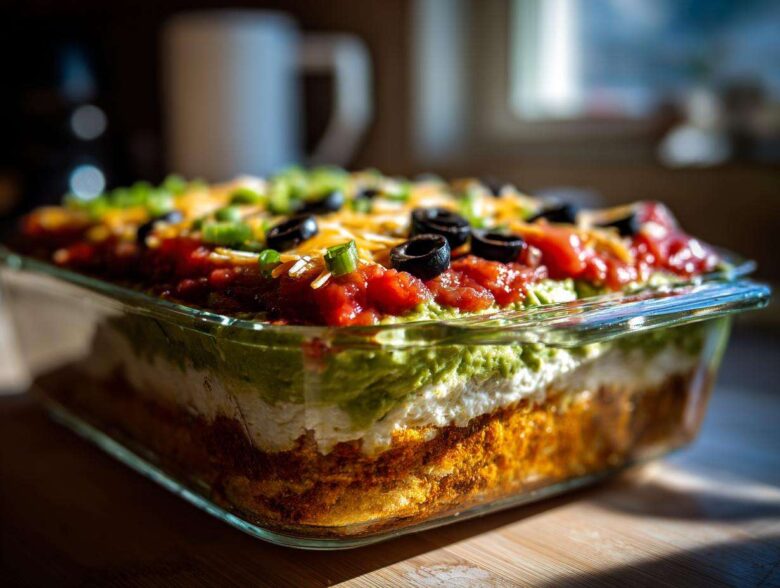
Oh, friends, if you are planning a gathering—a game night, a birthday, or just a Tuesday that needs some serious cheering up—you absolutely must bring the dip! Kenji and I have hosted countless potlucks since moving to New York, and I’ve learned one thing: the centerpiece appetizer always causes a frenzy. Forget fussy little appetizers; what everyone truly wants to see coming through the door is a true showstopper. My absolute favorite for this is the seven layer dip. It’s that incredible, colorful, Tex-Mex dream that ensures every single chip scoop gets a taste of everything delicious. It’s reliable, it’s gorgeous, and it’s a recipe we’ve made countless times for our own family celebrations here. You can find our main baking inspiration and stories over at the Whisk Daily blog, but trust me, this dip is mandatory party food!
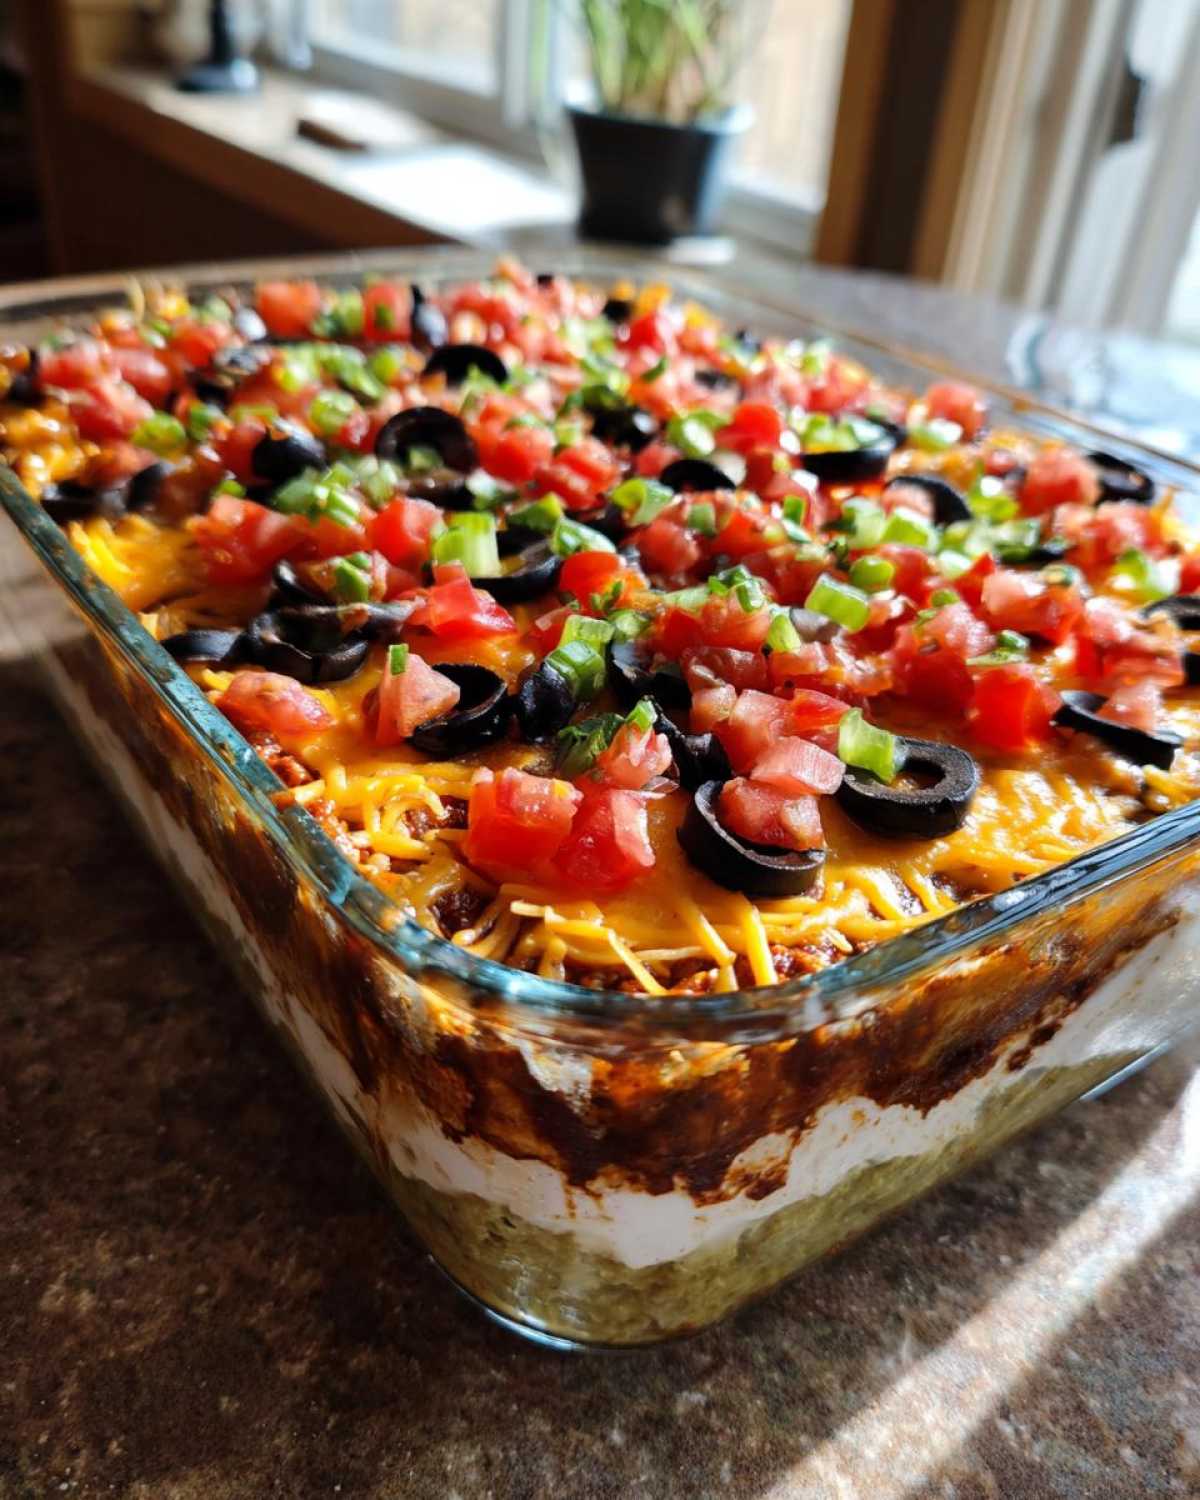
Why This Seven Layer Dip is the Best 7-Layer Dip for Parties
You’ve seen dips that turn into a murky brown mess halfway through the party, haven’t you? Not with this recipe! That’s why I call this the best 7-layer dip. Kenji and I worked hard to figure out the perfect density for each layer so they stay distinct, even when people are digging in enthusiastically. This party layered dip is totally foolproof, which means you can assemble it and forget about it until serving time. We want that vibrant, colorful presentation to last!
Quick Facts About This Easy Seven Layer Dip
- Prep Time: 20 minutes. Honestly, quicker than making decent deviled eggs! See my favorite deviled eggs recipe if you need another quick appetizer standby.
- Total Time: 20 minutes (plus chilling time, of course).
- Yield: About 8 generous servings.
- Cuisine: Classic Tex-Mex.
Gathering Ingredients for Your Seven Layer Dip
Alright, let’s talk groceries! Success in any layered dish, especially this easy seven layer dip, comes down to having exactly what you need. It feels like a lot of components, but trust me, putting them together is quick work. We need seven distinct players here, and they all need to be good quality since there’s no cooking to mask anything!
For our foundational bean layer, grab one 16-ounce can of refried beans. Don’t forget to mix in that cumin (one teaspoon) and chili powder (half a teaspoon) right away! This gives the base layer so much more flavor than plain beans. Then, we need one cup of your favorite guacamole—whether you use a high-quality store-bought version or whip up a fresh batch is up to you. The sour cream layer requires one cup mixed with one tablespoon of taco seasoning. And please, if your salsa is looking particularly watery, give it a little drain before it goes on top of the sour cream. We do not want ‘salsa soup’ ruining the structure!
Ingredient Notes and Substitutions for Your Party Layered Dip
When sourcing ingredients, I really push for a good Mexican cheese blend; the extra sharpness really cuts through the richness of the beans and sour cream. You want sharp cheddar mixed in there! Also, the diced tomato and sliced black olives must be well-drained, or they will weep juice into the cheese layer, and we want those colorful little toppings sitting nicely on top. If you are making this for a heartier crowd, feel free to tuck in an extra layer of seasoned ground beef right between the salsa and the cheese, if you like a bit of meat in your Tex-Mex appetizer. For those who love a fresh crunch, some finely shredded iceberg lettuce right before the tomatoes works beautifully too, though that would actually make it an eight-layer dip!
If you’re looking for other amazing dips Kenji loves to make, you absolutely must check out this sausage ball recipe—it’s a classic for holiday parties!
How to Make Seven Layer Dip: Step-by-Step Assembly
Now we get to the fun part—the construction! This is where the magic happens, and honestly, this is why we always use a pretty clear dish so everyone can gasp appreciatively at the beautiful stripes before they destroy it with chips. Remember, this whole process is done cold, so no need to preheat anything, thank goodness! In fact, if you need something else delicious and cold for your appetizer spread, you might want to try this easy seafood salad.
First things first, take your beans mixed with the cumin and chili powder and spread them as your first layer right onto the bottom of your serving plate. Be firm but gentle here; you want a nice, even blanket across the entire dish. That’s layer one done!
Next up is the green stuff. Gently spread that cup of guacamole right over the beans. Now, stop right there! This is my little trick for making sure this Tex-Mex appetizer holds up for hours: immediately press plastic wrap directly onto the surface of the guacamole. This seals out the air and keeps it beautifully green until you are ready for layer three. Once ready, peel that plastic off carefully.
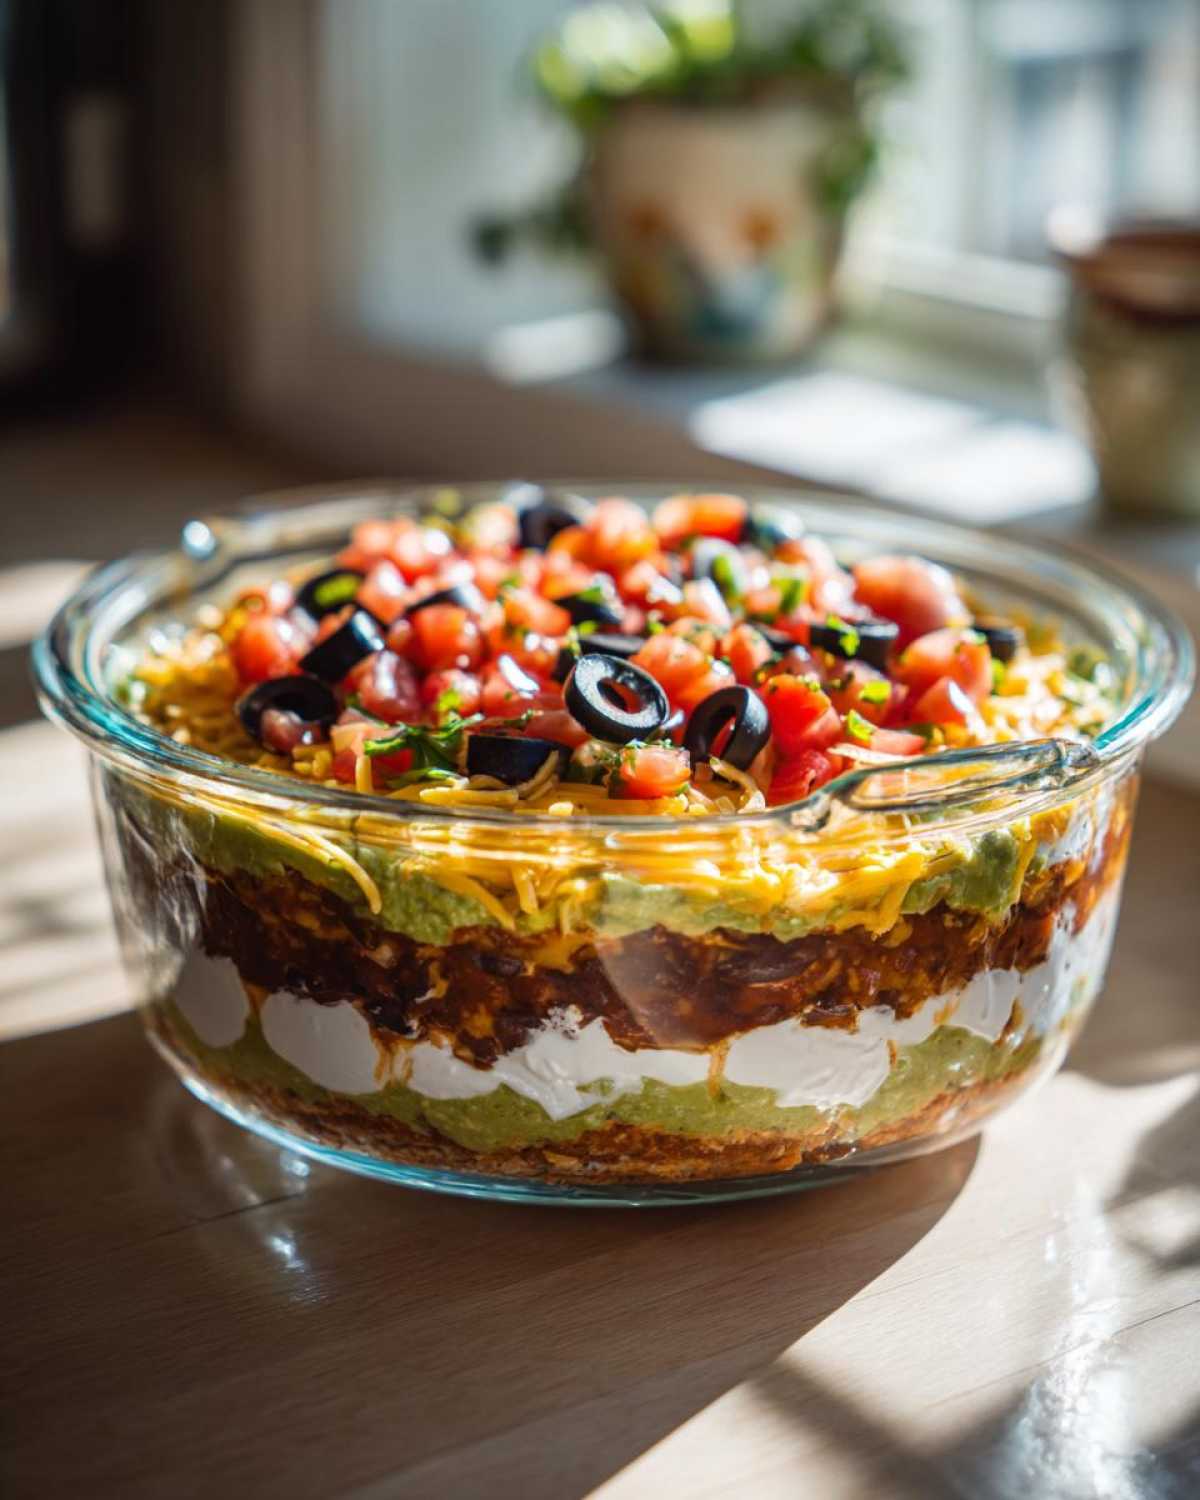
Next, spread the seasoned sour cream mixture over the guac. Go slow! You don’t want to disturb the green layer underneath. Then, delicately spoon your drained salsa on top of that. After the salsa, just sprinkle your shredded cheese evenly. I like to just let it fall naturally rather than pressing it down. Finish up with the diced tomato and finally, scatter those black olives across the top. If you need to chill it, pop it in the fridge for up to four hours. It’s just waiting to be devoured!
Expert Tips for Perfect Layer Separation in Your Seven Layer Dip
The main secret to making this easy seven layer dip look so impressive is paying attention to the density of what you spread first versus what you put on last. The refried beans are thick, which makes them the perfect sturdy anchor. As you move up, things get lighter. You must be incredibly gentle when spreading those middle layers, especially the sour cream and salsa. If you start aggressively swirling your spoon around, you’re going to start pulling up the guacamole layer underneath, and that’s how you get that messy look we are trying to avoid!
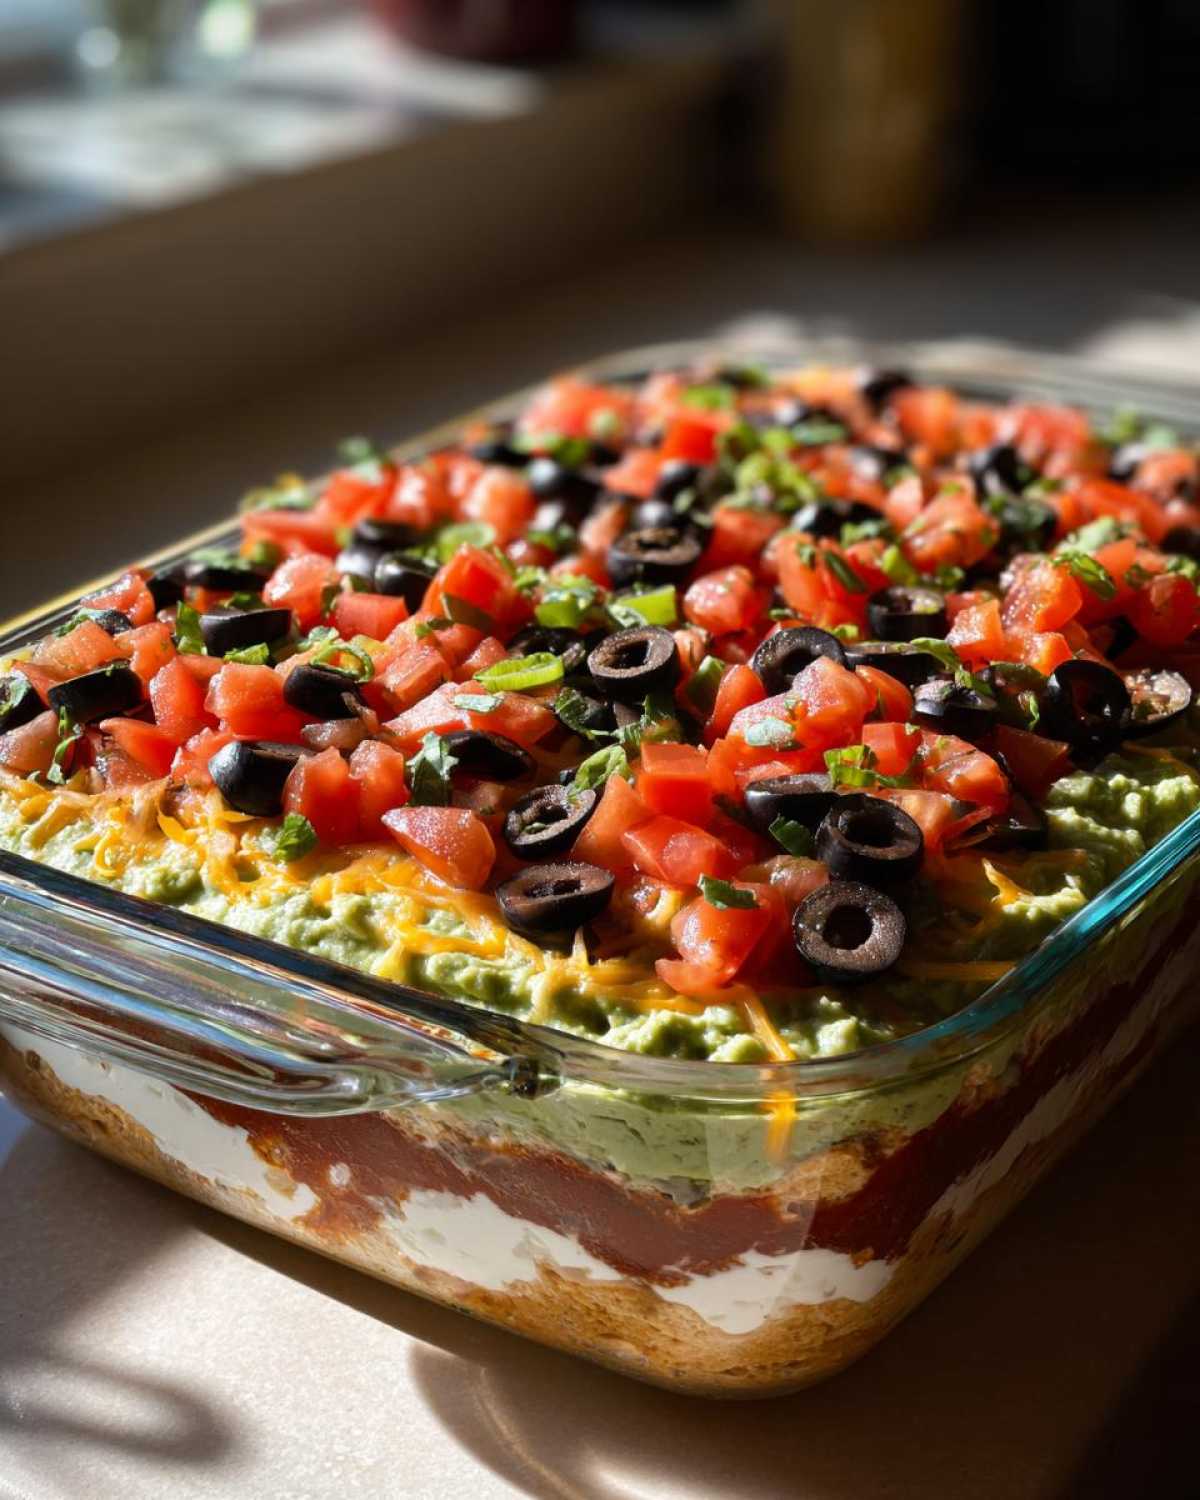
Using a clear, wide dish is non-negotiable because the impact of seeing those distinct layers is half the fun. If you want to check out another fantastic dish featuring cottage cheese, consider my recipe for cottage cheese sausage balls—they are wonderfully satisfying!
Making Ahead and Storing Your Seven Layer Dip
Planning a party means you want to get as much done ahead of time as possible, right? I completely understand that! Kenji always tells me I worry too much about timing, but having appetizers ready ahead of time is a lifesaver. The good news is that this seven layer dip does wonderfully if you prepare it in advance. The instructions say you can chill it for up to four hours, and that’s usually perfect for letting the flavors settle just a little bit.
However, if you need it to sit longer—maybe you’re assembling everything the morning before the big event—you absolutely must use my trick for keeping that beautiful green guacamole layer fresh. Guacamole hates the air! If you skip this step, you’ll uncover a sad, brownish layer later, and nobody wants that!
Here is what you do: Once you have spread the guacamole (Layer 2) and pressed the plastic wrap directly against it, you don’t put the sour cream on yet. Instead, very carefully drizzle a very thin layer of room-temperature water or a little fresh lime juice right over the plastic wrap covering the avocado. It sounds strange, I know, but this acts as a barrier. Then, cover the whole thing tightly with foil and pop it in the fridge. When you are ready to serve and assemble the rest of the layers, just peel off that plastic wrap and gently blot away any excess moisture before adding the seasoned sour cream. It’s amazing how well this works!
If you’re transporting this dish to a friend’s house, keep the dip chilled until the last possible moment. I often make things like this hot breakfast casserole for brunches, and I insist on keeping that warm until I get there. For this cold dip, just keep it insulated! It needs to stay cool for food safety reasons, especially sitting out on a buffet table.
Serving Suggestions for This Tex-Mex Appetizer
Now that you have this beautiful, perfectly stacked masterpiece, we need to talk about the carriers! You simply cannot serve this incredible seven layer dip without the right chip. Forget the flimsy, thin ones; they will just break off halfway through the tomato layer, and that is a tragedy. You need sturdy, scoop-style tortilla chips—the ones with the deep curves. They are designed specifically to shovel down through that thick bean layer and scoop up a perfect cross-section of all seven ingredients in one go.
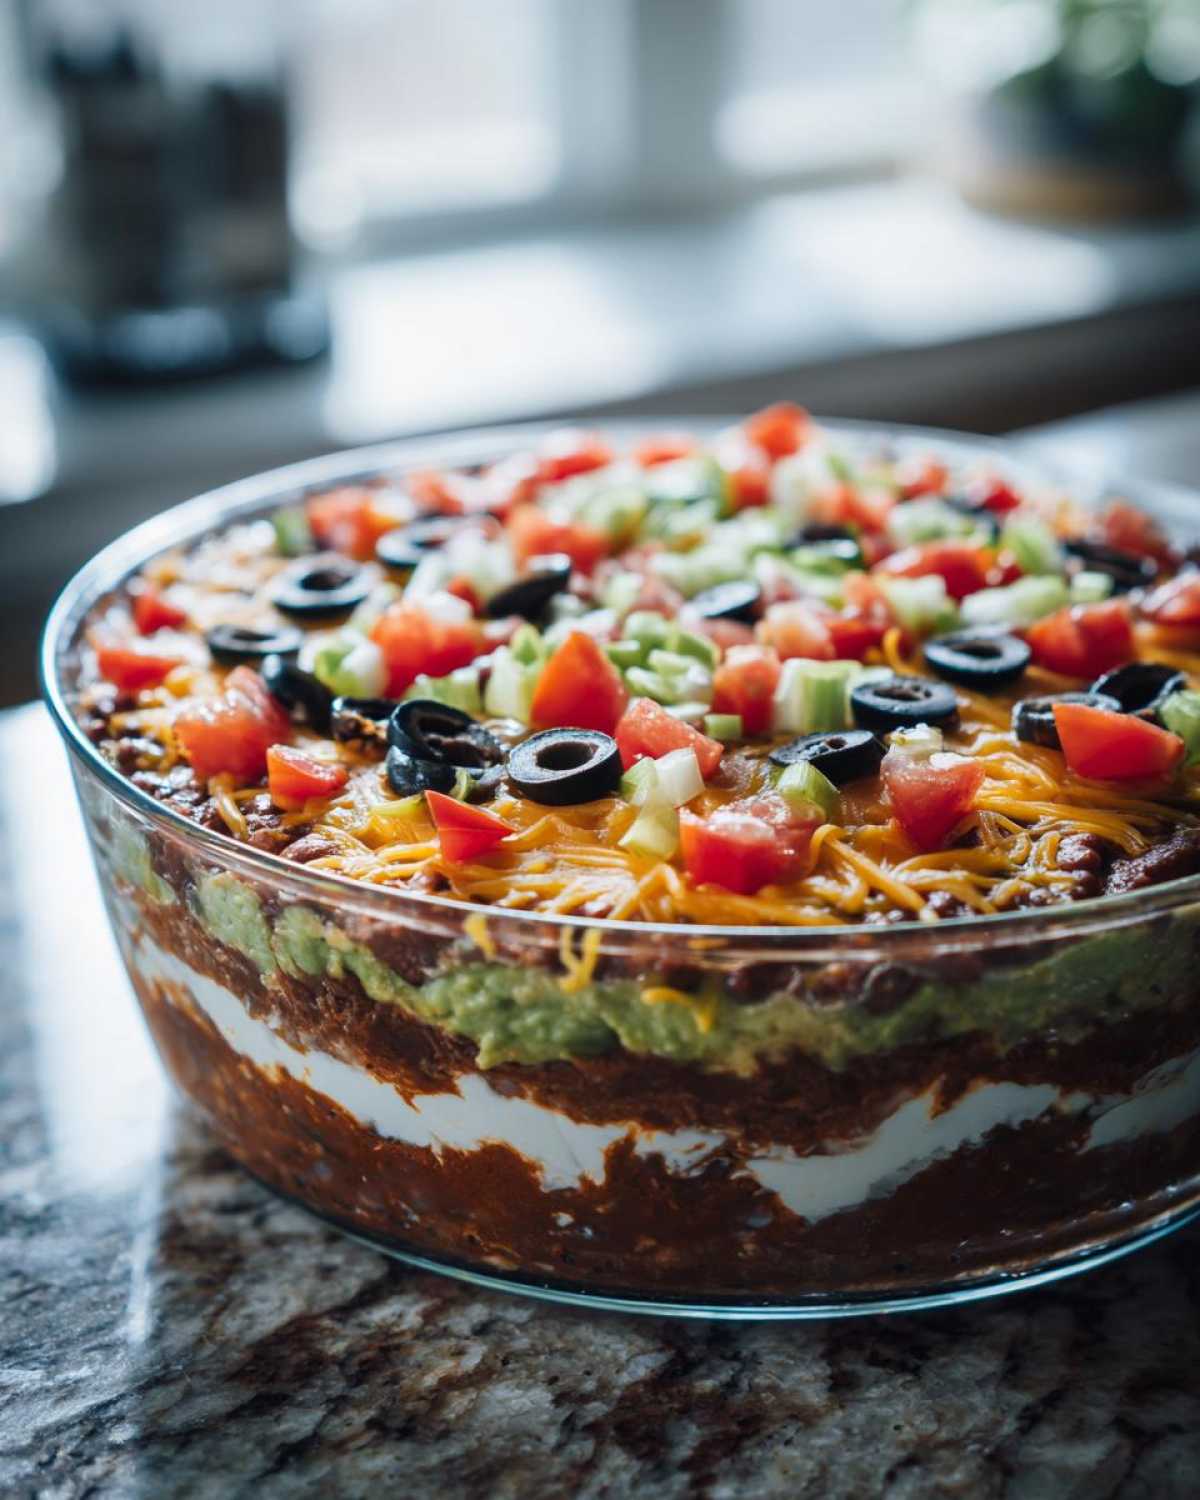
Also, remember that this is meant to be a cool, refreshing bite against that spicy Tex-Mex flair. Make sure you keep the dip chilled right up until serving time. Since it has creamy dairy components, it’s best served straight from the refrigerator. If it’s sitting out on the buffet, try placing the serving dish inside a slightly larger bowl filled sparingly with ice to keep it cool during the party.
If you happen to have leftovers—which I sincerely doubt you will, but let’s hope!—you can enjoy the remaining layers with something different. Kenji loves layering the remaining dip onto warm slices of my moist buttermilk cornbread the next day. It’s a totally different, decadent experience!
Frequently Asked Questions About Seven Layer Dip
Now that you have the assembly down, you likely have a few last-minute worries buzzing around your head before you head off to the celebration. That’s what I’m here for! Making an appetizer like the seven layer dip is all about planning, and these quick answers should help you feel confident that your dish will be a huge hit.
Can I make the seven layer dip more than 4 hours ahead of time?
Oh, I wish we could! For the absolute best texture and color, I really only recommend assembling this dish up to four hours ahead of time, as noted in the instructions. If you go much longer, you run the risk of the lovely salsa weeping moisture into the sour cream and cheese, and that starts to make things soggy. If you absolutely must prepare it further ahead, you need to use those tips I shared on preventing the guacamole from browning—keep that water or lime juice barrier over the avocado layer until just before you add the seasoned sour cream. If you skip that trick, you’ll be peeling off a green mask that has turned a sad brown!
What is the secret to keeping the layers distinct in this easy seven layer dip?
The secret is all about density and gentleness! Remember, we put the thickest layers down first, right? The seasoned refried beans are the heavy foundation. Then, every subsequent layer must be spread with the utmost care, like you are painting a very delicate portrait. Use the back of a spoon and just spread the ingredient gently outwards without pressing hard into the layer beneath it. If you press too hard on the salsa, it will push up into the cheese, and *poof*—no more distinct layers for your easy seven layer dip!
What is the best way to transport this party layered dip?
Transporting any gorgeous layered dish is always a little nerve-wracking, isn’t it? If you have a short drive, assembling it completely and putting it in a good, secure carrier will be fine. But for longer trips or bumpy roads, I highly recommend keeping some of the top layers separate. You can layer the beans, guac, and sour cream, travel with the salsa, cheese, tomatoes, and olives in separate small containers, and then assemble those final three layers right when you arrive. It’s extra work, but if you are bringing this beautiful party layered dip to a big function, it’s worth saving that presentation!
If you’re looking for a comforting, warm dish to bring along next time, you might enjoy Kenji’s recipe for vegetable beef soup. It warms the soul!
Nutritional Estimates for Your Seven Layer Dip
While we aren’t focusing on health food when making the best Tex-Mex appetizer, I know some people like to have a general idea of what they are digging into, especially when dairy and avocados are involved. Remember, these figures are estimates based on serving 1/8th of the dip, and they certainly won’t account for how many chips you use to scoop it up!
- Serving Size: 1/8 of dip
- Calories: About 210
- Fat: 15g
- Protein: 7g
- Carbohydrates: 14g
- Sodium: 350mg
Share Your Perfect Seven Layer Dip Experience
When you bring this seven layer dip to your next gathering, please come back and let me know how it went! Did your friends gasp at the clean layers? Did the scoop chips survive the bean layer? I love hearing about how our recipes fit into your life and become part of your own celebrations. Please leave a rating below so others know this dip is truly dependable, or share a picture! Kenji and I cherish seeing where our food takes you.
If you need a sweet finish to your party spread, don’t forget to try my simple microwave brownie recipe—it’s surprisingly good!
Nutritional Estimates for Your Seven Layer Dip
While we aren’t focusing on health food when making the best Tex-Mex appetizer, I know some people like to have a general idea of what they are digging into, especially when dairy and avocados are involved. Remember, these figures are estimates based on serving 1/8th of the dip, and they certainly won’t account for how many chips you use to scoop it up!
- Serving Size: 1/8 of dip
- Calories: About 210
- Fat: 15g
- Protein: 7g
- Carbohydrates: 14g
- Sodium: 350mg
I always check the nutrition labels on my ingredients, especially the cheese and sour cream, to make sure my final estimate is close. It’s just good kitchen planning! If you happen to be looking for a sweet treat to serve alongside this savory party favorite, you must look at my recipe for easy, moist sour cream coffee cake. It’s divine!
Share Your Perfect Seven Layer Dip Experience
Now that you have this incredible, colorful, five-star seven layer dip ready for your next big event, all that’s left to do is watch it disappear! Honestly, when Kenji and I bring this to a party, it’s gone before the main dishes even come out. It’s such food that just brings people together, isn’t it?
I truly hope this recipe gives you the confidence to make the most beautiful, structured appetizer on the table. Please, don’t be shy! Come back here and leave a little star rating for me. Tell me how many layers were left at the end of the night! If you took pictures of your perfect stack before everyone dug in, I would absolutely love to see them. Sharing our kitchen successes makes my heart so happy.
And because no Tex-Mex feast is complete without something sweet to finish things off, if you are looking for a fast dessert that tastes incredible, you should definitely check out my recipe for cottage cheese microwave brownie. Trust me, it’s surprisingly fudgy!
PrintClassic Seven Layer Dip for Your Next Gathering
Make the best 7-layer dip, a Tex-Mex appetizer perfect for any party. This easy recipe layers refried beans, guacamole, sour cream, salsa, cheese, tomatoes, and olives for a crowd-pleasing dish.
- Prep Time: 20 min
- Cook Time: 0 min
- Total Time: 20 min
- Yield: 8 servings
- Category: Appetizer
- Method: Layering
- Cuisine: Tex-Mex
- Diet: Vegetarian
Ingredients
- 1 (16 ounce) can refried beans
- 1 teaspoon ground cumin
- 1/2 teaspoon chili powder
- 1 cup guacamole (store-bought or homemade)
- 1 cup sour cream
- 1 tablespoon taco seasoning mix
- 1 cup salsa (drained if very watery)
- 1 cup shredded Mexican cheese blend
- 1 large tomato, diced
- 1/2 cup sliced black olives, drained
- Chopped fresh cilantro, for garnish (optional)
Instructions
- In a small bowl, mix the refried beans with cumin and chili powder. Spread this mixture evenly over the bottom of a 9-inch pie plate or clear serving dish. This forms your first layer.
- Spread the guacamole evenly over the bean layer. To keep it fresh, press plastic wrap directly onto the surface of the guacamole.
- In a separate bowl, mix the sour cream with the taco seasoning mix until combined. Spread this seasoned sour cream mixture over the guacamole layer.
- Gently spoon the drained salsa over the sour cream layer.
- Sprinkle the shredded cheese evenly over the salsa layer.
- Top the cheese with the diced tomato.
- Finish by scattering the sliced black olives over the top.
- If you are not serving immediately, cover the dip and refrigerate for up to 4 hours. Before serving, garnish with fresh cilantro if desired.
- Serve your party layered dip with tortilla chips.
Notes
- Use a clear glass dish so your guests can see all seven layers.
- To prevent the guacamole from browning if making ahead, place a thin layer of water or lime juice over the top before covering it tightly. Pour off any liquid before adding the next layer.
- For an extra layer, you can add a layer of seasoned ground beef or shredded lettuce between the salsa and cheese layers.
Nutrition
- Serving Size: 1/8 of dip
- Calories: 210
- Sugar: 4
- Sodium: 350
- Fat: 15
- Saturated Fat: 7
- Unsaturated Fat: 8
- Trans Fat: 0
- Carbohydrates: 14
- Fiber: 3
- Protein: 7
- Cholesterol: 25